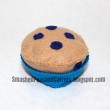
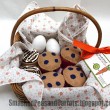
WOW! Thanks so much for all the love on the breakfast basket! My email inbox went crazy yesterday from all the sweet words! I will try to get a tutorial for the blueberry muffins and liners for you all too 🙂 I’m so glad you liked them so much!
OK, as promised here is the tutorial for the cinnamon roll! I hope you have fun making a few and having some pretend play with your littles. I love pretend breakfast play…super yum!
Yummy!!!
Ok, let’s get started…
Felt Cinnamon Roll
1 strip of 2 1/2 inch wide x 20 inch long light brown felt
1 strip of 2 1/2 inch wide x 20 inch long dark brown felt
fabric glue (not totally necessary but I thought it would help to keep the roll nice and secure!)
light brown thread (to match the light brown felt)
needle
rotary cutter and mat
iron and ironing board
white puff paint
First, cut strips of felt to the dimensions stated above. Then, fold your felt strips in half lengthwise and iron to make the folded felt nice and flat, like above!
Then, add some fabric glue in the fold you just made and press the folded felt in half. I used fabric glue just so the roll didn’t slip around after it was all rolled up…that way it’s nice and secure!
Here is what your strips of felt will look like once they are glued in half.
Then, place the dark brown felt strip on top of the light brown felt strip but do this one inch from the edge, like in the picture above (trust me, it’ll help with rolling!)
 Now, start rolling! I added bits of glue as I rolled, again, for the purpose of securing the roll so it didn’t slip apart once all put together.
 When you get to the end, cut the remaining dark brown felt strip so that 1/2 inch of the lighter brown edge is showing, like the picture above!
 Then, add some fabric glue to the lighter brown felt edge and press it to the darker brown felt. This will help keep the edges from slipping once it’s all rolled up.
 Place some more fabric glue on the edge of the dark brown felt too. Then press the edges to the main roll for a minute or two. Whipstitch the edges to the main roll with some matching thread to secure the roll in place. You can never be to secure with kiddies!




OMG!!! Waaaay too sweet. I think I’ll be making up afew batches of these for some little folks I know. Thank you for the super easy tutorial.
Carolyn
Totally awesome. And no sew too! Thanks for sharing!
WOW. Great tutorial! Thank you so much for sharing!
This is adorable! I’ve been making felt food for my son…and this is definetely being added to the ever-growing project list!
Those look good enough to eat!! Too cute!
That is unbelievably adorable! I am totally bookmarking this idea! I LOVE it! I have seen cute felt food before but never a cinnamon roll! Awesome.
I LOVE all your felt food. Keep them coming!
What a fun felt food tutorial! So easy and so cute 🙂
Great idea, especially for those of us with SMP (sewing machine phobia)! May have to craft a baker’s dozen of these. Thanks!
Love it! It looks so real too! Come link at my party: Thursday’s Treasures!!
http://treasuresfortots.blogspot.com/2010/03/thursdays-treasures-week-14.html
What a clever idea! My grandkids are going to love coming to visit!
Just letting you know, I tried your tutorial and linked back. Have a great day!
http://letsgoflyakiteuptothehighestheight.blogspot.com/2010/05/cinnamon-buns.html
Thanks so much! I used this idea and then cut it in half to make my Halloween costume “Buns in the Oven”
Thank-you for this. It is my first felt food project and the tutorial was great and so easy to follow. I love my new buns 😉
Perfect. I love the “frosting.” Thanks for this fantastic tutorial! I’d love for you to link this (and any other felt projects you’d like to share) up at my Felt Food Roundup on OneCreativeMommy.com. I hope to see you there!
I jusr made these with 9×12 felt sheets but only make them 2″ wide x 12″ long. Makes adorable mini rolls!