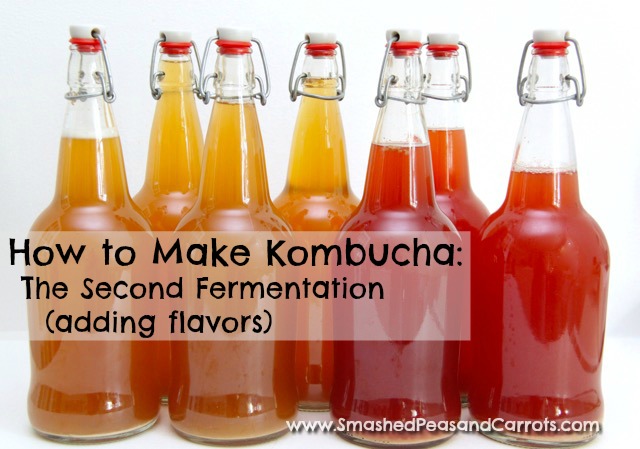
Today, I’m back talkin’ Kombucha, hooray! Since we covered the fermentation process to make plain Kombucha yesterday (in this post here!), I thought today I’d share how to make flavored Kombucha via a Second Fermentation which takes an additional 1-3 days. Think ginger, cherry, blueberry, pineapple….you name it, the sky’s the limit! The Kombucha you typically buy bottled at your local grocery or healthy food stores is usually second fermentation Kombucha. Are you ready to do this? Alright then, let’s get started shall we?
So again, following the initial 5-7 days of fermentation (First Fermentation talked about here) to make your initial batch of Kombucha, you have three options: (The first two options are covered in the first Kombucha post here).
- Place the Kombucha, as is, in the fridge to stop fermentation. This will be your “less fizzy” option. Start drinking with family and friends!
- Transfer Kombucha to a reusable glass bottle with cork-style top (like these ones here) to carbonate the Kombucha. This will take 1-3 days. Then place in fridge to stop fermentation. This will be your “more fizzy” option.
- (This option is covered in this post here)… Flavor your Kombucha doing a second fermentation.
For this post, I will be favoring two separate gallons of Kombucha… one with Ginger and one with Cherries. However, feel free to explore and try a variety of berries, fruits, etc. Mixing multiple berries together in one gallon makes for delicious Kombucha!!
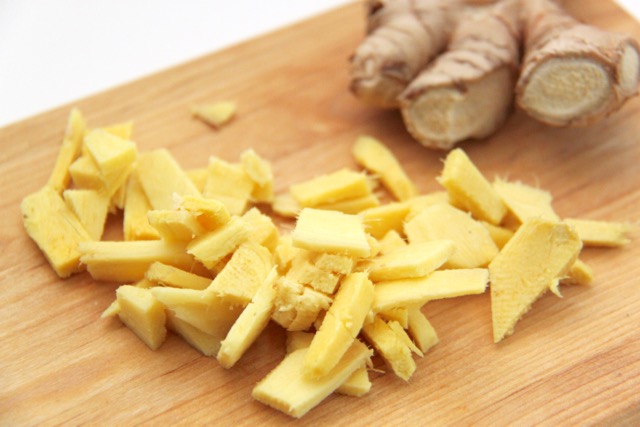 Ginger!!! Peel and roughly chop ginger. The amount can vary. We use approx 1/2 cup for one gallon. A little more or a little less…it’s all good…experiment to see what you like best!
 The Kombucha that you are adding the Ginger to is the one that you just took down off the fridge or whichever warm space you had it resting. This is the Kombucha that is 5-7 days old and you MUST now decide to go “less fizzy” – straight to the fridge, “more fizzy” – glass bottle (with cork – style top) it for another 1-3 days to build carbonation, or do THIS – the Second Fermentation.
So yes, I pulled down the gallon jar off the top of the fridge and took the cheesecloth off the top. Before I can add the Ginger, I must first take the scoby out using a WOODEN spoon along with a pint or so of the starter liquid. The scoby and starter liquid will be used to start the next batch of first fermentation Kombucha (Check out the first fermentation post here!).
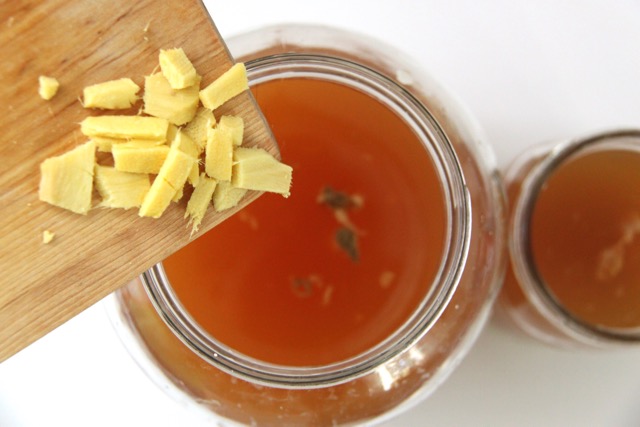
With the scoby and a pint or so of the starter liquid removed, Let’s ADD some Ginger!!!
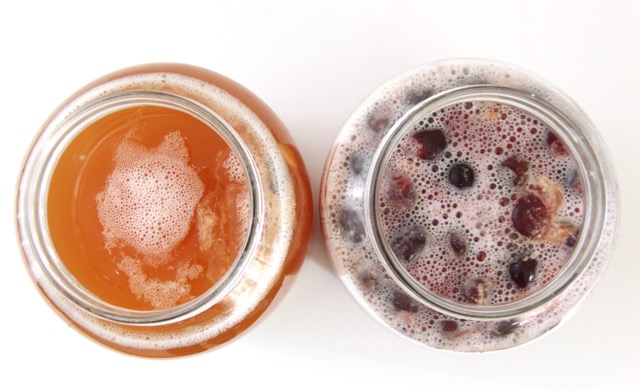
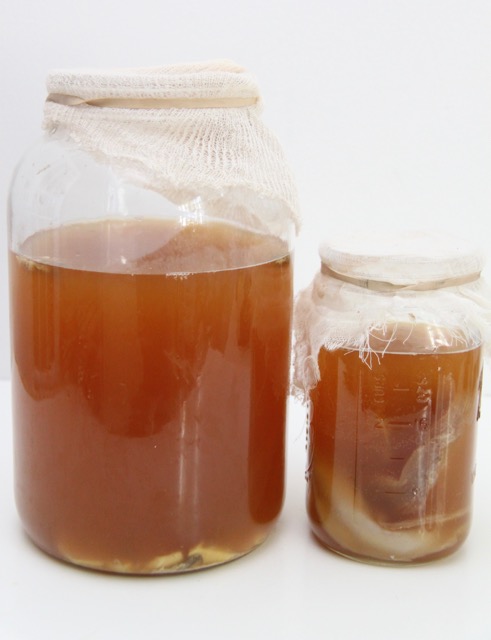 In this pic above, the gallon jar on the left has some the liquid transferred out as well the scoby. The scoby and liquid in the smaller jar on the right will be used to start a brand new batch of Kombucha next time. You can see the ginger pieces in the gallon jar at the bottom. Depending on what kind of fruit or berries that you add, some will float and some will sink.
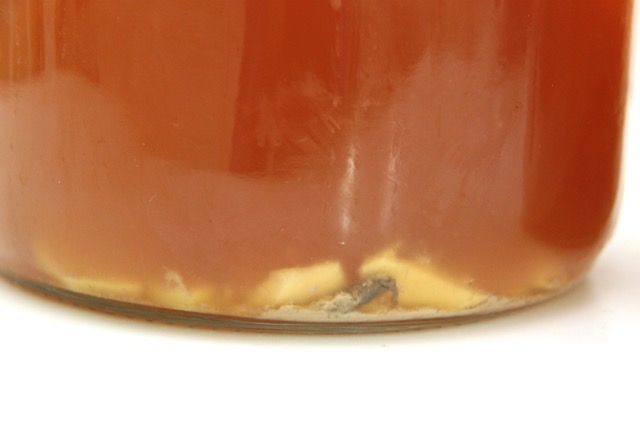 Close up of sediment which is totally natural and fine. The sediment at the very bottom is from the first fermentation. You can see the pieces of Ginger resting on top of it. Note: you can strain off the sediment before drinking if you like.
Once the ginger has been added, Cover with Cheesecloth and put back on top of fridge or wherever your dedicated Kombucha spot is and let it do its thing for another 1-3 days.
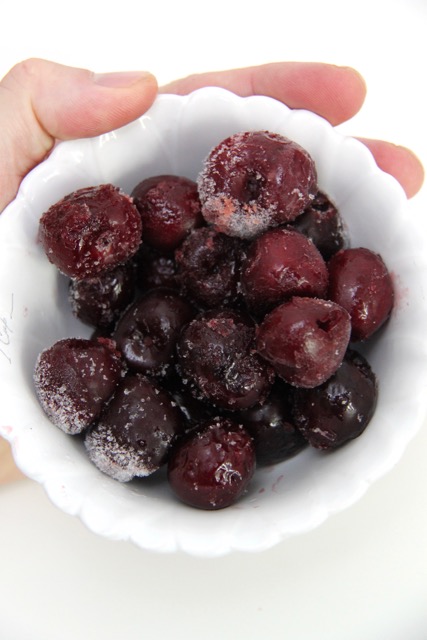 Next up: Cherries!! You can use either frozen or fresh, preferably organic. About 1 Cup per gallon.
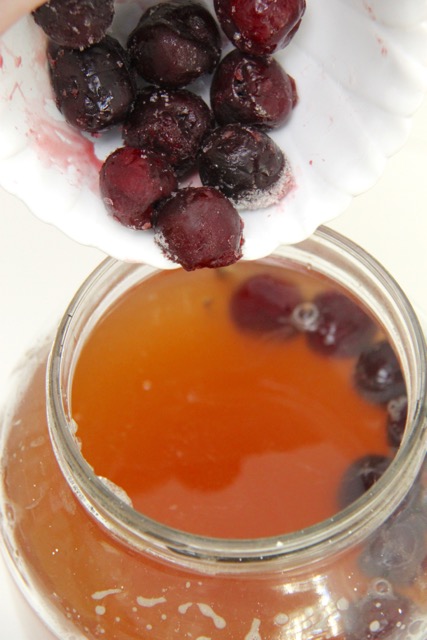 Again, use the same method as we did with the Ginger. For these pics I grabbed a second gallon jar of first fermentation Kombucha off the top of the fridge, removed the scoby and starter liquid, and added the cherries. Next, cover with cheesecloth and place on top of fridge for 1-3 days.
 FAST FORWARD —-> 3 days later… Gallon jars taken off the top of the fridge, cheesecloth removed… Ginger on the left and Cherry on the right. This is the end of the Second Fermentation. *** Note: You will most likely get a thin scoby-like film on the top which covers the ginger or fruit. This is normal. Its just the bacteria working. Again feel free to strain out any film or sediment that might develop.
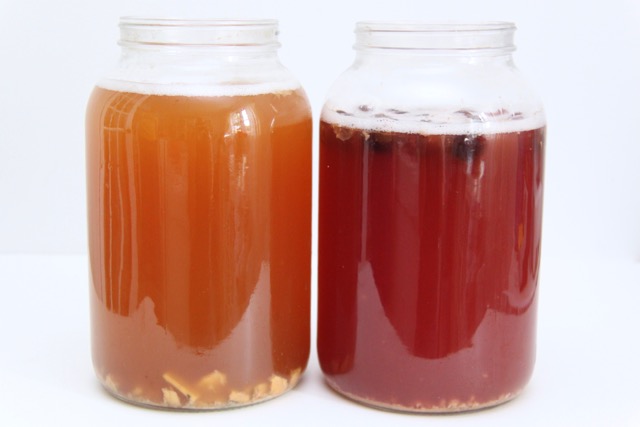 Side view: Sediment and fruit following the Second Fermentation.
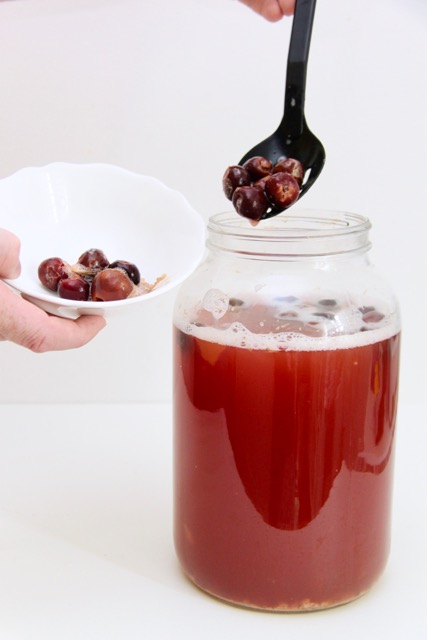 Remove cherries, ginger, or whatever you used to flavor your Kombucha. Again, NO METAL allowed. Use Wooden or Plastic utensils!!!
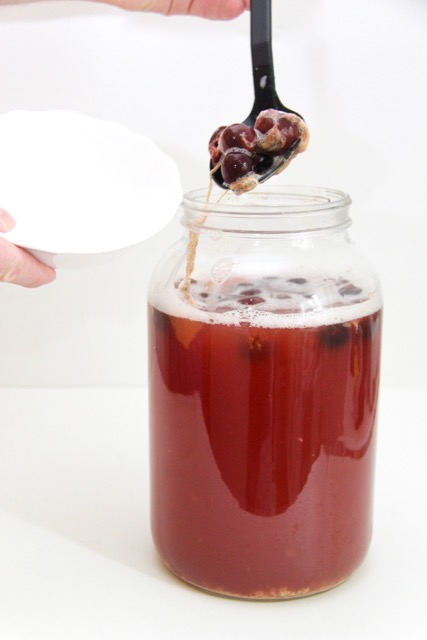 Close up of cherries with film produced from second fermentation. Totally normal although looks a little scary, lol!
Once you have taken out the fruit, it’s decision time again… Just as is with the end of the first fermentation, you can either put the flavored kombucha straight in the fridge to stop fermentation which gives you your “less fizzy” option and start drinking – Yum! OR you can do what I did below which is transfer the flavored Kombucha to the reusable glass bottle with cork-style top to carbonate it for 1-3 days. This option will produce the “more fizzy”option – Yum Yum!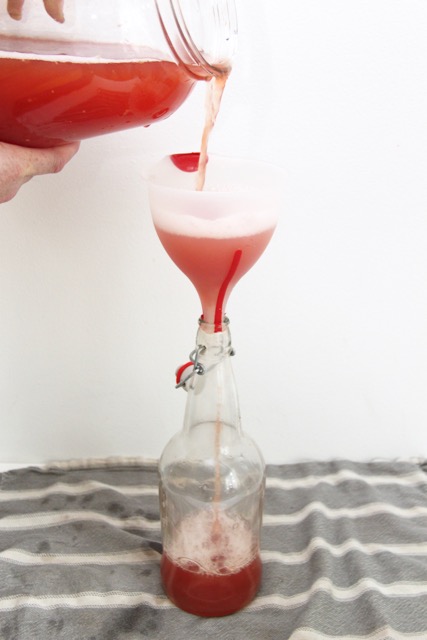 This step is always a little messy with drips, bubbles and foam.
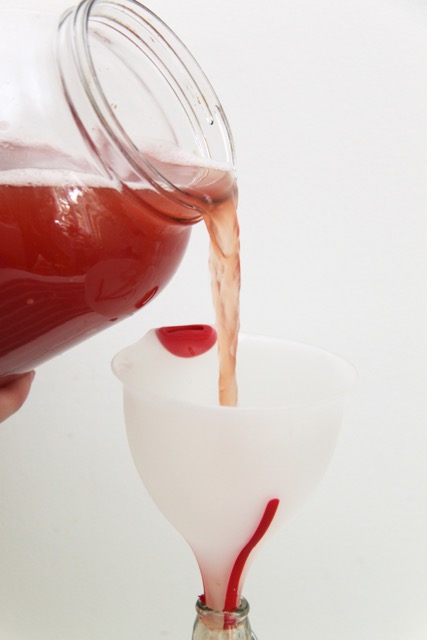 Remember to not use any metal. The plastic funnel work very well.
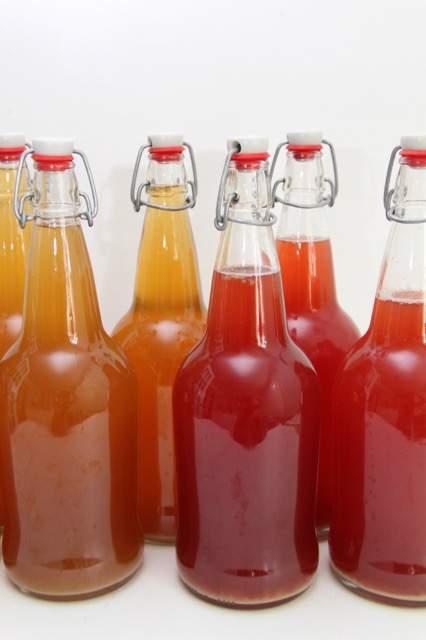 After 1-3 days of carbonation, transfer to the fridge to stop additional fermentation / carbonation. And that’s it… Flavored Kombucha is ready to enjoy and share with loved ones!! Be adventurous and try flavoring with a variety of berries and fruits!!
Thanks so much for stopping by today, if you have any questions please leave a comment below!
Love,
Maggie