Smashed Peas & Carrots

Inspiration For Living Creatively - DIY Crafts, Sewing, Recipes, Crafts & More

  • Press
  • Disclosure
  • Collaborate
  • Contact
  • Facebook
  • Twitter
  • Pinterest
  • Instagram
  • Dots
  • Google Plus

Become a Subscriber

never miss a thing!

  • Home
  • About
    • Advertising
    • Disclosure & Safety Disclaimer
    • Privacy Policy
  • Recipes
    • Appetizers
    • Bento Lunch
    • Beverages
    • Smoothies
    • Breads
    • Breakfast
    • Casserole
    • Crockpot
      • Visual Library
    • Dairy Free
    • Dessert
    • Gluten Free
    • Main Course
    • Holiday
    • Instant Pot
    • Paleo
    • Party Food
    • Salad
    • Side Dish
    • Soup
    • All Recipes
  • Tutorials
    • Children
    • Adult
    • Home Decor
    • No Sew
    • Sewing
      • Children Sewing
      • Adult Sewing
      • Home Decor Sewing
      • Sewing Basics
    • Sewing Studio
    • Knitting
    • Kids Crafts
    • Bento
    • Holiday
    • Parties
    • Gift Ideas
    • Natural Living
    • All Tutorials
  • shop
You are here: Home / Fabric / Riley Blake Design Team: Fabric Utensil Basket Tutorial
Dec
14

Riley Blake Design Team: Fabric Utensil Basket Tutorial

| Filed Under: Fabric, Gift Ideas, Home Decor, Home Decor Sewing, Sewing, Tutorials

Hi friends!! I thought today I would bring back home the tutorial I shared over at the Riley Blake Design Team blog a while back in case you needed a few more last minute handmade gift ideas for the holidays…or maybe you just want to make yourself a little something something! You will seriously love how easy making these Fabric Utensil Baskets are that you can make a drawerful in no time. Hooray for  getting all your silverware, other utensils, or maybe even your sewing knick knacks organized!!Easy Fabric Utensil Basket Tutorial // SmashedPeasandCarrots.com


Easy Fabric Utensil Basket Tutorial // SmashedPeasandCarrots.com

Easy Fabric Utensil Basket Tutorial // SmashedPeasandCarrots.com

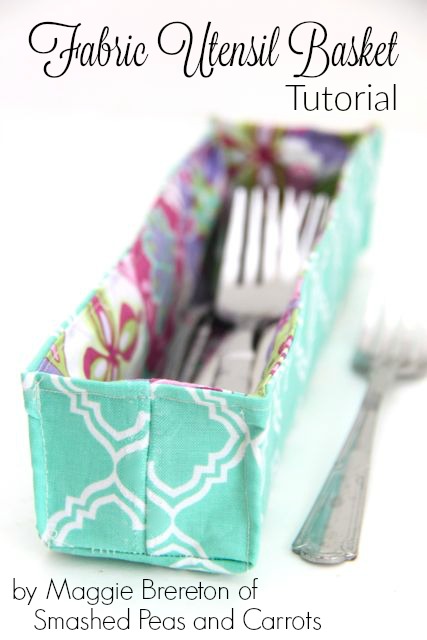
To make these Fabric Utensil Baskets you will need the following:

(2) 7 x 13 inch pieces of fabric (per basket)

(1) 7 x 13 inch piece of Pellon Craft-fuse (#808) or a cotton of poly batting

iron and ironing board

coordinating thread

sewing machine
Easy Fabric Utensil Basket Tutorial // SmashedPeasandCarrots.com

This is what the Craft-fuse looks like. You may also be able to find it on a bolt at your local fabric store too. One side is shiny and adheres to fabric when steamed with an iron.Easy Fabric Utensil Basket Tutorial // SmashedPeasandCarrots.com

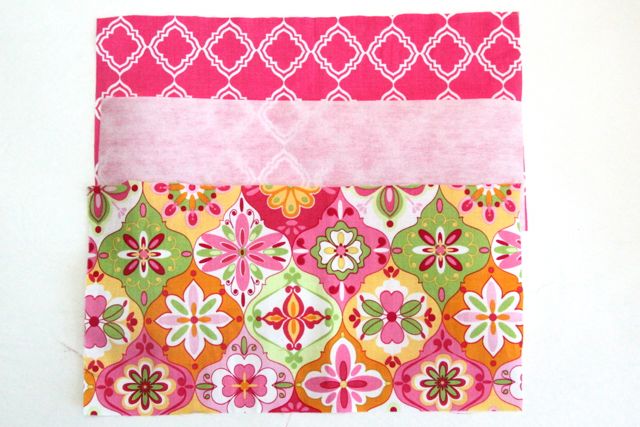
Before you begin this project, decide which fabric you will want on the inside and which fabric you will want on the outside. I am using the bright and happy Extravaganza by Lila Tueller Designs. Isn’t it so pretty?! Easy Fabric Utensil Basket Tutorial // SmashedPeasandCarrots.com

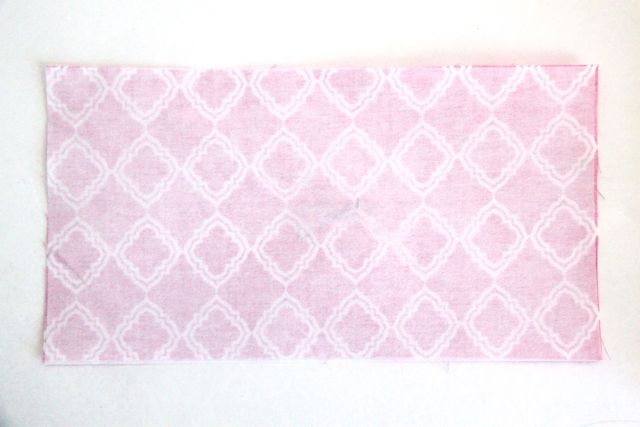
I decided that I wanted the pink geometric designed fabric on the inside. Whichever fabric will be on the inside you will iron the Craft-fuse to the wrong side of that fabric following the directions for the Craft-fuse to adhere it.Easy Fabric Utensil Basket Tutorial // SmashedPeasandCarrots.com

Next, fold each 7 x 13 inch piece of fabric in half lengthwise or hot dog style. Sew a 1/4 inch seam allowance on each short end.Easy Fabric Utensil Basket Tutorial // SmashedPeasandCarrots.com

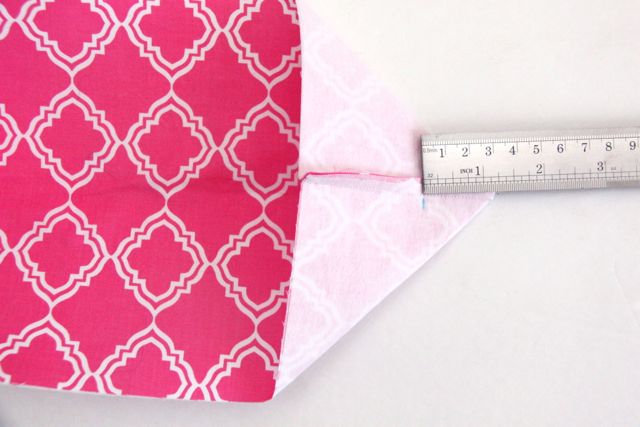
Next, fold each end in to form a triangle. Measure 1 1/4 inch from the tip and make a small mark. Sew a line down over this mark from one side to the other.Easy Fabric Utensil Basket Tutorial // SmashedPeasandCarrots.com

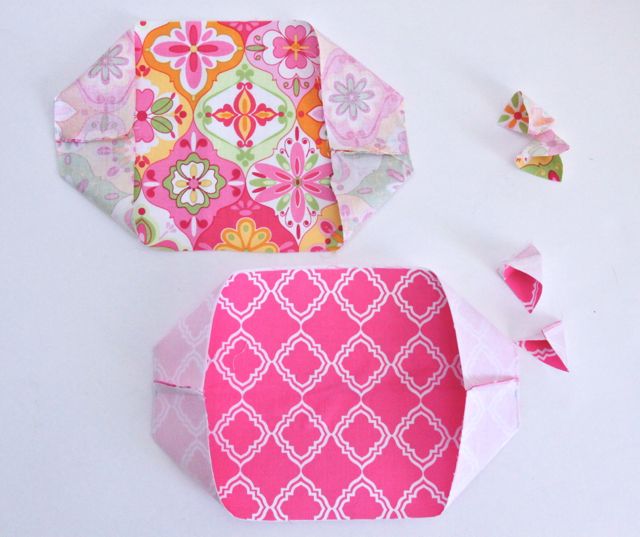
Next, clip the tip off making sure not to cut into the line you just sewed. Each piece should look like the beginnings of a basket now.Easy Fabric Utensil Basket Tutorial // SmashedPeasandCarrots.com

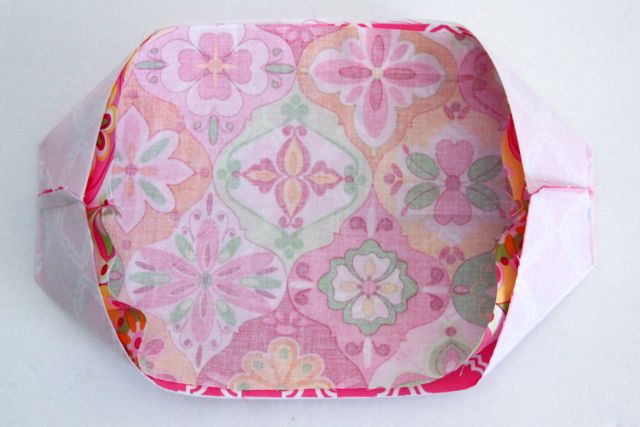
Next, place the outside fabric inside the inside fabric basket so that right sides are facing. Smooth out the corners and even out the edges.Easy Fabric Utensil Basket Tutorial // SmashedPeasandCarrots.com

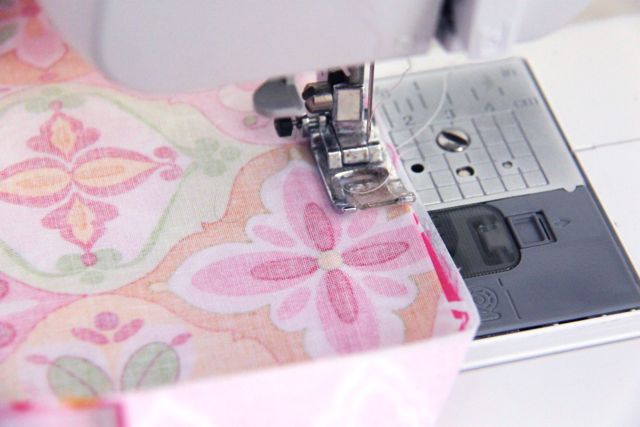
Now you will go around the entire edge of this basket using a 1/4 inch seam allowance making sure to leave a 2-3 inch opening for turning. Easy Fabric Utensil Basket Tutorial // SmashedPeasandCarrots.com

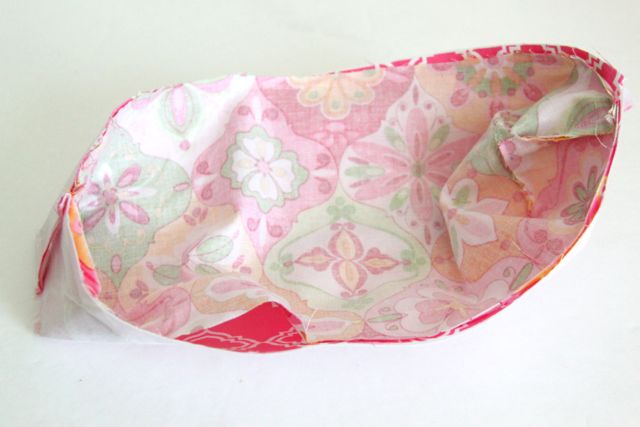
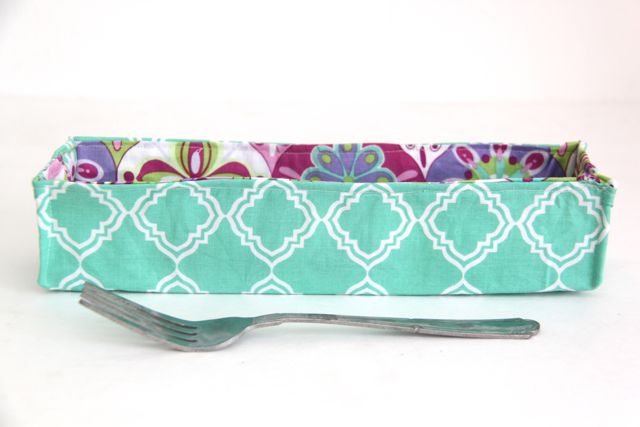
The fabric utensil basket should look like this when you are done. Now you just need to flip the basket right sides out. Smooth out each corner and neaten the fabric out before you top stitch around the entire top edge of the basket.
Easy Fabric Utensil Basket Tutorial // SmashedPeasandCarrots.com

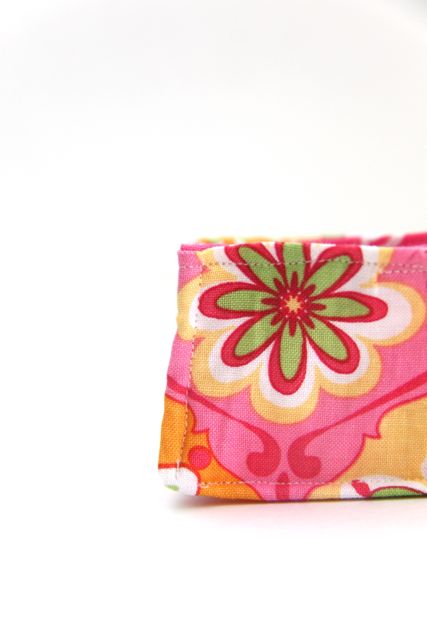
If you like, you can pinch each of the corners on the ends and top stitch them as well. You could even stitch down the bottom length of each basket if you like a more boxy look. I stitched down the corners and the length of the bottom with the pink basket only and you can see below how the basket will end up much smaller in height then if you just sewed the corners or left them without any stitching.Easy Fabric Utensil Basket Tutorial // SmashedPeasandCarrots.com

Easy Fabric Utensil Basket Tutorial // SmashedPeasandCarrots.com

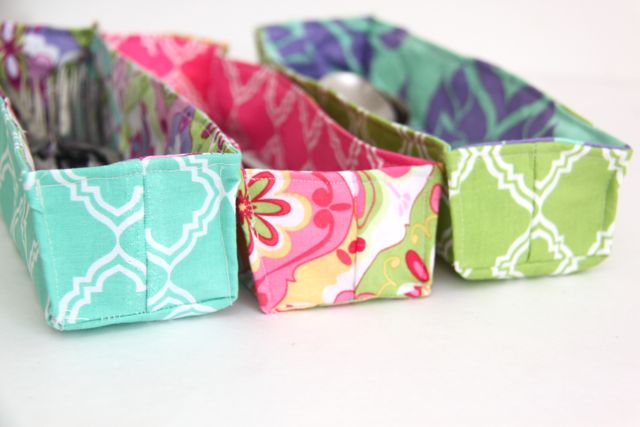
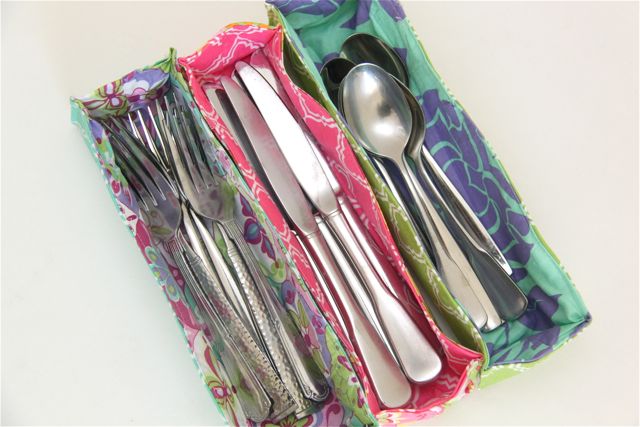
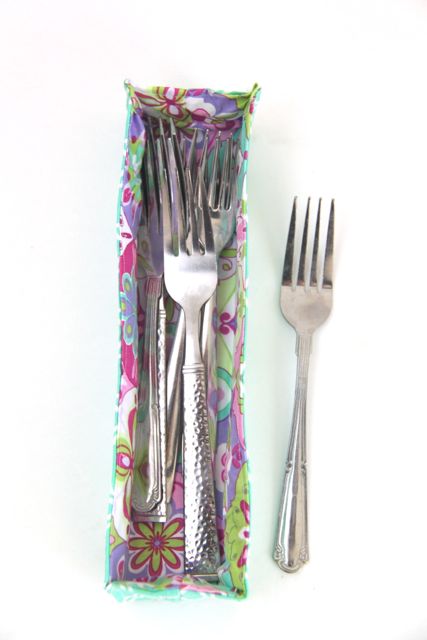
Now you can fill your baskets and straighten up your kitchen drawers…or use these beauties in your craft or sewing room to hold odds and ends! Happy Sewing!!

Love,

Maggie

    You may also like -

    Braided Ribbon Hair ClipBraided Ribbon Hair ClipsGnome Felt Finger Puppet TutorialGnome Felt Finger Puppet TutorialTiny Embroidery Floss Pom PomsDIY Martini MarkersFelt Hedgehog Ornaments // SmashedPeasandCarrots.comFelt Hedgehog Ornament TutorialGhostbusters Family Costumes // SmashedPeasandCarrots.comHappy Halloween 2016

    Become a Subscriber

    never miss a thing!

    Comments

    1. Mrs.T says

      December 15, 2015 at 2:57 am

      My silverware drawer needs some serious help. Maybe in the new year I can whip up a few of these. Great idea!

    2. LAggie says

      December 19, 2015 at 3:21 am

      I love this idea! Thanks for sharing photos and instructions.

    3. Sandy says

      January 17, 2016 at 5:35 am

      I pinned this to make after the holidays. Well, tomorrow is the day! I really dont like my messy kitchen drawers. Time for change!

    Welcome to Smashed Peas and Carrots. You can read more about me HERE
     photo designTeam.png
    Follow on Bloglovin

    Popular Tutorials

    Highlighter Valentine Card with Free Printable

    Highlighter Valentine Card with Free Printable…

    Play Doh Valentine Card Free Printable

    Play Doh Valentine Card Free Printable…

    Elderberry Syrup Recipe

    Elderberry Syrup Recipe: Natural Cold and Flu…

    Teacher Survival Kit

    Teacher Survival Kit with FREE Printable…

    Notebook Paper Pencil Pouch Teacher Gift Idea

    Notebook Paper Pencil Pouch Teacher Gift Idea…

    Free Silhouette File Teacher Canvas Bag Gift Idea

    Free Silhouette File: Teacher Canvas Bag Gift…

    Popular Recipes

    No Bake Energy Bites Recipe…

    Chocolate Coconut Cups {Gluten and Dairy Free}…

    DIY Taco Seasoning Recipe…

    Sugar. Cookie. Icing. {The Recipe}…

    French Dip..Crockpot Style!…

    Crockpot Banana Bread…for Real!…

    My Sponsors

     photo FatQuarterShop-175x175.png

     photo cdf15248-e6f8-4276-abc0-c145e2451c35.jpg


    Blog Archives

    Posts by Topic

    Stay Connected

    • Facebook
    • Twitter
    • Pinterest
    • Instagram
    • Dots
    • Google Plus

    Join me on Facebook

    Copyright Smashed Peas and Carrots © 2025 · All rights reserved · Design by Emily White Designs

    Copyright © 2025 · Smashed Peas & Carrots Custom on Genesis Framework · WordPress · Log in