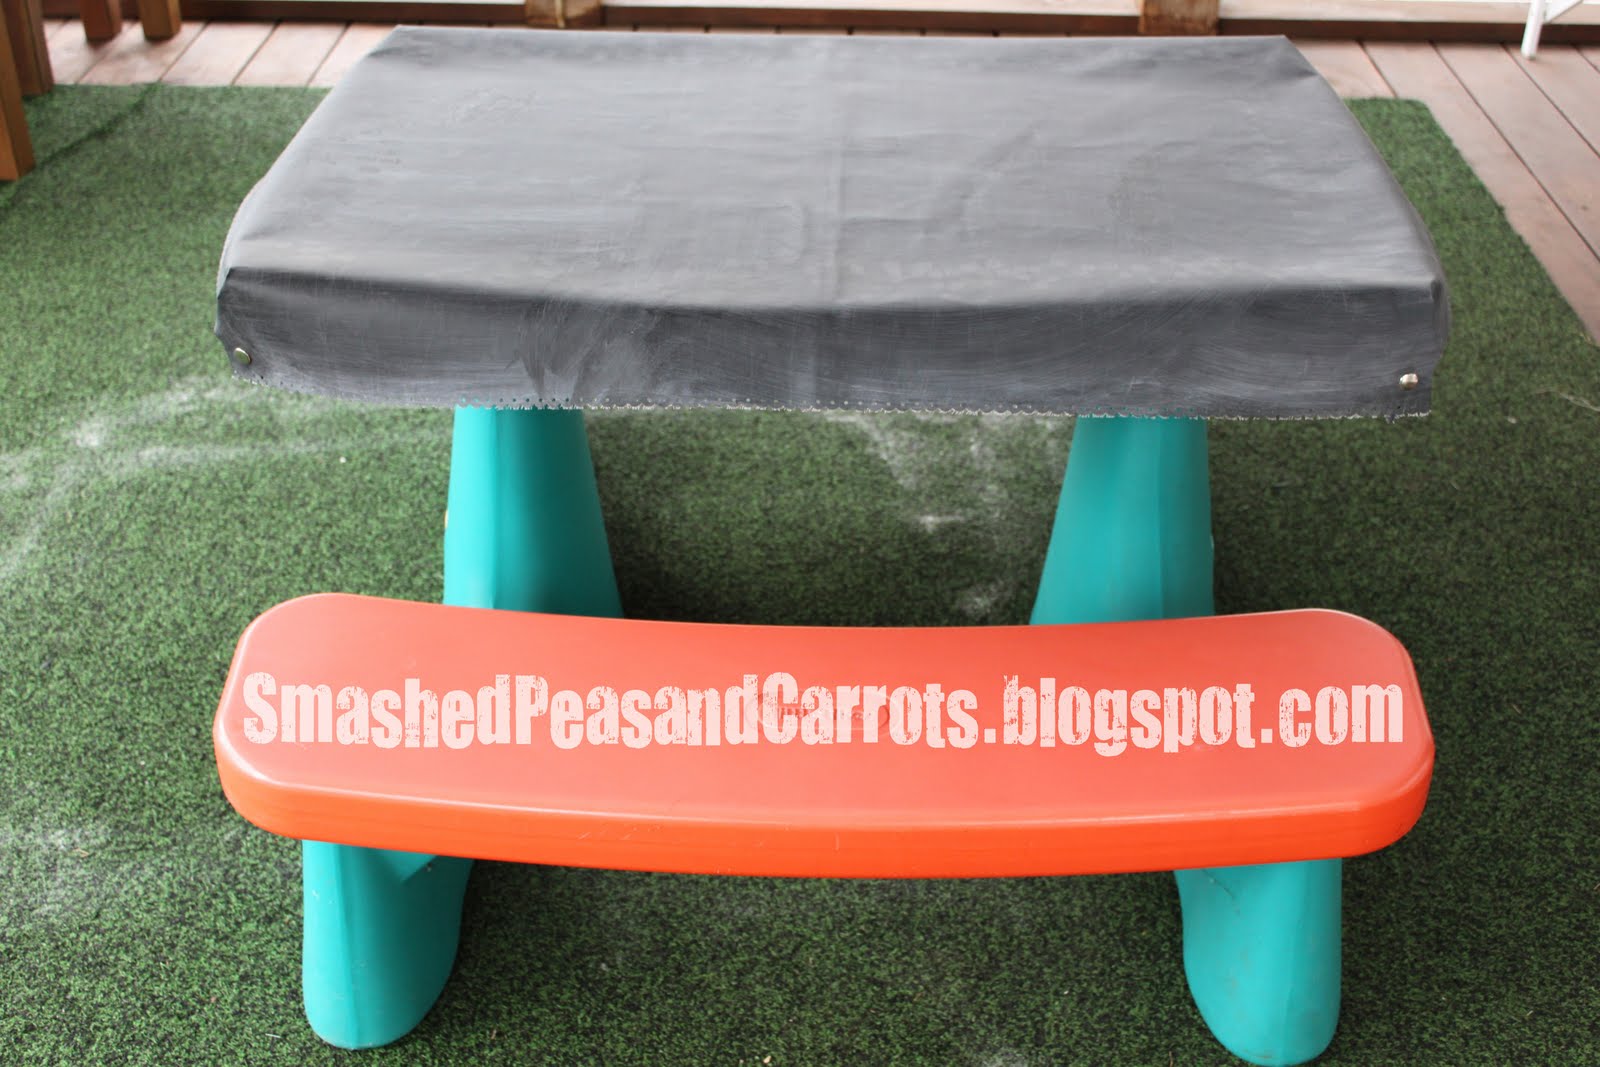
Since we have been having such lovely weather here lately and my kidlets have been running amuck outside a lot, I thought it would be a good idea to bring up our Little Tikes picnic table from the basement…it’s little home in the winter time. Any of you have one of these? They are super great, aren’t they!?!
We keep ours out on our screened-in porch in spring through fall and there the kids can do messy art projects and eat lunch and snacks too! Rock on! I happened to find mine for $10 at a garage sale…can I get a Woot Woot!
I love garage sales, they pull at my heartstrings just so. I am such a magnet for finding Little Tikes stuff too…it’s a complete adrenaline rush for me when I find them at amazingly cheap prices! I have to say I am the proud owner of the picnic table as well as 4 cozy coupes (for all the playdates we have…no crying over not having one now!) and all were bought for $5 a piece!! What a bargain, eh, life is great sometimes, no?
Anyways, these days Noah and Penny are really into coloring and making monster-sized messes the way kids do. We go through so much paper, it’s sick! I thought it would be a good idea to make them a table cloth out of chalkcloth for their little picnic table so they could color and be messy as much as they wanted without wasting all the paper…genius, pure genius I tell you!
Want to make one for your little ones too? It’s super easy…pinky swear!

Summer Fun here we come!
ChalkCloth Table Cover
1 large piece of chalkcloth (My Little Tikes picnic table measured 39 inches by 27 inches. I added 3 inches per side for the table cloth to hang down and snap together. So, my total measurements were 45 inches long x 33 inches wide!)
4 heavy duty snaps (5/8 inch) or a heavy duty snap pliers kit
scissors
edge punch
chalk (for prepping your chalkcloth and for drawing afterwards!)
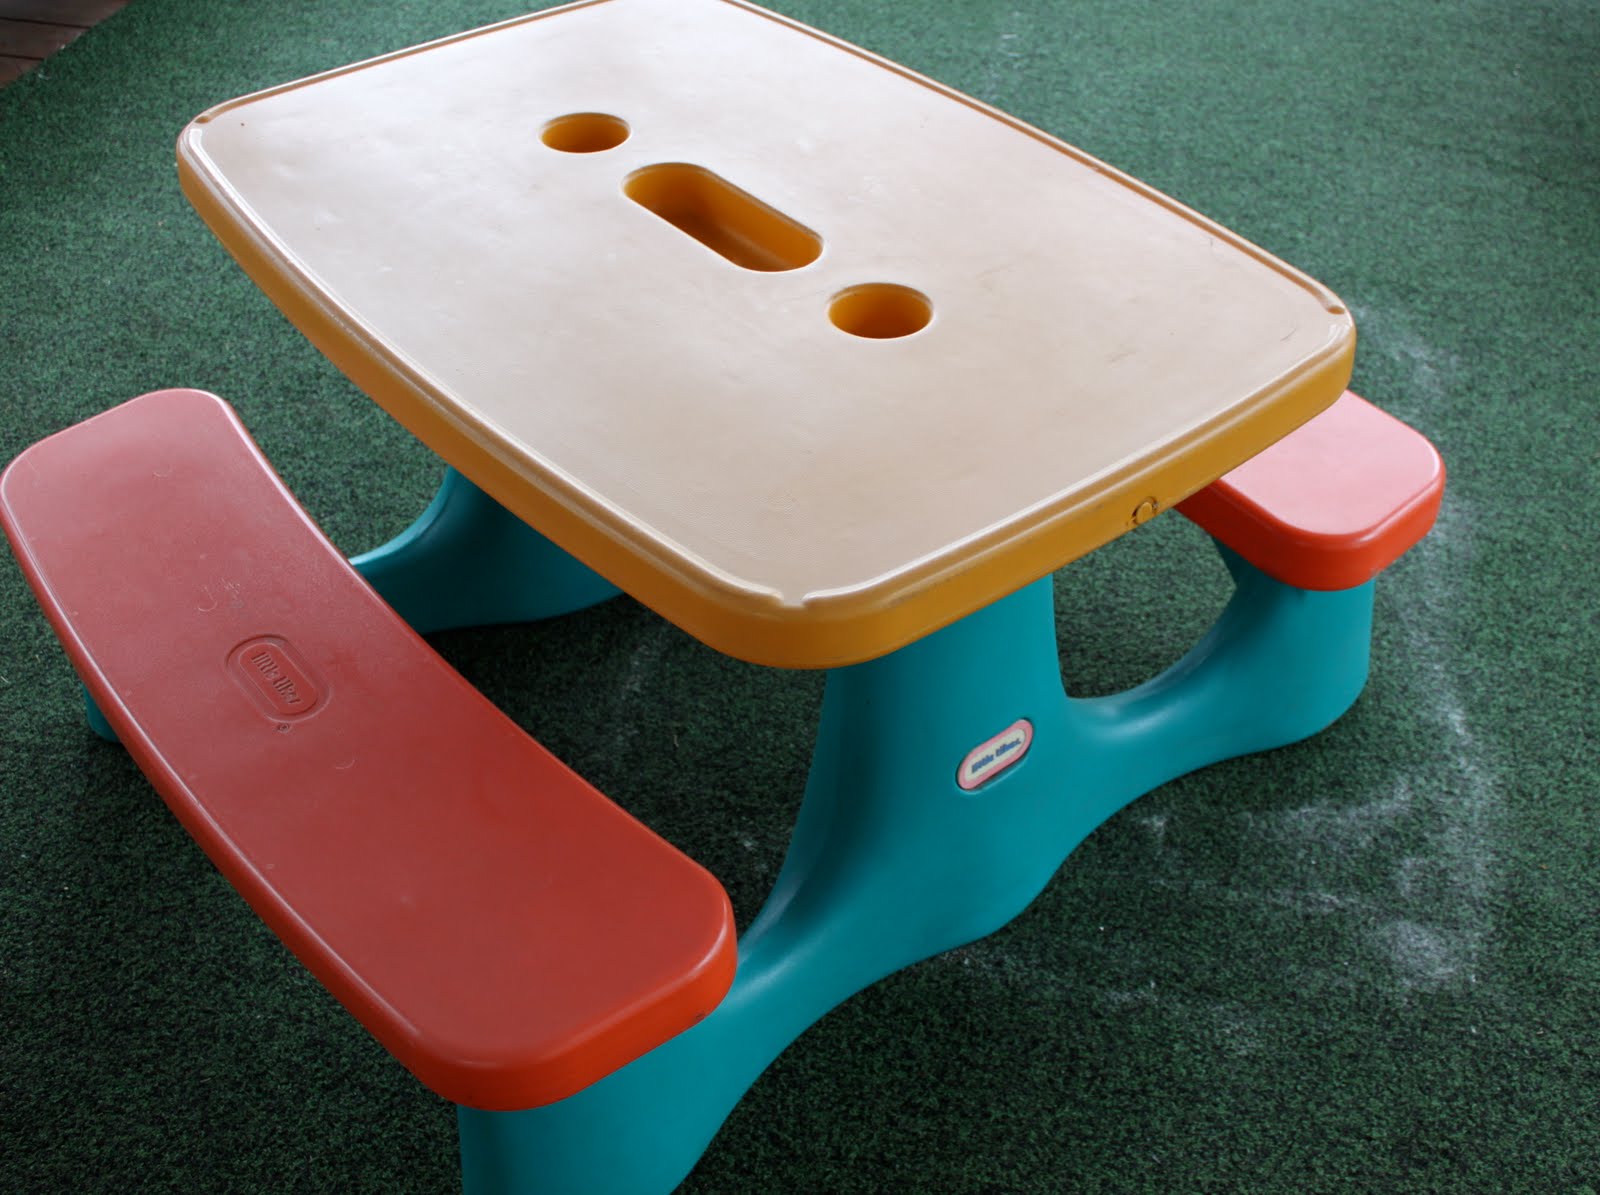 So, I started with owning one of these little suckers, above, but if you have a different table just measure the length and width and add a few inches for a border to hang down on the sides so you can snap it together. That way it’s nice and snug around your table.

First, cut 2.5 inch squares out of the corners…if you fold your chalkcloth in half you’ll only have to cut squares two time…yeah for saving some time!
Also, just so you know, I started with a 2.5 inch square but once I was ready to put my snaps in I cut a little more here and there so that the snaps matched up and the cover fit nice and tight over the table. You may need to adjust the corners a bit too!
 Next, I prepped my chalkcloth. To do this you take a piece of chalk and rub it left and right and up and down until the whole thing is covered in chalk. Wipe away and do it again. Not sure why exactly it needs to be done, I got my info from the Oil Cloth Addict, I ‘ll just take her word for it!
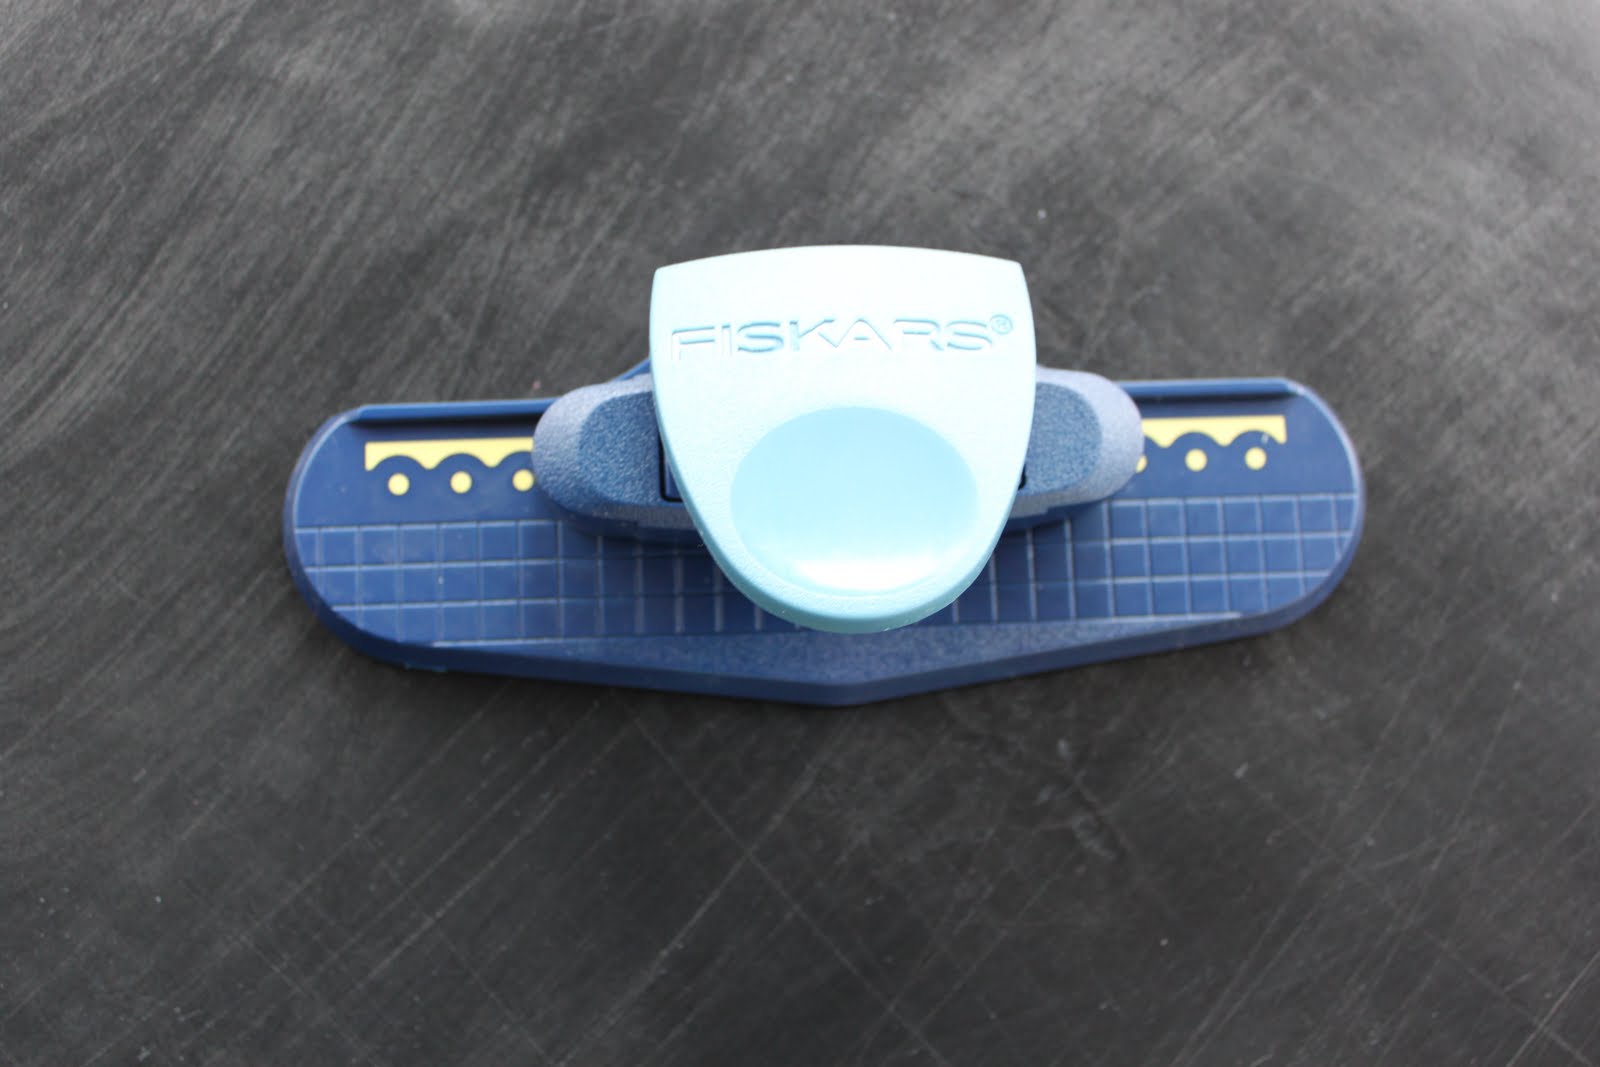 Then, I decided I wanted to pretty up the edges of the chalkcloth. So, I found an edge punch…mine is from Fiskars and it’s the ‘threading waters’ border punch. I just punched the edges all the way around…simple simon!
Let’s just take a look at those beautiful edges, shall we?
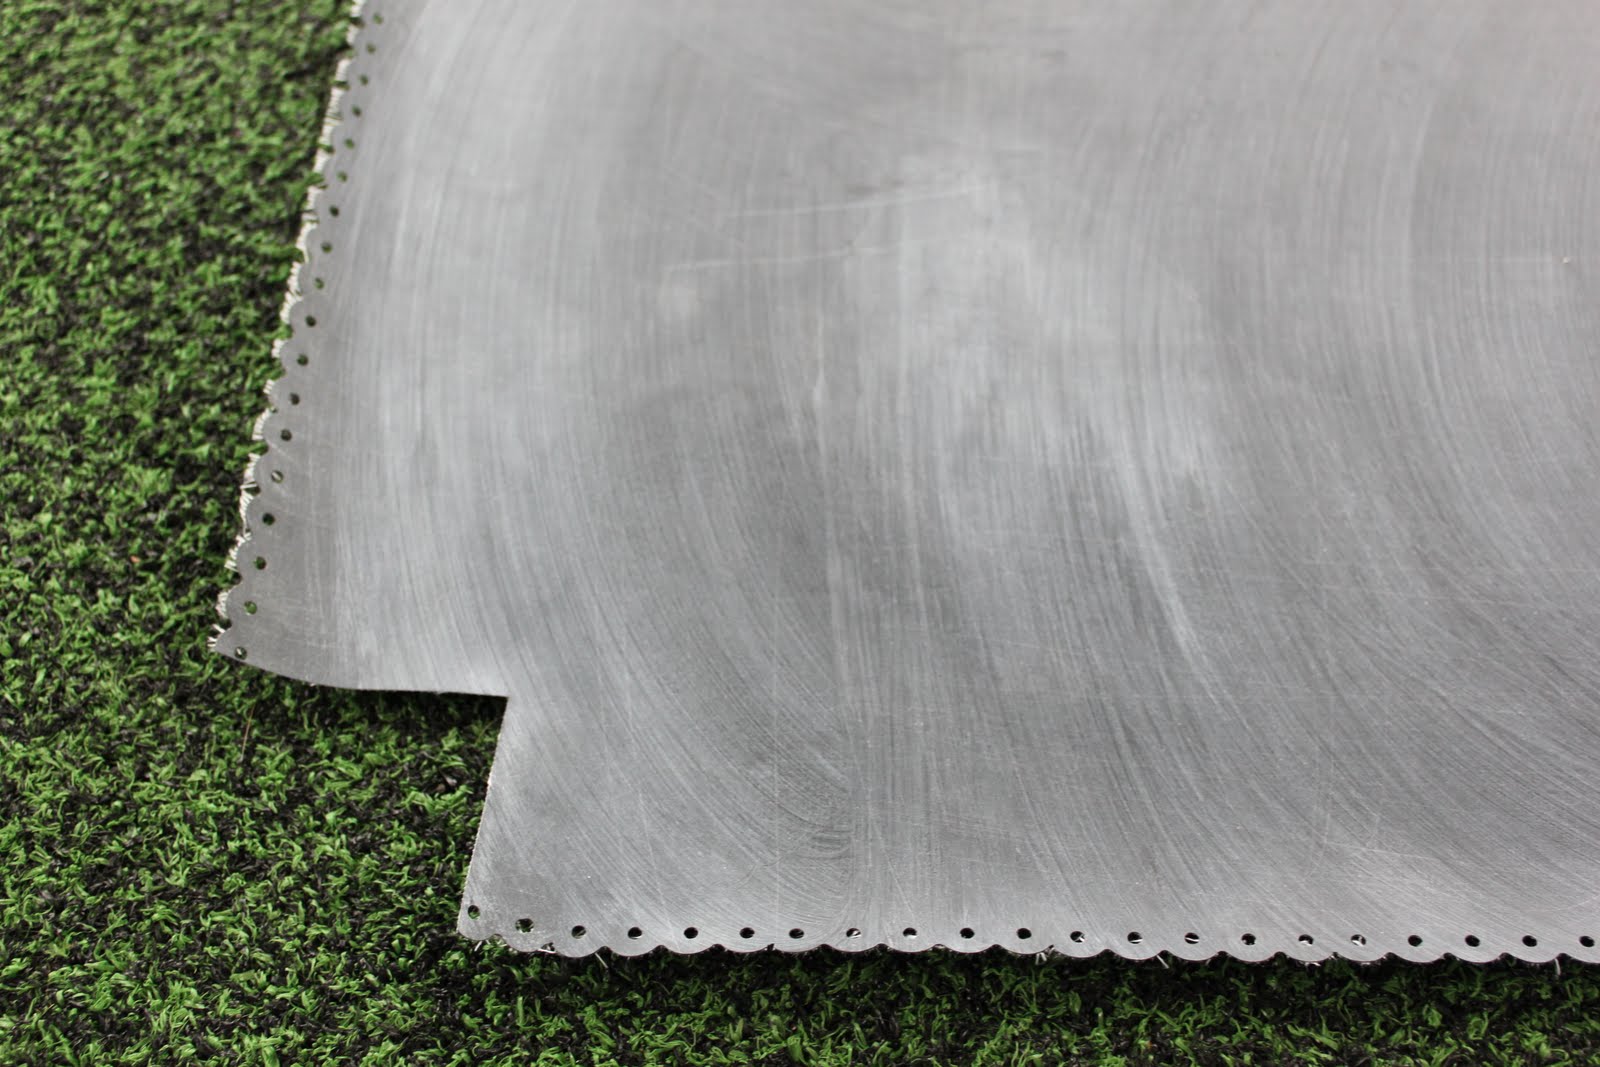
Ahhh yes, beautiful indeed!
 Then, I used my pliers kit, like the one above (I found mine at Joann’s), to press in four heavy duty 5/8 inch snaps to each of the four corners. You could probably just hammer them in but what can I say, I’m a wimp when it comes to snaps and eyelets! Muscles, what muscles???
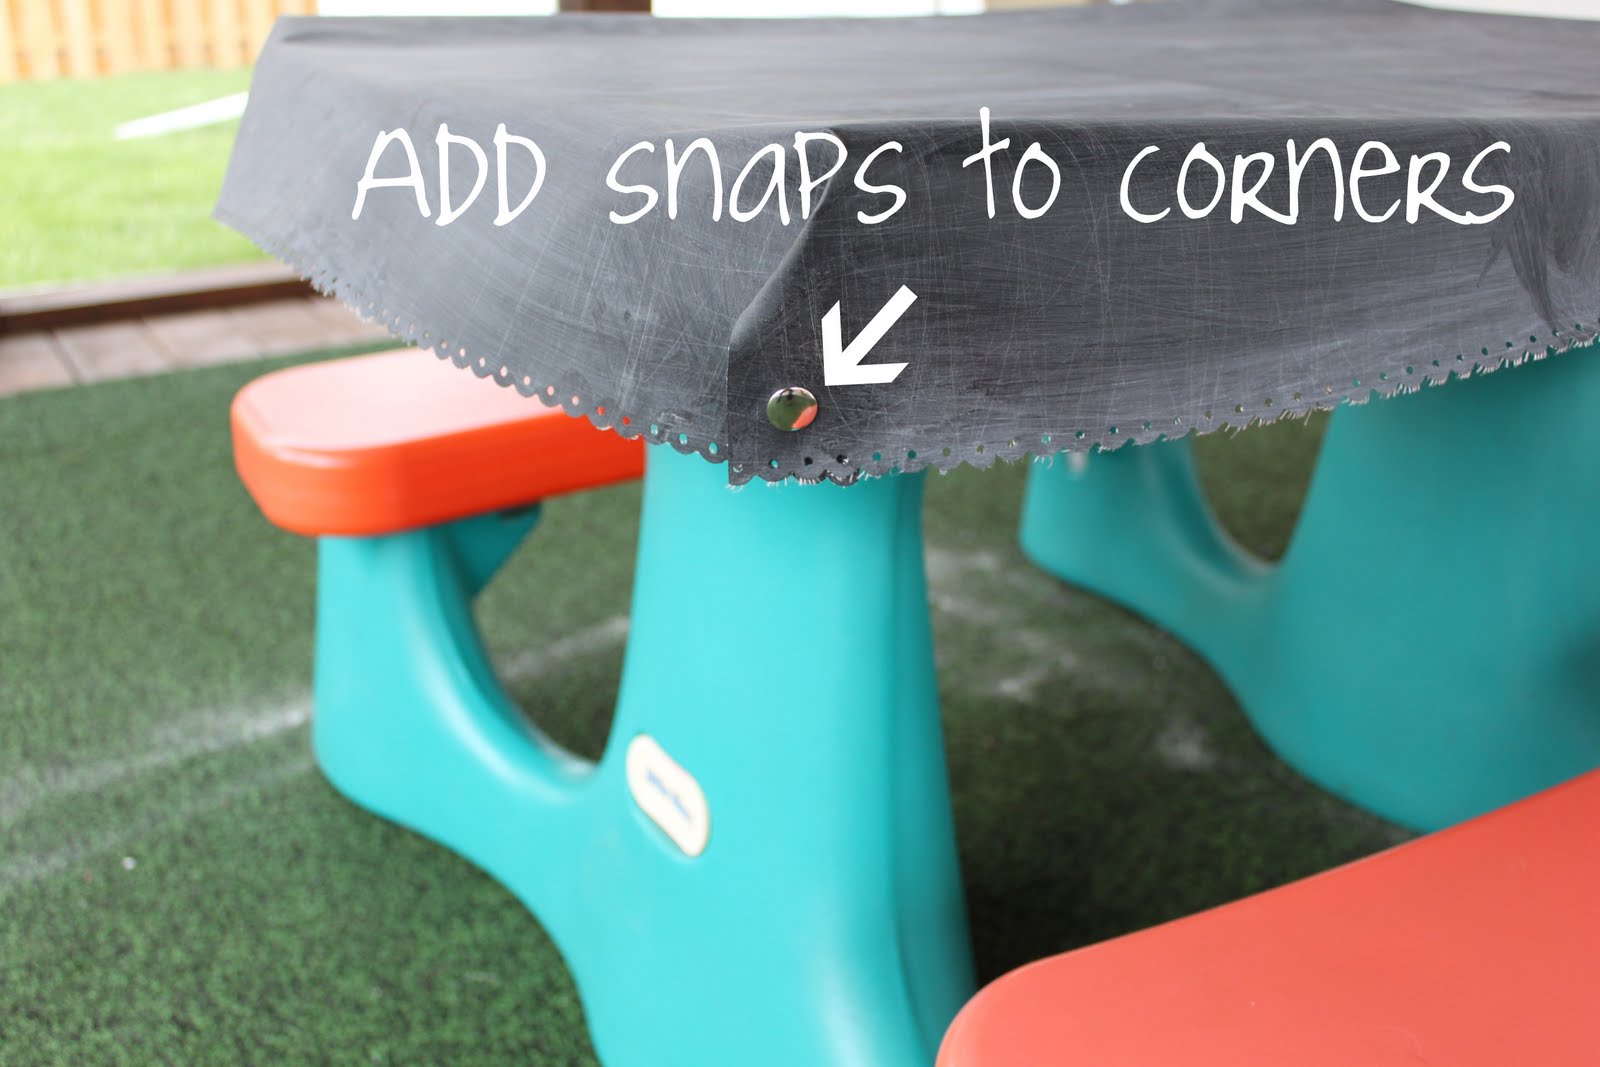
Then, just press in your snaps to all four corners. Make sure you have the cap and stud parts facing the right direction before you press them in place so they snap together right!!
And guess what kids??? You’re all finished!
Wasn’t that easy and fast, my kidlets are STILL sleeping!!
And, no sewing required…totally awesome!
All done…see my pretty little edges there?
Lovely!
(Just don’t mind the chalk dust…avert all eyes from that part of the picture please!)
I found Dustless Chalk at a Teacher Supply store near me…not sure what makes it dustless it still seems dusty to me…but I bought into it anyways, oh well!

Now go find some chalk and draw to your little heart’s content!
Have Fun!


That is amazing! Great idea!!! We go thru a ton of paper too!
Cute idea Mags!
Such a great idea! I love it. This would work on my kitchen table too!
love it but where did you find the chalkcloth???
I bought the chalkcloth at Vogue Fabrics: http://www.voguefabricsstore.com/store/product.php?productid=1665&cat=0&page=1
but I live semi-close to it…the Oil Cloth Addict on Etsy also has some at a good price too!!
-Mags
Love your blog!!!
Wow! How long did it take to make all the border? You are great!!! Looks fantastic. Did not know that there is chalk cloth. Thanks for sharing.
Have a fab weekend, ines
What a great idea! I’ve never seen chalk cloth before, but I’ll have to go looking for it.
I’ve never heard of chalk cloth, but I have to say it does seem to be the stuff of genius. Great idea for saving paper!
Ohhhh, great idea! Love it!
WOW! Awesome idea! Have to try it! Thanks for sharing.
this is a great and practical idea! love it!
So cute, I love it! Never heard of chalk cloth before.
I’ve got to get me some chalk cloth. I’m surprised the Fiskars punch went through it but it worked great and looked perfect.
Blessings,
Nancy
I love this! What a terrific (and useful) idea!
We have a Friday Fun Finds party- if you’re interested, we’d love it if you’d link to this!
Wow! This is brilliant! I love your blog. I host Tot Tuesdays every week and would love it if you would stop by and link up. I’m also hosting a giveaway at the moment you might be interested in. Have a great week!
http://delicious-ambiguity-nennyk.blogspot.com/
Chalk cloth is surprisingly thin so the border punch went through really nicely. The other option floating in my head was to use those funky scissors with scallop edges, that should also work nice!
-Mags
Love this idea. I’m sharing it with my blog readers today.
I am sharing this today here: http://www.bubblynaturecreations.com/2011/01/why-didnt-i-think-of-that-wednesday.html
I love your blog! thanks for the tutorial.