
So, I just wanted to post the fun little Sandwich Cozy tutorial that I did for Scrap Your Stash at Living With Punks a few weeks back. Enjoy!!
:: :: ::
A few years ago I had a few of these reusable sandwich mats for wrapping up your sandwiches or pretzels and such on picnics but I just majorly disliked the fact that they were made with this plastic-y vinyl type material. I have been getting rid of all my plastic food containers and these mats just didn’t sit well with me cause you were essentially storing your food right on the plastic side of the mat…ummm, yeah no. So I came up with an all-fabric cozy that you can wash and reuse and as a bonus you get to use up some of those precious fabric scraps, holla!

Each cozy is generously sized to fit a nice thick sandwich full of yummy toppings or a generous portion of snacky foods…pretzels, crackers, or even cookies perhaps?
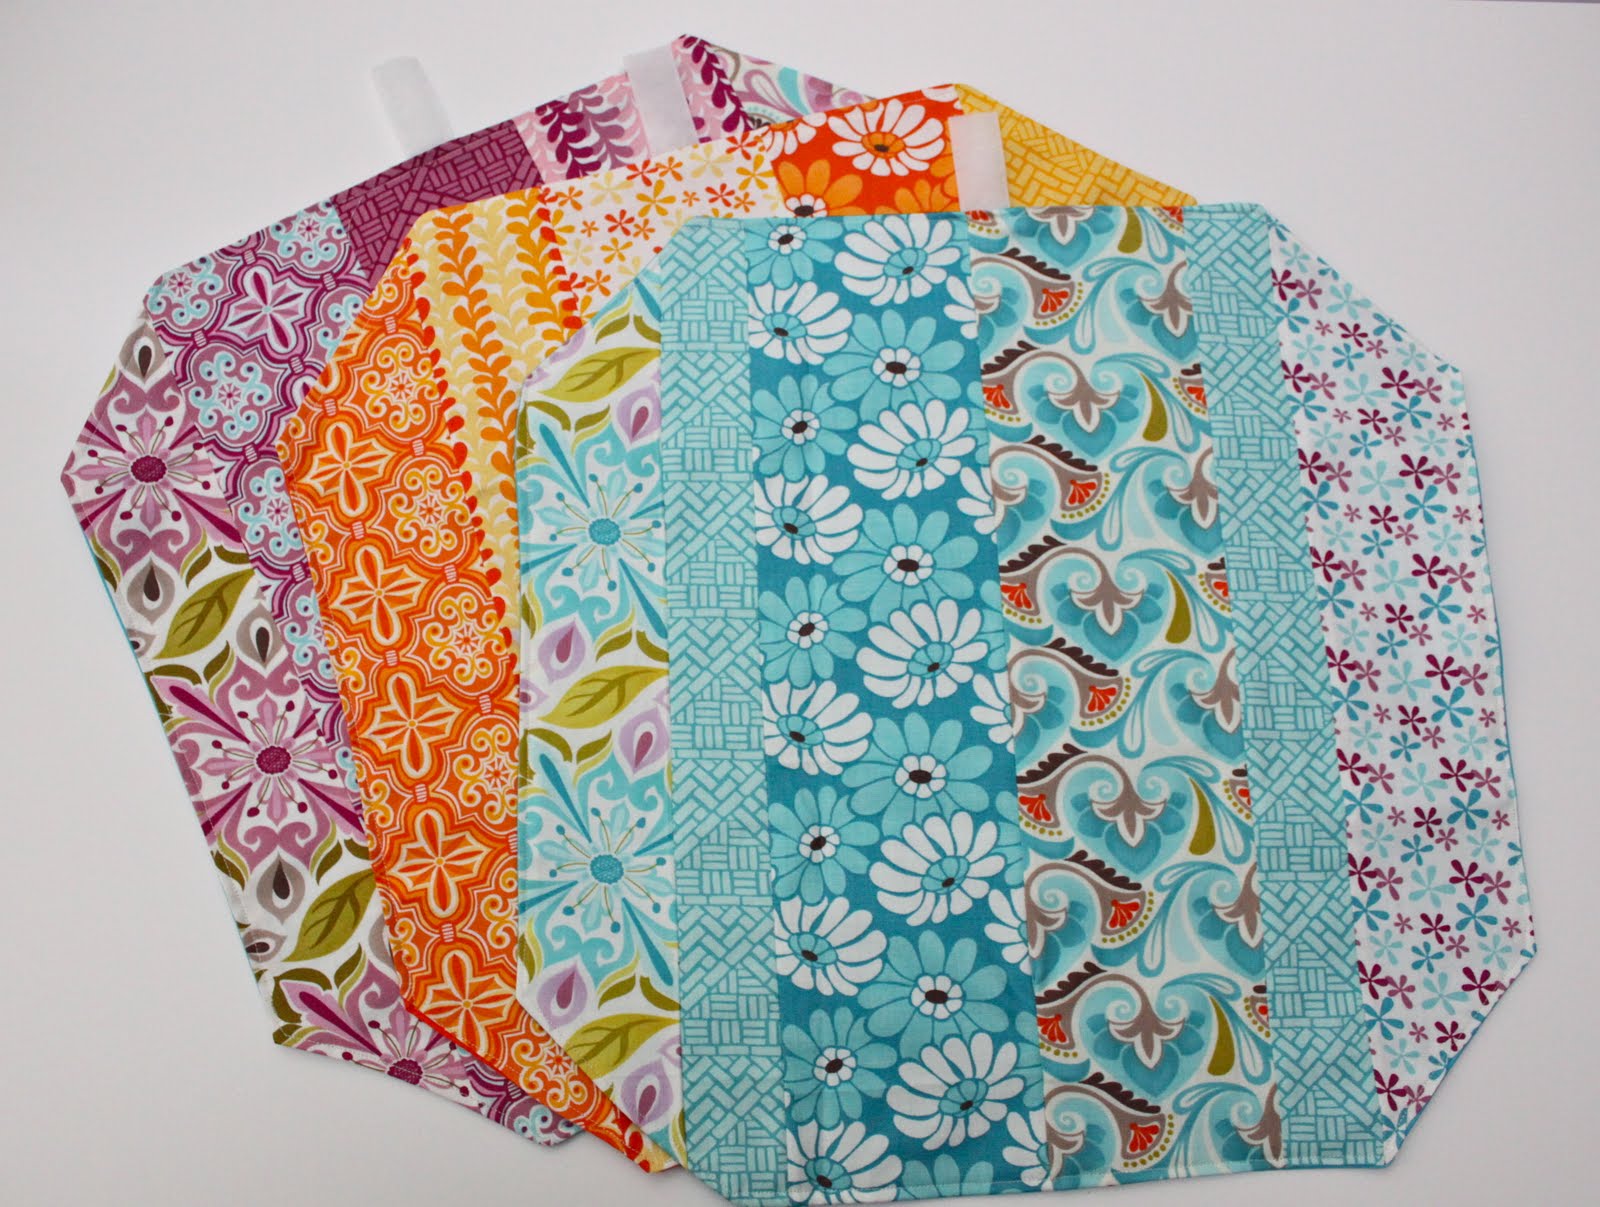
They are perfect for summer picnics, school lunches or taking to work. The velcro closure is just right for little hands too 🙂 I think you should make one or two for each member of your family and put a dent into that growing pile of scraps!!
Things You need to Get Started:
Fabric scraps in all sizes
Piece of coordinating fabric measuring 15″ x 15″
Piece of fusible interfacing measuring 15″ x 15″
2 inch piece of velcro
ruler
rotary cutter and mat
sewing machine and thread
iron

First grab your scraps (these are all scraps from Central Park by Kate Spain…love this line!) and figure out how you would like to arrange them before you start sewing. You will want to end up with a 15 inch by 15 inch piece of fabric so pull your scraps accordingly.
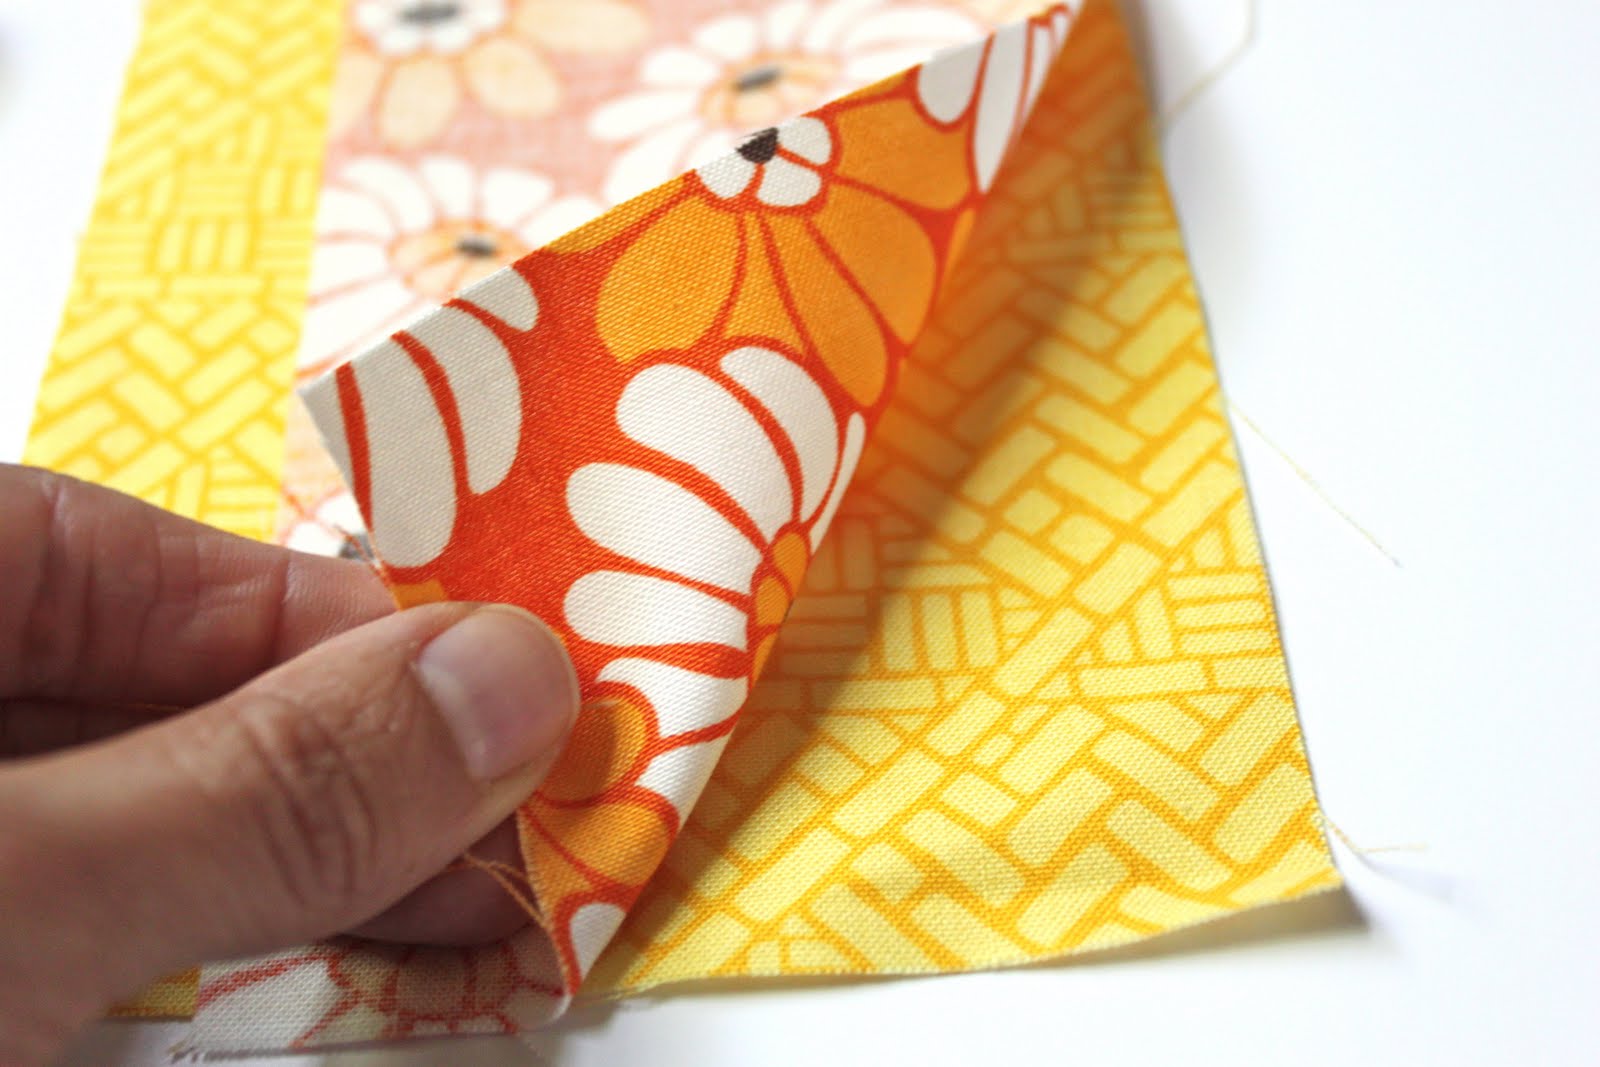
When you are ready to start sewing them together, place the first piece of fabric right-side up and then place the piece of fabric that will be next to it right-side down directly on top of the first piece. Sew together using a 1/ 4 inch seam allowance.

Continue doing this for each additional piece until you have something resembling 15 inch by 15 inch square or larger. Don’t worry if you are using scraps of fabric that are longer than 15 inches. We will cut them down to size soon!

Once all your pieces are sewn together, flip your fabric wrong-side up and press your seam flat, see picture above. This will help to reduce bulkiness once the cozy is assembled.
Now you can go ahead and cut your pieced fabric (this will be your inner fabric) so that it measures 15 inches by 15 inches.

Next grab your interfacing. This is what mine looked like.

Cut a piece of interfacing as well as a piece of coordinating fabric (which will be your outside fabric) to measure 15 by 15 inches. Iron on the fusible interfacing to the wrong-side of the outside fabric following the package directions.
Next, measure 3 inches in from each corner and draw a line between the two points. Cut a triangular piece from each of the four corners from both your inner fabric (pieced fabric) and your outside fabric (with interfacing attached) using your ruler and rotary cutter plus mat.

Then take the rough section of the velcro and center it about 2.5 inches from one side of the outside fabric. Sew in place.

Now this part is tricky to explain so bear with me here. Place the inner and outside fabrics right-sides together keeping the outer fabric on the top (like the picture above). You are going to sandwich the softer side of the velcro inbetween these two layers with the soft side facing down. Do this on the exact opposite side of the cozy from where you had sewn the rough side of your velcro. So if you are looking at this picture, the velcro needs to be shoved into the sandwich so that it is aligned with the raw edge. Make sense…or clear as mud?
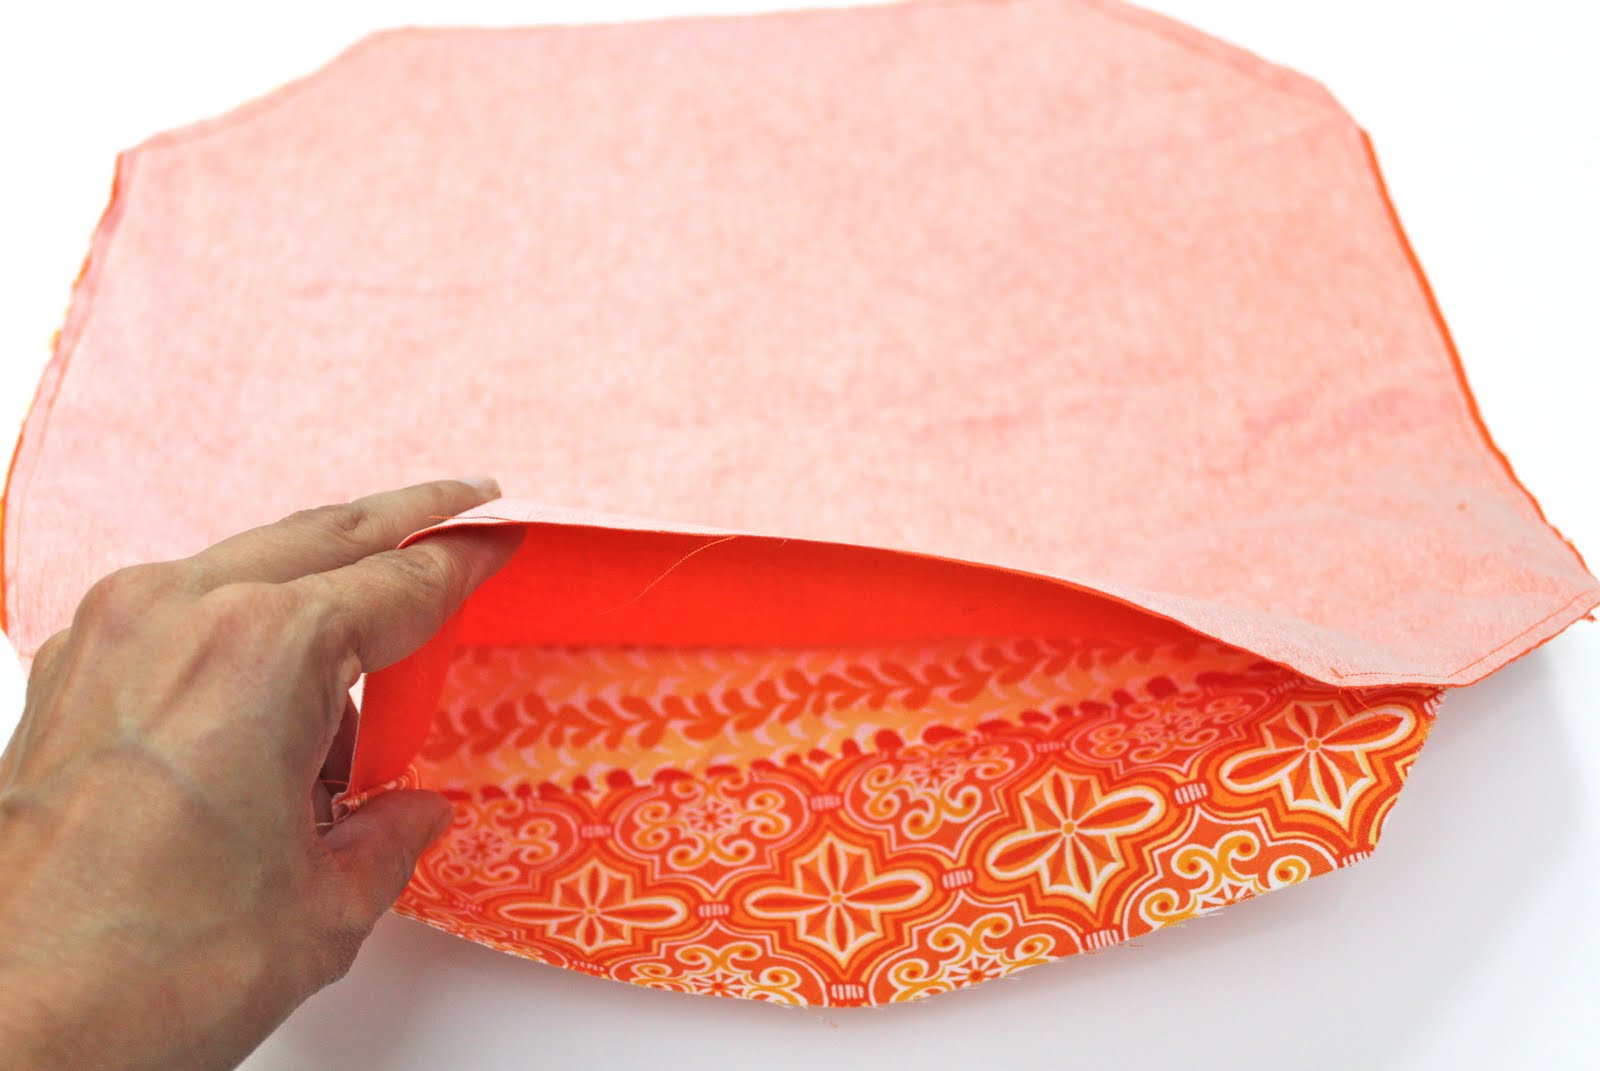
Okay, if you totally understood that last step pat yourself on the back! Next you are going to sew around the cozy with a 1/4 inch seam allowance leaving one side unsewn so that you have an opening for turning the cozy right side out.

Clip every single corner and then turn that baby right side out…almost done!!

Press the cozy flat and then top stitch around the entire cozy with a 1/8 inch seam allowance. This will neaten up the cozy as well as it will close that darn opening.
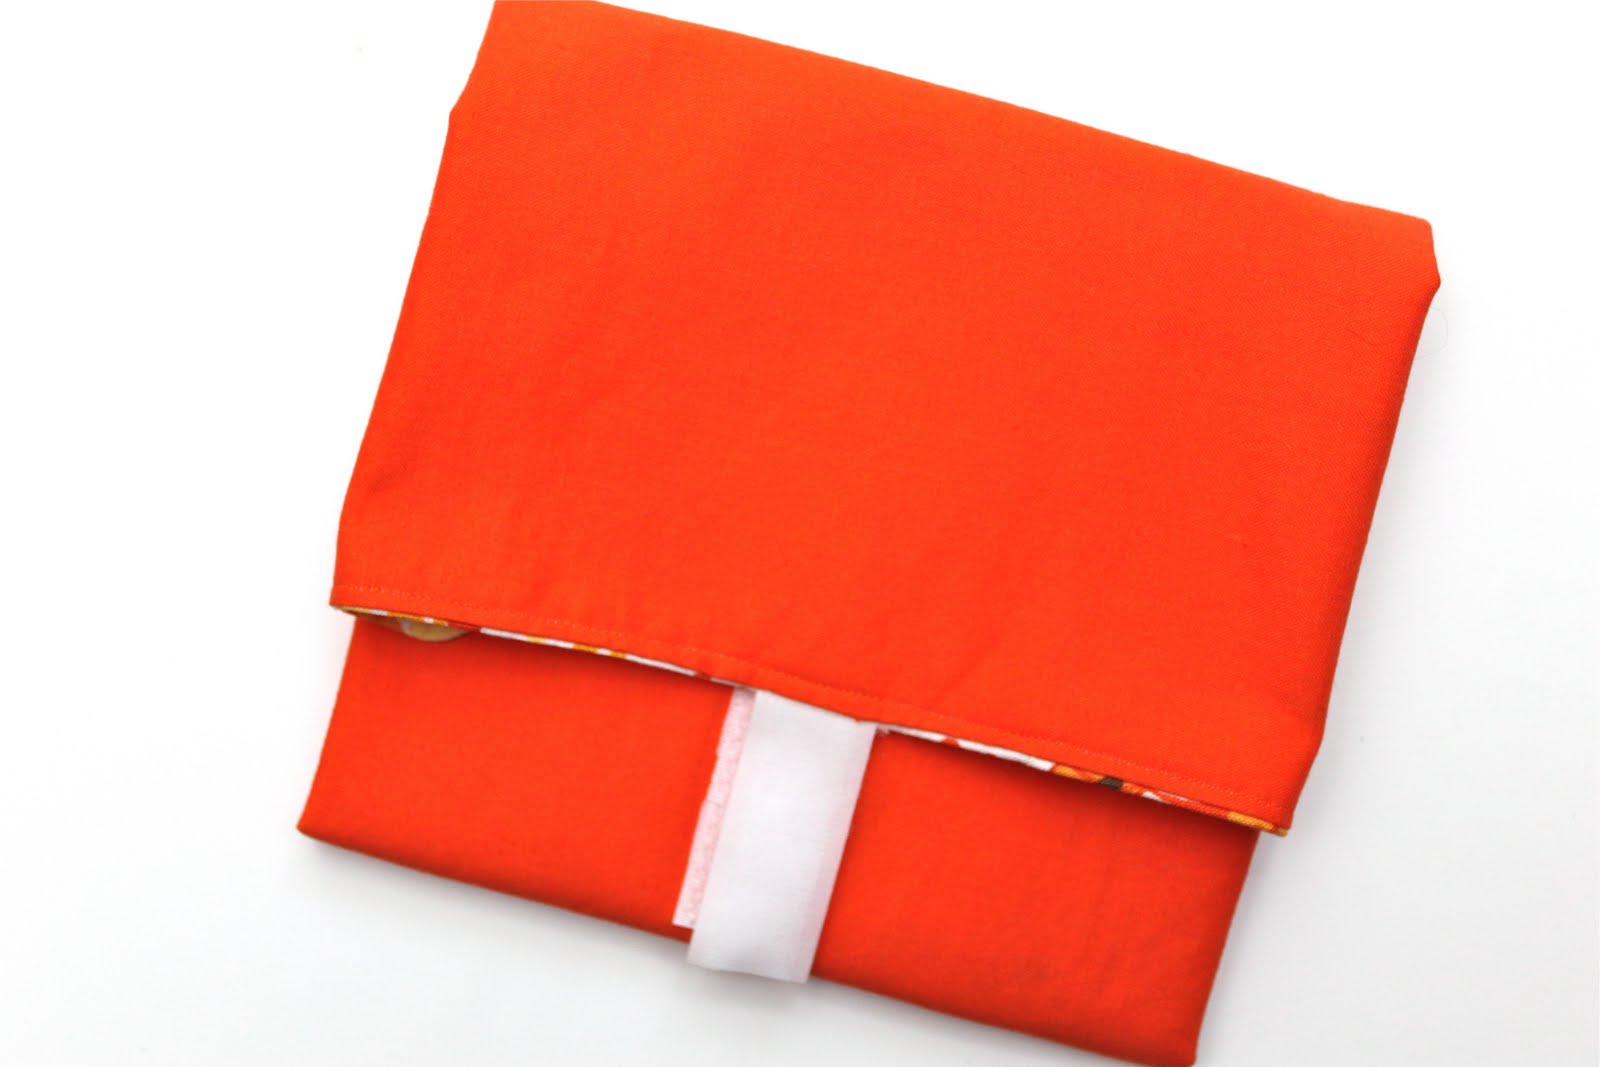
Done!
Isn’t it so cute!
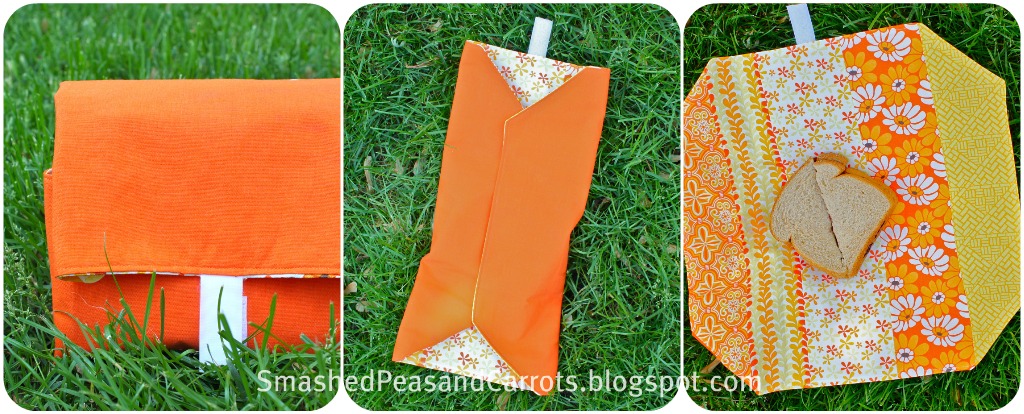
Now, fold up your cozy and get ready to do some summer picnikin’!

Ahh, summer…lush green grass and a little bit of shade equals the perfect picnic ambiance 🙂

PB & J anyone?

Happy Friday!!
XOXO,


Thank you so much for this post. I want to let you know that I posted a link to your blog in CBH Digital Scrapbooking Freebies, under the Page 6 post on Jun. 17, 2011. Thanks again.
Great idea. I think I’ll make some of these.
See, there are good reasons to want a sewing machine. And as soon as we have room in this disaster of a house to put one, I’ll get one…*sigh*
Maybe I’ll see if there’s time to hand-sew one. Okay now I’m laughing at myself.
Very cute! I love that it’s like a picnic mat and a sandwich/snack baggie at the same time. What a great scrap buster, too!
I should really make some, Nicole is ALL ABOUT PICNICS right now! Any time I ask her to do anything, it tends to be answered with, “…and then we have a picnic?” lol!
I saw these over at SYS and decided to make a bunch, which led to also making about 20-25 resealable cloth snack/anything baggies. I love them!! Thanks for the great idea.
This is great – thanks so much!! I love your fabric choices too! Can’t wait to try & make one. 😀
I understand not liking the vinyl side of the sandwich mat, but what keeps the bread from drying out? (have very picky kids, here) You’ve had success in keeping the bread moist ’til lunch?
Hi Sabrina, I used a piece of thin vinyl that I bought from Joann’s to line my sandwich
wrap. Worked well in keeping the bread moist.
Suzie
Where is the thin vinyl in your instructions? How is the vinyl sold? Thank you
Great idea! I like how it opens into a mat for your food. Do you have any problems with teh sandwiches drying out?
@Sabrina and @Becky-I have not had any issues with the bread drying out. Although I have not kept a sandwich in them all day either…just 4 hours at the most like for a trip to the zoo. I think using the interfacing along with the two layers of fabric helps out with that some. Hope that helps you some!
XOXO,
Mags
I’m definitely going to make some of these before school in the fall. We use fabric sandwich bags right now, and we’ve had no problems with bread drying out, either. Thanks for the tutorial!
I like this idea a lot, and like others said, love that it becomes a mat. I can see my daughter using these as gift wrap when she plays presents, too.
This is great! So much less expensive than those stupid reusable plastic sacks!
What a great tutorial!I’m visiting from 101 summer sewing tutorials roundup. Have a great day! http://runwithglitter.blogspot.com
This is sooo cute! I bring sandwiches to work every day for me and my hubby. I can make us each our own custom sandwich cozies!
I made one of these this afternoon and I’m loving it! Actually, I made two so far… but the first was practice and I don’t love it so I had to try again. The second one worked much better and now I’m going to try a third one! Thanks for the tutorial!
I just made one of these sandwich cozies! Thank you so much for posting this tutorial! If you’d like to see my finished version, check out my blog: http://littlebitomeghan.blogspot.com/2011/07/cute-sandwich-cozy.html
Hi I Really Like your great tutorials!!!
I Link to you on my Blog,
http://paneamoreecreativita.it/blog/2011/07/raccolta-di-progetti-di-cucito-creativo-per-lestate
Thanks for sharing 🙂
Ok possibly a silly question, but do you just wash these in your washing machine? Can’t wait to get started, my little has just started school and we are having lots of fun with her lunches! I think there will be a new lunch addition next week! x
Thank you for such a great tutorial! I’ve included this as part of my Pinterest Project! http://fabulouslydomesticbyambrosia.blogspot.com/2011/09/pinterest-project-day-14-sandwich-cozy.html
Thanks so much for another awesome tutorial! I am absolutely LOVING your blog! I made one and blogged about it here: http://www.mommade.org/2012/01/sandwich-wrap-placemat.html. Super cute!!
Have a great day!
Sarah
http://www.mommade.org
Thank you for the clear and simple tutorial. I love how easy and fast these are to whip up! Thanks!
I made three of these but I used whole pieces of fabric for both sides. I had scrapes big enough. I LOVE them! This was so easy to follow. Thank you!
Thanks so much for the great tutorial! I made enough for our family and gifts! I linked to you in a blog post, too. http://knittingirl40.com/2013/07/01/sunday-funday-sewing-projects/