
This cute little girl’s Vintage Tie Apron was created thanks in part to my momma. About once a month my momma sends out a big box full of lovely things just for us, isn’t she the best…we are so grateful for her (and my dad too of course!) We are truly showered with lots of love…there are yummy treats for all of us, sweet little outfits for each child, a gift card or two for us to splurge on ourselves or go have dinner, and she also lovingly sends out in each box a few pieces of my clothing from when I was a kid so that I can pass them along to Penelope and Eloise. You might remember when she sent me these. Well, not too long ago my momma sent me this sweet little dress that I used to wear when I was Penelope’s age:

So cute right!? If you can believe it, this little dress and apron fit Penelope perfectly. I loved this apron so much that I just had to create an updated version.

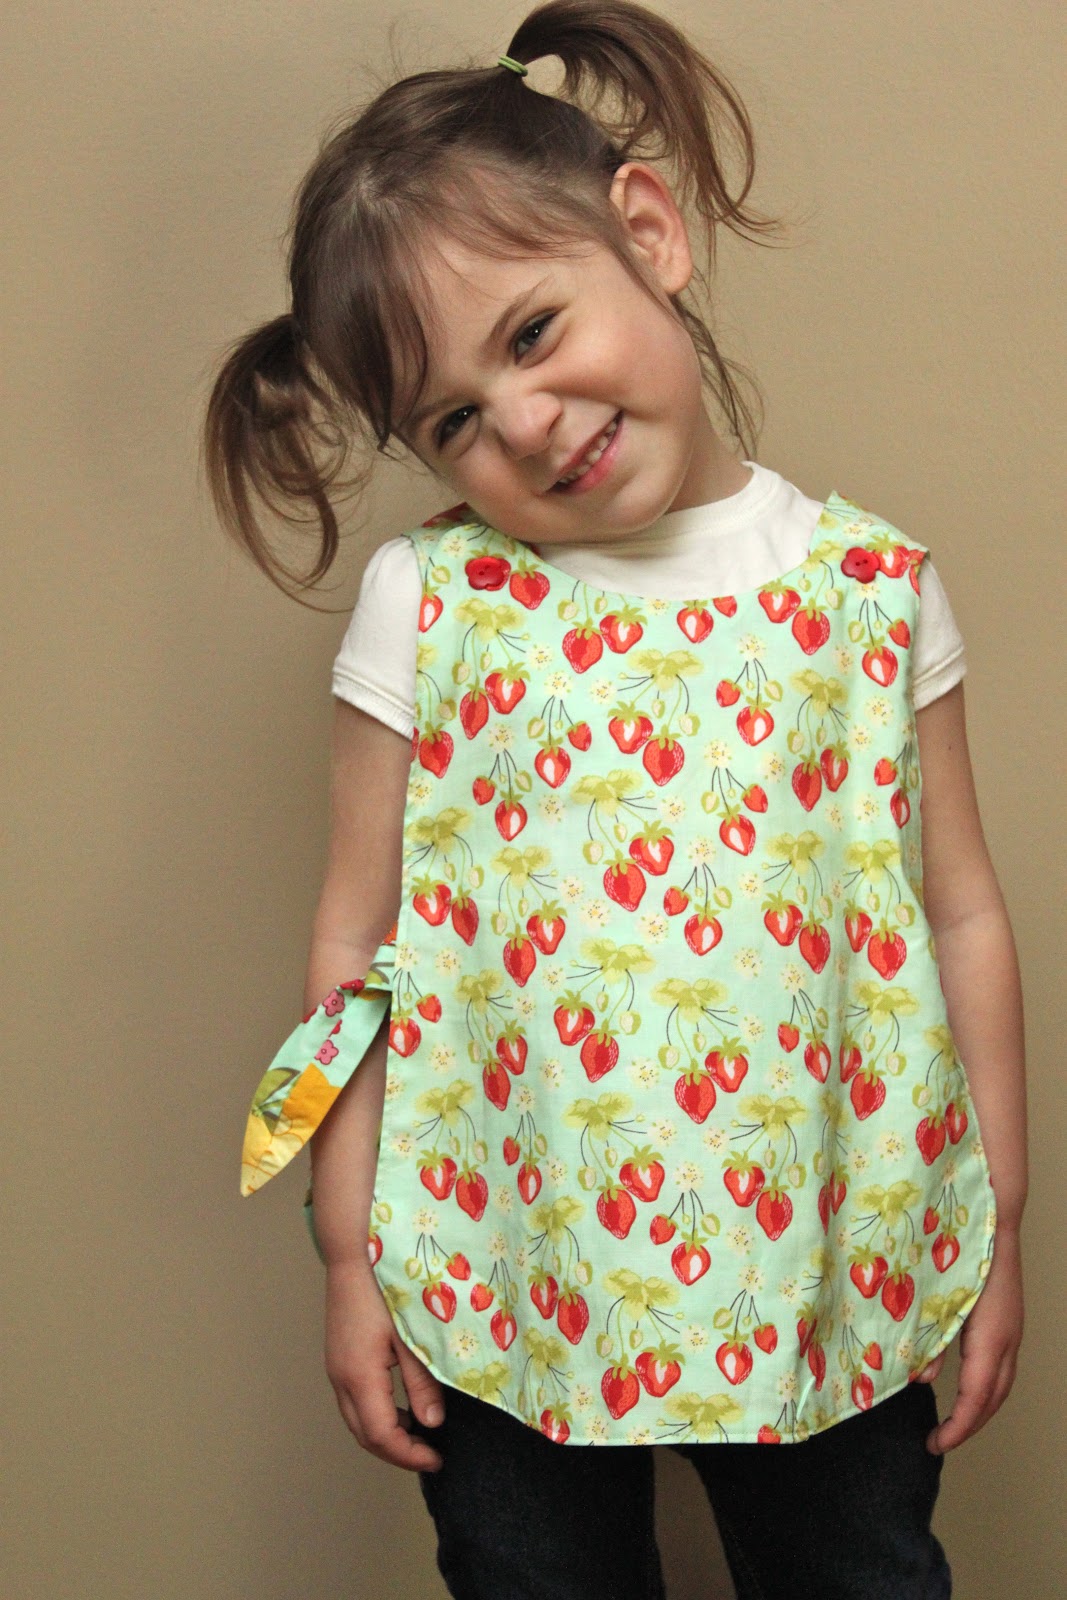
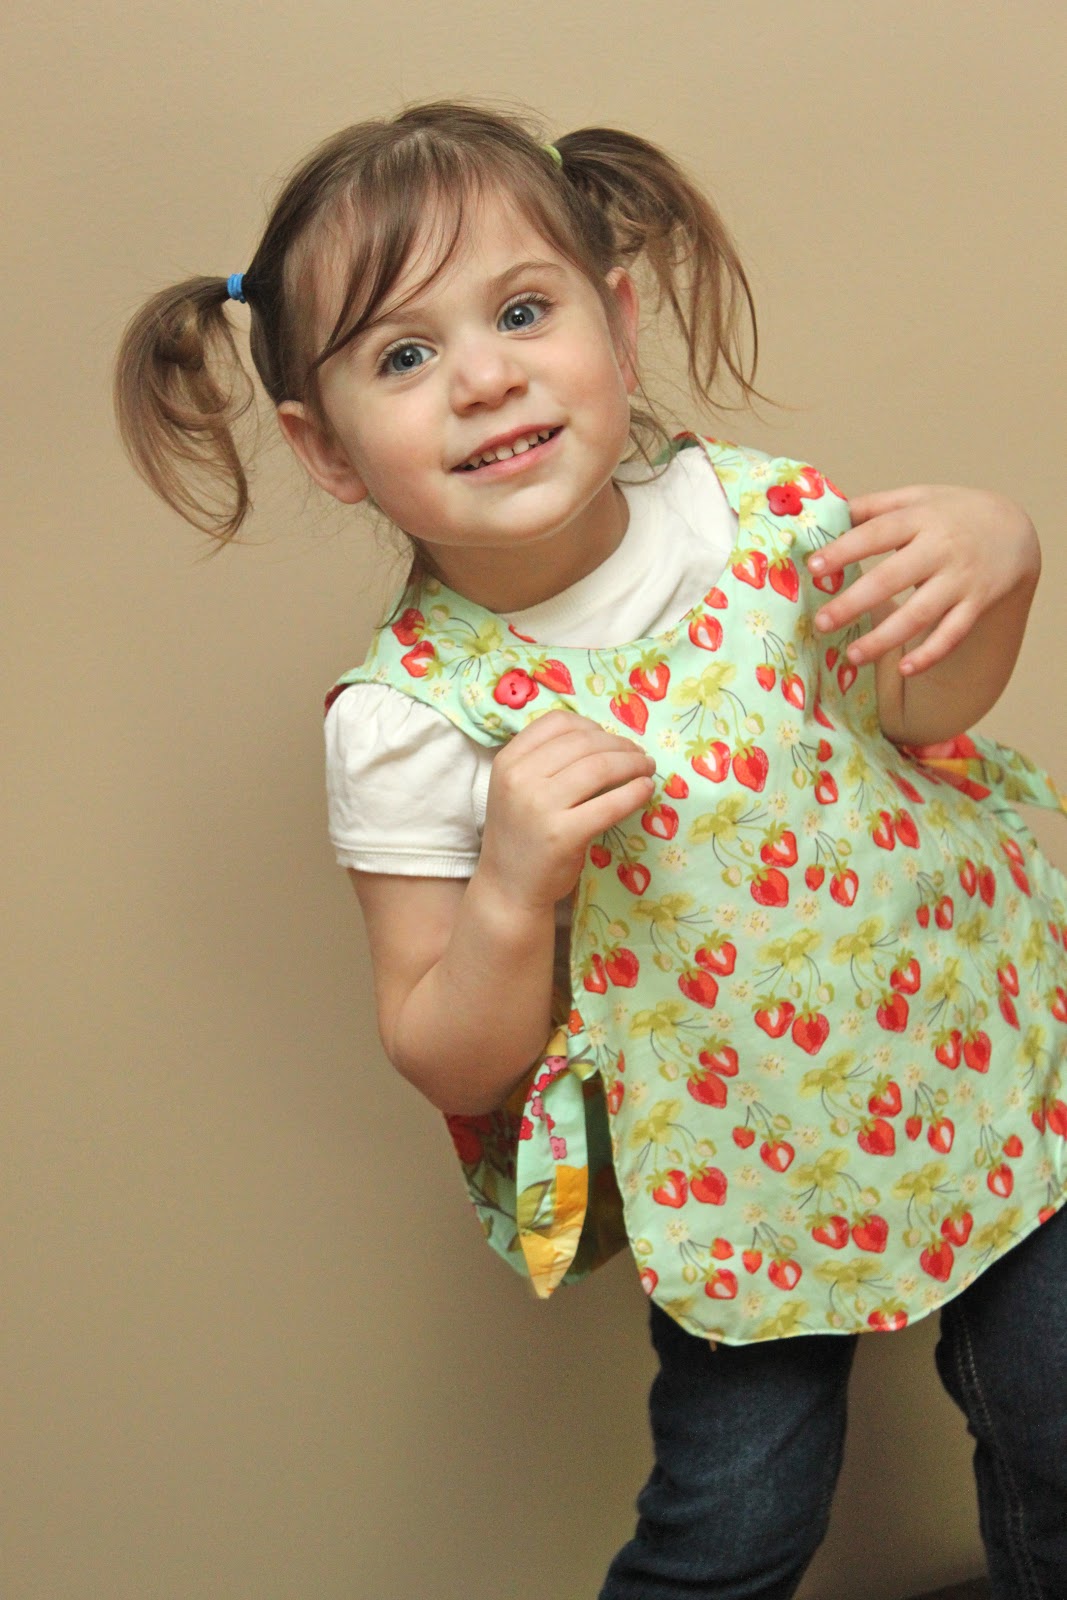
The apron that I made is a bit more rounded around the edges and I added buttons to the shoulders so that it could be reversible. Two looks in one? Yes please! Want to make one for your little girl? But of course!
Vintage Tie Apron (size 2T/3T)
1 yard of fabric in two coordinating colors
2 sets of flat buttons (not covered buttons as those have a shank)
iron
sewing machine
coordinating thread
hand sewing needle
rotary cutter and mat
Vintage Tie Apron pattern, found here:
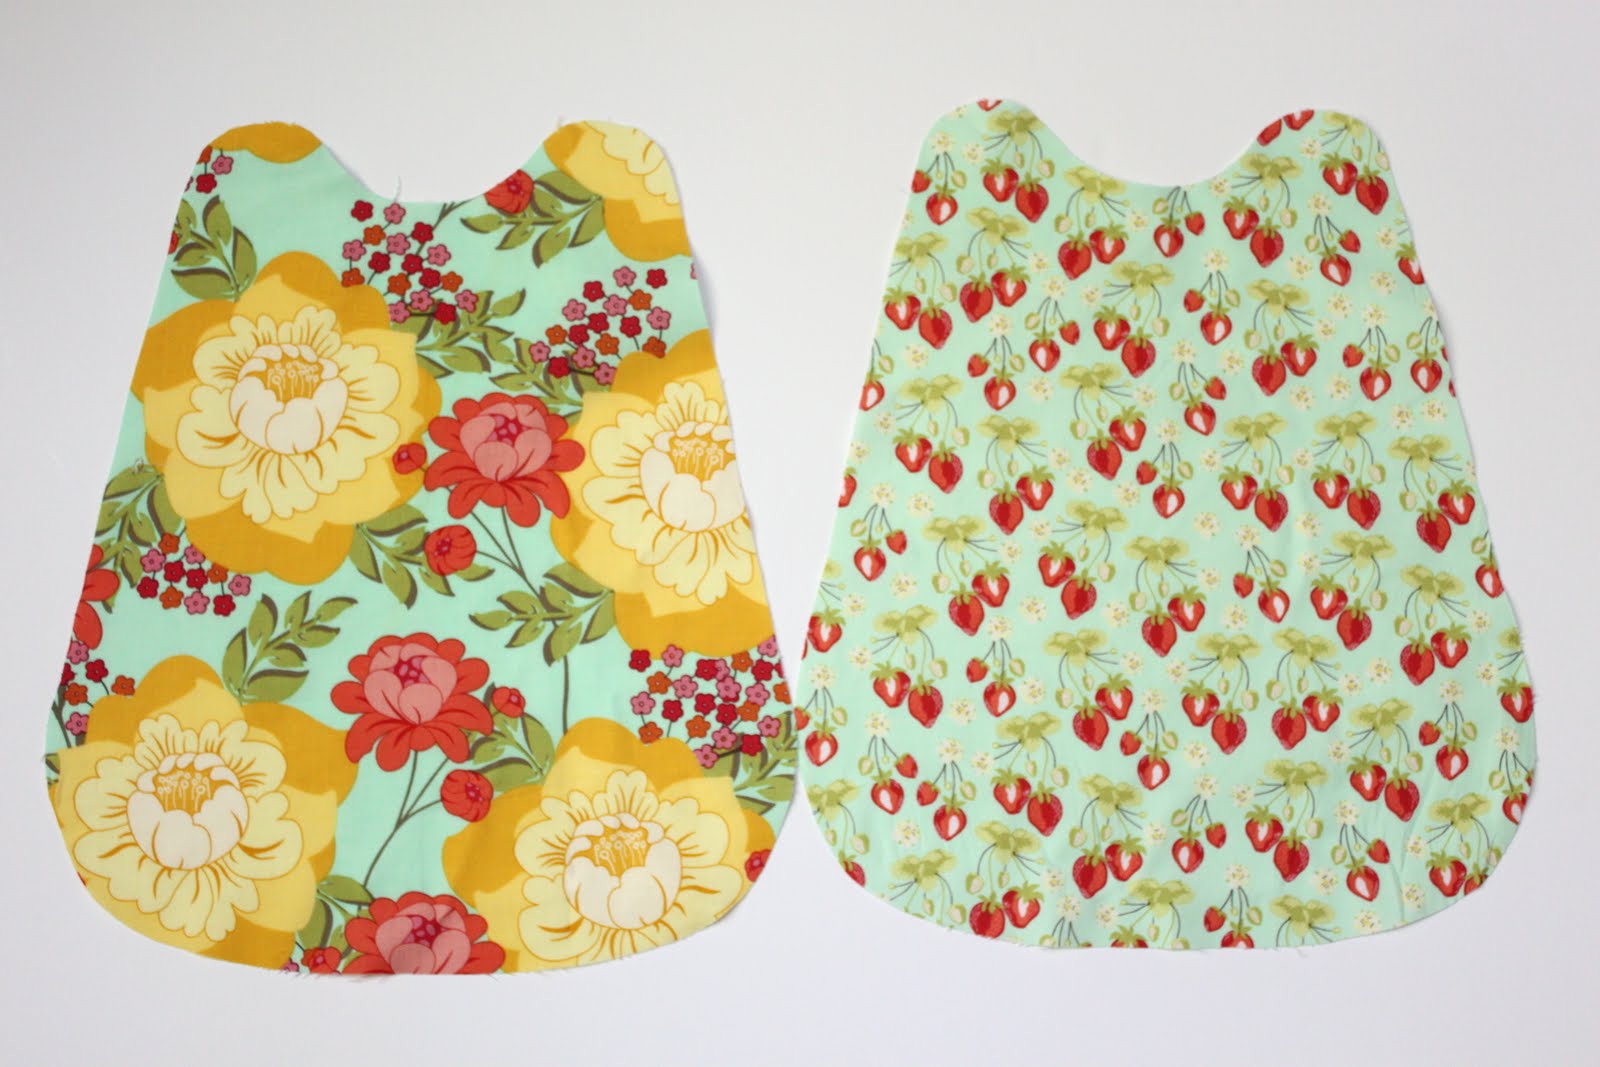
First cut out one front piece from both fabrics and set aside.
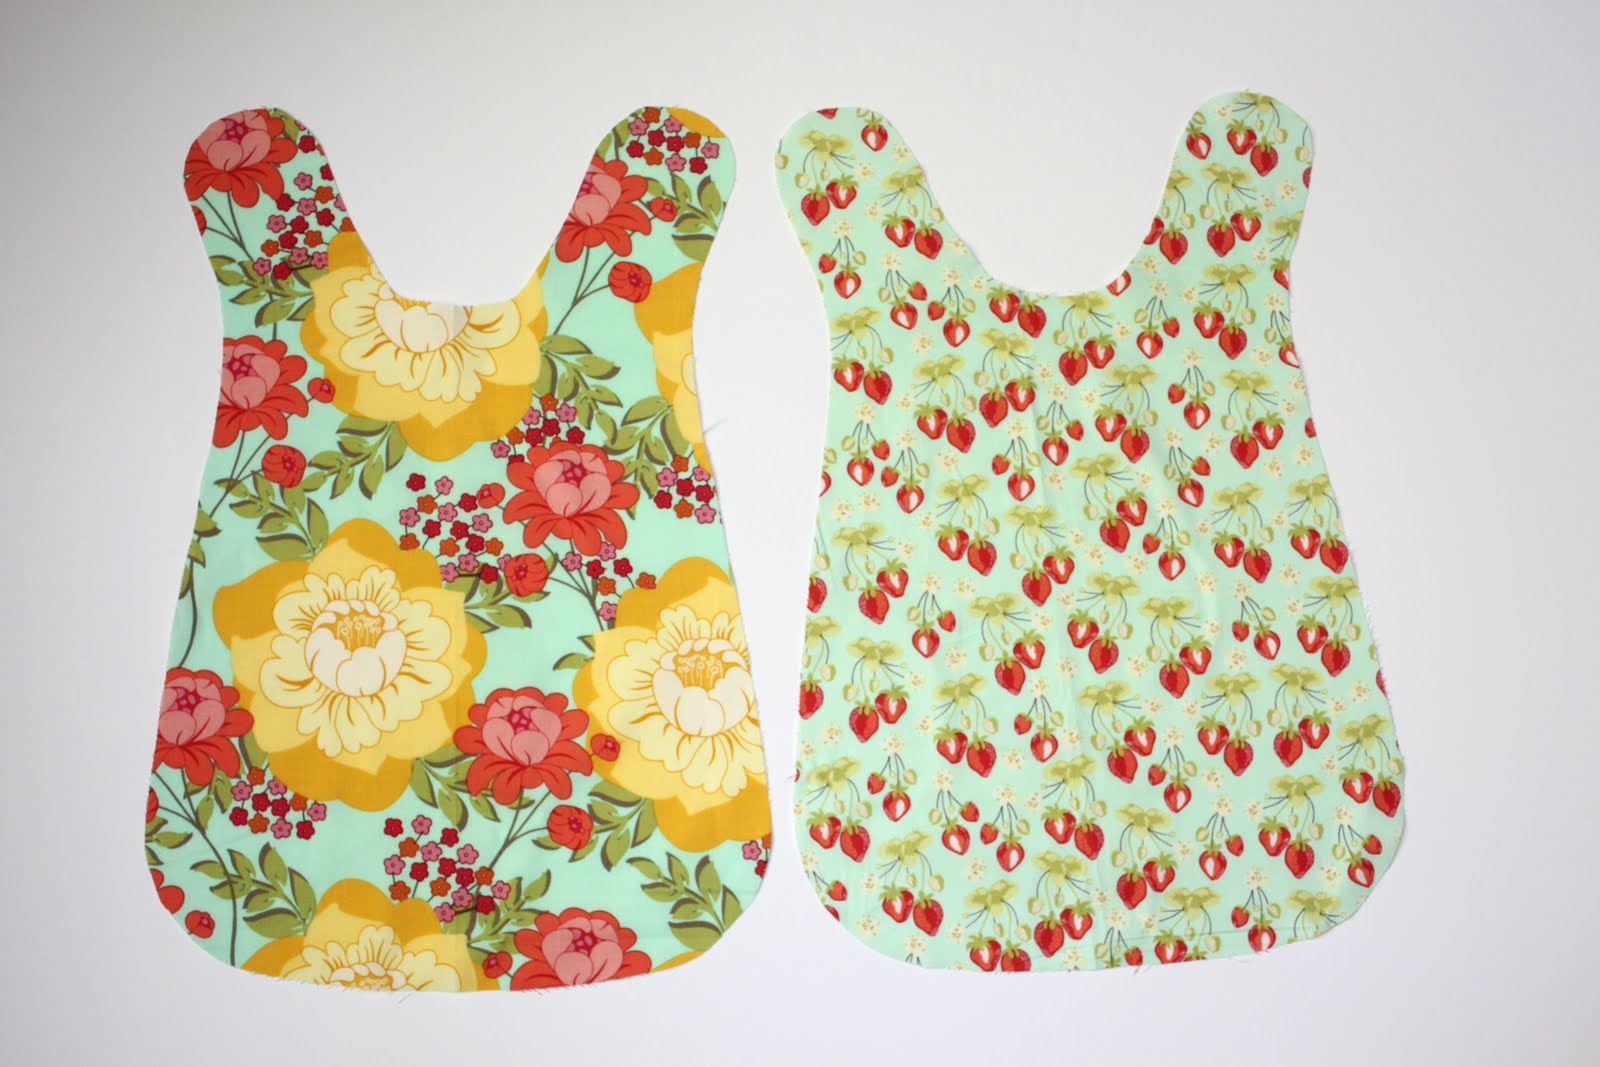
Then cut out one back piece from both fabrics too and set these aside.
Easy so far? For sure!

Next cut out 4 tie pieces from ONE of the fabrics. I chose to make the flower fabric my ‘main’ fabric so I kept the tie pieces the same. Fold each tie in half lengthwise and press.
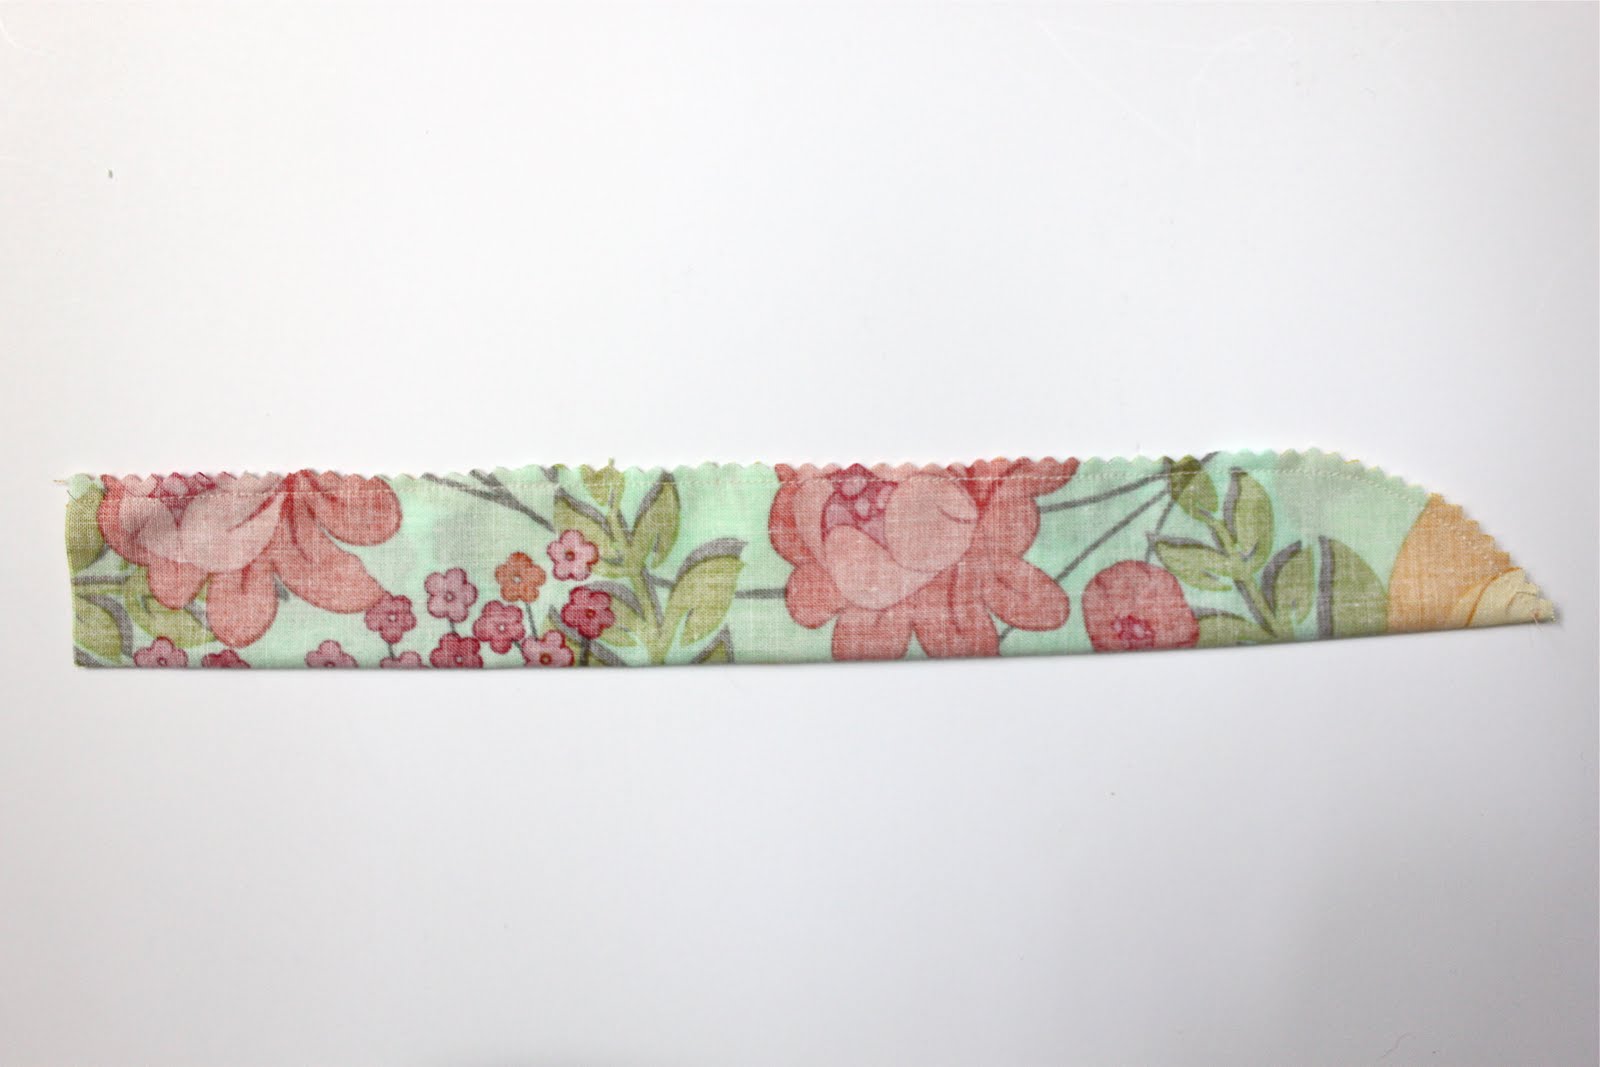
Sew a line down the length of the raw edge making a tube if you will. Taper your stitched line down to the fold in the fabric. Do this using a 1/4 inch seam allowance. If you would like you can take pinking shears and cut off the seam allowance to reduce fraying while turning.

Then by using the open end of the tube, turn each tie piece right side out and press with an iron.
 You will end up with four tie pieces that should look like this!
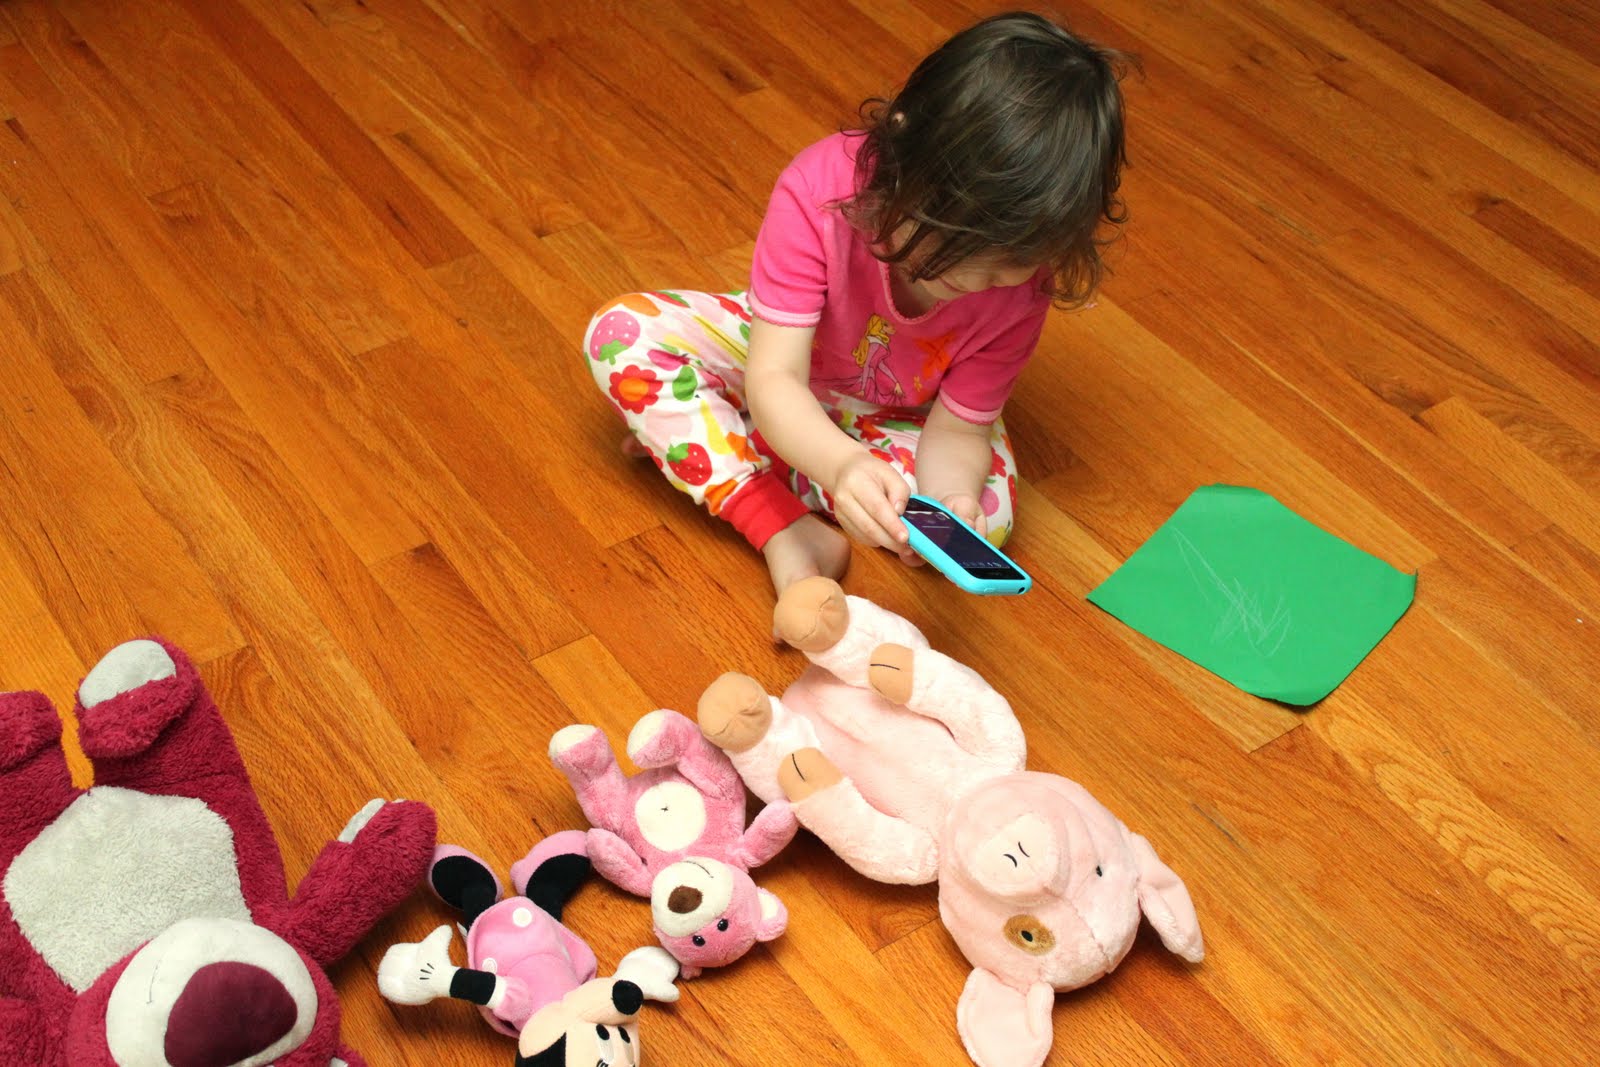
Then, take a quick look over at your daughter who is being suspiciously quiet and find that she is lining up her dollies and using the camera app on your iphone to take pictures 🙂 Ummm yeah, so they really do copy EVERTHING you do. Hah!

Hmmm, I wonder what tutorial she is getting ready to do? Hey, wait! She has a blog? Mommy needs to Facebook friend her ASAP to see just what this kid is up to!
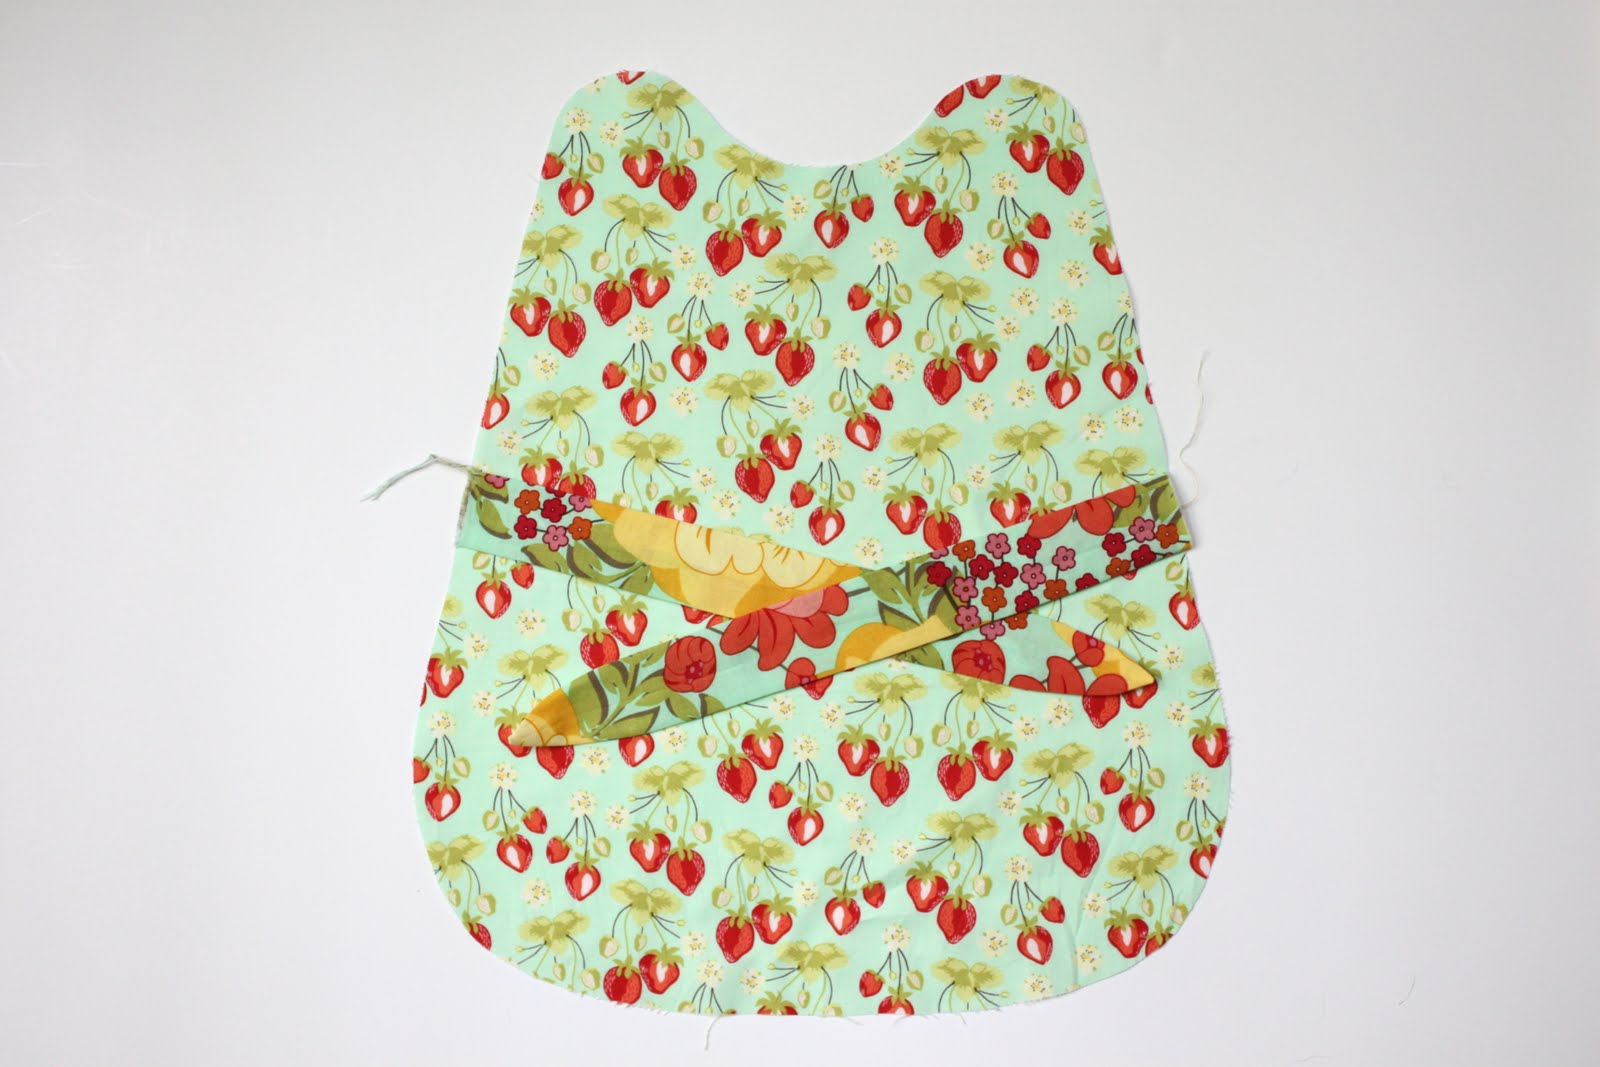
Okay, back to the tutorial! Next take one piece of the front fabric (doesn’t matter which one!) and lay it right side up. Next, place the ties with raw edges lined up with those of the apron front at about the middle of the apron. I also marked the tie placement on the pattern with an ‘X’ if you don’t feel like eye-balling it 🙂

Then take the remaining front piece and lay it on top, right-sides facing.
With the tie sandwiched between the apron fronts, pin them in place and make sure that the tie ends (the points) are shoved in the middle so that you don’t sew on top of them while you are sewing around the apron!

Sew around the apron using a 1/2″ seam allowance. Make sure to leave a 3-4 inch opening at the bottom for turning the apron right side out!
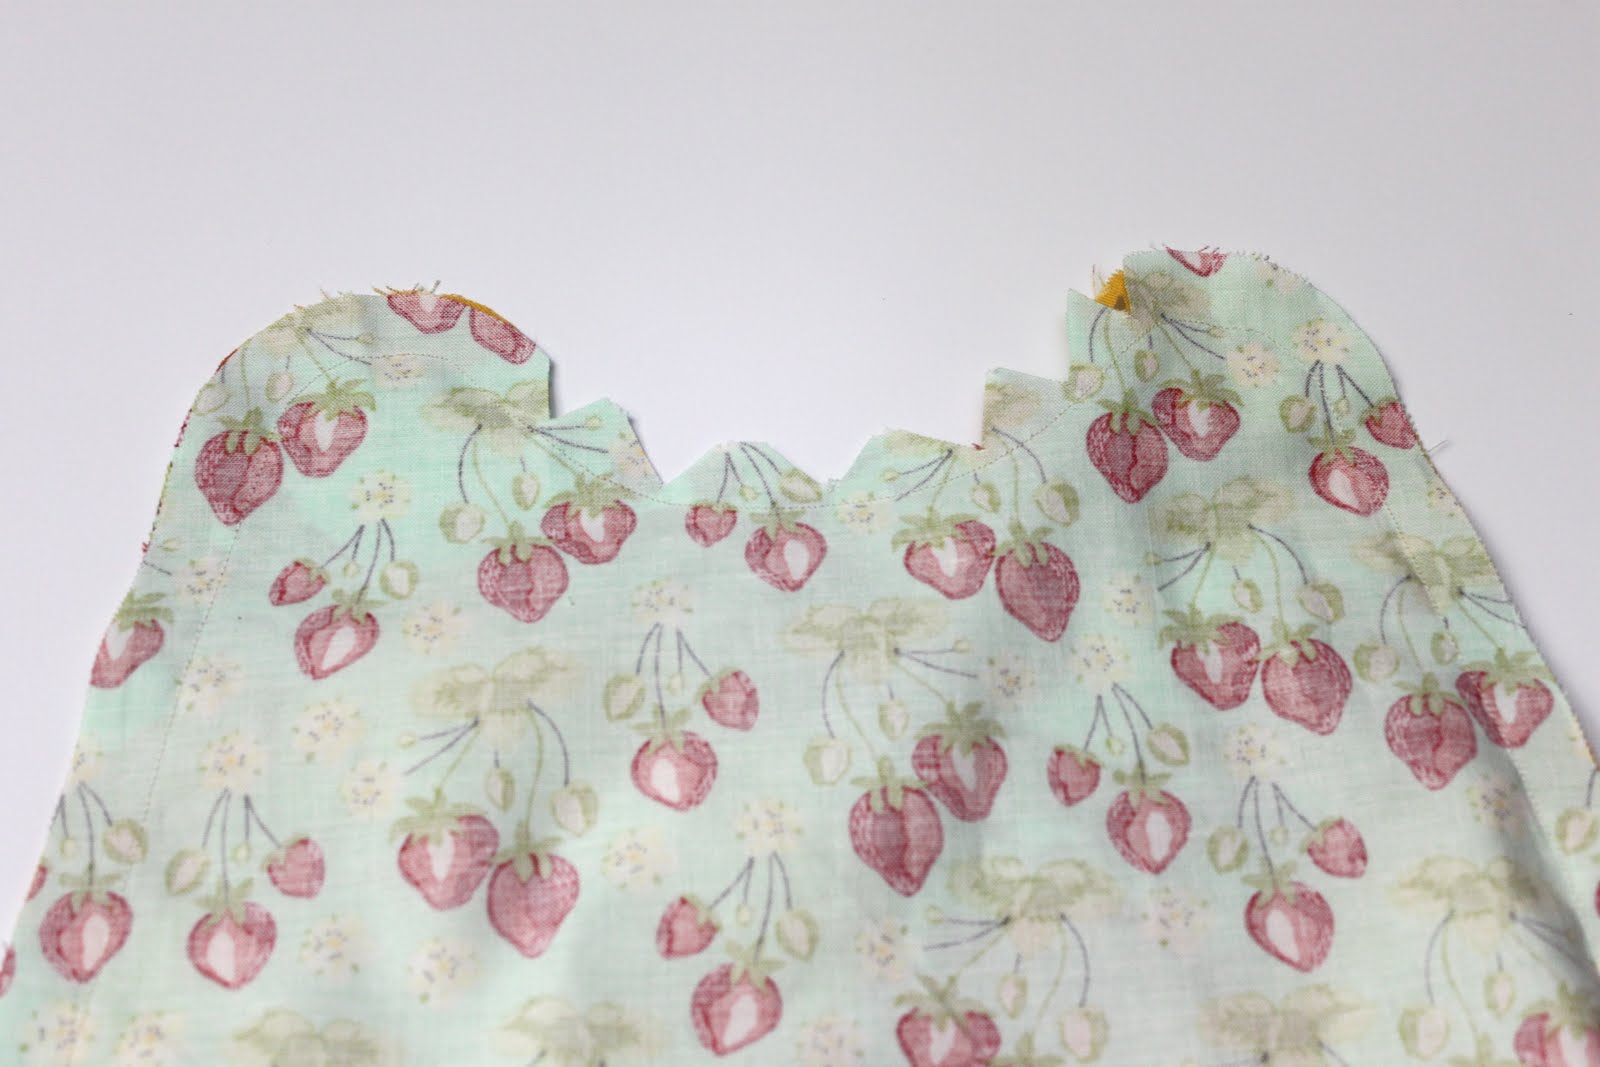
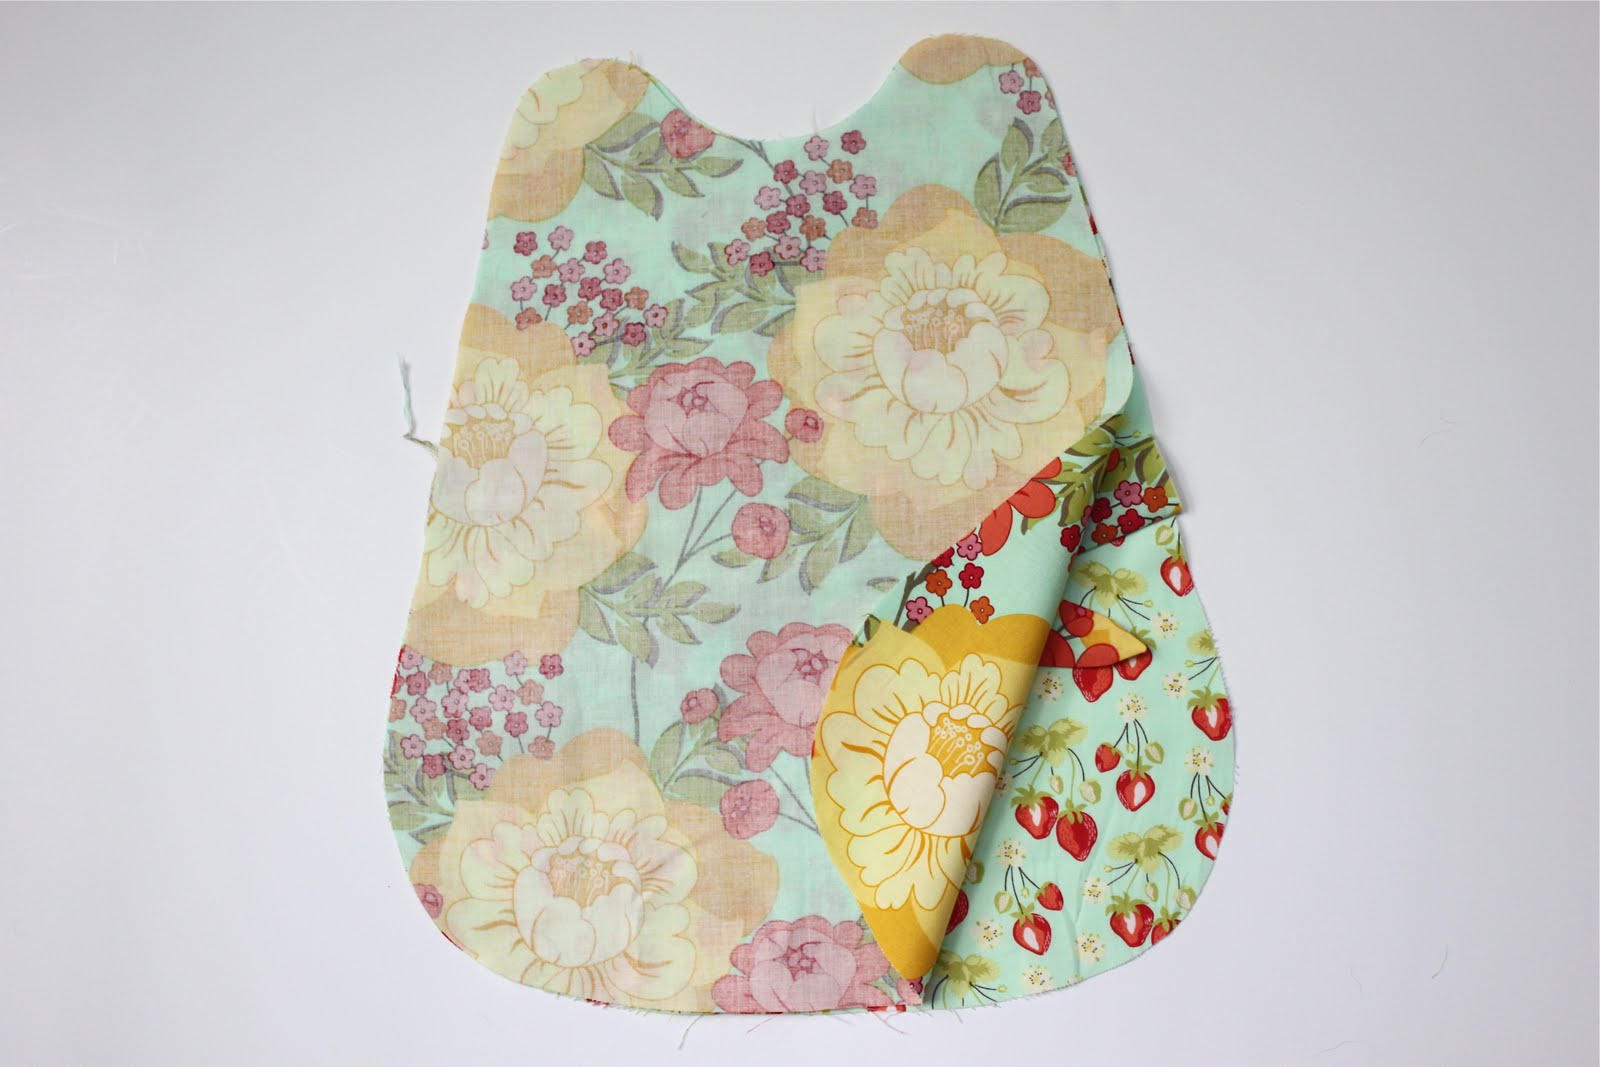
Once you are finished sewing the apron together, go ahead and clip the curves to reduce bulk when turning.

Turn the apron front piece right-side out and top-stitch using a 1/8 inch seam allowance. Yay, you are done with the front piece!! Now just follow these same basic steps to finish the back apron piece.
If you need help with placement of buttons and how to sew buttonholes check out my Pinafore post here for some help with that.
I also sewed my buttons as a mirror image at the same spot on the front apron piece, this makes the apron reversible. You don’t have to do this if you are not making yours reversible!
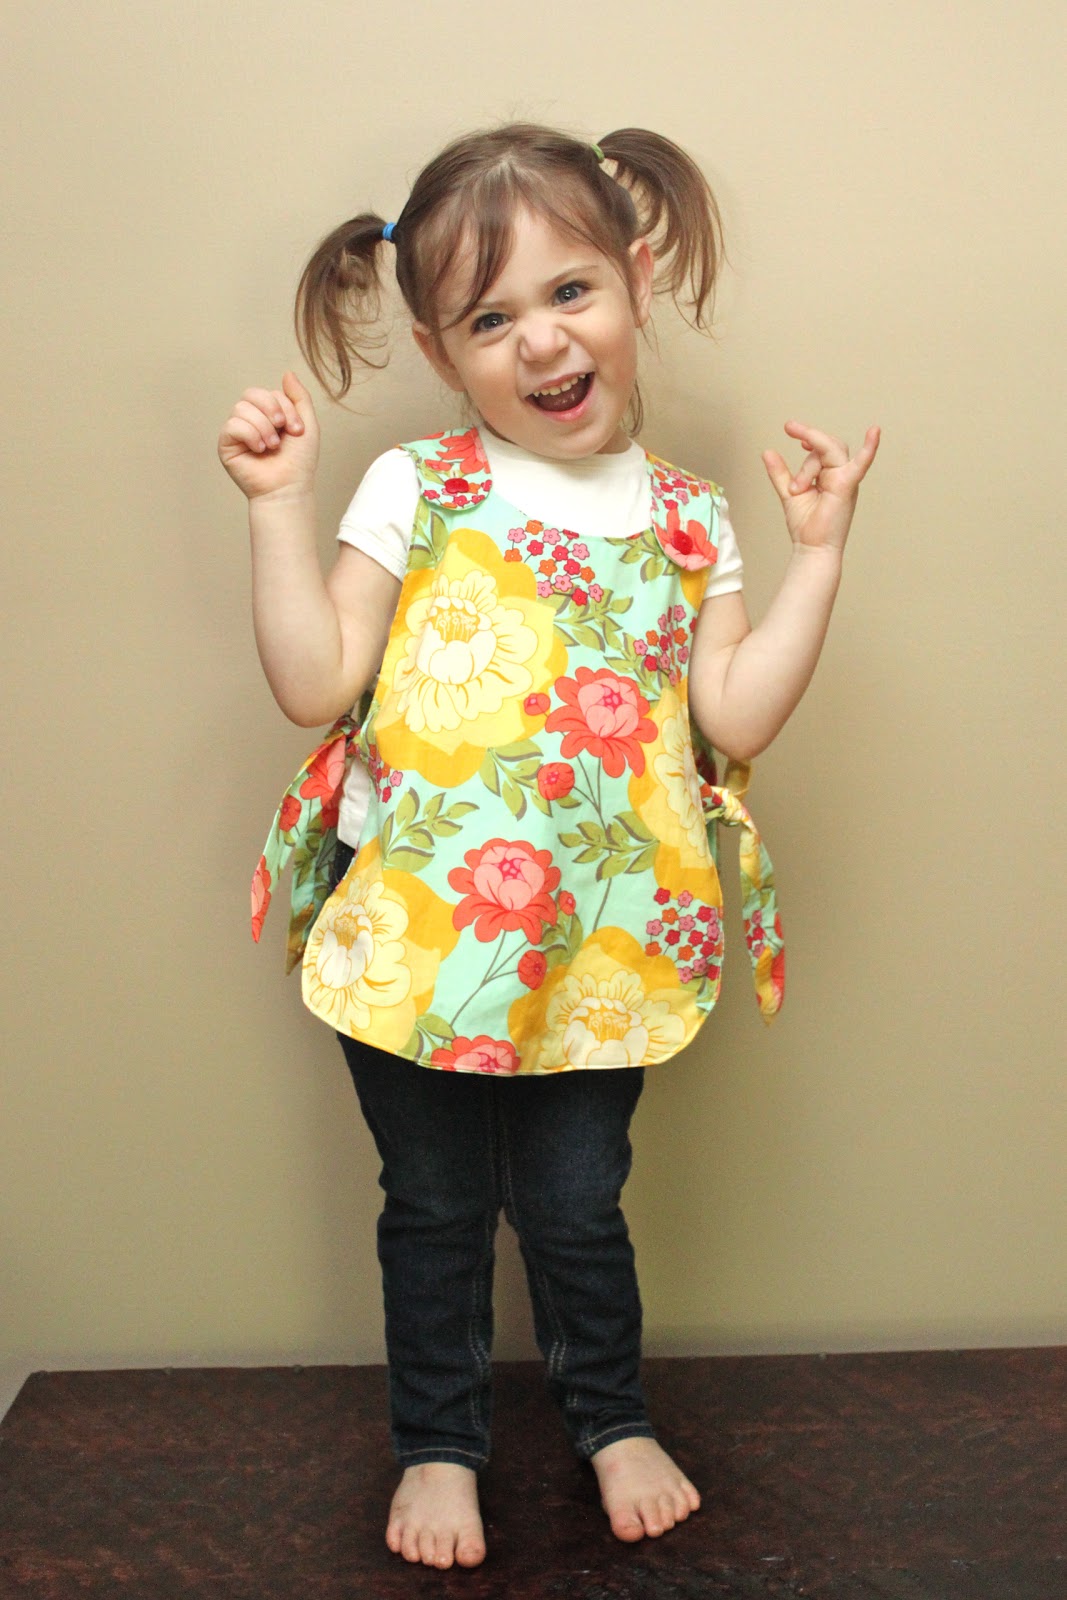
Then find a sweet little girl to wear this sweet little vintage apron…

This one is full of the giggles!
She told me she liked the strawberry side best…and that we NEED to go and pick strawberries like now! Sorry dear, not for another month or so…darn midwest living!!
Oh, and in case you are wondering, both fabrics used are from Sandi Henderson’s Meadowsweet collection, love them!!
Happy Sewing!!
XOXO, 


vielen Dank, wie wunderschön!
LG
Josali
The fabrics are darling .. but your model is too cutieful!!
I love them, so sweet. I would even wear one. She is so cute and adorable in them.
Thank you so much for this post. I want to let you know that I posted a link to your blog in CBH Digital Scrapbooking Freebies, under the Page 6 post on Jun. 02, 2011. Thanks again.
LOVE this! And LOVE the pic of Penny in her skinny jeans with the “rock on” face! …and I love the fact that the first comment on this post is in German (at least I think that’s German….)!
Ok, how stinkin’ cute can your daughter get!? =) The apron is adorable as well.
Wow. The mention of strawberry picking makes me realize I’ve been following you for about a year. You guest posted your wonderful strawberry upside down cake recipe on Leca’s blog. We went strawberry picking and made your delicious cake with our haul. Made it for a pot luck and got rave reviews. I even linked the recipe from my blog to yours. I love that you take pictures of every step because it makes cooking with my 4 year old a lot easier when she can “read” the steps too (by looking at the pictures). Thanks for blogging Maggie. You’re awesome.
Maggie, this is adorable and I love how it covers well!!
That is so adorable! I may have to try yet another “clothing” project 🙂
This is so cute.. I”m going to go make one for both of my daughters! I vividly remember a blue and red apron I had like this when I was a little girl!
how adorable! My little girls would love this! They like to cook along with me as I am cooking dinner in their pretend kitchen – these would just make it complete 🙂
Love this! Thanks for sharing.
This is great, and looks like something even I could do! 🙂
I want to make one for me! I have been looking for an awesome apron and that is so darling. I don’t have girls at my house – only 4 boys. Any way you could post a pattern for adults???
HI Amy! Hmmm, let me see what I can do!
XOXO,
Maggie
I was just looking for a quick and easy project to do to spruce up my 20 months old daughter’s wardrobe without spending a ton of money. This is perfect! I plan on making at least three for a total of six outfits, and if she gets it dirty I can just flip it to the other side and she’ll still be adorable. Thanks so much.
Hi there – I love when I see your comments on other blogs, because I check your blog out sometimes and enjoy so much of what you post.
Hi! New follower, found you from One Pretty Thing. This is so adorable thank you for the tut 🙂
Just came over from one pretty thing too – great pattern and super -cute model:)
Thank you for the tut. They are so lovely.
I will make them for to my girls.
Sory the english 🙂
http://www.agulhas-soltas.blogspot.com
I loved his work, to that you will continue to be enlightened by god.Bjs!
So cute – I can imagine this on my littlest one! Thanks for sharing, Cyndy
This apron is darling! I am going to feature it on somewhatsimple.com this Thursday. Thanks for the inspiration!
-Steph
Do I need 1 yard of fabric total or one per color?
I have the same question as Rebecca above, but I’ll take the pattern with me to the store and lay it out.
I’ve never used a printed pattern before, is there a way you could include approximate measurements (at least 1) so newbies can be sure we have the intended size? I held it up to my 13month old and it looked ok for length, so now I’m worried.
Thanks for inspiring me!
Hi Elisha! The pattern front measures 16 x 8 and the back measures 21 by 8 approximately, hope that helps some!!
I don’t know what I did wrong, but my pattern pieces came out 12 X 10 and 15 X 10 respectively. It seemed small but I just went with it. Luckily my 2 year old runs on the very small side so it still fits, but if I was going to make it again I would lengthen it. Was I supposed to overlap the pattern pieces to make the sides line up, or was I supposed to butt the pieces together and draw lines to connect them? If I hadn’t overlapped I think the length would’ve come out more like yours.
I don’t know what I did wrong, but my pattern pieces came out 12 X 10 and 15 X 10 respectively. It seemed small but I just went with it. Luckily my 2 year old runs on the very small side so it still fits, but if I was going to make it again I would lengthen it. Was I supposed to overlap the pattern pieces to make the sides line up, or was I supposed to butt the pieces together and draw lines to connect them? If I hadn’t overlapped I think the length would’ve come out more like yours.
My pattern pieces printed out this size, too. Did you print from Google Docs? I did and it looked like those pages shrunk the original scan and added an inch or more of margin to each of my pages. I wanted to print the Scribd pattern out to compare, but the site said I needed to pay for a premium membership to get it. Now that I know what they are supposed to be, however, I suppose I can redraw to the correct dimensions.
This is a beautiful project, I hope you don’t mind that I link you in my blog today.
http://www.licenciaparacoser.blogspot.com
Ana.
This is SOOOO cute and I’ve already downloaded the pattern pieces so I can make one or eleven of them 🙂 I have two friends with daughters turning three in the next month so guess what they’re getting for their birthday!
I’m a bit late finding this tute, and a bit late sticking your amazing blog in my faves but THANK YOU! This is JUST what I’ve been looking for to stick on my 2yo for her to play in as she’s SO hard on clothes! I was thinking of denim or cotton twill on one side and oilcloth on the other, she can use it for wet play as well then!
You are so amazingly generous and have such a cutie pie for a model!
Thanks again for sharing.
Love the pattern. I made one over the weekend for my daughter. Mine came out a bit small though, but I think I will make a few more.
http://sewcancass.blogspot.com.au/2012/03/reversable-apron-for-toddler.html
Great tutorial! You’ve been featured on the Quality Sewing Tutorials blog.
We hand select only the best free tutorials and patterns for the home sewist.
Grab a brag button!
I have three grandsons. I NEED A GRANDDAUGHTER!!! Love what I have seen!
I would love to make one of these for my niece for christmas (especially as I pinned it and her mom went out and bought her finger paints- yeah, I took the hint!) But I can’t get the pattern to print :/
No grandchildren? No problem! I have many friends with adorable children and grandchildren. I make all the creative things I want and just gift them away! Anonymous in Oregon
Gorgeous! Thanks for sharing! Jen in Ontario
So nice ! Thanks for this tutorial.
Just found your tutorial and I love it. I wanted to make some for my granddaughter and I attempted to print through Google and it did not print to the sizes mentioned in an earlier post. If you print through Scribd, it costs $9 and I don’t know if that one will print properly.
I’m wondering if you or any of the other readers have any suggestions as to how to print out the pattern properly.
Thank you.
I love this! I think I will try to make it bigger, with seams at the shoulders instead of buttons. (Still reversible, though.) Thanks for the sweet tutorial!
Love this. Think I might make one for my daughter and one for my Niece for Christmas. I am trying to come up with some easy practical hand made gift ideas for this year & this is now on the list. Thanks.
Beautiful! But I too am having problems with the Pattern. I belong to Google Docs but it wont let me download? Any Suggestions?? Your Mom sounds like One in A Million!
Fantastic! Very cute thing and very clear instrustions – ideal )) Thanks a million for sharing!
Thank you Maggi for your free patterns and tutorials…..they are so easy & extremely cute – loving your little model..!
Aww! Thank you for such sweet words! I am so glad yo find them useful! 🙂
XO,
Maggie
Helo Maggie,
Por favor donde encuentro los patrones de este precioso delantal ,gracias Gloria
Mi pc está con problemas y al querer inscribirme me sale unas letras gigantes,que no me permiten ver nada,ya que zoom está al 500% y no consigo arreglarlo,si alguien por favor puede enviarme los patrones a mi correo,se lo agradecería mucho,su proyecto es muy hermoso Gracias
This is EXACTLY what I was looking for to make for my two-year-old granddaughter! She’s on the short side, so I just overlapped the pattern pieces a bit. The hardest part was sewing around those shoulder strap curves, but it came out very cute. The printed out pattern was perfect! Thank you so much……