
So here they are! The Halloween costumes are complete, hip hip hooray! They are truly adored and they survived some pre-Halloween festivities this weekend too. I loved so many of your guesses as to what I was making and I loved hearing all the neat things your children are going to be too! Halloween is just so fun because of all the costumes, isn’t it?
I’m usually not much into making my kids their Halloween costumes since I feel like why put all that work into something they will only wear once but now that they are older and requested these I do have to say it was so fun and I think I may do this every year especially since these are definitely worthy of being dress-up clothing that they can wear year round. I just have to tell you that Noah and Penelope were absolutely ecstatic when I started sewing these together last Monday, it was so cute! They would just about die at each fitting and when I was finally done they were screaming with joy. Priceless, I say, absolutely priceless. The fact that they have worn them everyday since has just melted my heart. I love these guys!

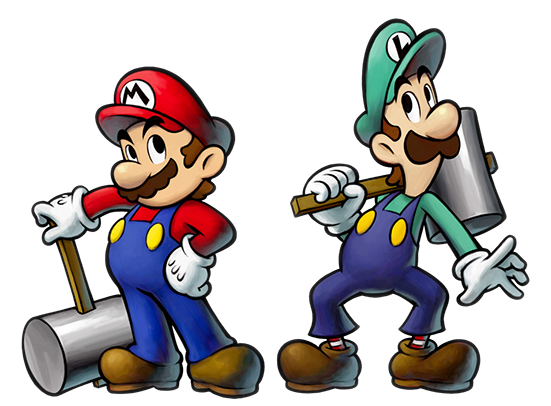
Noah has been asking everyday for the past month or so if he could be Luigi for Halloween, he wants all his super powers…throwing fireballs, becoming a giant or teeny tiny mini Luigi, and fighting off bad guys…awesome! Plus add in the fact that he is trying to find the beautiful Princess Peach who was stolen away and hidden by a mean guy…or that is how Noah tells the story anyways…and who would’t want to be Luigi or Mario, right! 😉 At one point we had the game for our Wii and Noah and my husband would play together in the morning before he went to work. My husband would be Mario and Noah would be Luigi. For some reason he thinks Luigi is the bomb, I think it’s because green is his favorite color. Anyways, that is where his love for ‘Mario Man’ and ‘Luigi Man’, as he calls them, comes from.
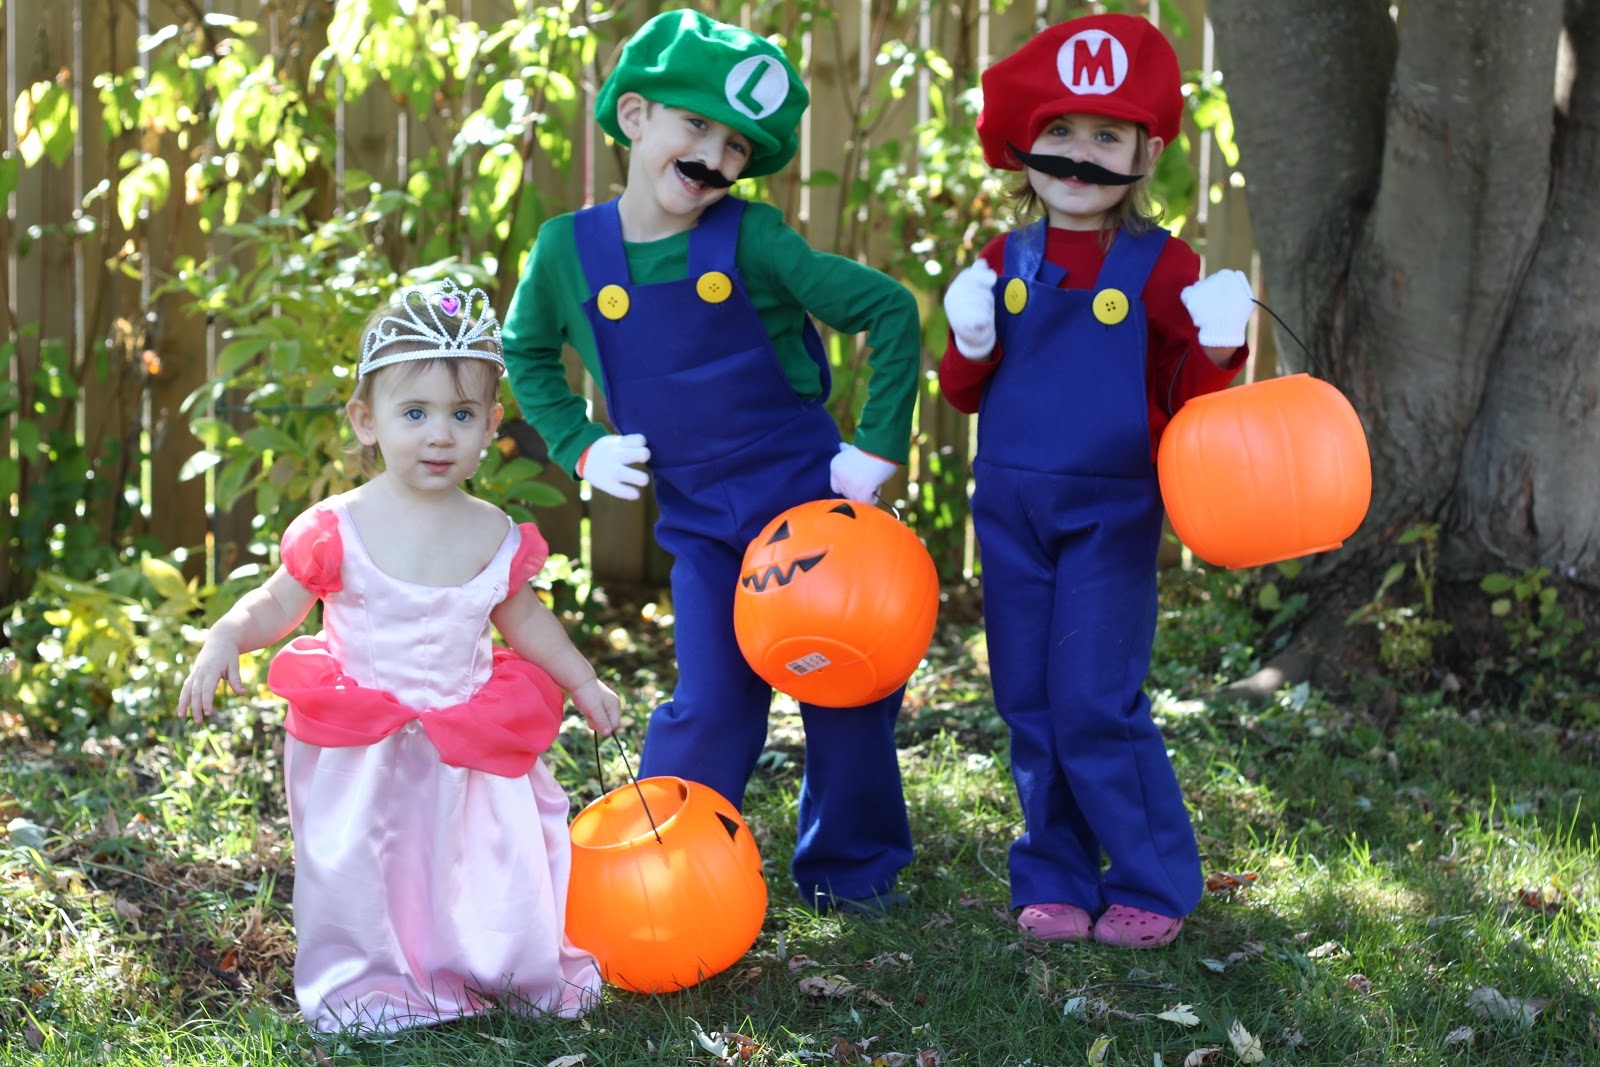
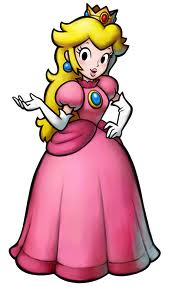
Since Noah wanted to be Luigi, I thought it would be perfect if Penelope would be Mario…and as luck would have it when I asked her about it she actually did want to be him! She really looks up to Noah and wants to do everything he does, even if it means being Mario for Halloween cause then she could be just like Noah 🙂 Eloise became Princess Peach because, well, it was the only other character I thought I could replicate somewhat easily!

I think her Princess Peach dress turned out beautifully! I’m definitely not a fan of melty costume satin but I guess one project a year won’t kill me. I left her gown quite long as I thought it looked more princess-y that way. Don’t worry though, I made sure that she wouldn’t be able to trip on it when she walked.
Their costume consists of a pair of felt blue overalls with big yellow buttons, long-sleeved t-shirts from Target (Penny’s is actually a boy’s t-shirt one size smaller than she would wear in her girly size), kid’s sized magic stretch gloves from the Dollar Store, Felt mustaches that I re-used from this party here, and the classic Mario and Luigi hats which I made based off this tutorial here. I made the white circle using my Go! Baby machine with this circle die and free-handed the letters ‘L’ and ‘M’. The only change I really made to the hat tutorial was that I added a 1.5″ piece of 1/4 inch elastic to the back so that the hat stayed on as it’s a one-size-fits-all kinda hat and felt stretches just a wee bit.
I thought today I’d show you how I made their overalls. I cut and sewed up both of these in one day…probably in less than two hours (of course it went much faster the second time around!) If you have a little Super Mario fan in your house maybe they’d like a pair too?!
Mario and Luigi Overalls
1 yard of blue felt per overall
1 pair of well fitting pants to use as a pattern
rotarty cutter and mat
sewing machine and/or a serger
2 big yellow buttons

First fold your felt in half so you can make two pants legs with each cut of fabric. The fold your pants in half with the front facing out and pull out the crotch area so that it form a point like you see in the picture above. Cut around your pants straight across the pants hem and then along each side using about a 1 inch seam allowance. Cut the top of the pants straight up 3-4 inches as this part will feed into the bib part of the overalls.

Now fold your pants with the backside facing out. Make sure you pull out the butt area to a point as well. Cut around the sides allowing 1 inch of extra fabric as a seam allowance and cutting straight across the bottom pants hem. Leave about 3-4 inches at the top and cut.
If you don’t have a pair of pants available to use as a pattern, Dana has a great printable pattern you could use here!

Next using a 1/2 inch seam allowance, either serge or sew (using a zig zag stitch…I would use a zig zag stitch over a straight stitch when using felt for pants as felt is slightly stretchy and these seams usually get stressed with little kids putting on pants!) both front and back sets of pant legs together just at the ‘J’ shaped curve at the upper right part of the pants legs.

Here’s a close up for you.

Then open up each set of pants legs into a V-shape and lay them one on top of the other, right sides together. Serge of sew (with a zig-zag stitch) along the inside of each leg.

Your overalls should look like this now. Now just sew or serge the sides of the pants, turn right side out and set aside for a moment.

Next cut 2 pieces of felt for the bib part of the overalls. You will want to measure the top of your pants and make that measurement your width. My bib measurements were 12 inches x 14 inches. Don’t worry so much about the length as you will need to try the overalls on your child to figure out how high you would like them to be on them. Cut 2 straps out of the blue felt as well, 14 x 2.5 inches in length.

Lay one piece of bib felt at the top portion of the pants making sure the edges line up nicely with the pants side seams. Pin and serge or sew it in place.

It should look like this from the inside once both front and back bib pieces are in place.

Then cross the straps at the inside of the back bib piece like the picture above. Sew across (I used a straight stitch here) at the very top of the bib where the straps meet the bib. Then sew a triangle in the middle of the straps right where they cross for added strength. Fold the sides of the bib in at an angle to give your overalls that classic graduated shape. Sew using a 1/4 inch seam allowance. Using your rotary cutter, cut off the excess felt.

It should look a little something like this now. I neatened mine up a bit after seeing this picture…yikes!

Do the same angled look with the front bib. Then if you have a buttonhole option on your sewing machine you can go ahead and add your two buttonholes. If not, you can just cute two buttonholes with an e-xacto knife. Felt doesn’t fray so the buttonholes should be okay although you may want to use a very small zig zag very close to the edges to help them from stretching out too much.

Try the overalls on your little one and figure out where you need to sew on the buttons and that is it! Now you have yourself the cutest little pair (or two!) or Mario and Luigi overalls 🙂

Please let me know if you have any questions about these.
I am happy to help you anyway I can!
And I hope your costume making is going well, only two weeks to go!!
XOXO,


So gosh dang cute! Really made my day. I want my 3 kids to be The chipmunks, Alvin, Simon and Theodore – but alas my daughter is a princess to the end. Maybe you next year?
this is so freaking adorable! I tried to pin it twice now, but pinterest is giving me errors! I love it!!! Great job!!!!
These turned out so cute. Well my guess of two peas in a pod was wrong…maybe next year. The princess is also cute as a button. You did good!
My kids were Mario, Luigi and Princess Peach last year! I did the exact same dress for my daughter too! Great minds think alike! Check it out! https://www.facebook.com/photo.php?fbid=451486688441&set=a.451485358441.243584.561738441&type=3&theater
Incredible! And so adorable.
OH.MY.GOODNESS!! Sooooo cute!! Absolutely adorable! And funny. 🙂
So cute! My son wanted to be Mario this year, but then changed his mind to be a Knight from the book “Take Care, Good Knight.”
I may just make this Mario costume for him to dress up in though; he loves Mario! Thanks for the great tutorial. 🙂
Maggie,
SOOOOOOO CUTE! I’m a long time reader and just couldn’t resist commenting on these! My secret guess was also Mario and Luigi-but got stuck on the pink fabrics LOL. Love, love, love your blog. And, your crockpot applesauce recipe is cookin’ as I type 🙂
Genius!! So dang cute!!
So Stinkin’ Cute. We don’t really do Halloween here is Australia. But I’m going to give it a go for dress ups.
SO cute!!!!!!!
WOW!! I loved Mario when I was little, used to play it all the time!! I absolutely love all three costumes. Well done you!!
– Ellie @ Mammy Made
OMG awesome, they turned out so adorable and they look fab in them…so sweet!!!
Thanks for adding this!!! How did you attach the mustache to their face so it would stay???
Thanks for the great comments! I have to tell you that Penny cracks me up cause she is always asking to wear her ‘Oreo’ costume and Noah and I always tell her, ‘what? you want to be a cookie? we thought you wanted to be Mario?’ and then we all crack up…Oreo for Mario…the little things!!
@Shelly-I actually just used masking tape, I bought some fancier tape but it didn’t stick long to skin!
no way! I was SO close to making the exact same outfits for Lucy and Owen, and sharing a tutorial! Funny! Yours turned out adorable. Well done Maggie. Instead we’re doing bats over here.
I JUST FINISHED THIS LAST NIGHT FOR MY 9 YEAR OLD. IT TURNED OUT GREAT.. HE JUST LOVES IT. YOUR INSTRUCTIONS WERE EASY TO FOLLOW. THANKS A BUNCH FOR POSTING THIS, I AM NOW THE COOLEST MOM ON THE BLOCK. HA!HA!
Maggie! My little guy is a Luigi fanatic too, and I think green is his favorite color BECAUSE Luigi is green! My kids have been BEGGING to be the Mario cast, and now seeing that it really wouldn’t be that difficult to make…grrr. Now I have to go to the fabric store. Thanks a lot! :p
xoxo
Tiff
You did such a great job! The kids look great 🙂 I just wanted to let you know I’ve included these in our homemade Halloween costumes round up on FaveCraftsBlog: http://www.favecraftsblog.com/link-love-handmade-costumes/
Please let me know if you’d be interested in publishing any of your craft projects/tutorials with us!
Awesome! My kids were in a neck and neck race between Mario theme and Peter Pan theme but they wen’t with Peter Pan this year! You did a great job!!!
Oh I am soooo glad I found this tutorial! I have been looking everywhere (in vain) for some denim overalls for my son’s costume, and no one has them. (I can’t justify spending 12 bucks on something new he will probably only wear a few times). Luckily I was at the thrift store today and they had 1 1/4 yards of blue felt for $2.49! I took that as a sign that these were meant to be handmade. 🙂
Thank you so much for the pattern, the overalls were so easy to make! I am wondering though, if you made their hats, and if so, do you have a pattern for those as well?
Hi Jes!
The link to the hat tutorial is found in the paragraph below the cartoon picture of Mario, Luigi and Princess Peach!
the link to the hats does not work…I would love to have the pattern, I have the costume but not the hats 🙁
Hi Maggie-
I know this post is older, but I was wondering where and how you put the elastic on the hat. My kids are obsessed with Mario and Luigi and would like to make the hats as durable as I can. Thanks!
Amy
Hi Amy!
I just put a piece of elastic on the back of the hat on the inside. I stretched it as I sewed it on so that it grasped their heads a bit better!
Hi Amy,
I have to ask about the hats. How did you do the hats? Awesome costumes and superb tut!
There is a link to the tutorial I used in the post!
Where did you find those big yellow buttons?!
Where did you find the big yellow buttons?
I’m pretty sure I bought them at Hancock Fabrics, Katie!
I just finished making these costumes for my boys for Halloween and they turned out great! Thank you so much for the step by step directions!! I never could have done it without you 🙂
-Stephanie F.
Totally being that for Halloween!
Silly question- but did you wash the felt and fleece first?
Not silly at all Raegan! I did not wash the felt first and they have been washed numerous times since then and are okay. The kids actually still wear them to this day…yesterday actually!
I LOVE THIS!!! I do have a question – at the end, you say:
“Try the overalls on your little one and figure out where you need to sew on the buttons”
I thought the buttons were already sewn on at this point? What am I missing…..are you saying more like, secure them more, here at this point, orr……??
Feeling stupid!! :o)
Thank you so much for this posting, it was the BEST out of all my Google searching. Perfect!!! I bookmarked your page.
Thanks again –
Gerri
Hi Gerri!
LOL, no worries! The step before that had you making just the buttonholes. I always sew buttons on last to make sure that overall straps aren’t too loose, there’s nothing more annoying then straps that keep falling down!
OH! Also, another question…sorry…
1) 1 yard of blue felt per overall:
Really, that’s all? I do NOT sew very often (obviously) so that’s why this seems like so little to me….is that all I’ll really need? (just worried that I’m not reading into this correctly -again, inexperienced)
2)
Rotarty cutter and mat:
Can I just use scissors?
And yup, one yard of felt per overall. Felt on the bolt is much wider than your average cotton fabric! And, you can for sure use scissors, I just happen to love my rotary cutter and mat 🙂
Thank you so much! Worked out great!
I used your patterns to make both Mario and Luigi for my two boys. They wore their costumes today and received so many compliments! Thank you for the detailed instructions and pictures- you made it so simple. I was so happy with how well they turned out!
What an incredible tutorial!!! I just finished making the Mario overalls and it was so quick and easy. Thank you thank you thank you! This is so much nicer than what is available at the store 🙂
I made these costumes for my boys! Thanks a ton! One question – how’d you get the mustaches to stick??? Thank you!
Thanks for the tutorial! I made these for my two boys – so cute and so affordable! I’m a newbie sewer, and it was pretty simple. I appreciate it! One little question – what’d you use to make the mustaches stick? Just double sided tape? That doesn’t seem to be working on my boys…darn runny noses! 😉 Thanks again!
I just used double sided tape, but a really strong one cause yeah, they will fall off skin! I can’t remember the brand I used but I remember I bought it at Joann’s!
I made these for my boys and they turned out great! I was able to get 2 pairs of overalls out of 1 1/2 yards of felt by cutting the legs out of 1 yard and using the 1/2 yard for the bib and strap pieces. I used yellow fun foam to make fake buttons and fastened the straps with Velcro instead. My boys were thrilled and they got tons of compliments tonight on their costumes. Thanks so much for posting these directions!
Thanks for your tute! I found it this afternoon… I went to town at 4pm to buy the felt & fleece. 7.30 hat & overalls are done! I couldn’t be more rapt! My boy looks awesomely cute! Your tute was helpful! & easy!
Haven’t done the dress up yet, but for the mustache I think I will use ends of bandaids to go on the skin. I will attach the bandaid to felt with double sided tape! Hard to find something skin friendly. Bandaids are…
The link to the hat tutorial is not working for me – is there somewhere else I can find it?
I do not have the link anywhere but here…maybe try googling it!
Do you happen to have the pattern for your princess peach dress? I wanted to make it for my daughter but I can’t find a pattern anywhere!!
I bought a pattern at Joanns and loosely followed it, I believe it was for Cinderella or a princess. They probably have a bunch of Halloween costume patterns in stock now too to browse!
Am I missing something? where are the instructions for the hats? this is what I am really after, your kids look about the same sizes as 2 of my grandsons who are crazy about Mario and Luigi.
I just clicked through on the link and I’m sorry to say but it looks like the site is either down or gone!
I also noticed that the hat link doesn’t work, so I used this tutorial for the hat: http://www.mumofalltrades.com/2012/01/24/mario-luigi-hats/
– and just made the bills bigger, because I thought they were a bit too small.
I’ll be using your overall tutorial soon – thank you!!
Lindsay
My kids have been obsessed with M&L for as long as I can remember and I always refuse to buy the store bought costumes as they are too expensive and look cheap. I love these so I will attempt to make them. I have only sewn pillows before so this might be a challenge but it will make a great Xmas gift to go with all the Mario toys they asked for. It’s about time I learn to use the machine my dad bought for me after seeing me hand sewing all my children’s pants to shorts last summer. Thanks!
The link to the hat no longer works….boo.
Can you direct me please?
Oh, dang! I’m so sorry! The only place I had the link was in this post…I bet you could google it and find it though!Good Luck~
XO,
Maggie
I’m having a problem figuring out how they will get them on. With extra layers underneath for cold weather, if they fit good at the waist, there isn’t extra room to wiggle them up. Most overalls have side buttons. Has this been a problem?
We did not have this problem but if you think you will have a cold Halloween just make them a size or two bigger to fit whatever style clothes may need to go underneath.
xo,
Maggie
I know this is a couple years old, but I made some for my son for Halloween this year and they turned out perfect! I’m such a novice sewer but your tutorial and pictures were so well done. Thank you so much for taking the time to share your talents. I’m planning on making another pair of overalls because I’m sure my twins will want to be Mario & Luigi in a year or two. 🙂 Thank you, thank you, thank you!
Oh, and I got Mario & Luigi hats on Amazon for about $7 for the pair. They were shipped from Hong Kong so I planned in advance but they were PERFECT!
YAY! I’m glad this tutorial was so helpful to you, Marie! And I love passing on costumes, I bet your twins will rock this get up!!!
xo,
Maggie
i want to thank you for sharing this tutorial ! We ( in Belgium) have next month carnaval at scool and my two sons are goïng as mario and Luigi ……( sorry for my writing mistakes) And my boys are loving their outfit !!
Hooray! I am so glad this was helpful to you!!! Hope they have fun!!
XO,
Maggie
These look awesome! Thanks for sharing. Could you share the link for the hats with me? It doesn’t seem to be working.
Oh, I don’t have the link anymore unfortunately! That’s why I included it in the post! That is a bummer that the site is down!!!! 🙁
How do you make the hats? I want to do this for my two boys this Halloween, I am new to sewing and am curious how the hats are done. Thank you, Super cute!
It is such a bummer that the blog post I linked to is no longer available!! I will try to see if I can find my kids old Mario and Luigi hats so I can walk through how I made them! So sorry about that!
Here is the link from archive.org
https://web.archive.org/web/20121019071741/http://www.groovykidstuff.com/?p=167
Thanks so much for this tutorial. Easy to follow and turned out great. My 4 year old is thrilled by his Luigi costume. FYI – I found a great hat pattern at fleetingthing.com