
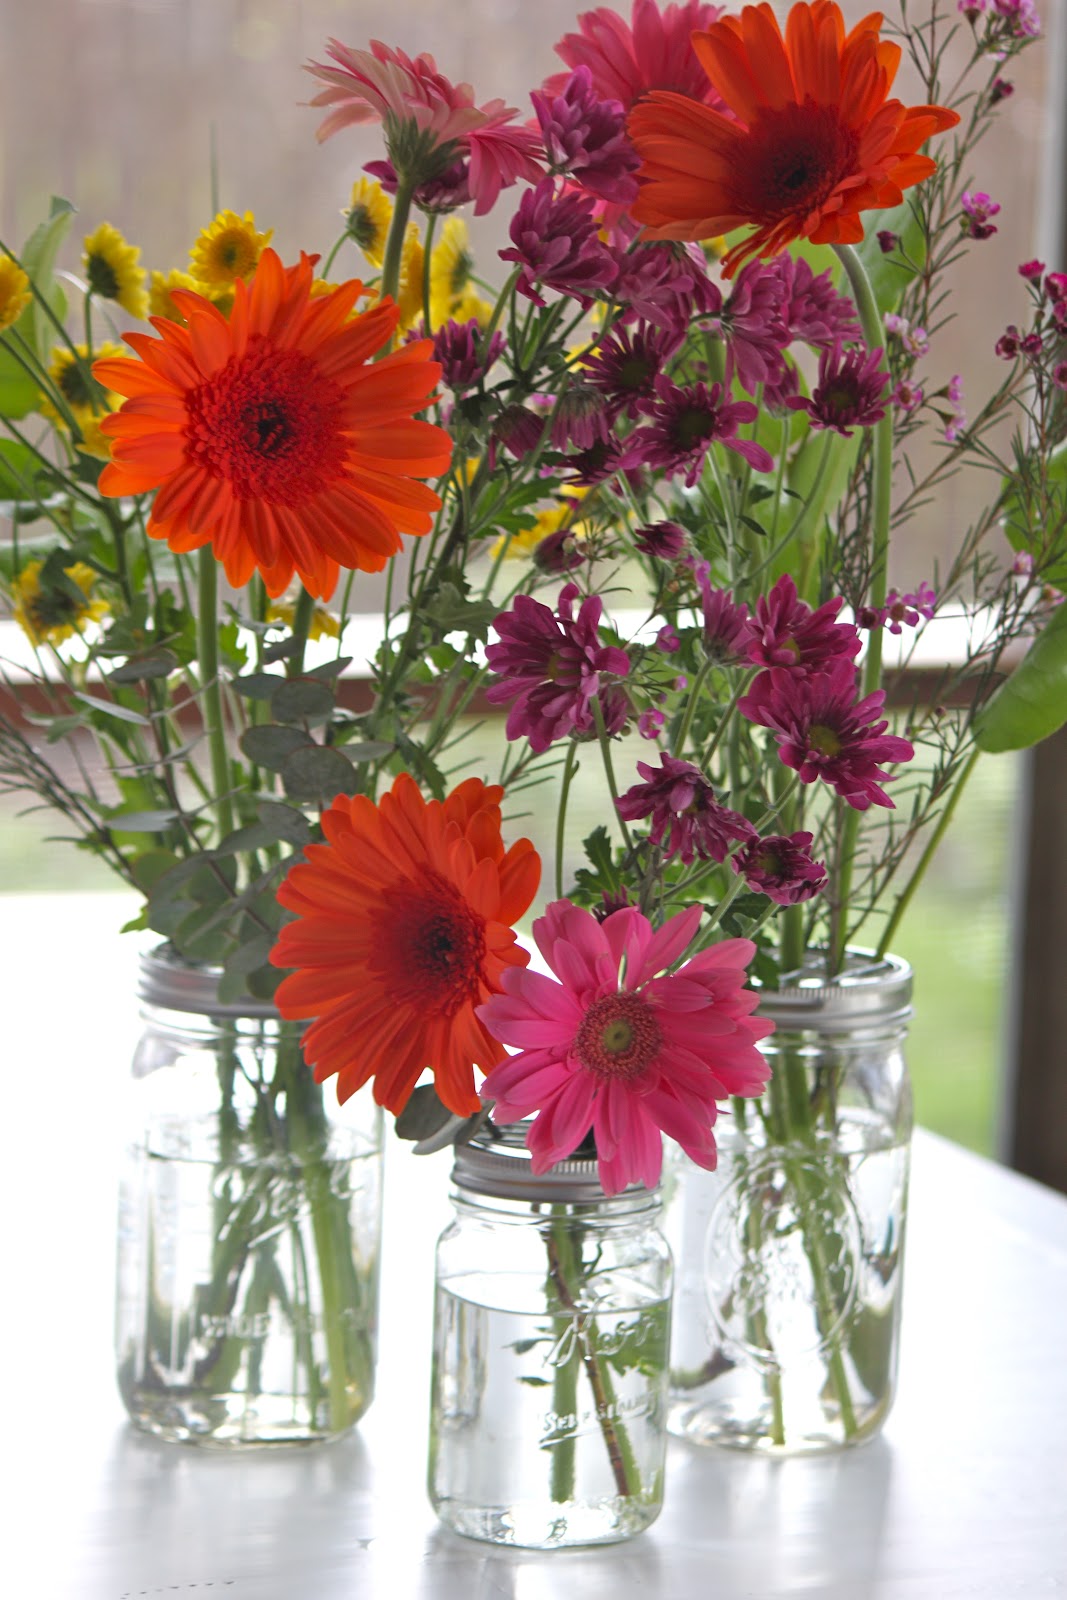
Today we are throwing a little play date party for Noah, Penelope, and Eloise’s little friends. Hooray for Spring time fun! We’ve got quite the spread ready for their little friends (and my sweet momma friends too!)…I love throwing parties! Since we are throwing a “Yay Spring is Here!” party I wanted to add a bunch of fresh flowers to our buffet table, since what says Spring more than beautiful and colorful fresh flowers? So I got out my trusty mason jar frog lids I use when I turn my mason jars into flower vases and thought I would share with you how to make them. They are super easy peeps, for reals.
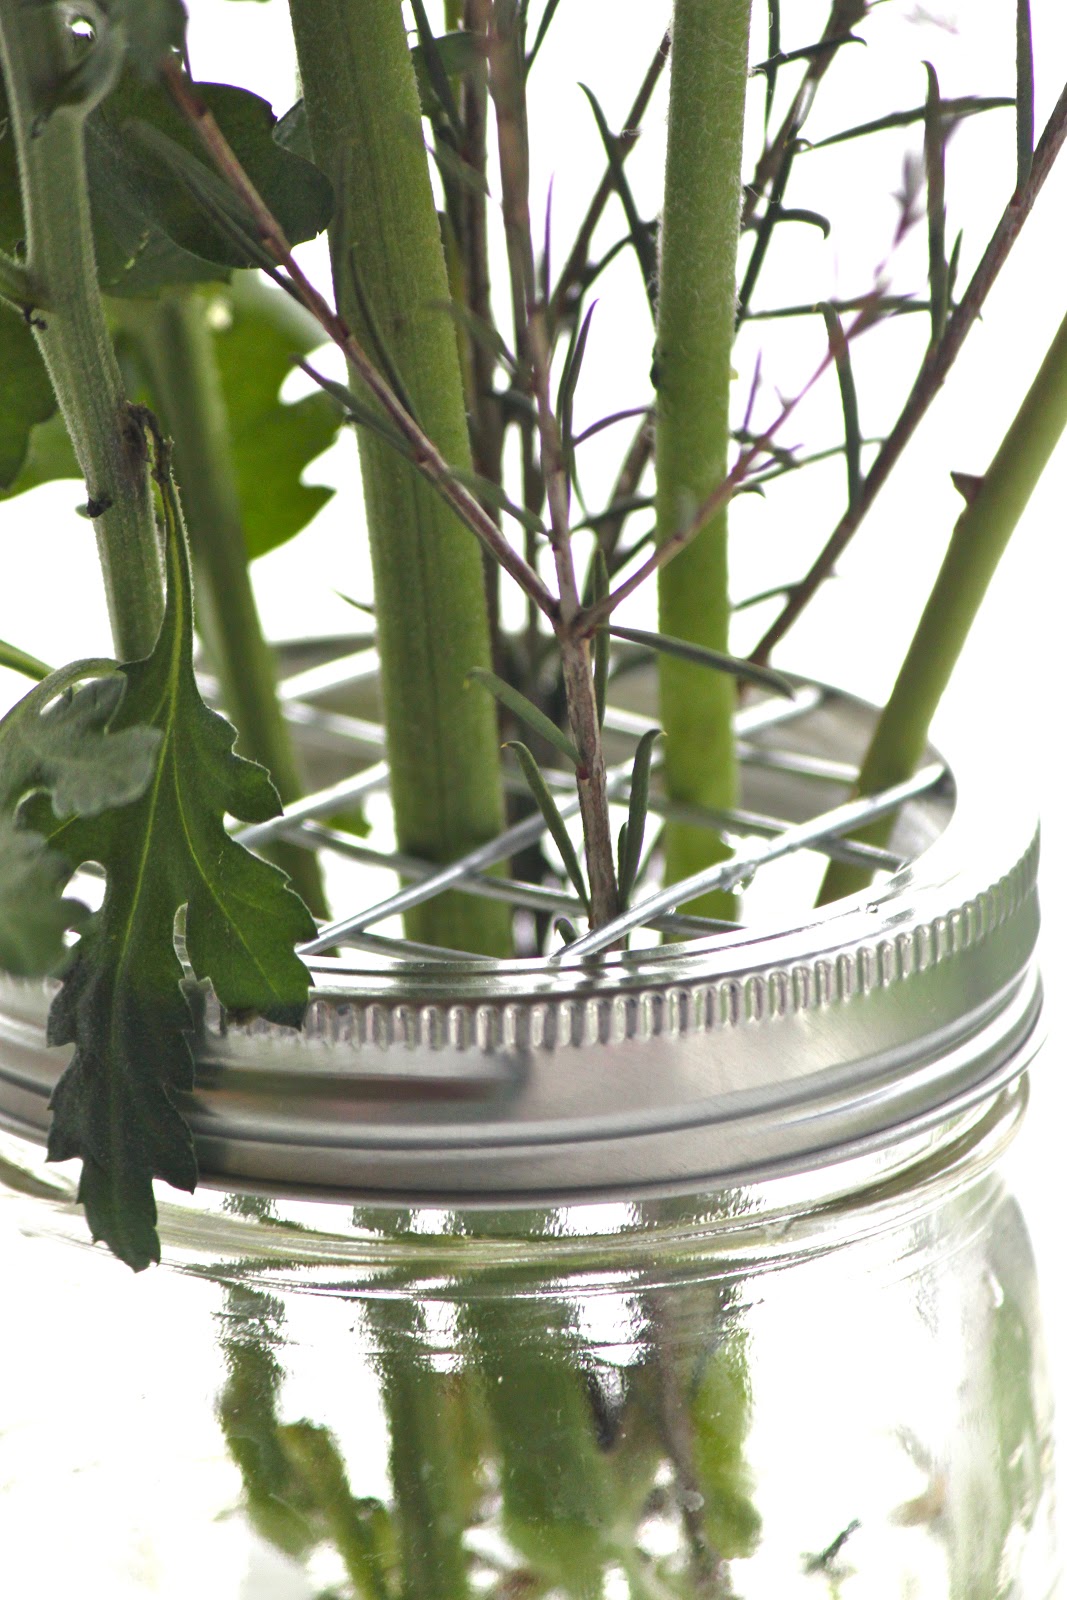
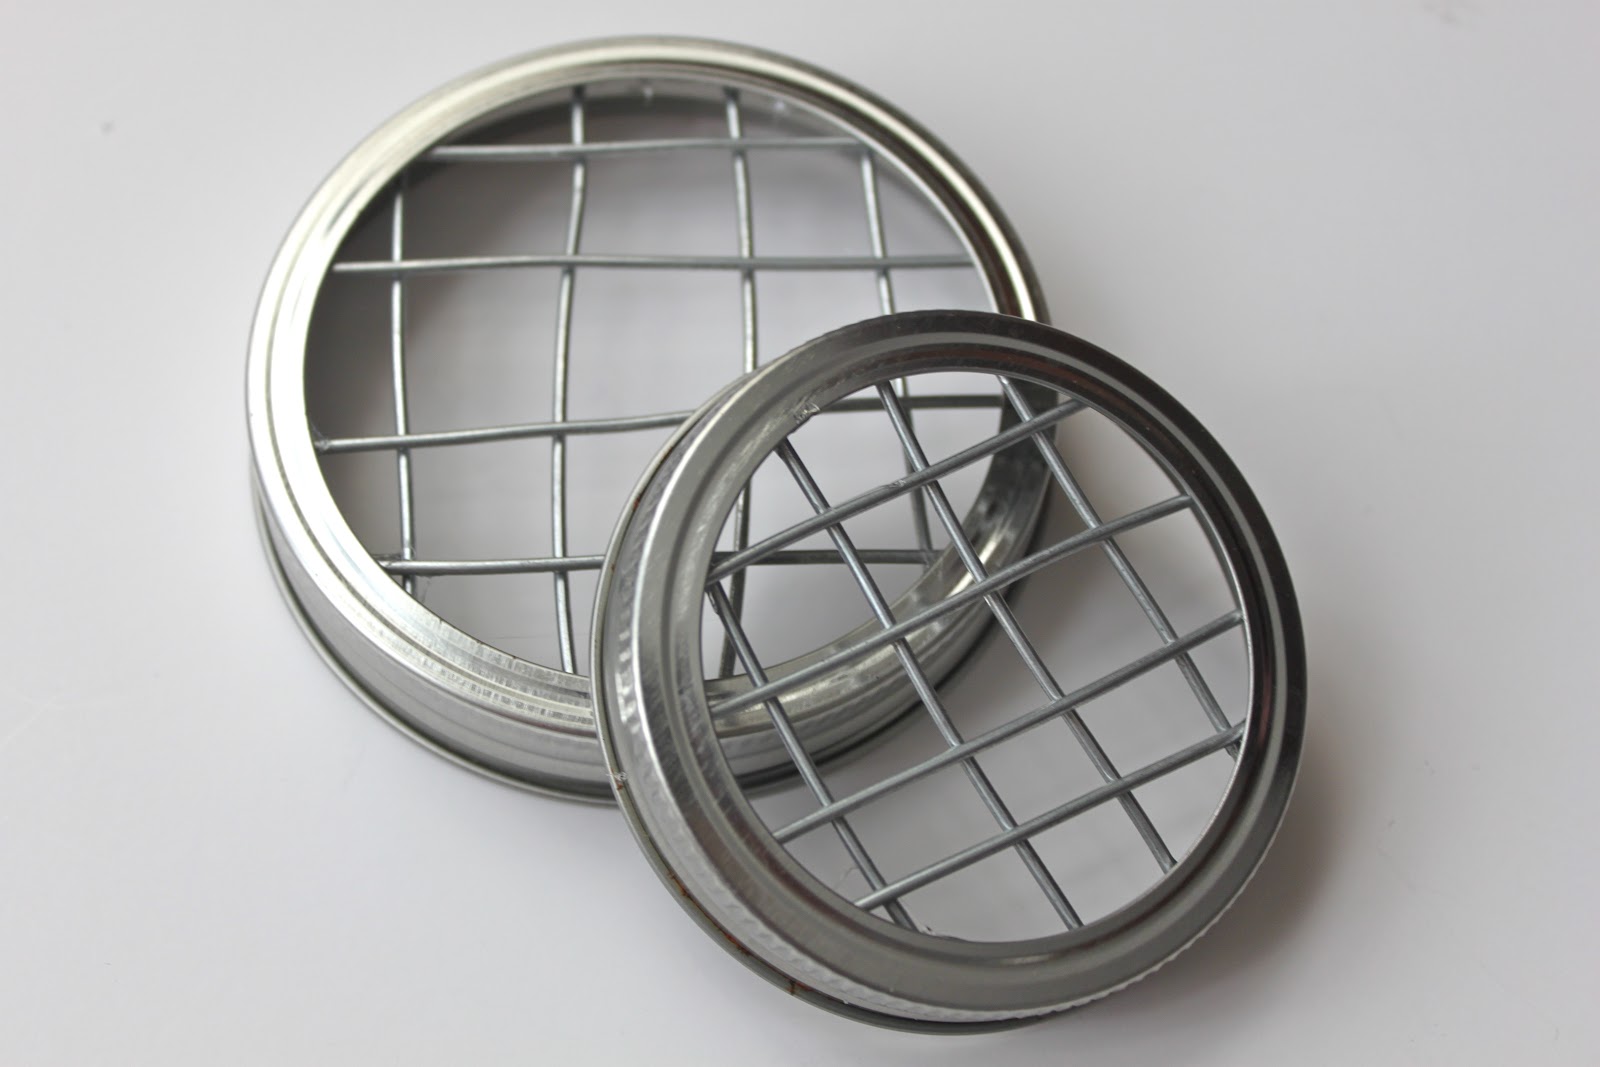
‘So what’s a frog lid?’ you might be asking yourself. Well, if you’ve ever seen pretty flower arrangements bursting out of mason jars or similar lidded jars at a wedding or other party a frog lid helps keep the flower arrangement full and pretty. It is just the ring component of the mason jar lid with a wire grid. The grid allows you to place each stem exactly wear you want it making arranging your bouquet easy peasy!
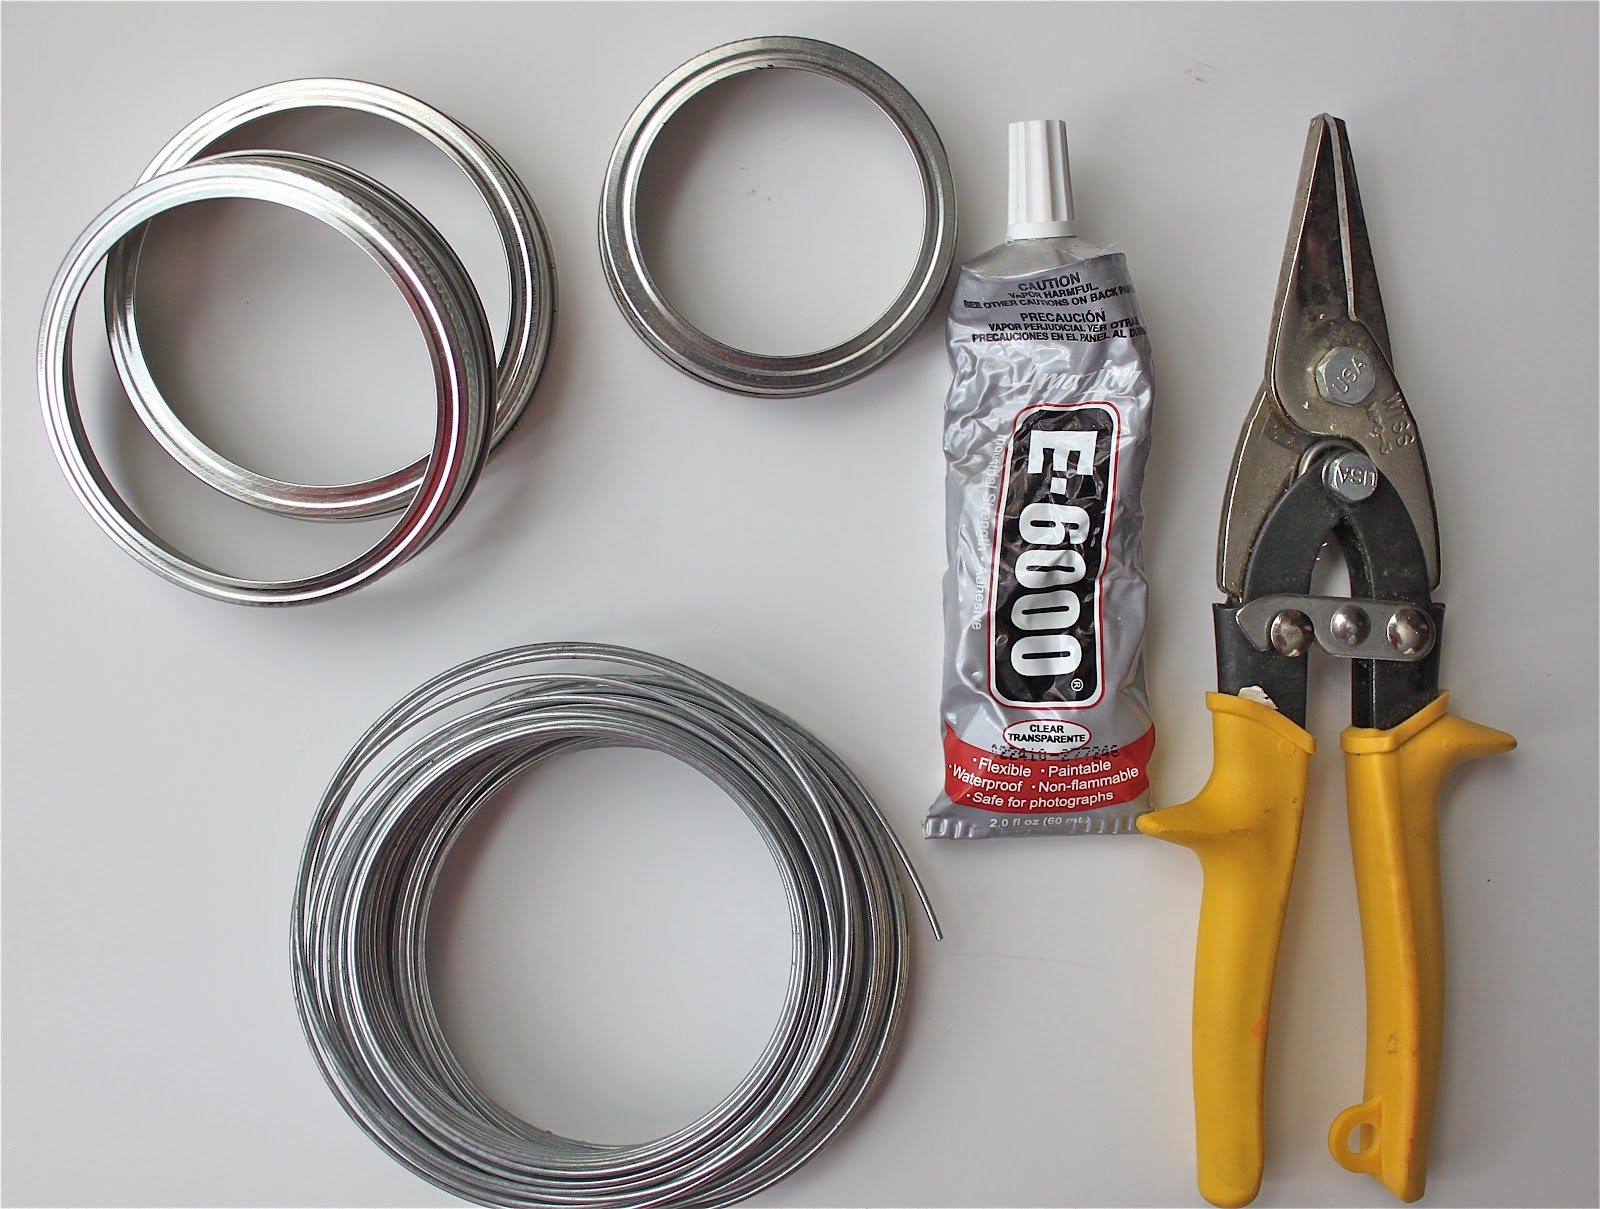
To make a frog lid you only need a few simple things, who knew!
Are ya ready to make a few?
Mason Jar Frog Lids
Mason jar rings
12 or 14 gauge wire
Tin snips
E-6000
You can make your frog lids using regular or wide mouth mason jars rings…and they can fit the standard clear or the pretty vintage blue mason jars too, the possibilities for your mason jar vases are endless!

Just snip your wire into lengths that will fit the diameter of your ring, you will need 4 going in one direction and then an additional 4 in the opposite direction to form the grid. The wire we had on hand was ridiculously strong which made it hard to straighten out in a nice line…no one will see the imperfections once the flowers are in there though so if you happen to use some pretty tough wire do not worry about not being able to straighten each piece out perfectly 🙂

Slowly squeeze the E-6000 around the lip of the inside of the mason jar ring. Place the cut lengths of wire in place and arrange into a grid. Let the frog lids dry for a few hours up to one day.

And there you have it, you are now ready to arrange all those pretty flowers just the way you want them in the mason jar of your choice 🙂

I love my frog lids!!
Happy weekend to you and thanks for stopping by!
We’ll talk soon!
XOXO,


ok, so simple yet so genius! I wish I knew this a few months ago for my wedding! ;o) Def will use in the future!
hugs! Kim @ Party Frosting!
Thanks Kim! Now go whip yourself up a bunch!!
Love this!!! Especially since I saw some high dollar ones for sale the other day! You can also do it with floral tape!
Yup, they are so easy it’s almost silly isn’t it!
~and if you did it with floral tape it wouldn’t show against green flowers and be able to reuse the lid if you actually use them to can! I do like this idea too.
Thank you so much for this! I almost bought some online the other day, 2 lids for $7! With your method I can do a bunch of lids!!
Wow, for that price you could make quite a few! Have fun crafting!!
Wow these are fantastic. I’m excited about all of the flowers popping up in our yard. I’ll have to make some of these once they start blooming.
Frogs just make me happy. I love this idea! Thank you for sharing. 🙂
Maggie, you are brilliant! When I read your post, I had a complete DUH! moment. Like why didn’t I think of this before? Like I said…you’re brilliant! Thanks for sharing, I’m going to buy me some wire and do this too. I stink at flower arranging! 🙂
Ooh those are great! What a fantastic idea! Thanks so much for sharing this spring-perfect how-to, I’ll be linking.
This is genius! What a wonderful way to start the flower displaying season, will definitely be making some of these. Thanks for sharing this idea with us.
I love this project…so simple but so useful!!
love it – just pinned!! 😉
That is so cool. I was showing my husband this and he said there is handware mesh that you can cut into circles too. Definately in my to do list.
Pretty and practical, and simple to make. What’s not to love? Thanks for sharing your project.
Clever idea. Love it!!!
Thanks so much for sharing. A couple years ago I started looking for Frog Jars and lids and I did end up finding a couple at a garage sale and Love them. I will be making more and I just so happen to have all materials. Thanks, you made my day too! rosasinwillow@aol.com
This is a very pretty idea that I’ve never seen before. Much nicer than just letting the flowers flip flop around the place (which is what I would do).
What a great idea! Now, I may have to hold some jam jars hostage from my Mom. I don’t think Grandma will mind too much, though!
Oh this turned out great!
Put this idea in my wedding file for future reference with my daughter! Thanks!
This just saved me tons of $$$! Thanks so much!
Hooray for DIY!!!!
Wonder if I can solder this instead… Gonna try it tomorrow! If it doesnt work, I’ll break out the ol glue.
Thanks for a great idea!!
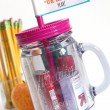
i was wondering were you got the ball pitchers thoes are cool!!! lisa llmiracle@hotmail.com
Hi Lisa!
I have a link to the site in this post here: http://smashedpeasandcarrots.blogspot.com/2011/09/how-i-make-my-sweet-tea-recipe.html
Cool idea! Thanks for sharing! Will make a great quick and easy garden gift!
Found you on Pinterest. This is genius! I’ll be making several. Thanks for sharing.
Another great idea! This is Ann again from Just Moved Ministry. Your last idea we shared at JustMoved.org was a big hit! (baking soda air freshener). I’d like to share this idea – great for summer flowers too!
As before, I’ll provide a link to your blog and cite you as the author.
Thanks!
Instead of using the wire, I bought some wire mesh, cut circles using the sealing lid as a guide. I just pop them in and screw on to the jar. The ring lid keeps everything in place and I can slip them out to use the jars for other things.
Great idea!