Here is a little bit about the punch:
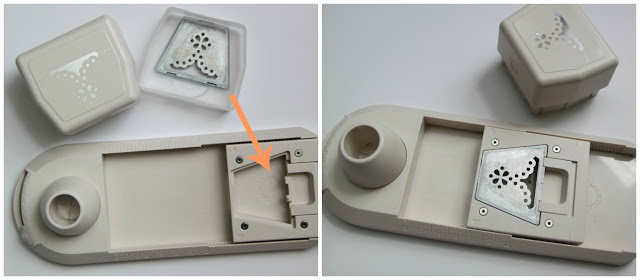
It comes with one punch cartridge and metal plate that you place into the sliding tray base by pulling on the release tab. Easy peasy! Literally, it only takes seconds to set up!
This tool is so neat because it works via magnets! The rotating knob (on the left) has two and the cartridge has 4 at each corner.
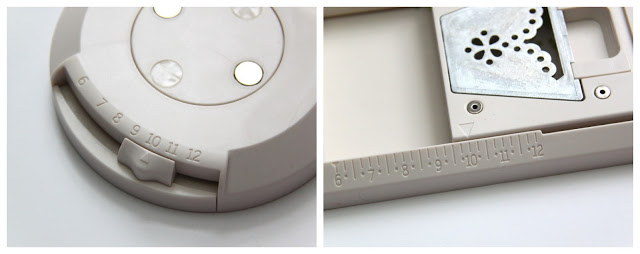
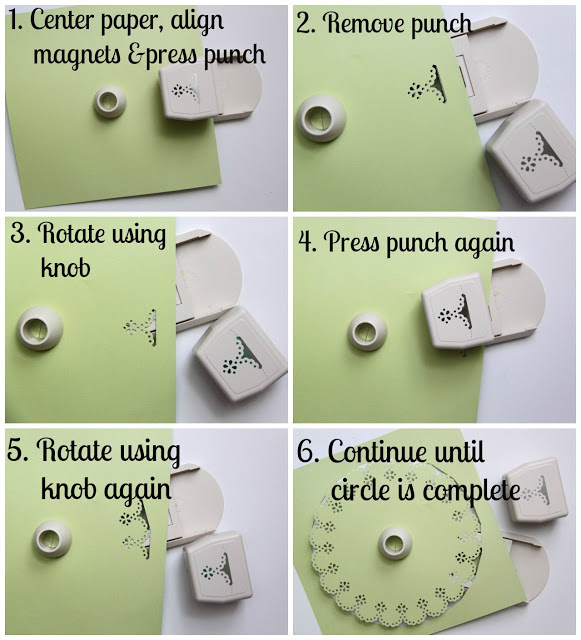
Okay, so to start using the Circle Edge Punch, you first need to choose a size for your finished circle. You can choose sizes between 6-12 inches in one inch increments. I chose to make a 10 inch circle in the picture above. Just slide the switch at the curved portion of the punch as well as on the sliding tray to the same measurement.
To punch out your circle, just follow the diagram above! It was super easy, even my kids could help me do it!
The end result was this pretty doily! I love that now I can make doilies in any color paper I want…no more standard white for me. How fun would this be to make a doily banner for the mantel…or for a birthday party with each letter of “Happy Birthday” on a separate doily? These would also be fun to make your own party cones or party hats too!
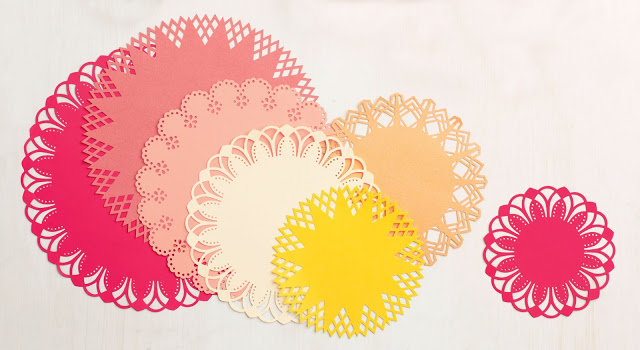
Here are a few other punch designs available for the Circle Edge Punch…
You may also like -
 Back to School Organization with Martha Stewart Home Office™ with Avery™ PLUS Giveaway!
 TUTORIAL: How to Make Water Fireworks PLUS Martha Stewart’s Favorite Crafts for Kids Book Review and Giveaway
 TUTORIAL: How to Silkscreen A Spring Centerpiece
 REVIEW and GIVEAWAY: Martha Stewart Home Office with Avery Totes and Cases
 DIY Christmas Cards and Kraft Paper Envelopes-TUTORIAL




Wow, I definitely need to use that code! I love Martha Stewart!!
Me too! She is amazing! 🙂
I have some of her all around the page punches and love them. They so make the ordinary extraordinary. We use them on notes and invitations and Thank you cards Aldo. Can’t wait to get one of these