
It’s time to start decorating your home for the Christmas holiday and I thought what better than to post my Candy Cane Bunting that I shared last year over at Delish! This is really easy to put together and extremely festive for this time of year. All you need is some pretty red and white fabrics and a few other goodies to get started, enjoy!

Candy Cane Garland
(6) 3 x 36 inch strips of fabric in three coordinating colors
(1) 8 x 36 inch piece of fusible interfacing
2 yards of jumbo ric rac or wide ribbon in a coordinating color
candy cane template
disappearing ink pen
scissors or rotary cutter and mat
pins, thread, and sewing machine
iron and ironing board
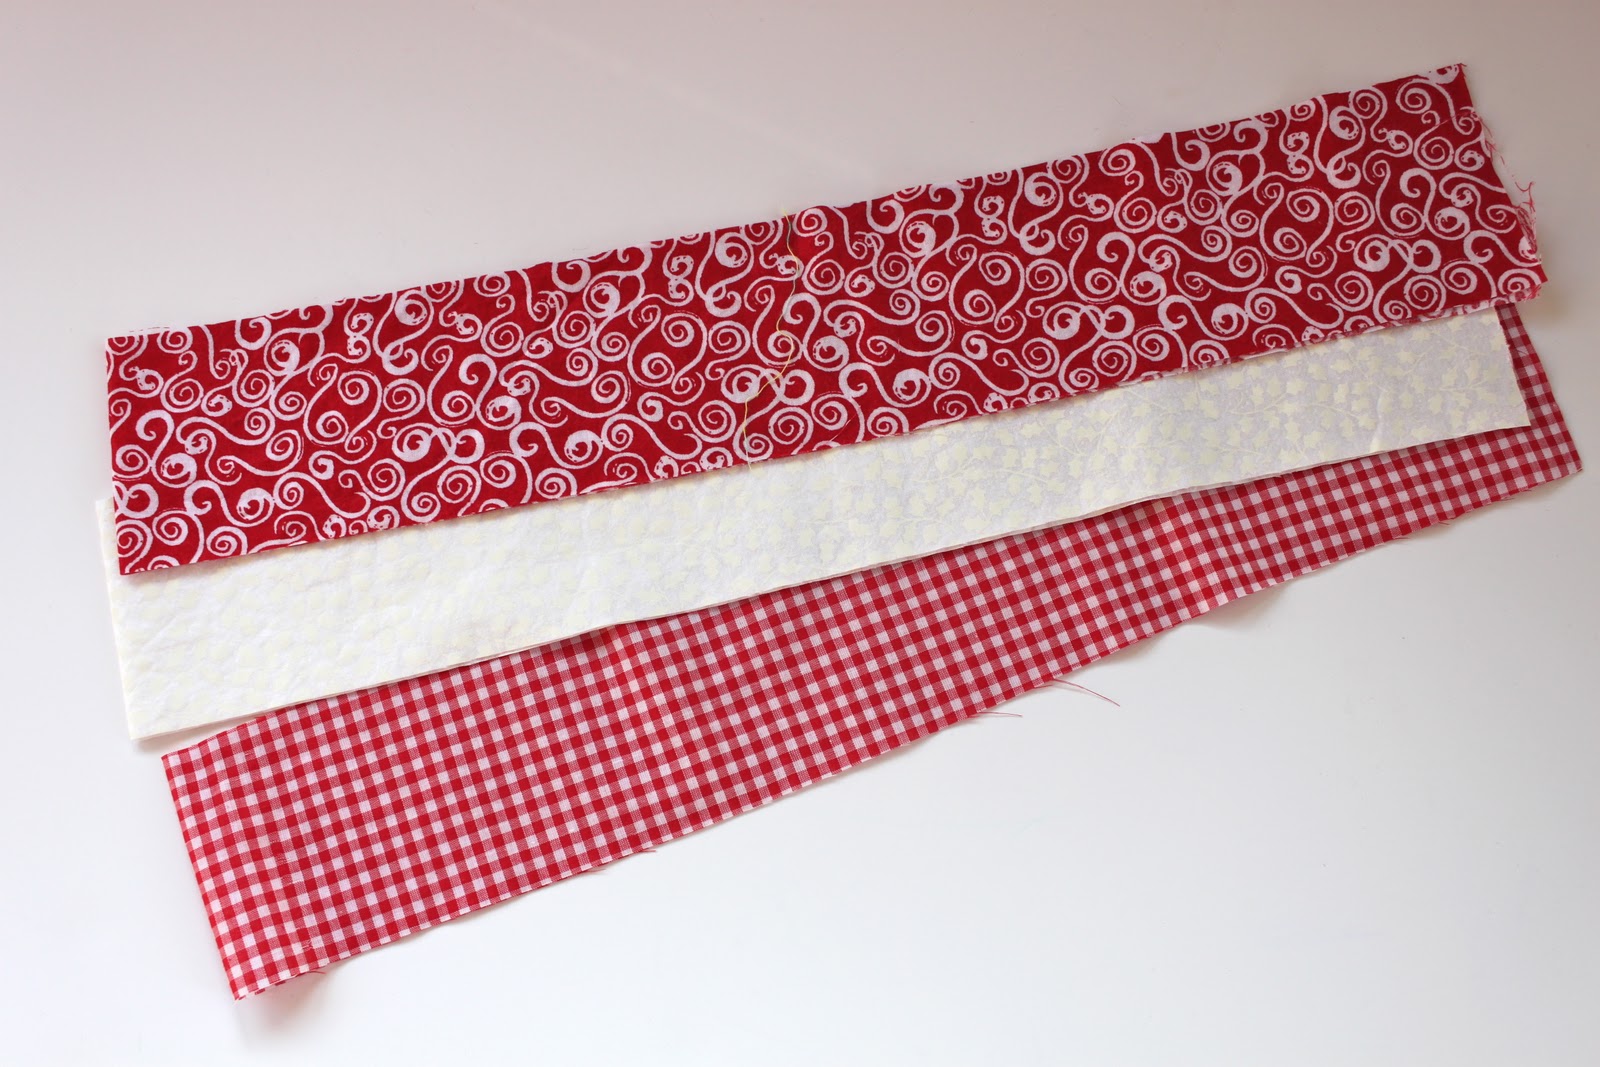
Cut two strips of three coordinating fabrics measuring 3 x 36 inches each. These will be sewn together to form the front and back of your candy cane design.
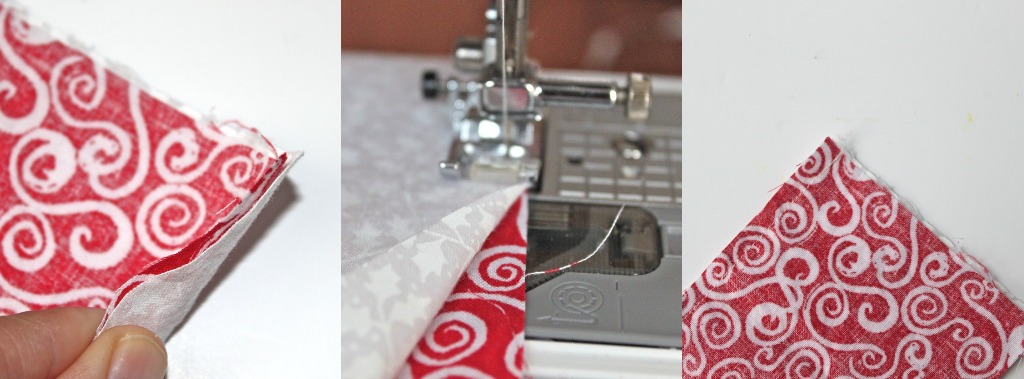
Place two of the strips of fabric (I used a red swirl and a white Christmas-y fabric) with right sides facing each other and sew a straight stitch down the length of one side with a 1/4 inch seam allowance.
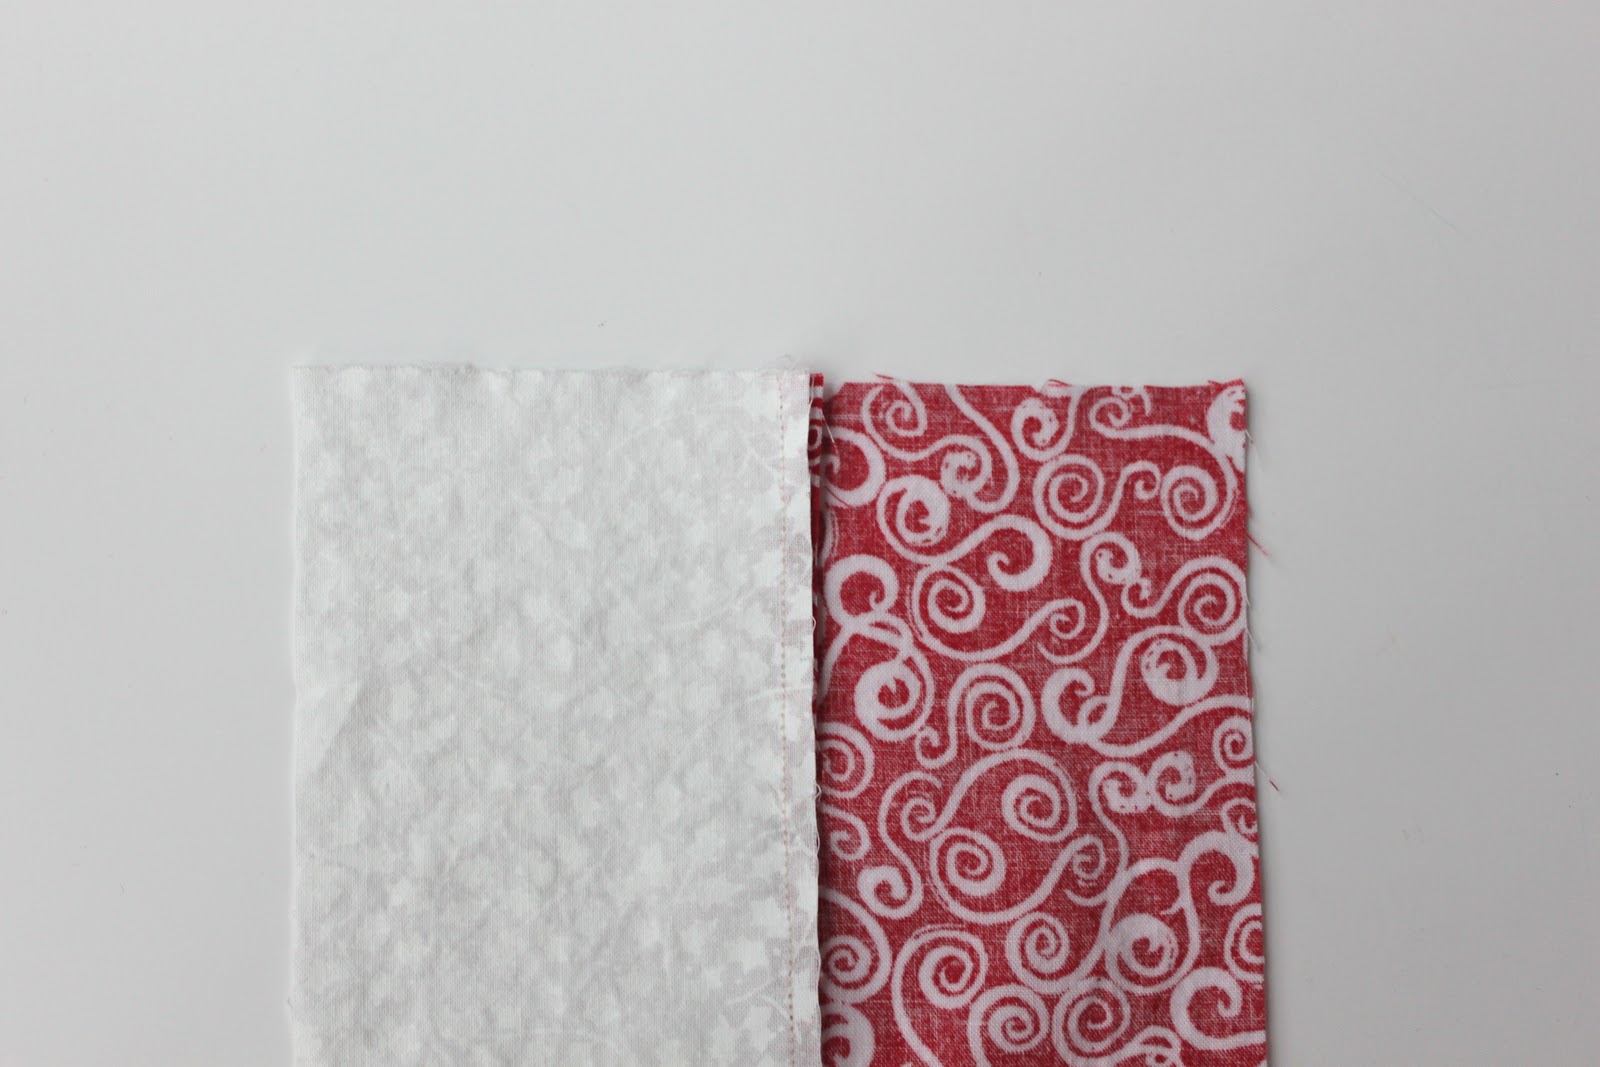
With wrong side facing up, spread the fabric open and press the seam towards the darker colored fabric.

Next, take the remaining strip of coordinating fabric (my remaining strip was a red gingham) and place it right side facing to the right side of the white fabric. Sew a straight stitch down the length of the fabric with a 1/4 inch seam allowance.

With wrong side of the fabrics facing up, press the seams toward the darker colored fabric. Do the above steps to the remaining three strips of coordinating fabric and set aside.
Next, take your length of fusible interfacing and, following package directions, iron it to the wrong side of ONE of your candy cane fabric pieces you just sewed together.

Layer the two pieces of candy cane fabrics right sides together with the fusible interfacing side facing the bottom (or toward your table). This way you can cut the front and back of the candy canes at the same time.

Draw a candy cane template, I just free-handed mine and made it about 8 inches tall by 5 inches in width. Place it on top of the candy cane fabrics at a slight angle to reproduce the classic slanted red and white stripes seen in candy canes. Trace the candy cane onto your fabric using a disappearing ink pen. Cut each candy cane out with a pair of sharp scissors or use a rotary cutter and self-healing mat.

Next, grab your jumbo ric rac or ribbon and lay it out on a table so it is not twisted.

Starting about 12 inches in from the end, place the back of the first candy cane underneath the ric rac and then the front of the candy cane on top of the ric arc, making sure the wrong side of the fabric are facing each other. Pin in place, being sure to catch the ric rac with the pins near the top of the candy canes.

Sew around the entire candy cane using a straight stitch and a 1/4 inch seam allowance. This will allow the candy canes to fray at the edges a bit, giving them a nice vintage feel.
Continue placing your candy canes on the ric rac about 4-5 inches apart. Just remember to leave about 12 inches of ric rac at the end for hanging your bunting.

That’s it! Now you have some sugary-sweet bunting to decorate your home for the holidays. And remember that you can incorporate so many fun fabric colors or even use red and white felt to make this pretty vintage style bunting!

XOXO,


What a cute, festive project! I love the rickrack – just the right touch! Your tutorial was very clear, thanks to your photos. I have bookmarked it!
It turned out so cute, great job!
LOVE!! I feel like such a slacker when I visit and admire all your craftiness…lol
So cute! Thanx for sharing, I love anything christmas and garland! 🙂
Natalie
http://www.projectdowhatyoulove.wordpress.com
I LOVE this idea… I can’t sew to save myself, but it’s easily translated into paper… well done. x