
I was asked recently by Waverly to be a part of their 12 Waverly Bloggers of Christmas, how exciting!! I said yes of course, how could I not? If you head over to Waverly’s Facebook page you will find 12 bloggers sharing how to create DIY holiday crafts using Waverly materials every other day or so. The series goes until December 23 so head on over to check it out!

My holiday craft is a modern twist on Christmas Stockings…using of course Waverly’s beautiful Modern Essentials line of fabrics. This line is truly gorgeous and has so many vibrant colors to choose from, I think these stockings will add the perfect amount of Christmas cheer to any home this season!

Cheery Christmas Stockings
1/2 yard of two different fabrics per stocking (one for the lining/cuff and one for the outer fabric)
10 inches of Waverly Trim per stocking
scissors or rotary cutters and mat
pinking shears
coordinating thread
sewing machine
iron an ironing table
hand sewing needle
pins
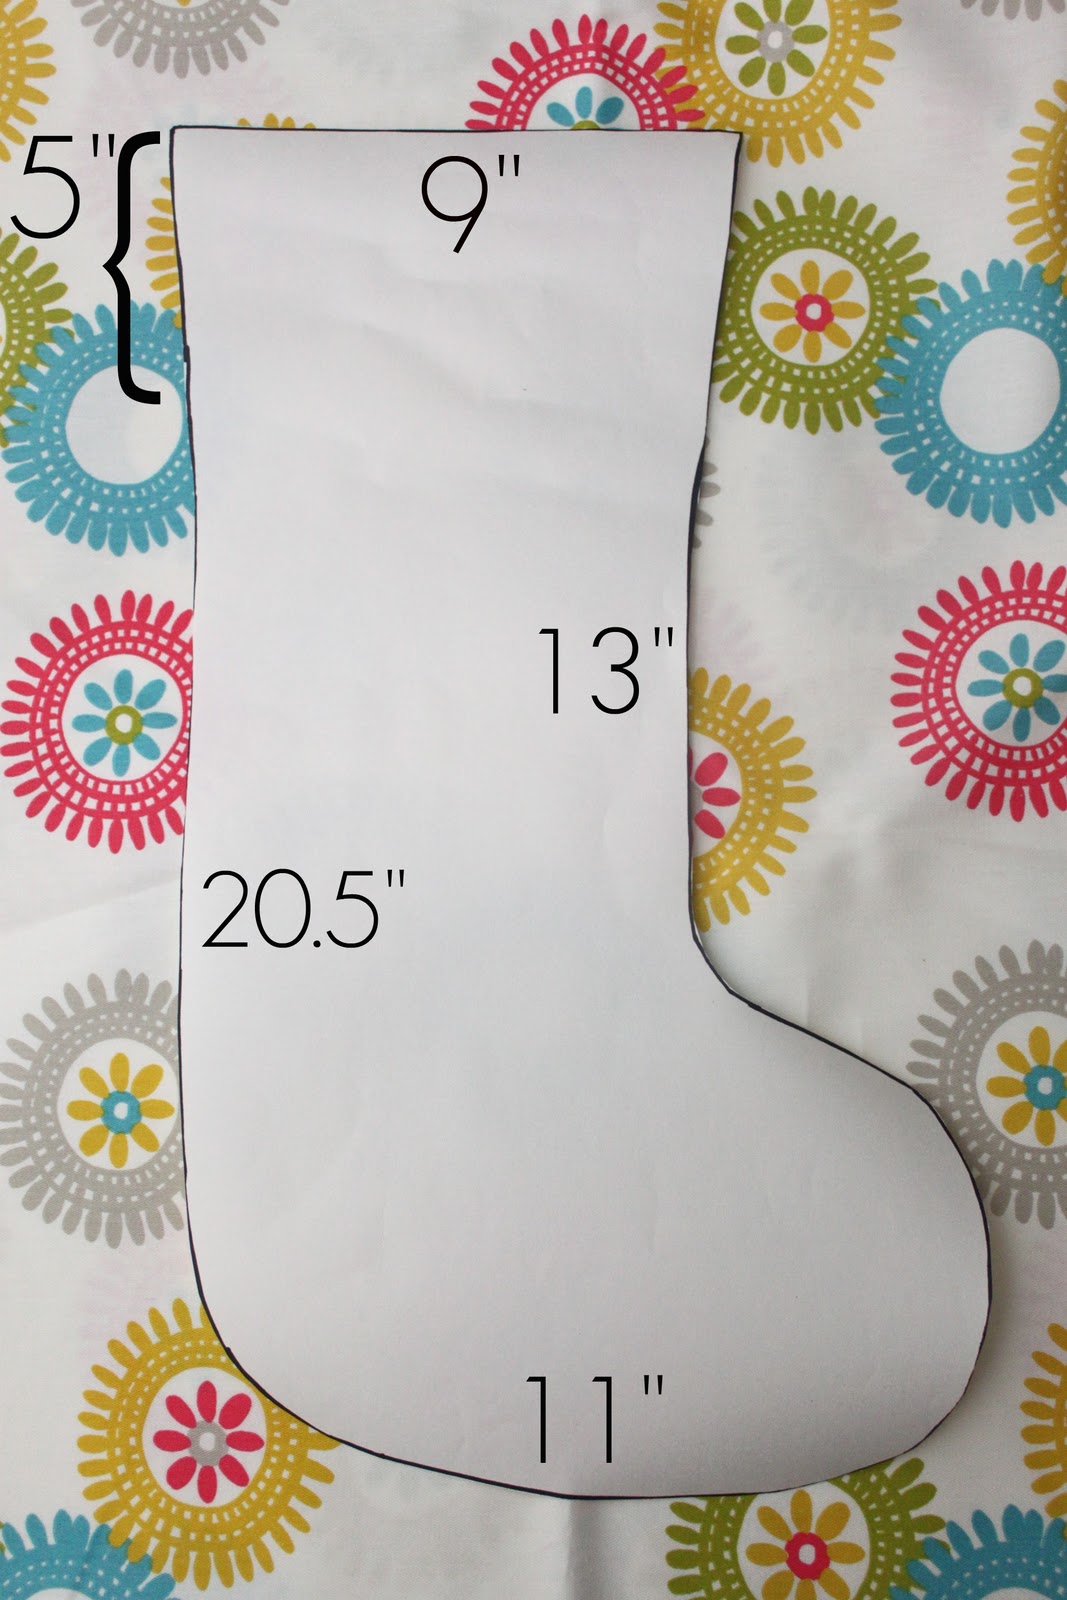
First hand sketch a stocking template in the dimensions written above. The top 5 inches of the stocking are flared about 1 inch on each side which will help when we fold the top of the stocking over to make the cuff. Trace and cut two stockings from your outer fabric choice and two stockings from your lining fabric choice.

Next, grab your trim. I used this pretty 1/4″ piping from Waverly. You can get it here.
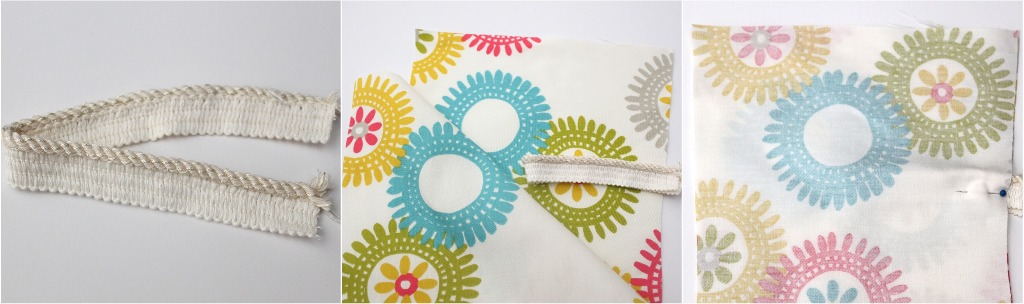
Cut a 10 inch piece of trim and fold it in half. Place the the two stocking cut outs that will be your lining so that they are right sides together. Fold the top fabric piece back and place the looped trim about 5 inches from the top of your stocking on the side opposite the foot of the stocking, this will become the hanging loop for your stocking. Make sure to place the looped part inside the stocking (middle picture) with just a small portion of the trim showing over the edge. Fold the top fabric back over top and pin the trim in place.

Place two more pins about 2-3 inches apart at the bottom foot of the stocking lining. This will be the opening you will use to turn you lining inside out. So now your stocking lining should look like the picture above.

Using a 1/4 inch seam allowance, sew down with sides only (not the top!) of the stocking lining and stop when you get to each of the bottom foot pins. Your stocking lining should now be completely sewn together and have a small opening at the very bottom of the foot as well as a top opening.

Take the outer stocking fabric pieces and place them right sides together, then sew them together using a 1/4 inch seam allowance. Now the outer stocking should be completely sewn together minus the top opening.

Grab your pinking shears if you have them and trim around the boot and heel of both the lining and outer stockings, this will help keep the curved edges flat when turning your stocking right side out. Make sure you take care not to cut through your seam allowances. You can always use a pair of scissors to clip notches in these rounded areas too.
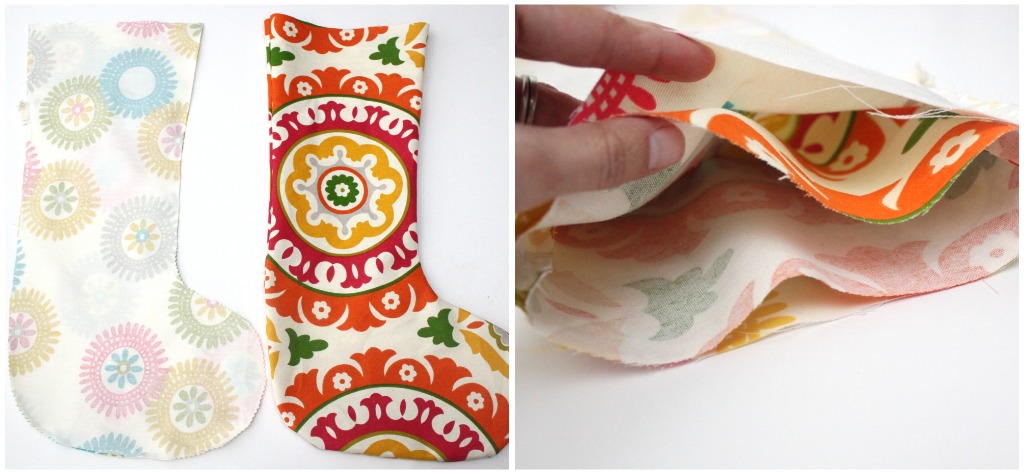
Next, turn the outer stocking right side out and place it inside of the lining stocking until the upper edges of the stocking line up as well as both left and right seams (see picture on the right).

Your stocking should now look like this (above).
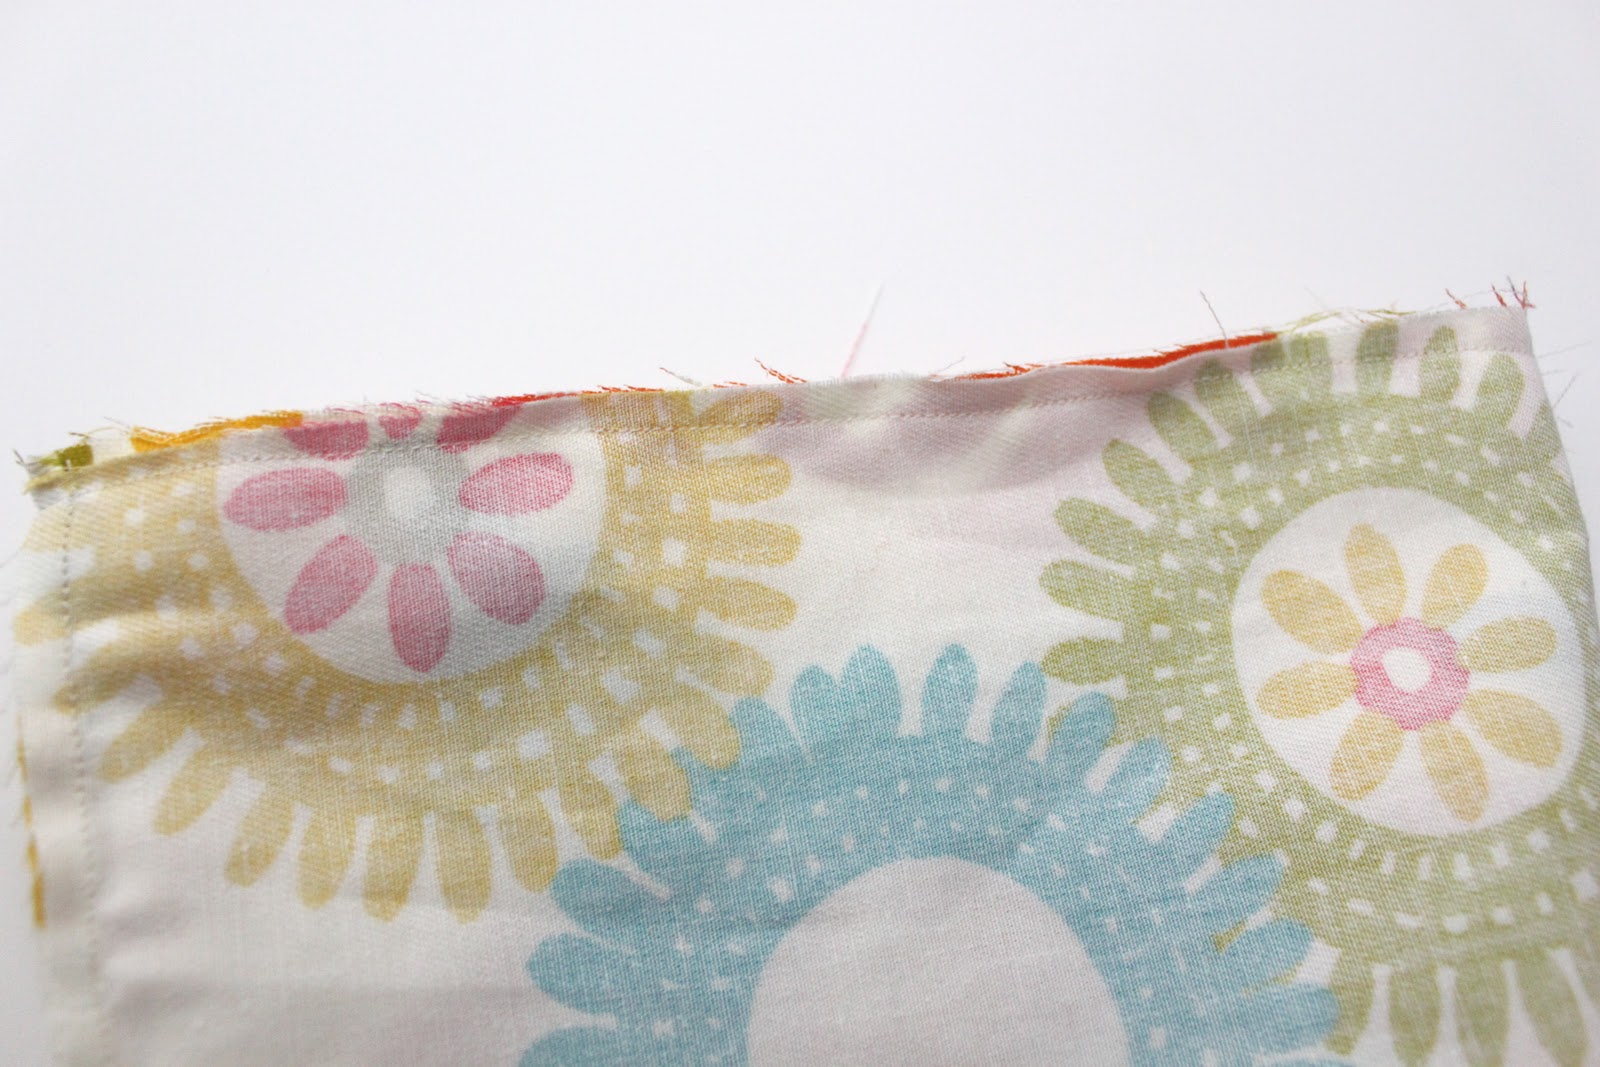
Next, sew the upper edges of the lining and outer stocking together using a 1/4 inch seam allowance. Make sure to only sew the two layers together and not all four!

Now shimmy the lining part of the stocking up and over the outer part using the small opening we created earlier. Once the lining is completely separated from the outer stocking, use your hand or a chopstick to push the seams flat at the boot of the stocking lining. Sew the opening closed by hand.
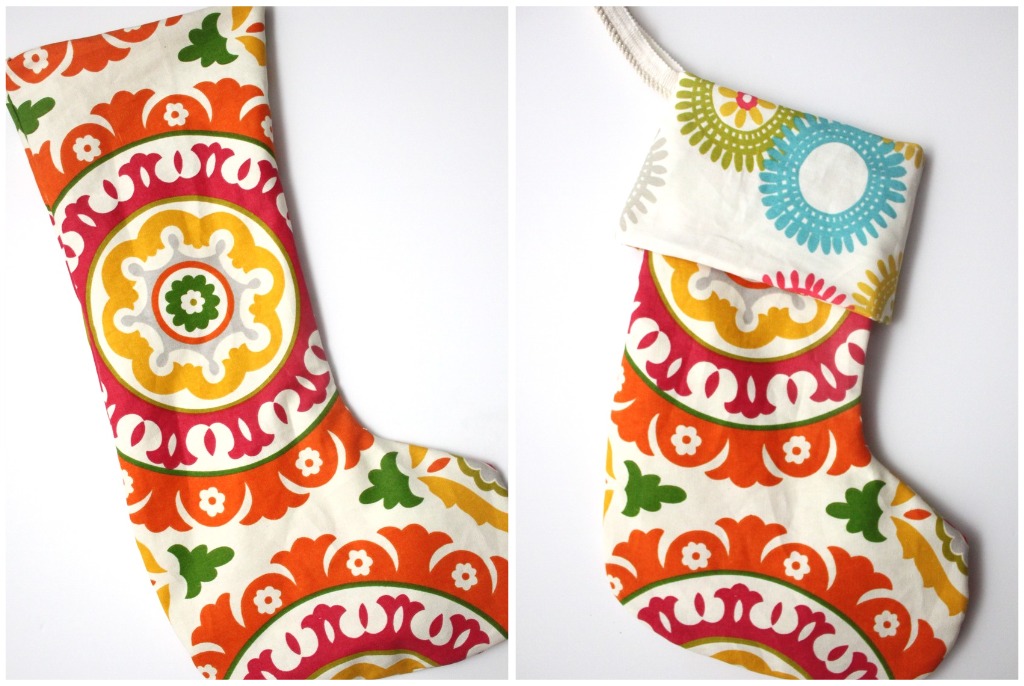
Push the lining into the stocking and press with an iron to make the top edge nice and flat. Fold the top edge down about 5 inches so that the hanging loop pops out and you are done!
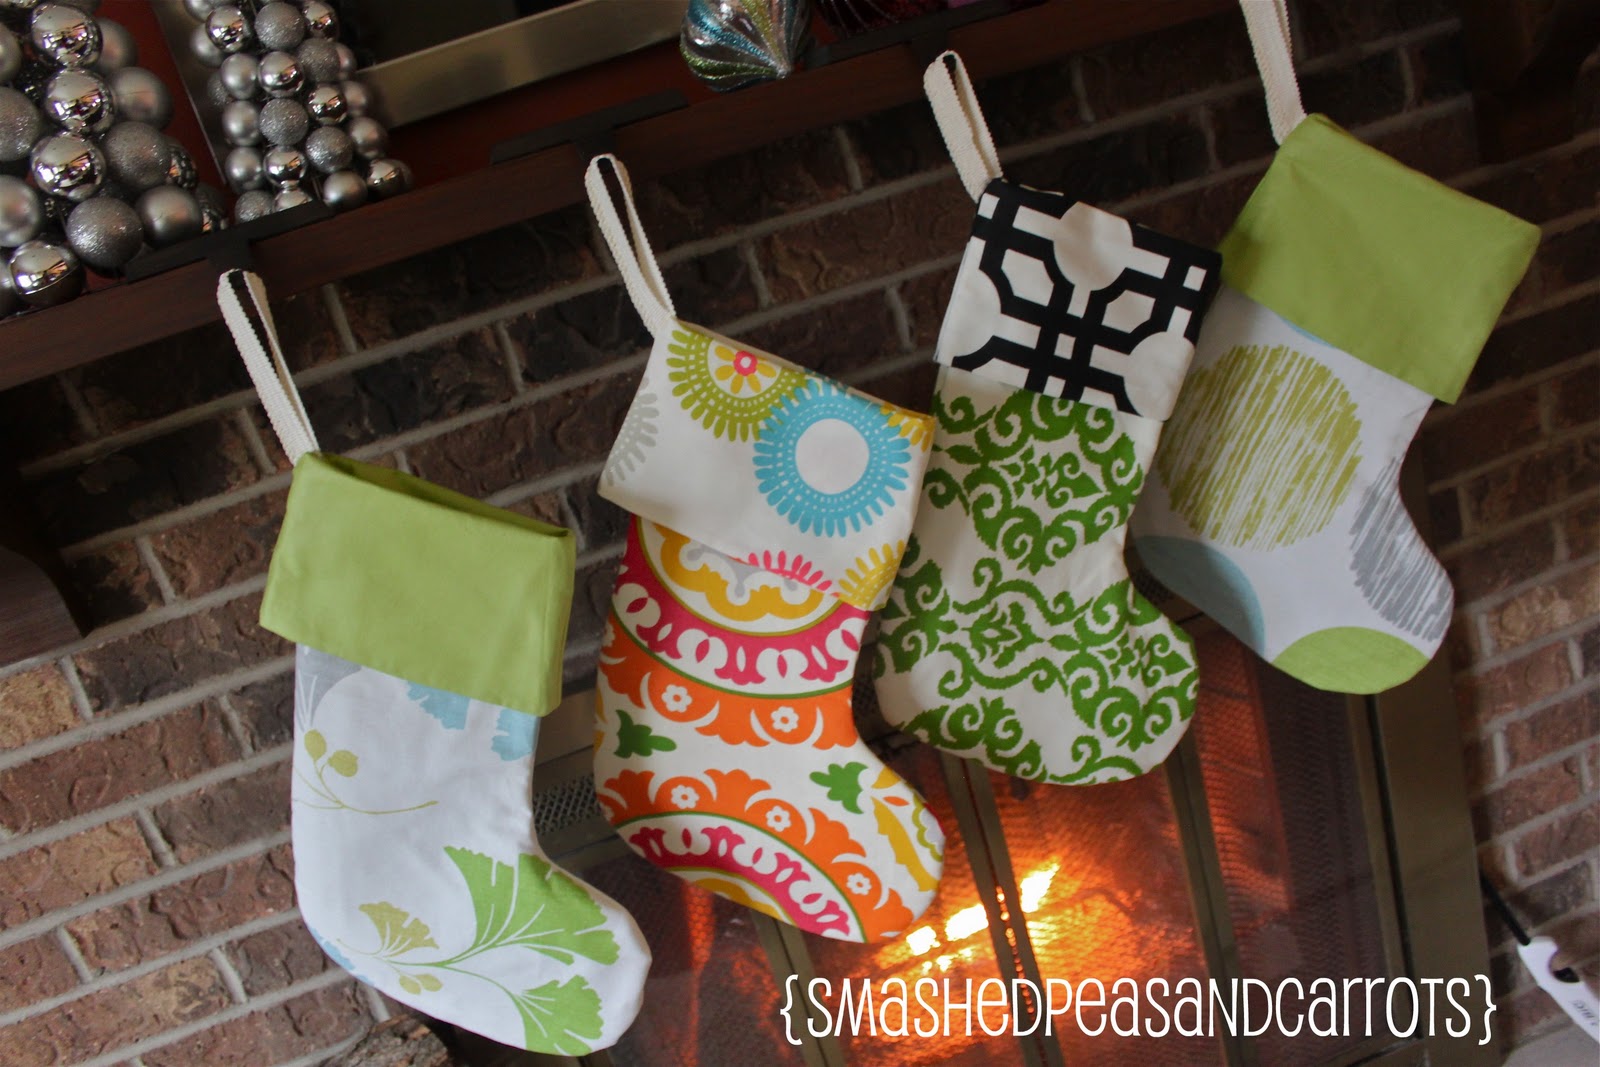
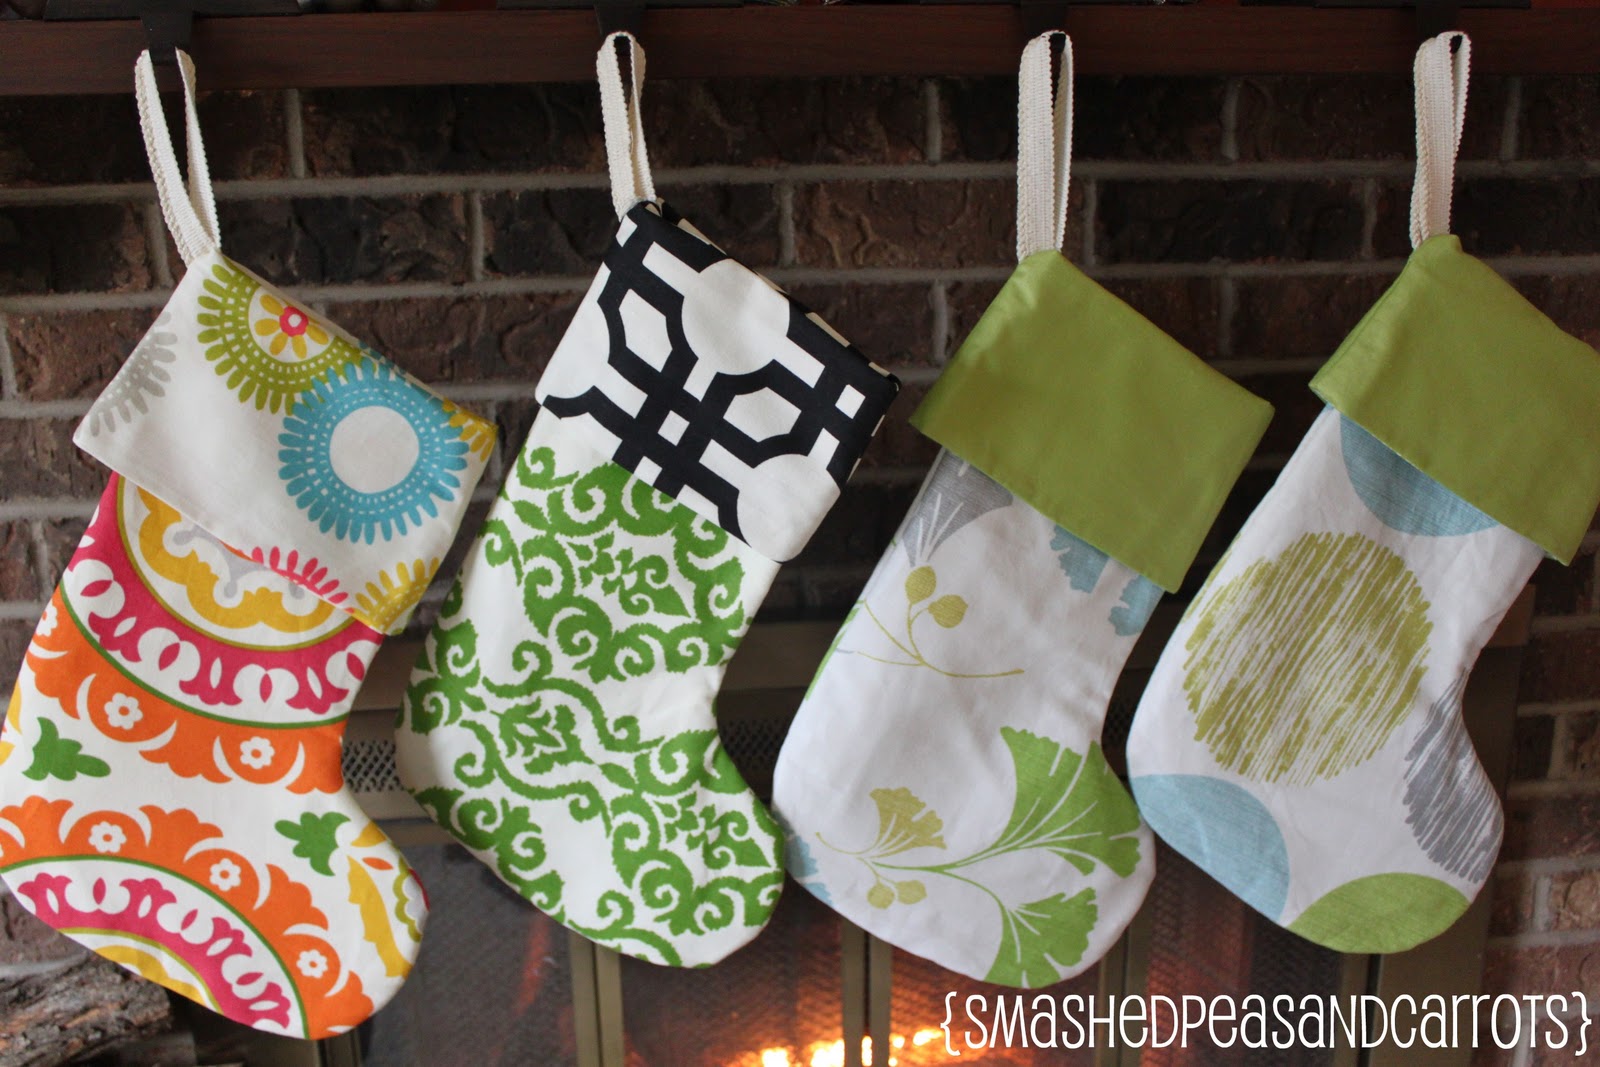
Now you have some cheery and festive stockings to give to the ones you love.

You can create stockings that coordinate with one another or stockings that are individualized to each recipient’s personality…so many options!
And remember, you can shop all of Waverly’s products here.
Aaaand if you go to Waverly’s Facebook page you can enter to win TWO $100 gift cards!
One to JoAnn Fabrics and one to Michael’s, now how’s that for a Merry Christmas!

XOXO,


Those turned out very pretty! I was going to make stockings this year and those were a perfect inspiration for me to get started!
LOVEEE THESE! I’m definitely going to try these! Love the Waverly Fabric!
These are amazing!! Such a cute idea!
I love waverly & these stockings!!!
so pretty!!! love the way that the bright colors accent the room
Love your fabric choices and your stocking shape. I just made my first and I think I made it backwards! The foot is facing left instead of right. hahaha.
Oh I love these! We are Northern Hemispherers living in the Southern Hemisphere and I’ve been thinking of getting rid of our ‘wintery’ stockings in favour of some summery ones. Fur seems really inappropriate for a 35decC summer!
These turned out so darling!
Those are stinking adorable!! Love the bright colors. I really need some pinking scissors. They would make things so much easier. I love your blog. I’m your newest follower. Would love you to stop by DIY Home Sweet Home
Jamie
http://diyhshp.blogspot.com/
P.S. I have a linky every Monday would love you to stop by Monday and link up.
Oooh! Love the fabric. Waverly has such fun patterns.