So here is my first ever furniture rehab project ever! It was so fun and easy and I can’t believe I waited this long to rehab something. I think it was all the sanding, priming and painting I had heard about that was freaking me out. Does that freak you out too? Ugh, I just hate sanding. Maybe because my dad made us wake up at the crack of dawn on the weekends to sand all of our basement doors when we finished our basement when I was in high school. Definitely not high on the list of things I wanted to be doing on a Saturday morning 🙂
Just look at this sweet little vintage children’s bench. Can you imagine having to sand all those spindles?
Not cool.
I bought this little bench at a local thrift shop for only $6, a total bargain. But it looked like this when I bought it…
So much potential yet it seemed like too much work having to sand and prime all that varnish off of it (especially being pregnant) so I literally sat on it for over a month trying to figure out what I needed to do, at least I know it’s a comfy seat!
I finally talked to the lovely ladies over at the most adorable vintage treasures shop called Tattered Tiques and they helped me see the light. The light being the combination of Annie Sloan Chalk Paint and beeswax. They held my hand (and played with my children!) while they walked me through what I needed to do to re-paint a varnished piece of furniture. Ahhh, sweetness.
{Blerg! Look at that icky varnish}
{Ahh, love! Pretty vintage goodness!}
So just in case you might be in the same boat as me…scared of having to sand, prime, and then paint lots of nooks and crannies on a piece of cute furniture…I thought I would share what I did and how it worked for me. It was actually really super easy and took me less than 5 hours from start to finish, yahoo!
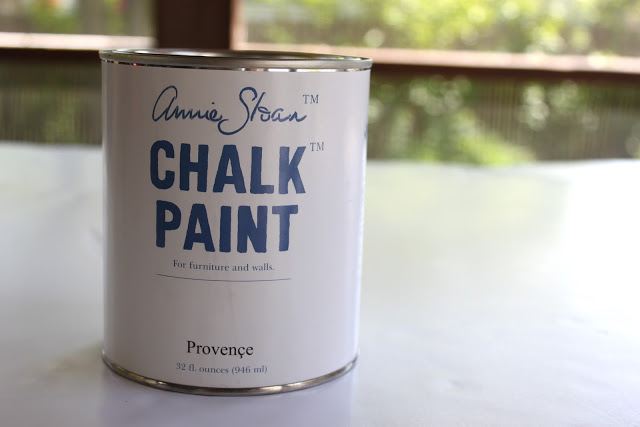
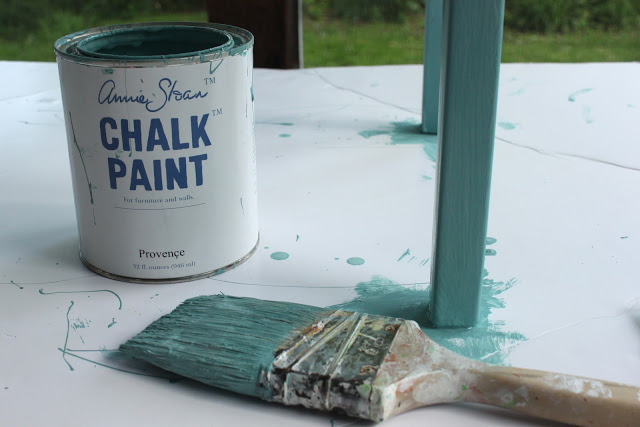
First off, I bought some Annie Sloan Chalk Paint (ASCP). Yes, this little can is quite a bit more expensive than your regular ‘ol paint from Home Depot and Lowes BUT it cuts out so many steps in a furniture rehab project that involves varnish or laminate and to me, that is sooo worth the expense. I didn’t want to have to spend hours on end in my garage with a protective breathing mask on dealing with sanding, etc. Plus, I barely used any of this paint for this project (and I used two coats!) which means I have plenty left for other fun projects I have up my sleeves 🙂 I also heard this paint has great coverage for painting over cement, brick, stone, etc and although I have never tried it on those surfaces I wouldn’t doubt it, this stuff literally rocks my socks off.
Here is my wee little bench after one coat of chalk paint. I just wiped the bench clean with a damp cloth and then painted the chalk paint right on top, no prep work! You can still see the varnished bench underneath one coat of paint, and from what the ladies over at Tattered Tiques told me this is normal. Usually laminate or varnished wood needs two layers of ASCP. The first to adhere to the icky stuff and the second coat for coverage.
Oh, make sure you cover your work surface before you start! I am not the neatest painter on the block so for me this is must. I just put a huge piece of foam board down first…it’s my spray painting ground cover…and placed my bench on top of that. Good thing I did, right? Mr. Smashed Peas would not have been the happiest camper if he had seen I made this mess on top of our outdoor table 🙂
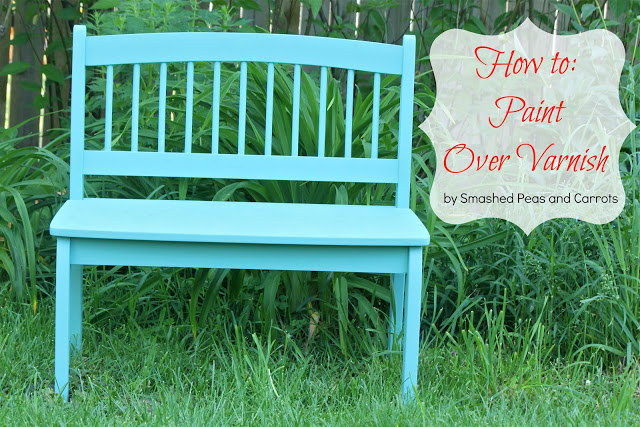
I let the paint dry for about an hour and then I applied a second coat. See the coverage now? Muuuuch better! Actually, it’s perfect!
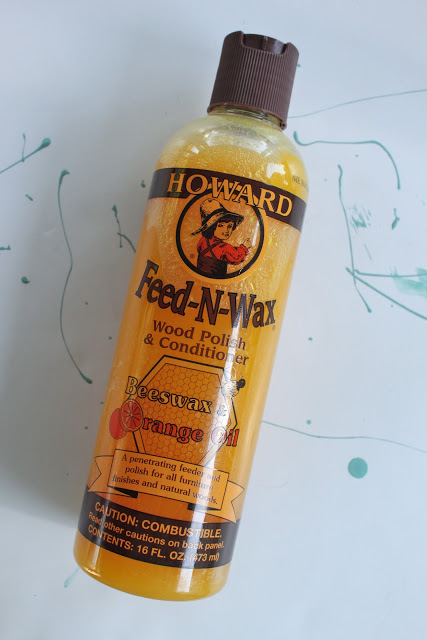
Then I waited two hours for the paint to completely dry and rubbed in some Beeswax. Yup, weird I know. I didn’t even know you could buy this stuff but you can. I bought mine at Home Depot. You could buy the Annie Sloan wax but I was told that this was just as good and oh so much cheaper which it totally was!
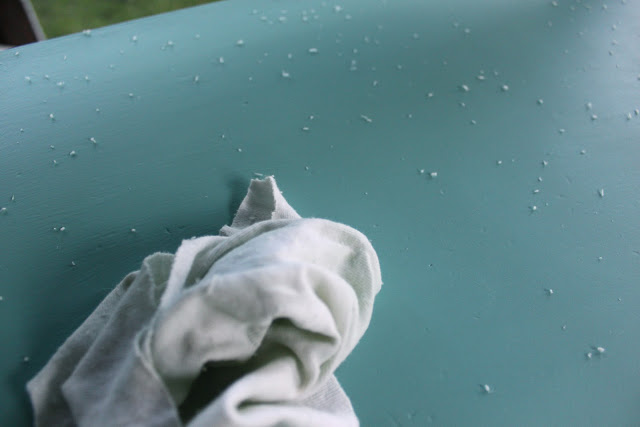
I just squirted some on the bench, a little at a time, and wiped it on using long strokes with an old, soft t-shirt. You want to go slowly and use it sparingly because if you use to much it is going to be really hard to wipe off. Once the bench was completely covered in beeswax I let it cure for about 45 minutes. You can see my t-shirt left little bits of lint all over the chair. No worries, you will just wipe them off later!
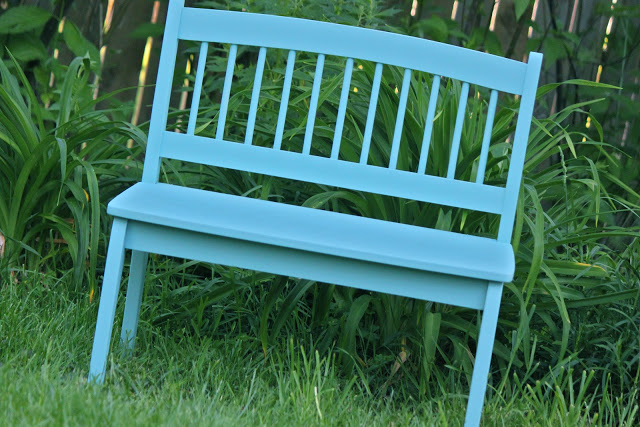
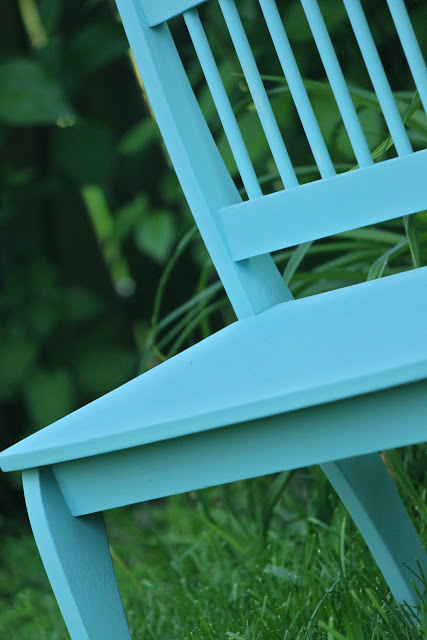
After 45 minutes, I came back with my old t-shirt and rubbed it in using a circular motion. After it was all rubbed in I let it cure for about a day and there you have it! Easy peasy furniture rehab!
As soon as it was done I put the bench in our front room and would’t you know it but my kids were like magnets to it. They loved the new and improved bench and would sit (and stand) on it with their dirty summer sandal feet. I about had a heart attack after I saw all the little black footprints. But, amazingly I just used a damp cloth and wiped it all away with no problems at all. The paint still looks great to this day. I may go back and ‘rough’ it up a bit with some fine grade sandpaper but for now I like the clean look of it. What do you think?
So the end all be all for me is that I love me some Annie Sloan Chalk Paint, yup, LOVE! I just think this stuff is the greatest thing since sliced bread. Go get some today, there are tons of amazing colors and so many furniture rehab possibilities with it! I’m currently eyeing the French Linen and Versailles colors…so pretty!
By the way, this is not a sponsored post just my true feelings about an amazing product! Although I will gladly accept any ASCP sent my way 🙂
Thanks for stopping by and reading today!








I just bought some ASCP last week. All I’ve managed to paint are some picture frames. I have a side table next on my list and the ease that you did yours makes me super excited!!! This ASCP is an amazing craze that I love! It’s a miracle working paint 🙂
OMGosh, I am so excited for you Aimee! ASCP seriously is awesome stuff! I can’t wait to paint more furniture with it!!!
Where can you buy the Chalk Paint…just wondering if I could get it somewhere local.
That is adorable! Do you think this method would work for a kitchen table? Would it take the abuse of food spills and wiping down several times a day?
Hi Maureen! I think this would totally work for a kitchen table! Most furniture rehabbers seem to love ASCP for re-doing dressers and kitchen tables and both those types of furniture can take a licking! I also think you could re-apply the beeswax every so often too just to keep the top in tippy-top shape! Have fun!
great table! I’m thinking of redoing my dining room table and chairs, but I wasn’t looking forward to all the sanding – especially being my first project =) Thanks for the info! Now I can convince my hubby that IT IS doable without all the sanding!
YES!! It is totally doable and won’t take forever!! You will love this paint product as it has saved me so much time…worth it!!!!
do you see the wood grain thru for this annie sloan chalk paint? want to paint kitchen table, but hoping some wood grain will show. I have a alder table with a varnish/stain on it in early american orange oak colour, want to paint it grey.
You will see the grain on the first coat, typically the second coat hides it though it may depend on the color you are choosing to use!
SO very cool. I’ll have to check out that paint. Love all the pix – it’s nice to see a start finish!
Thanks Carolyn 🙂
Are you kidding me?! This is a project I can totally handle!! (and this after sanding our kitchen table and chairs and coating the table in several coats of polyurethane and letting it dry for three days while we ate off the sofa. . . .) LOVE this! I’m also extra excited it was easy to get footprints off. 🙂
LOL Emily! I’m not kidding! This paint rocks! And you can eat off of it the next day, lol!!!
Oh I LOVE the colour!
Hm, and I hope, I can buy that kind of chalk paint here in germany- My next project is: paint the playkitchen of our daughter and till i read your post, I thought I have to sand the playkitchen and so on, but now… =)
Might be, it will be a funny project and not a long long way to a new painted playkitchen 😉
thank you for the inspiration! I’ll look for paint now ^^
Oh, I really hope you can buy this paint in Germany too, that would just be cruel now!!
I LOVE this—-I didn’t know you could do this without sandpaper—this is amazing. It may be life changing;) Thanks for sharing!!!!
Yes!! No sandpaper needed!!! It is life changing, I agree!!
Thanks so much for this idea! Love it and it sounds so easy!
Hope you try out this paint, you will LOVE it!
Cute. It’d be way cute with a patterned, removable cushion, too!
Oooh, now that does sound cute! I may have to look into that now, thanks!
Great job!
Thanks my dear!! 🙂
Thanks for sharing. I love great products that make a job easier. The bench is precious.
Thank you Ramona!! 🙂
I wished I had known about this before I redid a dresser for our youngest. It took me two weeks because of all the steps that you hate and I happened to also get sick, I’m really not that slow of a worker
Ugh, that is what I hate about furniture rehab…all the time it takes to wait for things to dry, the sanding, etc. So glad you finished it though!
This paint looks and sounds remarkable. It is a little spendy, and the colors are fun, I don’t know if I’d need a hole quart of Barcelona Orange for my project, but I need more than 4 oz. It would be fun and economical to be able to trade 1/2 used cans with someone else to get more colors…just an idea.
That would be such a great idea since sometimes you only want a pop of color on one piece of furniture or in one room!!
Do you think this is okay for surfaces to eat off of? Not sure what else besides wax is in it as your picture has a big “warning: combustible” on it. Do you know?
That’s a great question! I know you really rub in the beeswax and it is used mainly as a protectant. I know you can eat off of a varnished or lacquered table and I’m sure the warnings on those are much worse!!!
Good to know about the beeswax, I actually bought the Annie Sloane wax. But I agree it is worth the extra money for no sanding and priming.
YES!! It totally is…I love it!!
It’s gorgeous! I’d love to search for old furniture at the thrift shops, but it’s in a really bad part of town. 🙁 I’m on the search for a larger dresser than the one I rehabbed 7 years ago. 😀
Oh, that would be so fun to makeover! I hope you can find one soon!
Epic! That liquid is so powerful.
Seriously, it is heaven in a can!
What color did you use for the bench? So cute!!
Provence is the color I used!!
Love your bench!!!
Does the beeswax make it feel greasy at all? I bought the cutest little kids rocker at a garage sale today. It’s varnished and pretty beat up (AND I’ve never rehabbed any piece of furniture- ha. I got brave and just couldn’t pass the rocker by!) but maybe this paint is the answer?! I just want to be sure it is a good paint for an indoor piece of furniture that will be in a kids room. What do you think? Thanks in advance 🙂
No greasiness, I swear! You rub the beeswax in about 30 minutes after you first wipe it on and it magically just soaks into the paint. The finished product feels just like the paint…so cool!
What an awesome transformation! How much paint did you end up having left? I have a project I need to tackle and I’m trying to judge how much of the ASCP I’ll need. Thanks for sharing! 🙂
I ended up using somewhere between 1/4 and 1/3 of the can. So not a whole lot especially since I even used 2 coats of it!
Where were you able to buy this? Did you order it online?
I bought mine at a local antique store, mentioned in the post above with a link. You can also order it online I believe!
It looks super cute! What a great color!
Thanks Jennifer! 🙂
Wow, so glad I found your post! Just bought an old varnished dresser and was all prepared to do some serious sanding before the paint coat. Thank you so much for saving several hours for this also preggo mama 🙂 hugs!
Good luck and have fun Sabr!
OK, so sorry if this is a dumb question… but would this work for kitchen cabinets also, seems like it would right? or is there something/ someway better for that?
and thanks for sharing your talent!!!
–Julie
I think it would work just fine! Let me know how it goes if you try it!
Love this! I have been wanting to paint a little table my toddler uses but I was dreading the sanding!!!
The sanding is the worst, isn’t it!!
Would this paint and the beeswax work for an outdoor bench? I really want to try it on a bench I don’t want to sand but don’t want to waste the money if it isn’t good for outdoor use. 🙂
Hmm, I’m not sure how this would hold up outdoors? Maybe the ASCP website has more info on that for you?
Oh and I LOVE your bench! The color is adorable!
Thanks Hallie! 🙂
Your pictures are great and the color you chose is fabulous! I have a piece I’m going to paint this weekend that same color … adding chippiness and stain afterward. Thanks!
Ooh, that sounds awesome! Have fun!
Do you think it would work on my banister?
It should! If you do it, I would love to see a before and after picture, it sounds like a fun project!
Love your project! I need to do an entire hallway of 6 doors and trim… do you think this would work? What kind of finish do you think it might have on a smooth door?
I think it should! The chalk paint dries smooth and has a soft satin-y finish I would say. It would look awesome on a door and trim.
This turned out so cute!! The color is perfect. Thanks so much for mentioning us and or little shop. We had such fun meeting you and your darling kids. Congrats on the 4th…what a precious gift! Come back and see us soon….bring the new guy!
Anne
Thank you so much Anne!! You ladies were so awesome, I am so in love with my new-to-me bench as are my kids! I definitely want to stop by again and get some other colors…and I will for sure bring my new little guy too!
XOXO,
Mags
Great job on the bench! The color is perfect. Thanks for mentioning us and our little shop. We had such fun meeting you and your darling kids. Congrats on the 4th….what a precious gift! Come see us soon…bring the new guy!
Anne
Nice work on the bench! It is adorable! The color is perfect. We had such fun meeting you and your darling kids. Congrats on number 4….what a precious gift. Come see us soon…bring the new guy!
Thanks very much for this great tip, is really valuable to people like projects like yours.
Is ASCP avaliable in Home Depot?
Sincerely,
Carry
No, I think it is only available at specialty stores or online, check the ASCP website (linked above) to find a store near you!
How fun! I didn’t know this (or any paint) could be used over lacquer but now there is hope for my bedroom set. I wasn’t about to move or sand any of it LOL
LOL! I hear you Aimee! You will love this paint then!
I’m trying to paint an old kitchen table that has a veneer top. I would have liked to use the paint you used but they do not have the color I am looking for (espresso/dark brown). Do you know of any other brands of similar paint with more color options? Thanks!
The place where I bought mine said they could mix paints together to achieve a custom colour. Also, ACSP sells coloured waxes that darken/lighten any of the paint colours.
Awesome bench! What is the purpose of the beeswax? And do you know anything about refinishing metal?
can i buy regular chalk board paint in place of ASCP?
Hmm, I don’t think so…I’ve never tried it though but ASCP seems different in consistency.
This comment has been removed by the author.
Thanks for the wax tip. I was thinking I had to spend the $$ on the AS wax and the fancy brush. So excited to use a tshirt and beeswax! Has it held up well? I’m getting ready to do a breakfast table and hutch.
What if you wanted to paint another color besides blue. Does ASCP finish in any different colors?
Love your blog! I’ve been doing some research as I need to restore some pine furniture and I’ve found your blog really helpful, thank you!
Came across your post and was so inspired I immediately got my hands on some of his paint (in duck egg). It was the first I had ever heard of chalk paint. I have a long list of things to paint at home now!
I hope you don’t mind, but I mentioned your blog on mine 🙂
Please let us know how this is holding up a year later. I worry about chipping without priming and I worry about it rubbing off or getting dirty easily with chalk paint.
Thank you!
Hi Andrea!
My bench is still perfect! It has held up wonderfully! There is no chipping on it at all. It does get dirty though, it’s used as a seat for my littles to put their shoes on so lots of dirty little feet touch it daily but it cleans really easily with a wet paper towel or a clorox wipe. Highly recommend this method and hope you give it a whirl!
How much paint did you have left over? Do you think one can will cover a dresser?
I probably had about 2/3 of the can left over after this project. It will depend on the size of your dresser for how much you will need!
Maggie – Did you use primer?
Nope! Just the chalk paint and beeswax was used!
Thanks very much for this posting! Your bench looks great. I’m defs checking into that paint for a wood project I have.
I bought a dresser at a thrift store recently. It was solid wood from the 1940’s-bowed front and original hardware. But, it has little spots and nicks all over it and I thought it would be a good paint project one day. I decided to try and clean off as much as I could with mild dish soap and water, but it did not make much of a difference. Then I put some of the beeswax product on it that you show in your blog and every single spot disappeared like magic! I thought for sure they would all be back the next mornign when I got up, but they did not come back. It’s been a week and that dresser still looks like new. I am shocked but so happy I accidentally made this discovery. I will not be painting this dresser now.
Debbi, that is soooo awesome!!! And hooray for loving it the way it is now!!!
xo,
Maggie