 I am so excited to be a part of the Home Sewn series that my friend, Susan, is doing over at her blog Living with Punks. I just love Susan and feel like I’ve known her forever. She has such a great eye for decorating, have you seen her little girl’s room? It is so awesomely well done that I want to live in there! Susan invited me and a whole bunch of other lovely bloggers (see above!) to participate in her new series this month called, Home Sewn. It showcases lots of pretty home decor ideas that are, duh, sewn! You will love it if you haven’t been following along already!
For my turn as a guest blogger I thought I would show y’all how to make one super sweet and shabby chic Ruffled Embroidery Hoop Laundry Bag! It can be used for your laundry or maybe you need a pretty place to store your fabric scraps or even your yardage that needs to go through the wash. It’s a bag of many functions I tell ya!
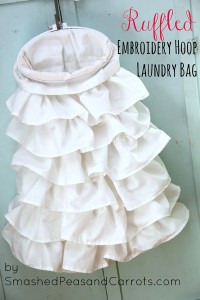
I am just loving all the pretty, flouncy ruffles on this laundry bag. It is definitely one that you will want to keep out and not hide in the closet or bathroom!
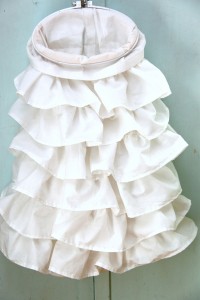 It uses a simple inexpensive embroidery hoop to not only keep the top open but also to hang it with. I just spray painted mine white so it blended in nicely with the bag.
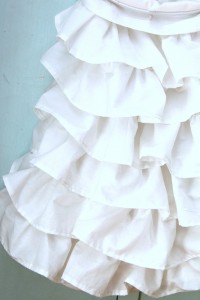
So let me show you how to make one!
Ruffled Emroidery Hoop Laundry Bag
1 yard of white home decor fabric (may also use duck cloth or a heavier type material)
2 yards of bleached white muslin
4.5 x 9 inch oval embroidery hoop
white spray paint
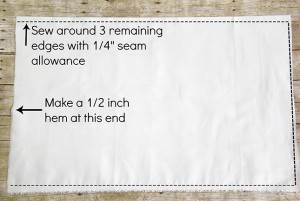 The first thing you need to do is lay out your yard of white home decor fabric. You will be using the majority of this yard. Fold the yard in half so it measures 36 x 22 inches. On one short side, fold the edge over 1/2 inch and then another 1/2 inch and hem in place. Then sew all the way around the remaining 3 edges using a 1/4 inch seam allowance (see picture above).
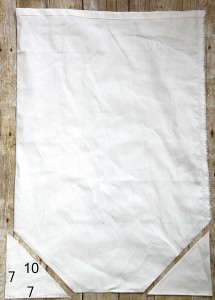 Next you will cut two triangles measuring 7 x 7 x 10 inches off the bottom corners of the bag (the end opposite the one you hemmed!). See picture above for how to cut.
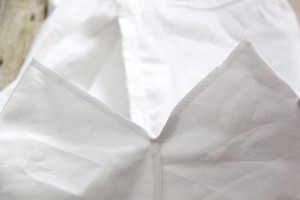 Now this next part is tricky to explain as you are going to be making the laundry bag have a flat bottom. You are going to sew these fresh cuts you made closed but not by just sewing them closed one on top of the other. You will need to open up the fabric along each 10 inch side and press it together in the opposite direction so that the bottom corners come together. Click here to see another way to look at this on post I wrote about sewing together a flat bottomed bag. Sew together using a 1/4 inch seam allowance.
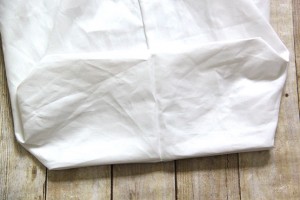 When you are done you can turn your bag right side out and it will look like this on the bottom once you push in each of the 4 corners. If you’d like you can cut the flaps of inside the bag and sew them shut but that step isn’t totally necessary.
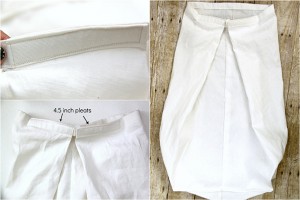 Then we are going to place a pleat at the top of the bag so that we don’t have the material bunching up around the embroidery hoop. With the bag right side out you will make two pleats measuring 4.5 inches each on each side of the middle of the backside of the bag (see picture above). Sew them closed using a box design to make a strong stitch.
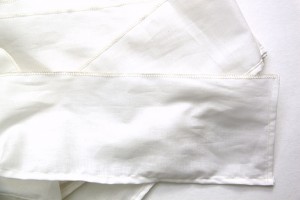 Next you will take your muslin and cut it into four strips measuring 5.5 inches x 72 inches and two strips measuring 5.5 inches x 60 inches. Make a 1/4 inch hem along all sides to finish your ruffles. If you have a serger you can use that to finish the edges, I used mine just to finish the top edge that will be sewn into the laundry bag.
Then gather the tops of each ruffle using your sewing machine.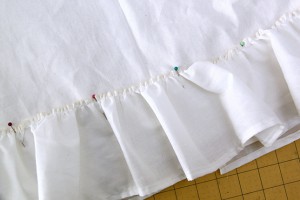
The four long ruffles will go on first starting at the bottom of the laundry bag and the two smaller ruffles will be placed at the top where the narrowed opening was just made. Pin the ruffles in place starting with the lowest ruffle and making sure the bottom of the ruffle just brushes past the bottom of the bag. Sew it on carefully and then continue with the next ruffle layer. There should be room for slight overlap with each layer that will meet at the middle of the backside of the bag.
The top ruffle should be placed about 4 inches from the top of the laundry bag so that when you place the embroidery hoop on the excess fabric will hide the gathered part of the ruffle.
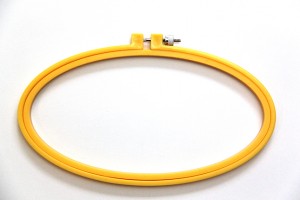 Finally, you can paint your hoop white to match you shabby chic laundry bag if you’d like. I just painted the outer hoop but I think I will go back and do the inner hoop to just to be consistent!
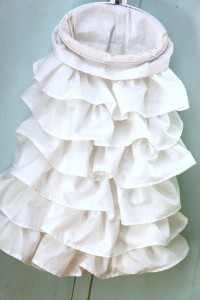 Then place your laundry bag in the hoop, cinch down and hang up!
 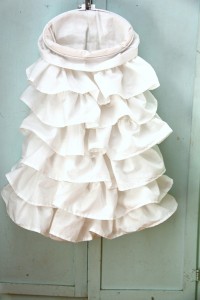 Adorable, isn’t it!
 P.S. Don’t forget to head on over to Living with Punks to enter Susan’s huge giveaway for the Home Sewn Series! What an awesome grand prize!!!!
Thanks for stopping by today!
Love,
Maggie


Pretty!! I’ve got a Craft Gossip post scheduled for later tonight that links to your tutorial:
http://sewing.craftgossip.com/tutorial-embroidery-hoop-ruffled-laundry-bag/2014/03/20/
–Anne
Awesome! Thanks for the link love, Anne!
Love,
Maggie
Thanks so much Maggie for the adorable idea! I absolutely LOVE it! xoxo
OMGosh! Anytime, Susan! Thank you so much for having me, I am loving this series!!
Love,
Maggie