This year when we were deciding what to grow in our garden my hubby read about raised bed gardens and all the great things about them so one weekend he decided to whip up a whole bunch of raised beds (Mr. Smashed Peas is pretty darn crafty himself especially in the carpentry department) and we set out to plant our little ‘farm in the city’. We filled each bed up with rich compost soil and decided to plant either things we love and can eat immediately (salad greens, swiss chard, carrots, broccoli, etc) and things that we love and I could can for future use. I really started getting into canning last summer but mainly made fruit jams and preserves (yummy!) this year with a push from our garden I am going to really venture into the realm of vegetables starting with pickling cucumbers…making my momma proud!!
Our garden is exploding with produce right now, it is really amazing what a difference a raised bed, a good location and good soil can do for veggies. We are picking salad greens, cucumbers, summer squash, zucchini, green beans and broccoli on a daily basis which makes for some delicious summer dinners.
We planted 3 different varieties of cucumbers this year, two which are pickling cucumbers and the other which is a variety good for salads and pickling (it’s skin is more smooth than bumpy). You can see the pickling cukes I just picked above. As much as I love eating fresh cucumbers I really wanted to grow them to make pickles 🙂 We go through so many jars of pickles every year, especially in the summer with all the entertaining we do that I thought why not try my hand at making them myself.
I found a bunch of old sheets of recipes at a thrift store one day, flipped though them and saw what looked like an awesome recipe for Spicy Pickles, it didn’t even call for boiling water…umm, I had to try these. I paid my quarter and the recipe came home with me that day 🙂
Refrigerator Spicy Pickles
Recipe Type: canning
Prep time:
Total time:
Serves: 3-4 pint jars
Ingredients
- 5-6 pickling cucumbers, washed and sliced
- 1 cup water
- 3/4 cup distilled vinegar
- 4 cloves of garlic, chopped
- 1/4 cup white sugar
- 1 1/2 tsp pickling spice
- 3/4 tsp dill seed
- 2 tbsp dry dill weed
- 2 1/4 tsp salt
- 1/4 tsp crushed red pepper flakes
- 3-4 sprigs fresh dill weed
Instructions
- In a large bowl, mix together water, vinegar, garlic, sugar, pickling spice, dill seed, dill weed, salt and crushed red pepper flakes.
- Whisk together until the sugar is dissolved.
- Add in all of the sliced cucumbers and mix thoroughly so that all cucumber slices are coated.
- There will be more cucumbers than vinegar solution.
- Let stand for 2-3 hours on countertop. While waiting, clean and dry 3-4 pint canning jars.
- Add 1 sprig of dill to each jar.
- When ready, pack cucumbers into each jar leaving 1/4 headspace.
- Pour vinegar solution over top, seal and refrigerate.
- Ready within 7 days.
- Eat within 1 month.
Okay, so slice up those cucumbers…every. last. one. Don’t forget to discard the ends!!
Grab one cup of water and one cup of vinegar and pour into a large bowl.
Next add in 1/4 cup of sugar and 4 cloves of garlic. I cheated and used garlic in a jar. See, I’m not perfect…not even close!
Then add in all your spices. Just remember to add in your dill weed too, it missed the photoshoot…something about it just couldn’t work under these conditions. Diva!
Whisk everything together and you’ll get something that looks a bit like this…dill weed floating up on top, normal, totally normal folks!
Add in all your cucumber slices and mix it up well.
Mmm, not only does it look good but at this point it smells good. Pickle-good if ya know what I mean. Please do not worry if the vinegar solution does not look like there is enough. After we wait it out a few hours we’ll see the oohs and ahhs of one of the greatest subjects of all, biology! And I don’t just say that because I took like a gazillion classes in it in college and majored in it too, it just is one of the coolest…hello? osmosis, diffusion, equilibrium? …all totally rad words with even cooler definitions…see, totally the best subject!
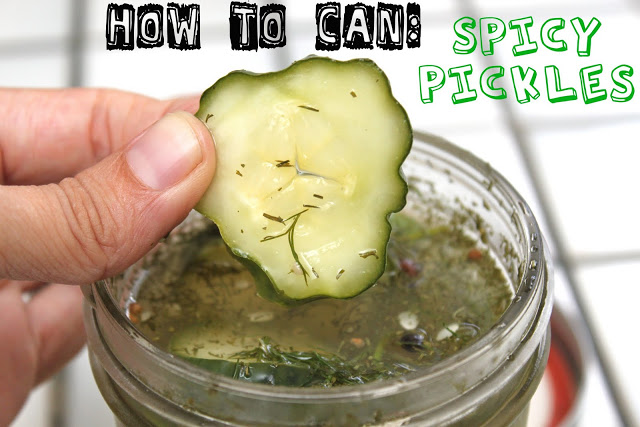
Okay, so go ahead and try one if you’d like…the taste will only get better from here 🙂
Now since you’ve had a little snack, go and clean up your mess. While you’re doing that, do you wanna clean up my mess too? You’ll want to do something cause you have a good 2-3 hours to wait while those cucumbers get all saturated and pickl-y!!
After you’ve endured such a long hard wait, it was tough wasn’t it? You will see how osmosis was at work. Your vinegar solution is doubled in size! Kazam! How did that happen? Oh yeah, BIOLOGY! The water will move out of the cucumbers (lower concentration area) into the vinegar solution (higher concentration area) to help get everything to equilibrium…rad!
Check out all that salty, spicy solution…neat-o, huh?
Okay, okay enough with the science lesson you say! So next take your fresh dill weed and smell it…mmmm, good! When you are done cut it into 3-4 pieces.
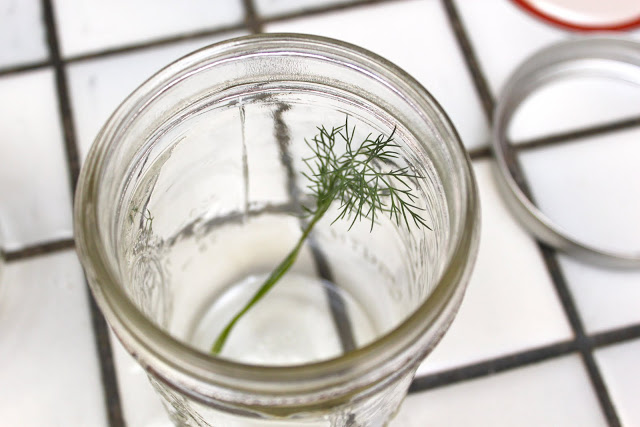
Add one piece to each of your canning jars…this one looks pretty measly in this shot but it really was much nicer, promise.
Now grab a pair of tongs or something similar and load up those canning jars, packing your cucumber in nice and tight. Leave about a 1/4 inch of headspace at the top of the jar.
Then pour the vinegar solution over top and add the remaining bits of garlic, pickling spice and red pepper flakes on top.
Gorgeous!
Aren’t they just lovely!!
Seal those babies up by placing the lid on top and then screwing on the band.
Refrigerate for about 7 days to let the flavors blend and the cucumbers soften a bit. But really, who am I to tell you to wait THAT long. That just seems mean. I think you should try one right now, then in one hour, then in another hour…let’s see if we have the willpower to have any left in 7 days. Challenge on!
Willpower? What willpower?
Enjoy!!
XOXO,








ew, science nerd… 😉 lol! Those look really tasty! When it says spicy is that like SPICY or is that more along the lines of ‘flavorful’?
Refrigerator pickles need to be a part of my life on a more consistent basis…
It’s more like zesty…not super hot! You NEED to add refrigerator pickles to your life…why? Because I said so…now go make some!!
Do you have a recipe for sweet pickles? Can’t wait to try this one! I have cucs coming out of my ears.
Those look so yummy. I love pickles. I didnt get a summer garden in this year but I am excited about a winter one.
Thank you so much for this post. I want to let you know that I posted a link to your blog in CBH Digital Scrapbooking Freebies, under the Page 3 post on Jul. 23, 2011. Thanks again.
Do you know if there is a way to can them so they last longer then seven days. It is just me and the hubby and we would love to can them so we can have them in a few months. I havent really canned anything, but growing things that I will start canning…so I have no idea what I’m doing.
Those pickles look delicious! I have never canned anything and would love to learn more about canning. Do you have any good resources for first time canners? I loved your step by step pictures. It really helps it make sense for me!
That recipe looks great. I will have to try that this weekend and can some. For anyone interested and new to canning I found the CanningUSA.com website very useful when I started out.
Happy Canning!
Mmmmm, those look really good! Great pictures too!
I just made these and I can tell you that they won’t be around in 7 days. The smell of the mixture is great!