
{Avery Printable Tags with Strings #22802}
Today I wanted to share with you how I designed all the food tags and tent cards as well as the goody bag stickers for Eloise’s Vintage Milk and Cookies birthday party seen in this post here.

{Avery Small Tent Cards #5302}
A few weeks before Ellie’s birthday party Avery contacted me and asked if I would like to try out some of their products to help with Eloise’s party. Yes, please! I immediately new which products I wanted to try and the wheels were turning on just how I was going to design them.
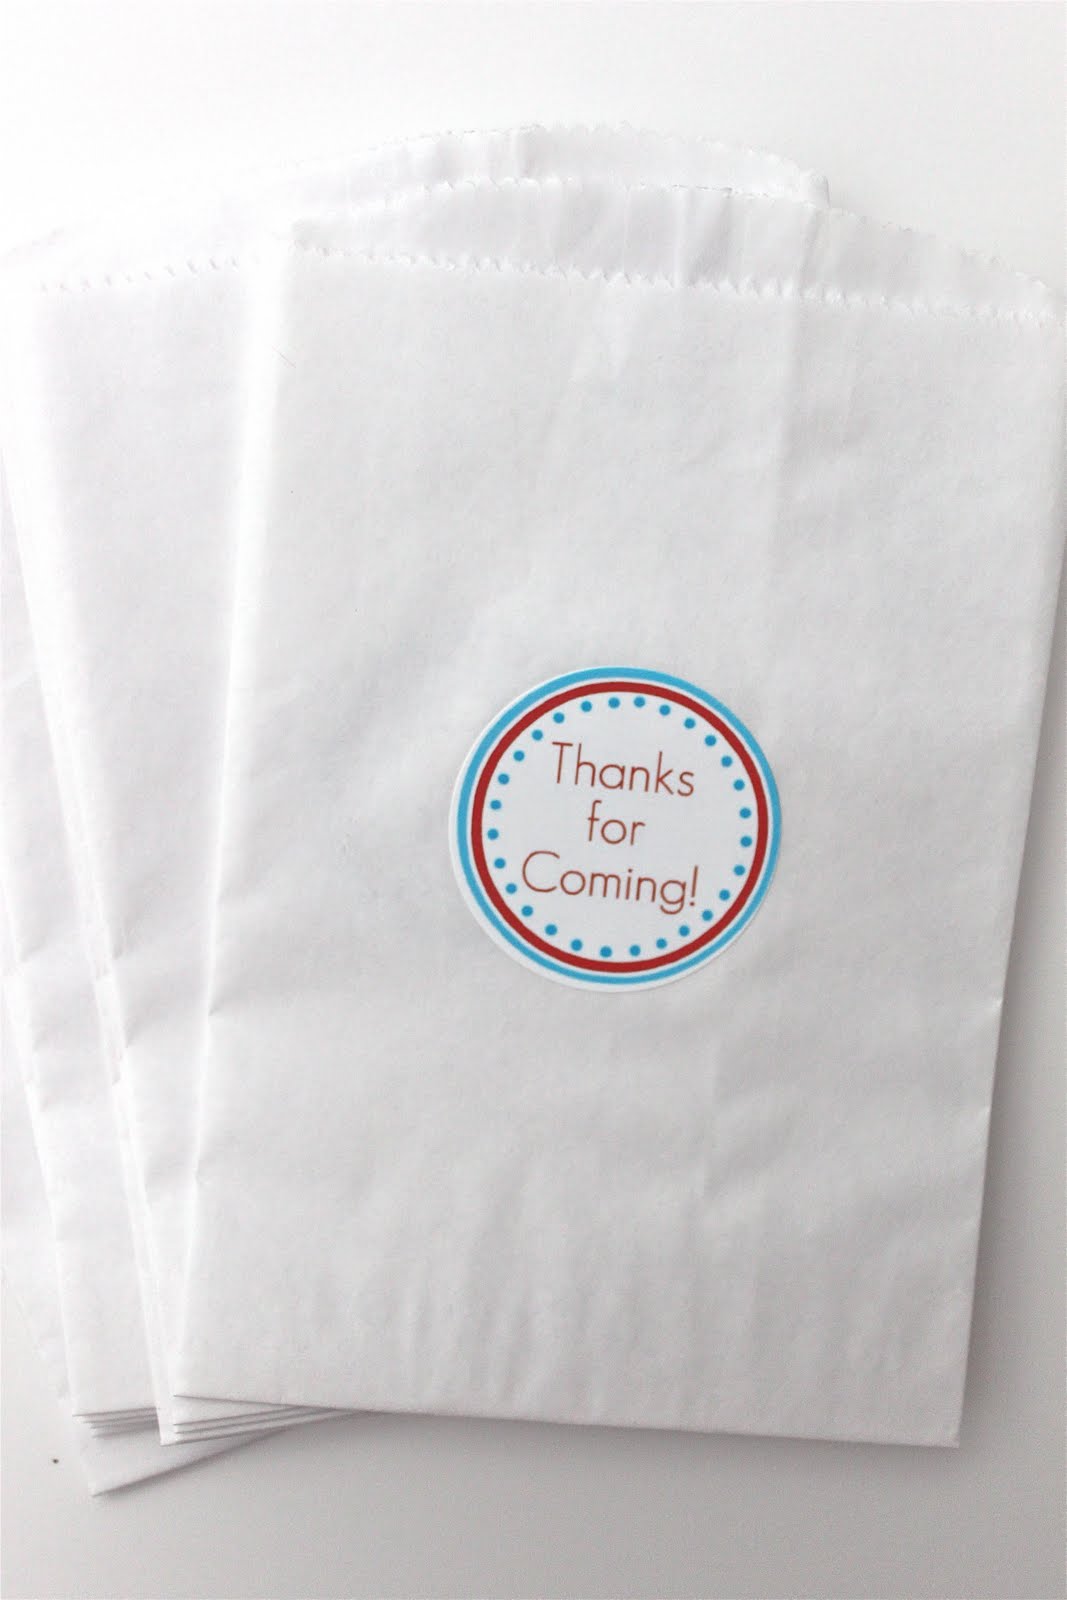
{Avery Print-to-the-Edge Round Labels #22807}
One night after the kids were in bed I hopped on to Avery’s website to design the labels. It only took a few hours to do, if you can believe it. I am not a super computer/techie person and I found Avery’s Design & Print Online program really easy to use. I’ll walk you through how I made the tent cards below!
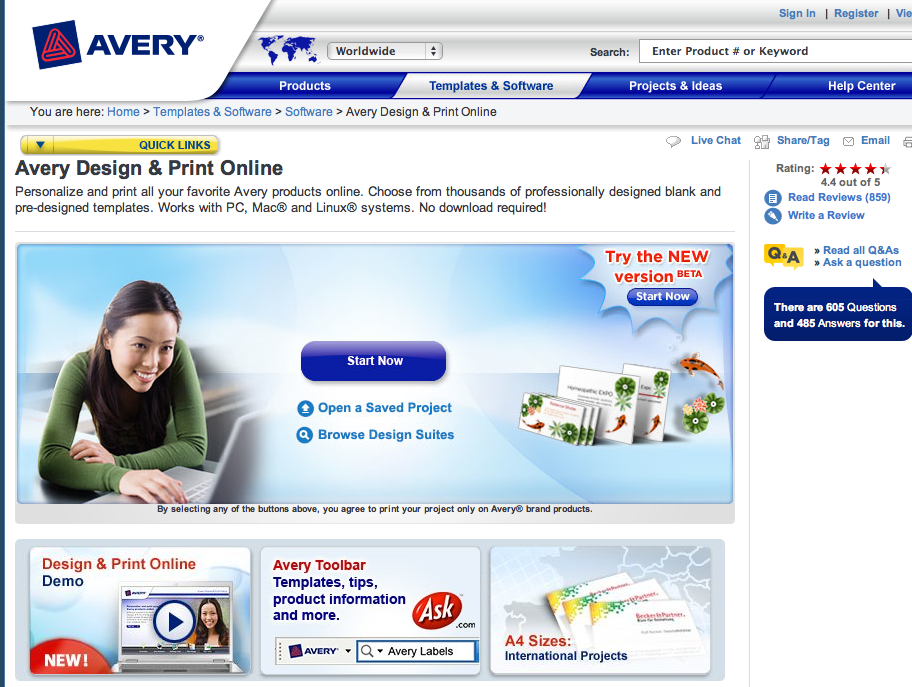
This is the homepage for Avery’s Print & Design Online Center. Just click on the blue ‘Start Now’ button to start designing your labels.

The next page you are brought to is for helping you to find your Product via the Product Number or a Description of the Product. Since I am going to show you how I designed my tent cards I typed in ‘5302’ in the blank space as those were the tent cards I was using. Once you type in your number or description just hit enter.

The next page will give you all sorts of options for the particular product’s design options. To make my tent cards I just clicked on the first picture, the upper left one as this one gives you a completely blank space to create any design you want. Many of the other options show all sorts of designs or color backgrounds, there are so many it could be a bit overwhelming if you were just there to browse and didn’t already have something in mind.

The next page asks you if you want to do Enhanced Editing or a Mail Merge. Since I wanted free range for my tent cards I chose the Enhanced Editing button but really had no need to do a mail merge, that would probably work really well for address labels.

Then the program takes you to your design page, this is where the magic happens! 🙂 Here you can play with text and shape boxes and choose how you would like everything to look, I loved how there is an option to add grid lines (which do not show up in your final product!) they were a huge help in making sure I had things centered correctly. There is also an option to copy everything you have done to all the other tent cards on the page…no more having to line up everything each and every time, woot! There are also lots of color and font options too.

When you are done and ready to print you just hit ‘Next’ at the top right of the page and it takes you to the print page.
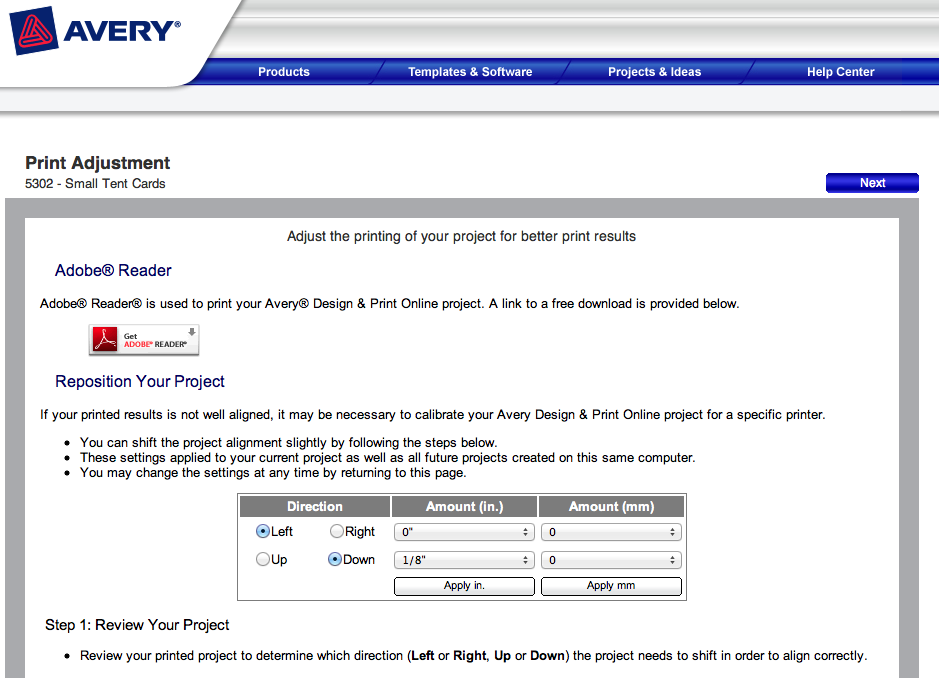
Word to the wise though, make sure you print out your first page on just a plain piece of paper. Your printer may be slightly off so you may have to go back to re-align the labels to the page by a few millimeter or so. I had to do this with each type of labels I made. I printed off the tent card sheet on plain paper and then held it up to a light with the unprinted label sheet on top to see how accurately it was lined up. Then I did it for reals…totally helped me save from wasting my precious labels!!
Okay, so that’s it! I have to say once again how this program was really easy to use. If you have any labels, be it address labels or thank you cards, this is a super easy way to make them personalized to you or your party. Hope this little walk-through helped you some and as always, let me know if you have any questions!
XOXO,


I remember these labels and now that I have read your easy to follow walk-through, I’m definitely doing this! Love your color combo with the party labels. Thanks!
Does it cost anything to use their website for the design process.
Thanks
VickiS
Nope!! It’s totally free!!
I can’t seem to figure out how you created the blue and red borders on the Print-to-the-Edge Round Labels #22807…I’m assuming you created these in the Avery Print and Design Online Center as well.
HI! I actually did those stickers in Picnik and imported them before I started using the Avery templates…it was a ton of work so I would not suggest it. It was so much faster just working within the Avery system for the other labels!