

So here’s a peek at the old furniture look. Yikes on the electric orange, yellow, and red! We had originally bought this little child’s table and chair set at Ikea about 5 years ago for Noah and his bright green room (more on that make-over in another post!). I still liked the bright colors of it but I wanted it to be more simple and well, white, so I could put it to use in the girls’ room (which we used to be Noah’s bright green room). The look of their new room is soft and feminine…I love it…but that is for another time, today we talk laminate make-over!
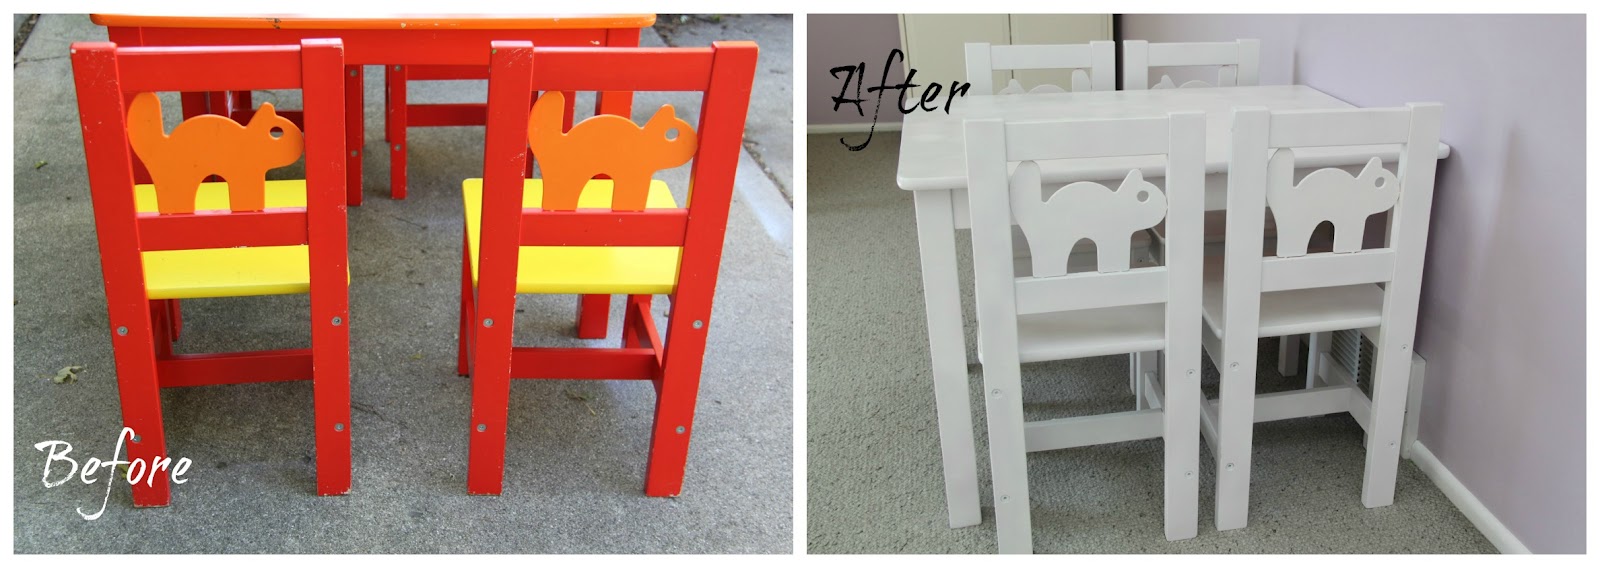

The laminate was chipping on some of the edges due to normal wear and tear. I thought this would be a plus in my make-over as it might give the new paint some character so I didn’t sand any of the chips and dings down at all. This set was in our basement being unused for the past year so I just did a quick wipe away of dust and then a little scrub here and there of old kid goo that just comes with 5 years of toddlers living in my home.

I ended up going through four complete cans of this. Zinsser Cover Stain Oil-Base Primer. This stuff rocks…big time. It allowed me to cover that dark yet oh-so-bright orange/red and do so WITHOUT sanding any of the surfaces! Cut out a step? Yup, I am all over that! I need to work quickly during Oliver’s naps so I tend to choose spray paint over regular paint in a can. I just can’t deal with brushes and drips when I’m on a time constraint, I’m waaaaay to impatient. This stuff was the perfect thing for me.

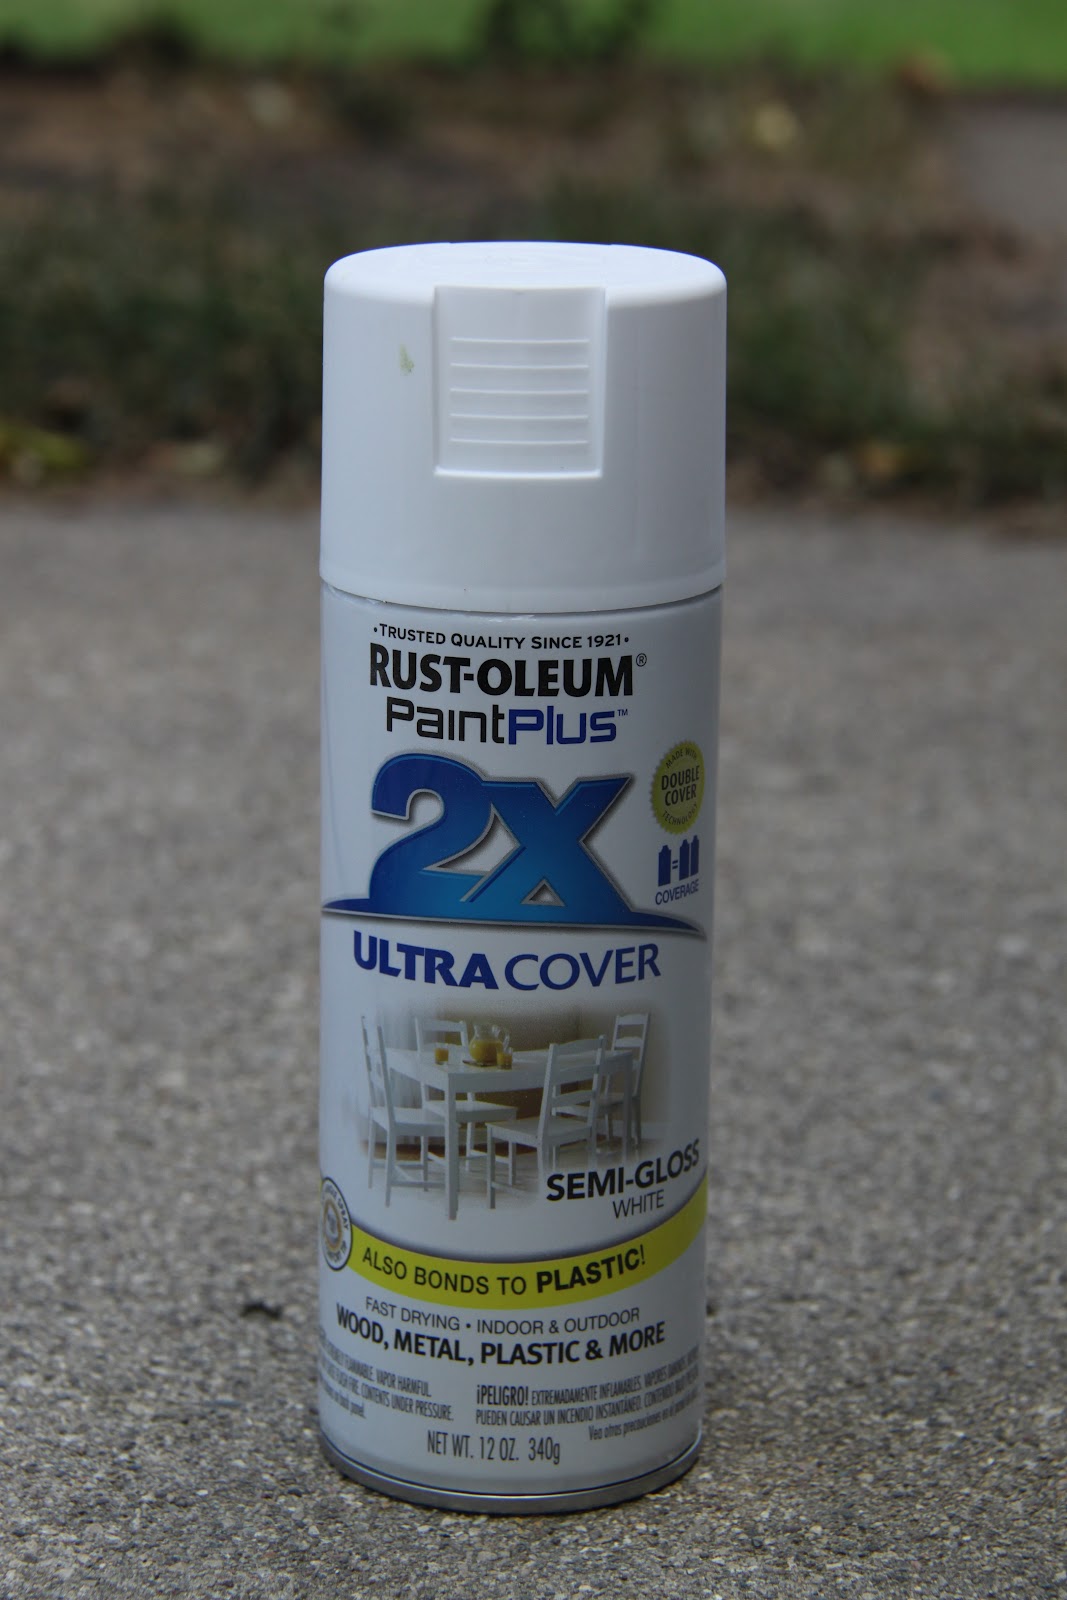
Then I used this stuff. Rust-Oleum Paint Plus in Semi Gloss White. I LOVE this spray paint. It covers so dang well. I feel like it’s an endless can of spray paint with how many projects one can covers.
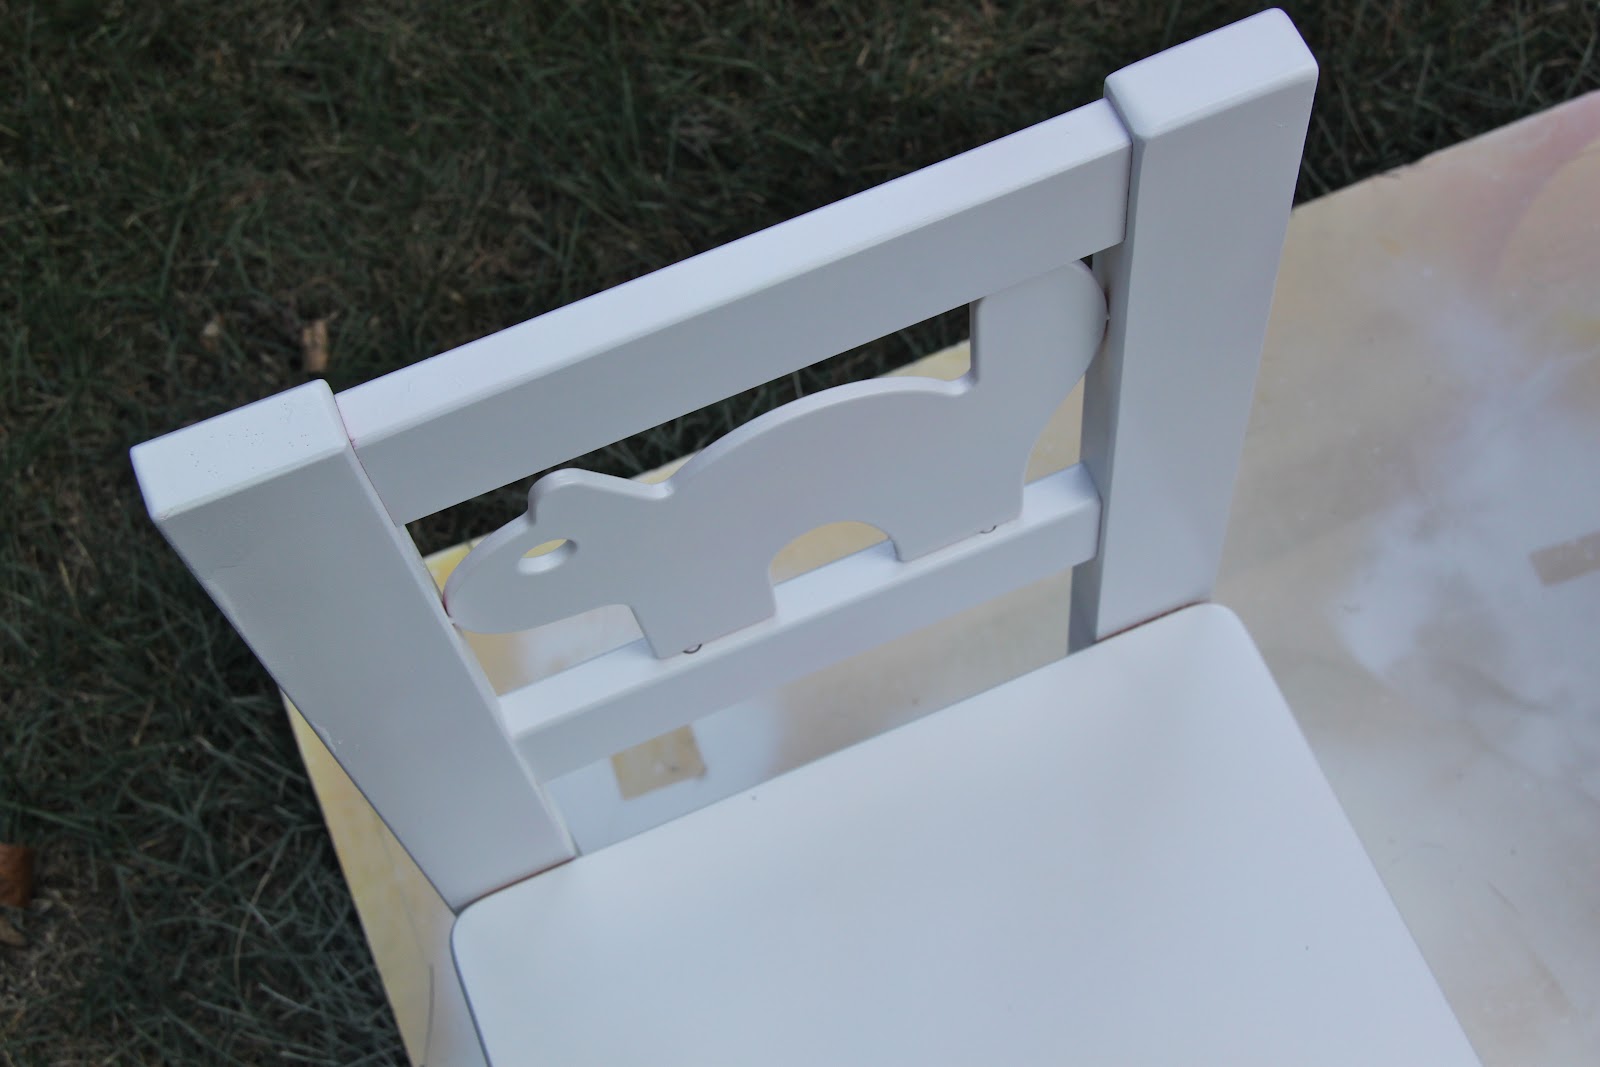
I used one, that’s right ONE, can of paint to cover the entire set of furniture. Awesome. I gave it one coat as the coverage was so great. You see, even those little nooks and crannies by the squirrel cut out were covered nicely.

Do you see that coverage? Love it. PS. Please ignore my new-to-us white grass, Christmas has come early around these parts 😉 No really, I should probably use a drop cloth but the impatient in me just has no time to get it out.


I let everything dry in my garage for a day before bringing it all inside to get the ‘royal’ treatment for the kids, ie. crayons, markers, chairs being tipped over and stood upon.

And guess what? The paint has stood up fine!
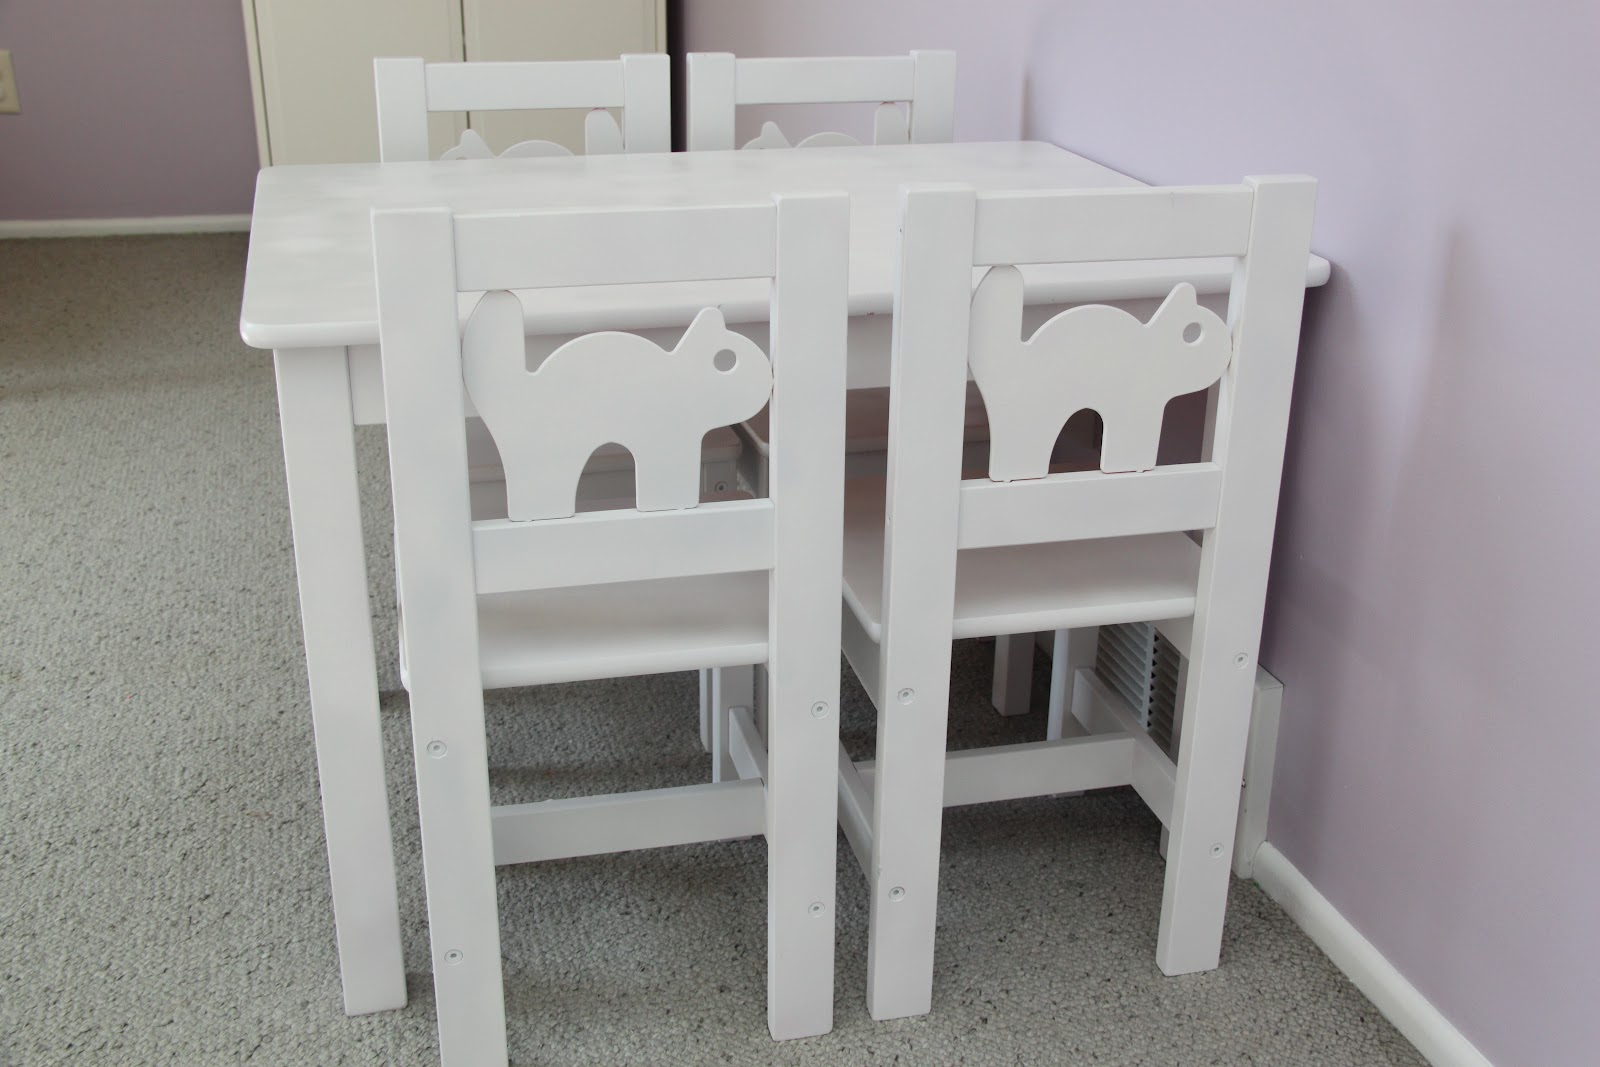
So if you happen to have some laminate furniture in your home that you are not loving, try a little painty-paint job on it and give it a new life. I am so lovin’ this new piece in the girls’ room, it totally fits the feminine style and look of their room so much better than that bright orange and I didn’t have to buy another set and sell the old one to get it, yayyyy!


Cute! I’ll have to remember that paint for our next repurpose/makeover project.
Thank you so much for this post. I want to let you know that I posted a link to your blog in Creative Busy Bee Craft Inspirations, under the Page 1 post on Oct. 01, 2012. Thanks again.
Very nice!
This is so perfect, I just found a freebie bookshelf that is perfect in size but needs paint!!! Going to buy paint today!!!! 🙂
love it ,but i have to laugh ’cause when i first looked at the chairs I thought the anmial was a cat! like in a scared black cat LOL and that thought sorta went with the orange and yellow and red, think halloween.
Anyhoo.. i love it in white! so cute! cute too, would be to paint the squirrel/cat a differnt color. I know that would mean taking out the good old paint brush. !! hahaha
thanks for the information
:>)
Seriously awesome make over. I will have to check out those products if I find some furniture to paint.
Nice! I have two pieces lined up to do almost the opposite – strip paint that matched the kids’ rooms off! I’m not sure what I’ll find when the paint is gone, but it will be an adventure. Really nice job!
Wow!
Hey, don’t stress about the grass. It’ll grow, and you’ll eventually mow it. No harm at all.
Haha! Yup, Mr. Smashed Peas will be so happy when he can mow it 🙂
So I was totally imagining doing this with an expedit shelf for my craft corner. My concern was that the paint would “rub off”…looks like that’s not a problem, huh?
Holla!!!!!
Thank you so much! Thanks to your tutorial and recommendations, I just transformed my daughters bed from Ikea. It was laminate white and red now it’s white and green apple. Perfect match to her room.
Thanks for this tutorial! I have Ikea stuff in my sewing room of varying shades of brown. Now I can have a clean & uniform look to make it beautiful.
So happy I found this! I was hoping someone found spray paint that would work and you did. The spray painting is perfect and I know I’ll do it long before I’d bust out the rollers and brushes.
Thanks!
so you didn’t sand after the primer?? I hate that part!!
Nope! Didn’t sand a thing! 🙂
ok not sure what I did wrong! I bought the exact products you recommended. but it just turn out semi gloss…it’s rough! it doesn’t look bad until you touch it! any suggestions??
meant to say it DIDN’T turn out semi gloss!
Hmmm, I’m not sure Stephanie! I’ve done this exact way on a few other pieces and it’s always come out the same!! Are you spraying in short strokes making sure to release the nozzle after each swipe across the furniture? I know you have to have a certain spray technique when you use spray paint, you can’t just have a continuous spray of paint flowing.
I didn’t release the nozzle but did do short strokes. should I sand it and respray it??
Hi Stephanie!
Yeah, I think your best bet now would be to lightly sand it and then make sure you really shake your spray paint well before starting…I forgot to ask that! If it’s cold outside or if you keep your spray paint in the garage where I live (Chicago) it definitely doesn’t spray as well! Good luck!!!!
that’s my project this week! we live in Florida so the can wasn’t cold but I’ll definitely shake it longer and use short sprays and RELEASE THE CRACKEN! I mean NOZZLE!
Thank you for posting this! I recently decided it was time to do something about the Ikea Poang chair in my daughter’s room, it’s dark and black and her room is light and airy so something needs to be done. Now I know exactly what primer spray paint to look for when I go to the hardware store. I agree, I’d rather spray paint then paint with a roller any day, AND if I can skip a step like sanding I’m all for it!
~Felie
Followed your directions to spruce up two pieces of furniture that didn’t really go with the rest of the room. They turned out great, and it was so easy and inexpensive. Thanks for the very helpful post!
this might sound dumb but can the kids eat on the table?
Hmm, good question! Since this is a kids reading table we don’t eat off of it but I don’t see why you couldn’t. Maybe put some placemats down just in case though if you are worried about the paint!
Great work! It looks wonderful. And the squirrel cut-out is so much more visible when the furniture is all white.
This is so helpful! I want to paint my Ikea chairs white and I’m gonna follow what you did! I can’t wait!
Thanks for sharing the valuable tutorial.
My question is: I have at home some cans of primer and paint. Do you think the result will be the same like using paint in spray??? I am a complete beginner in DIY projects.
Thanks!!!
Hi Miriam!
Yes, you can use either with really great results!!!