
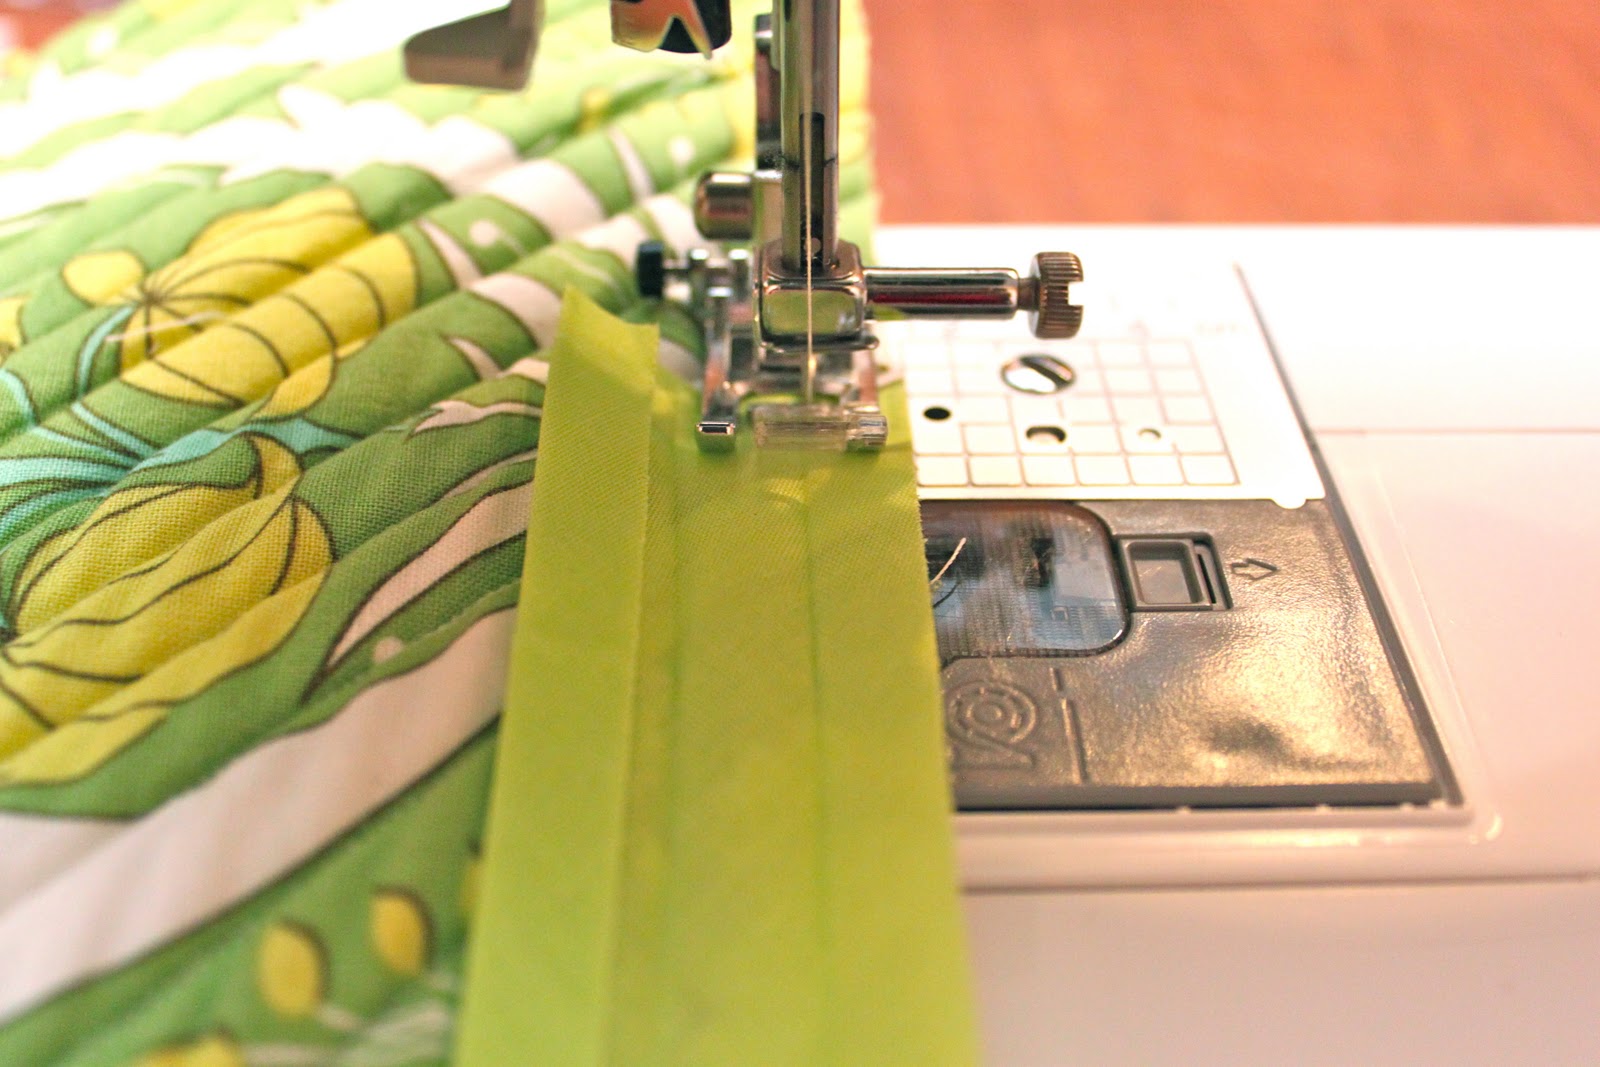
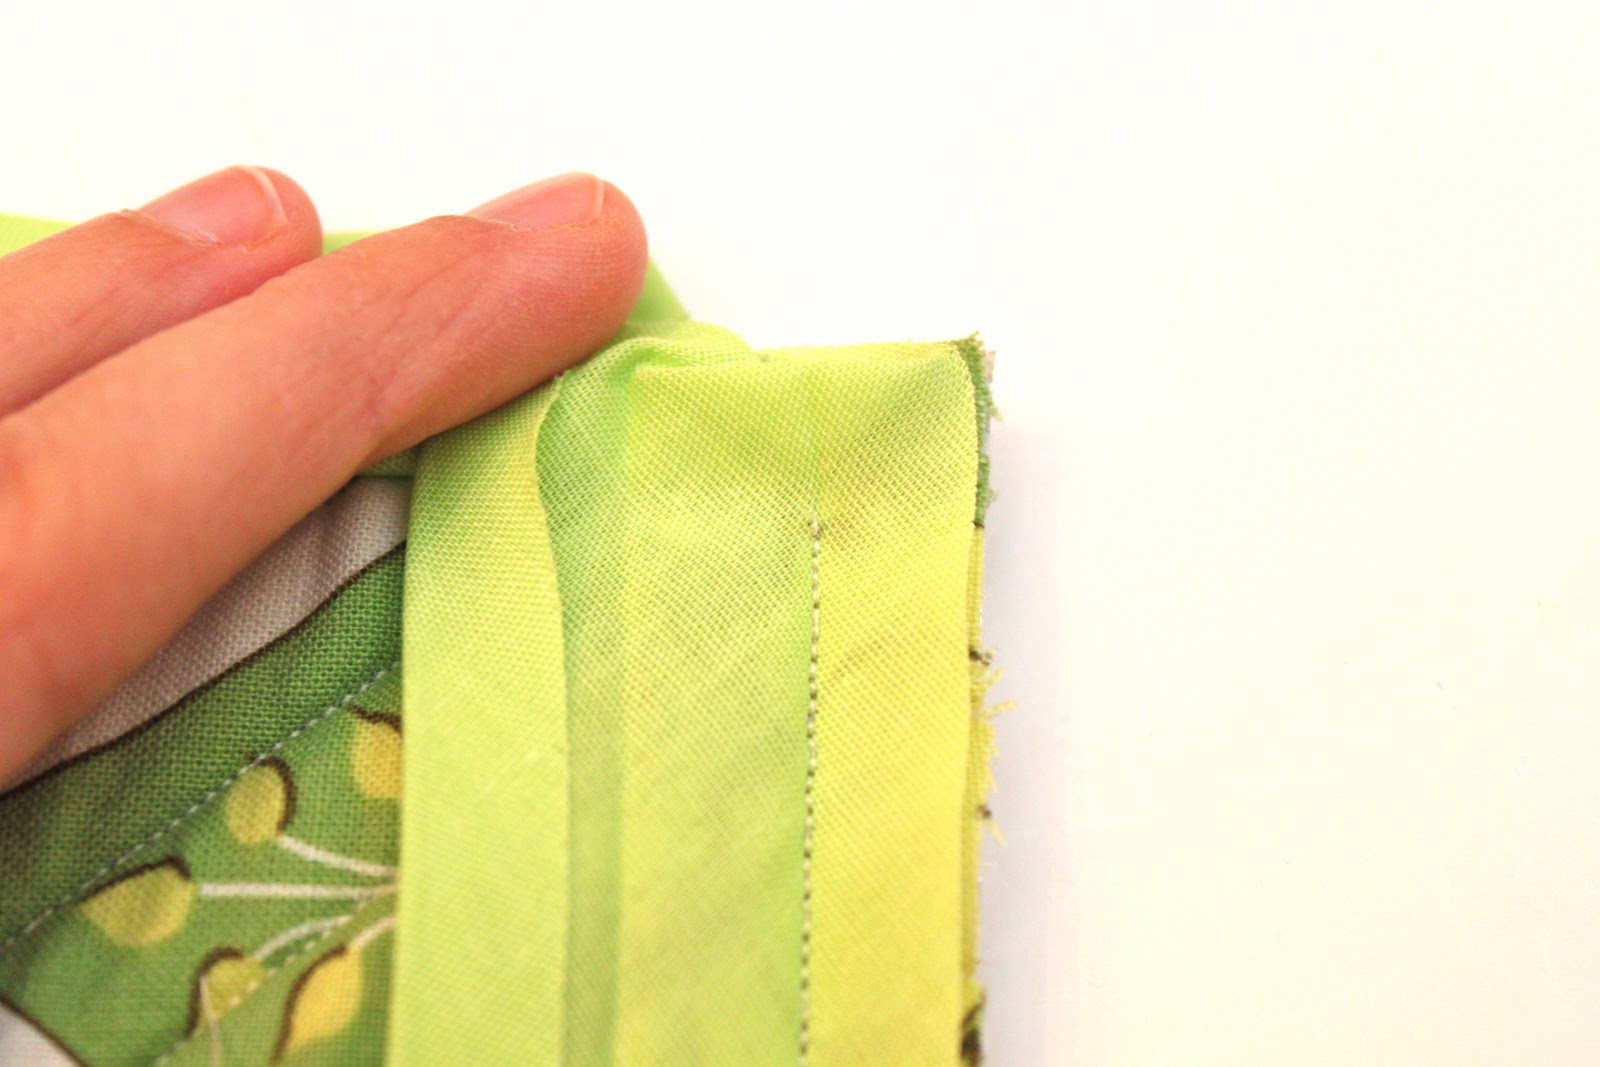
Sew down the crease of your bias tape until you get about 1/4 inch from the edge. Backstitch and cut your threads being careful not to cut your bias tape.

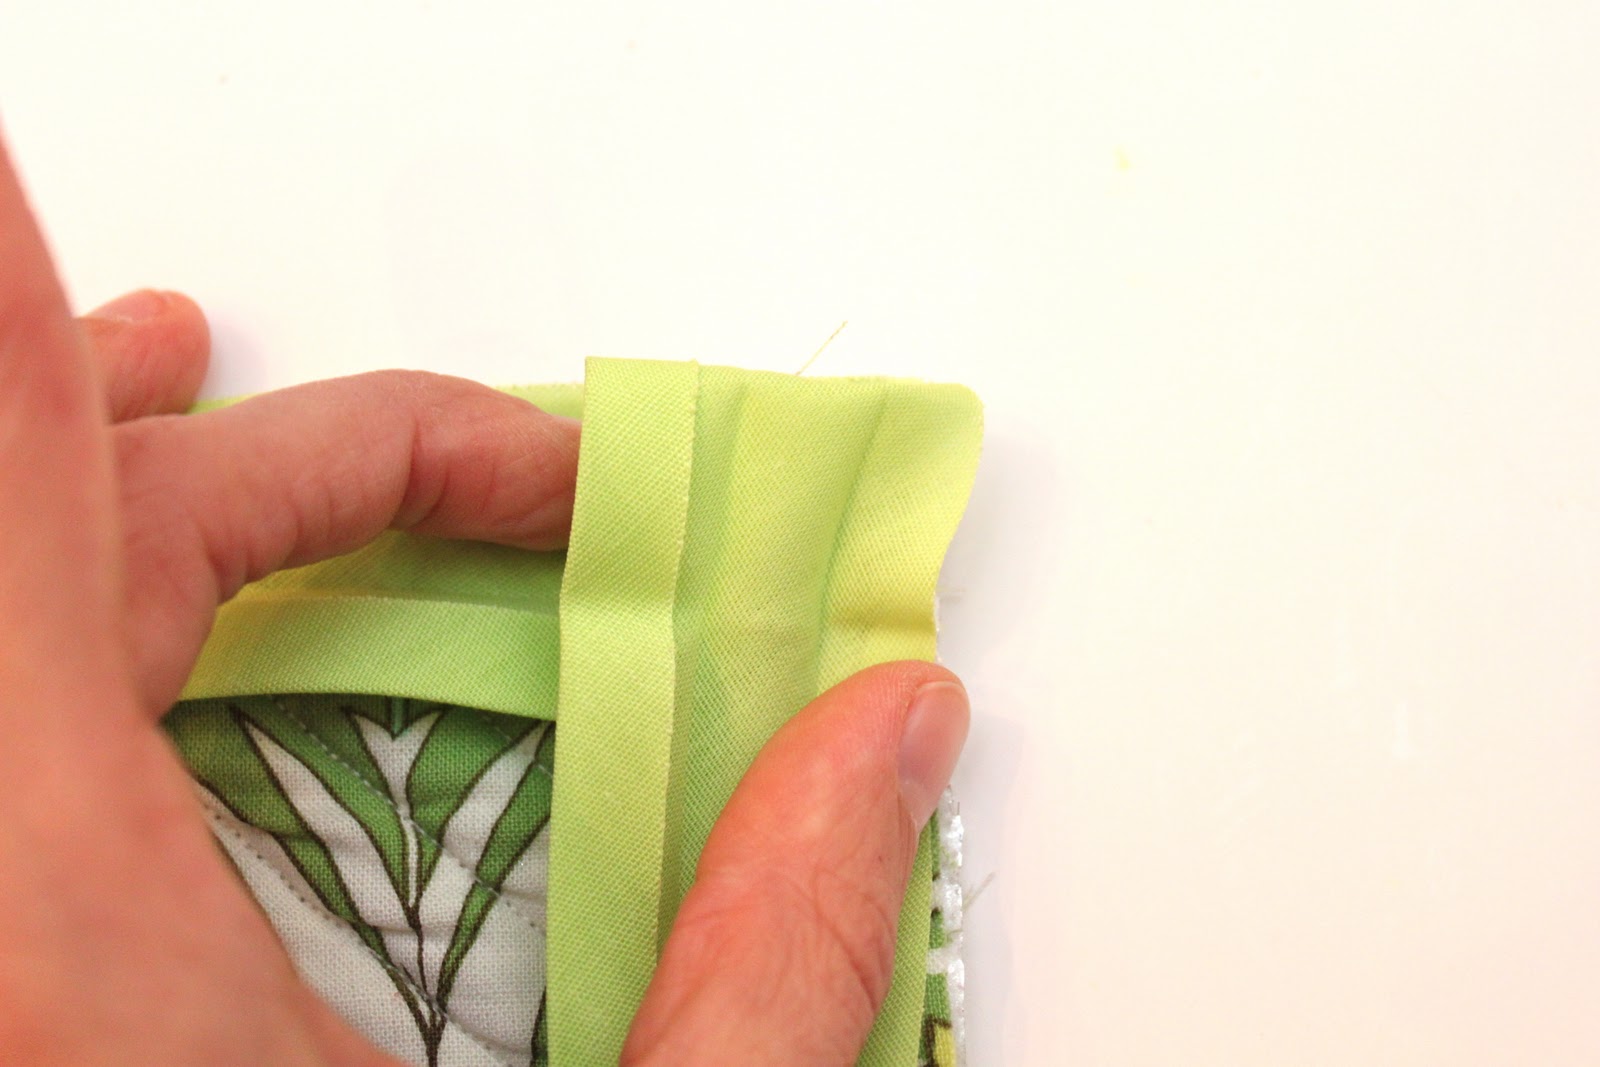
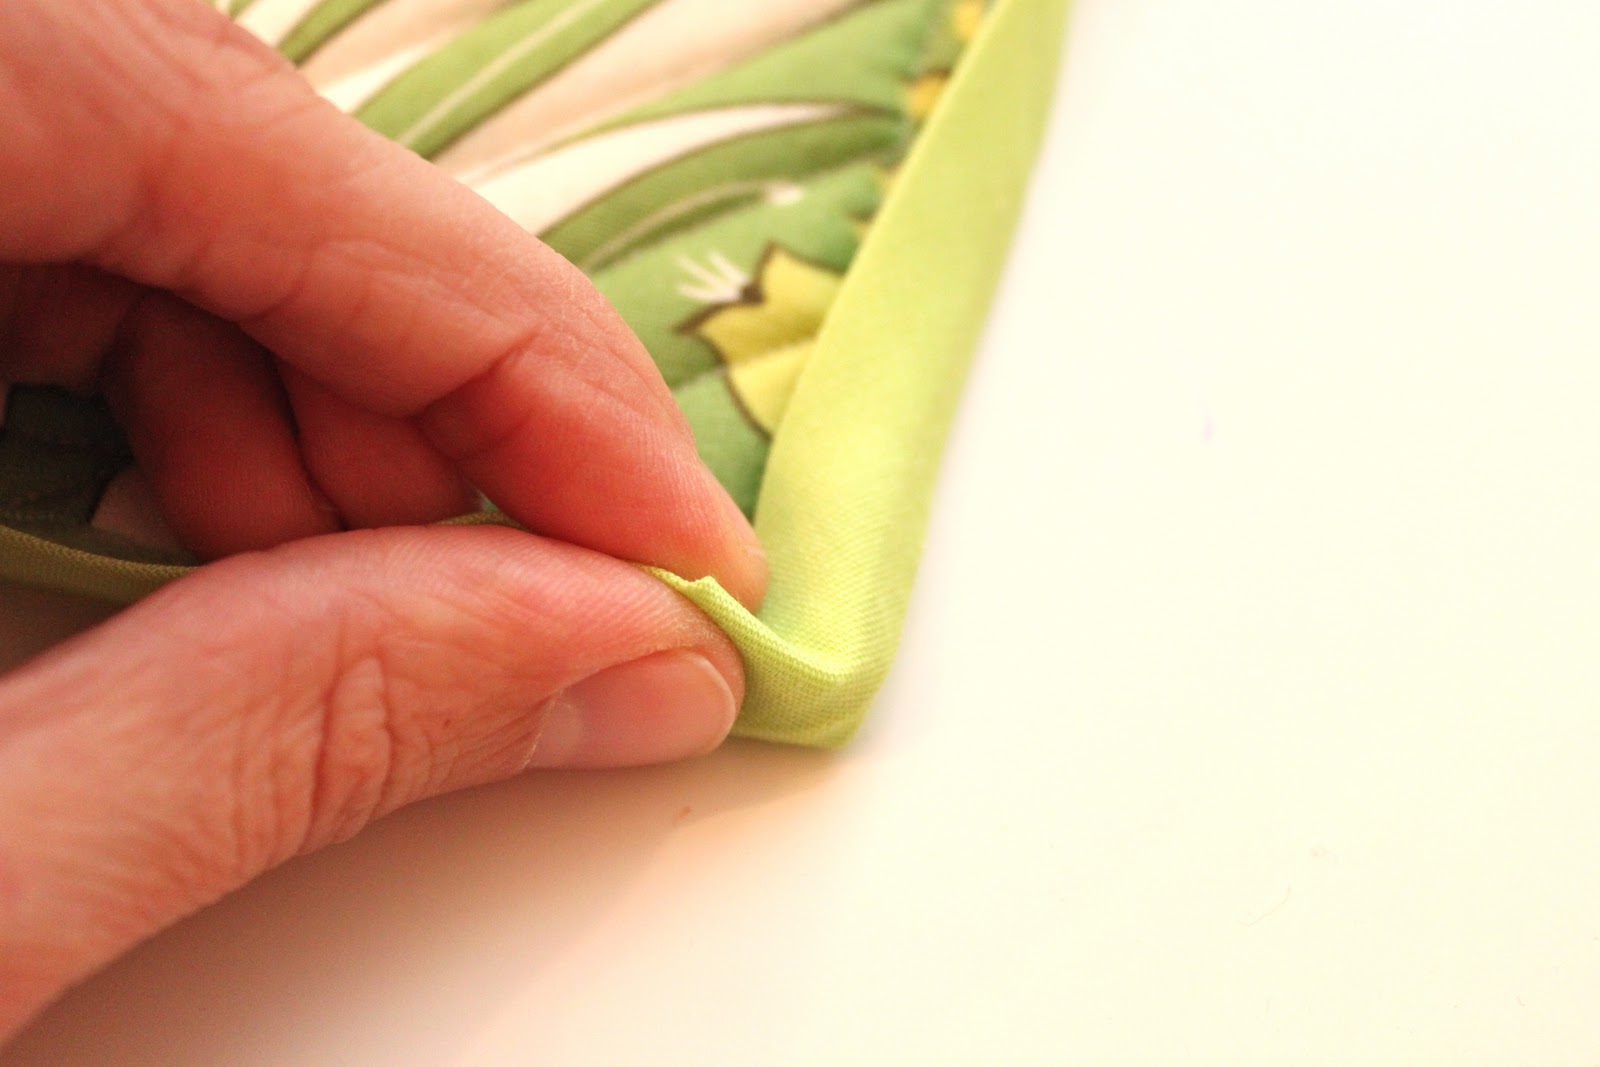
Then, gather up your bias tape at the corner of your fabric so that you are pinching it at a 45 degree angle. See the picture above to get a better idea of what I’m talking about. Am I making sense…hands in the air, anyone?
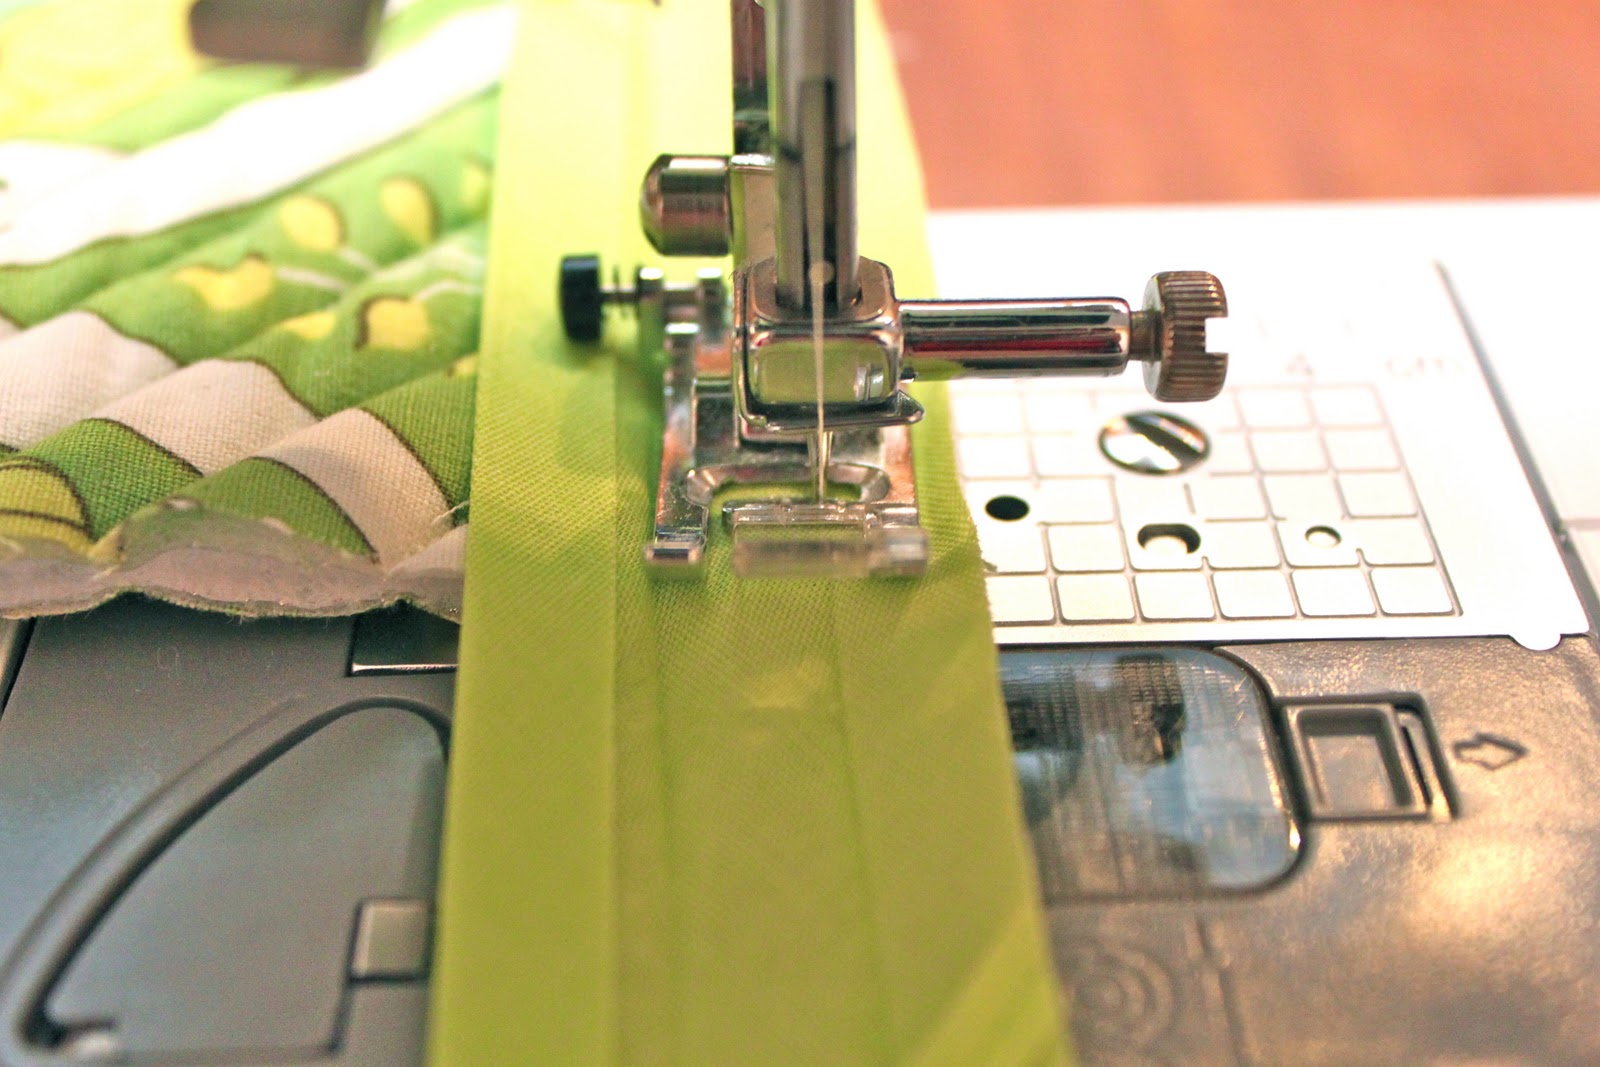
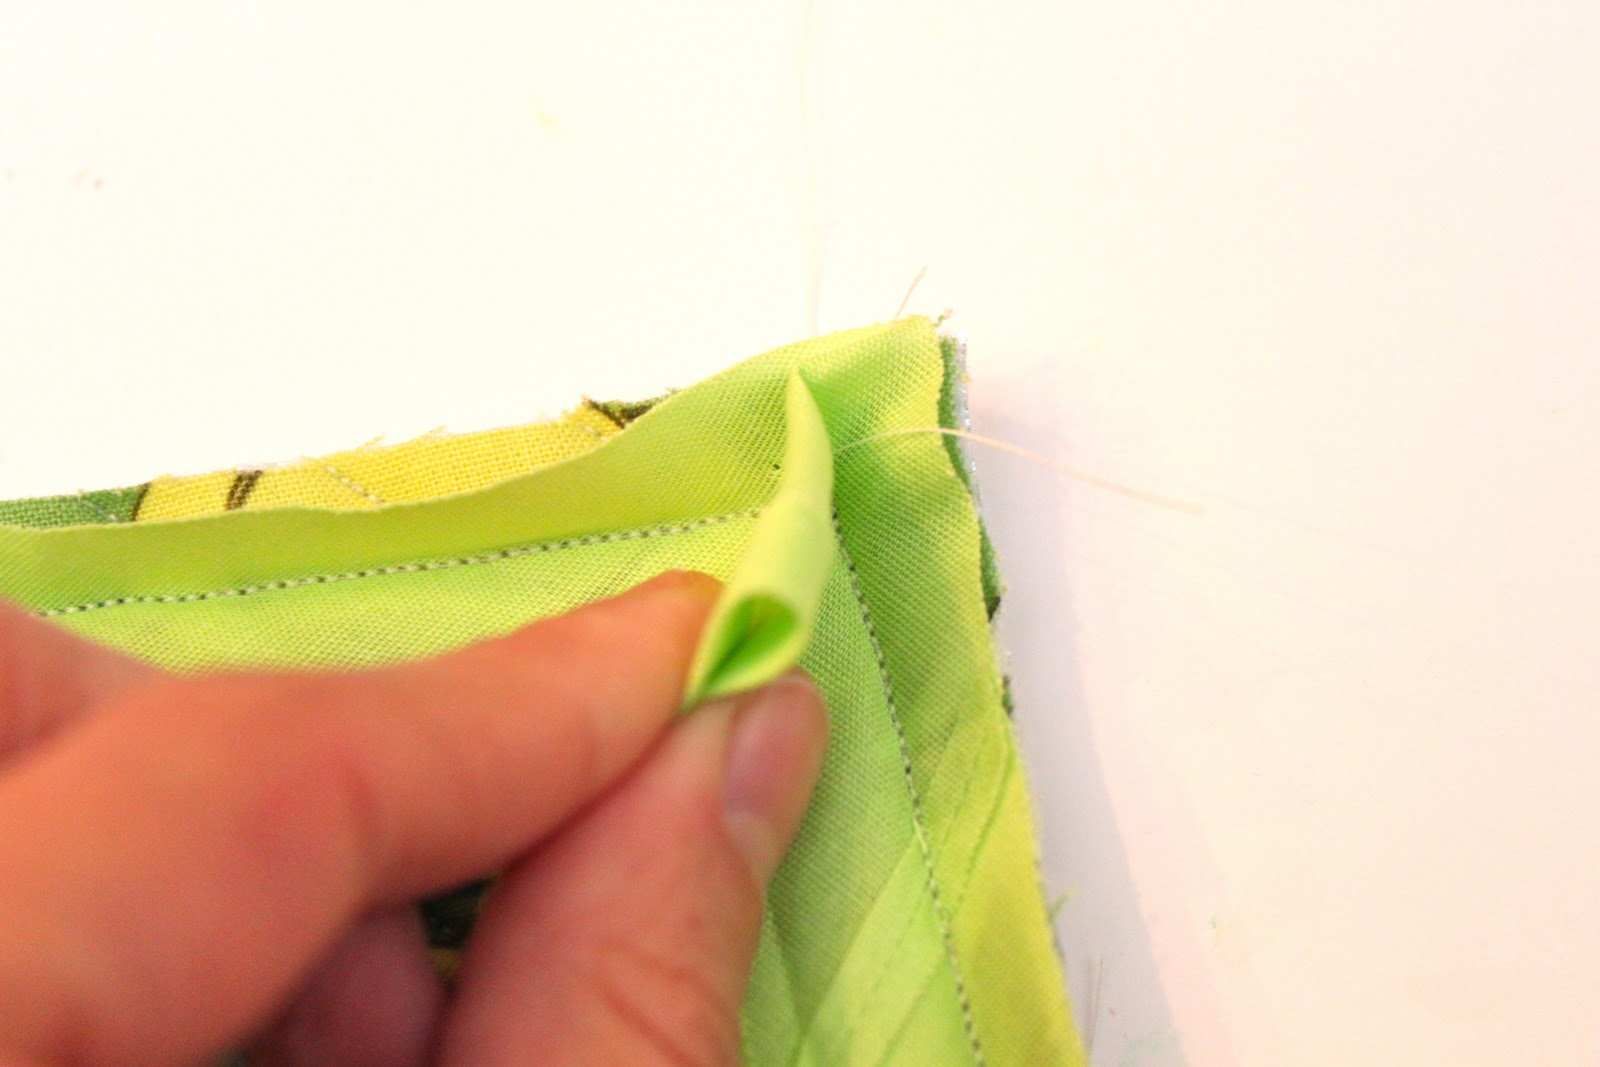
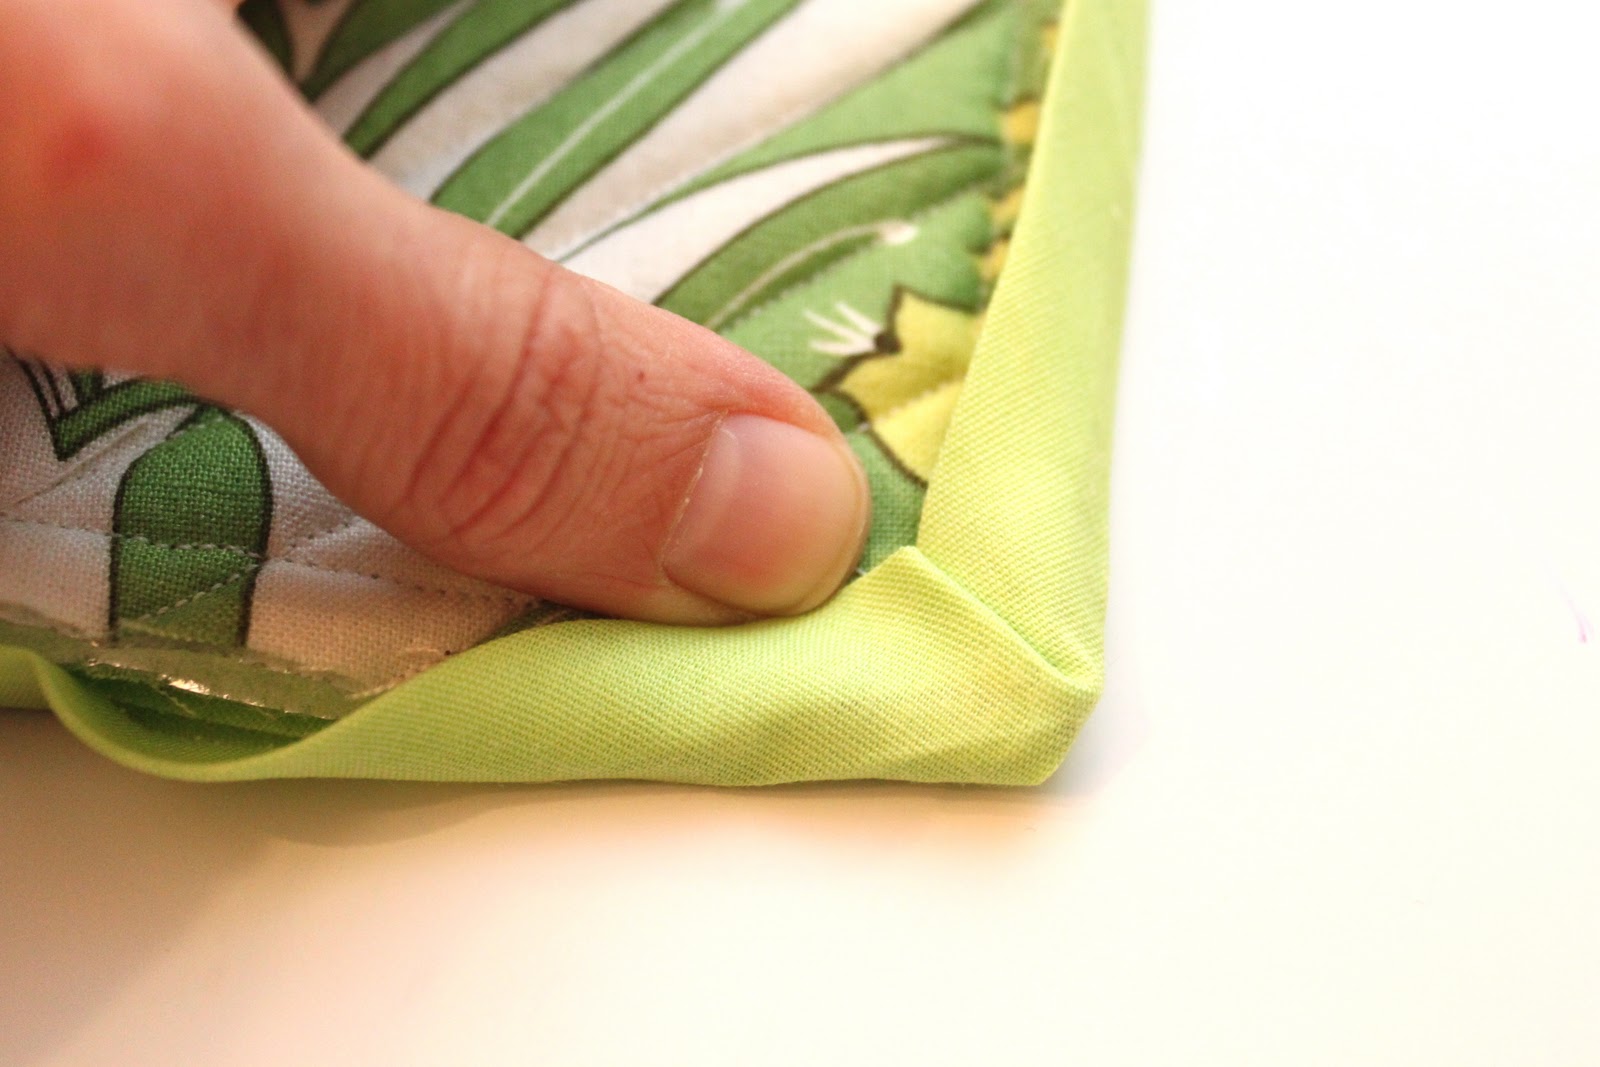
Next, lay that pinched section of bias tape off to the side so that you can stitch down the next section of bias tape to your fabric. You will start stitching right at that cross in the bias tape up above. The point where the two creases intersect…are you seeing it?
Alright, start sewing this side down. See how my pinched up corner is off to the side (up there to the left in the picture)?
Okay, so now you have this going on…
Your sewn bias tape should look like the picture above.
Here’s your aerial view (minus the helicopter)…
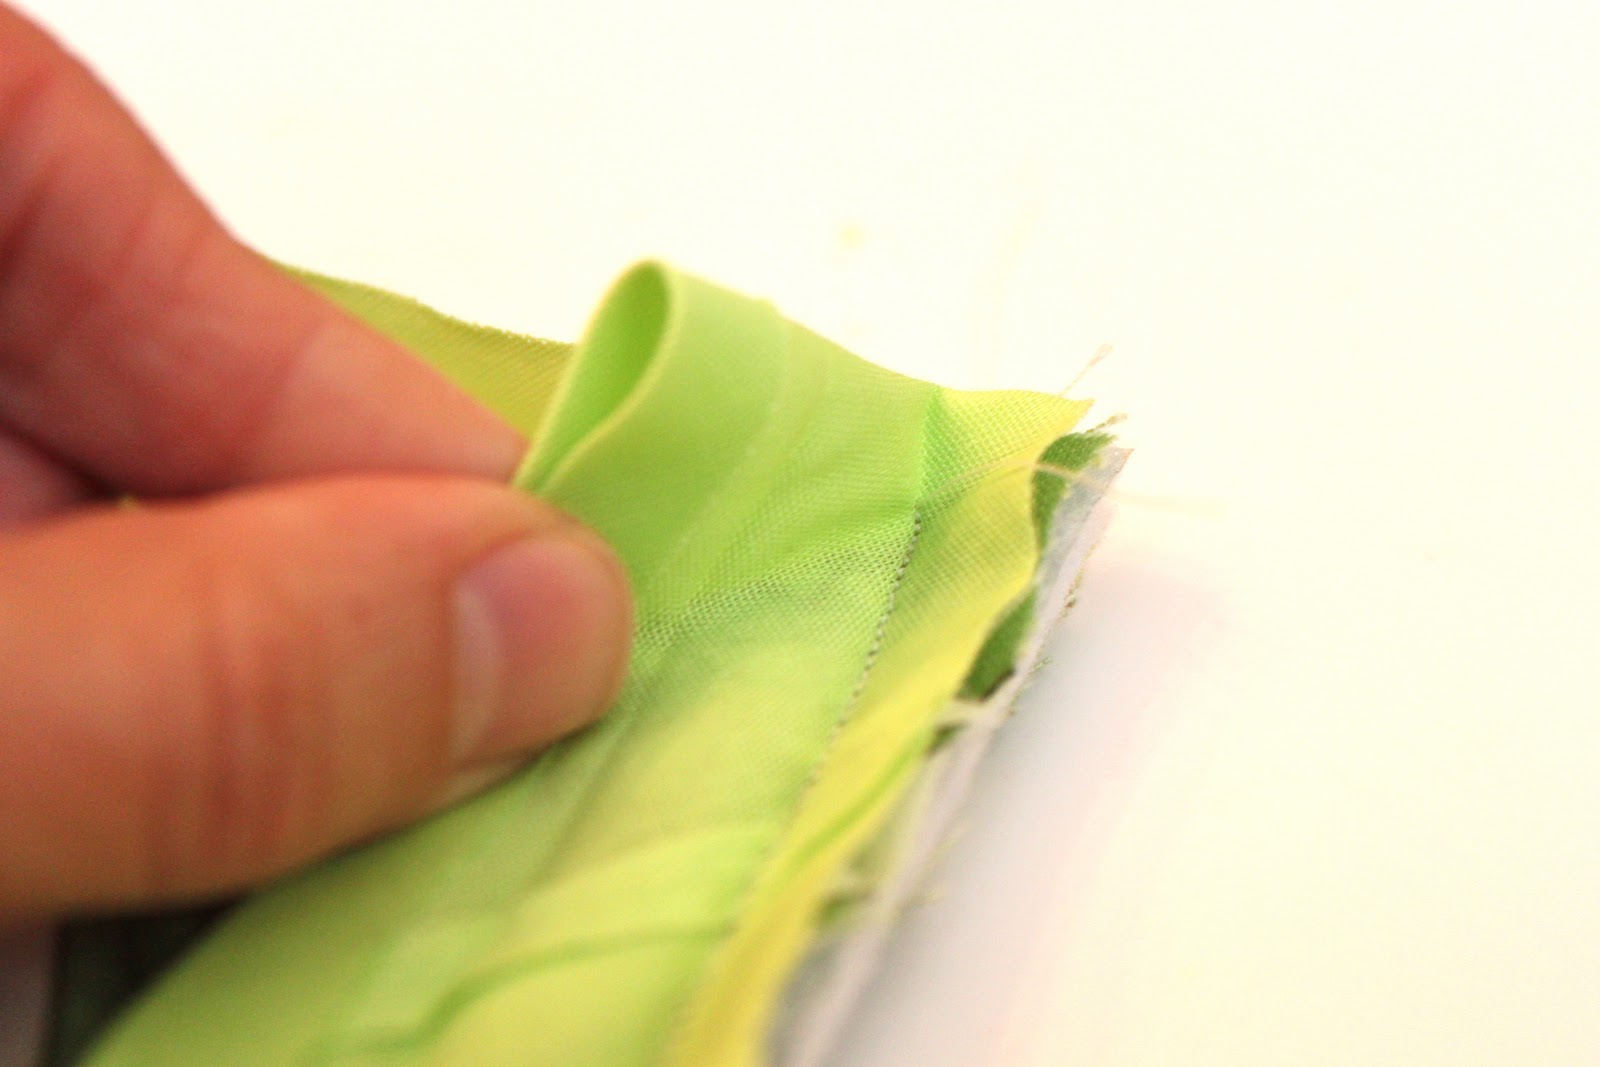
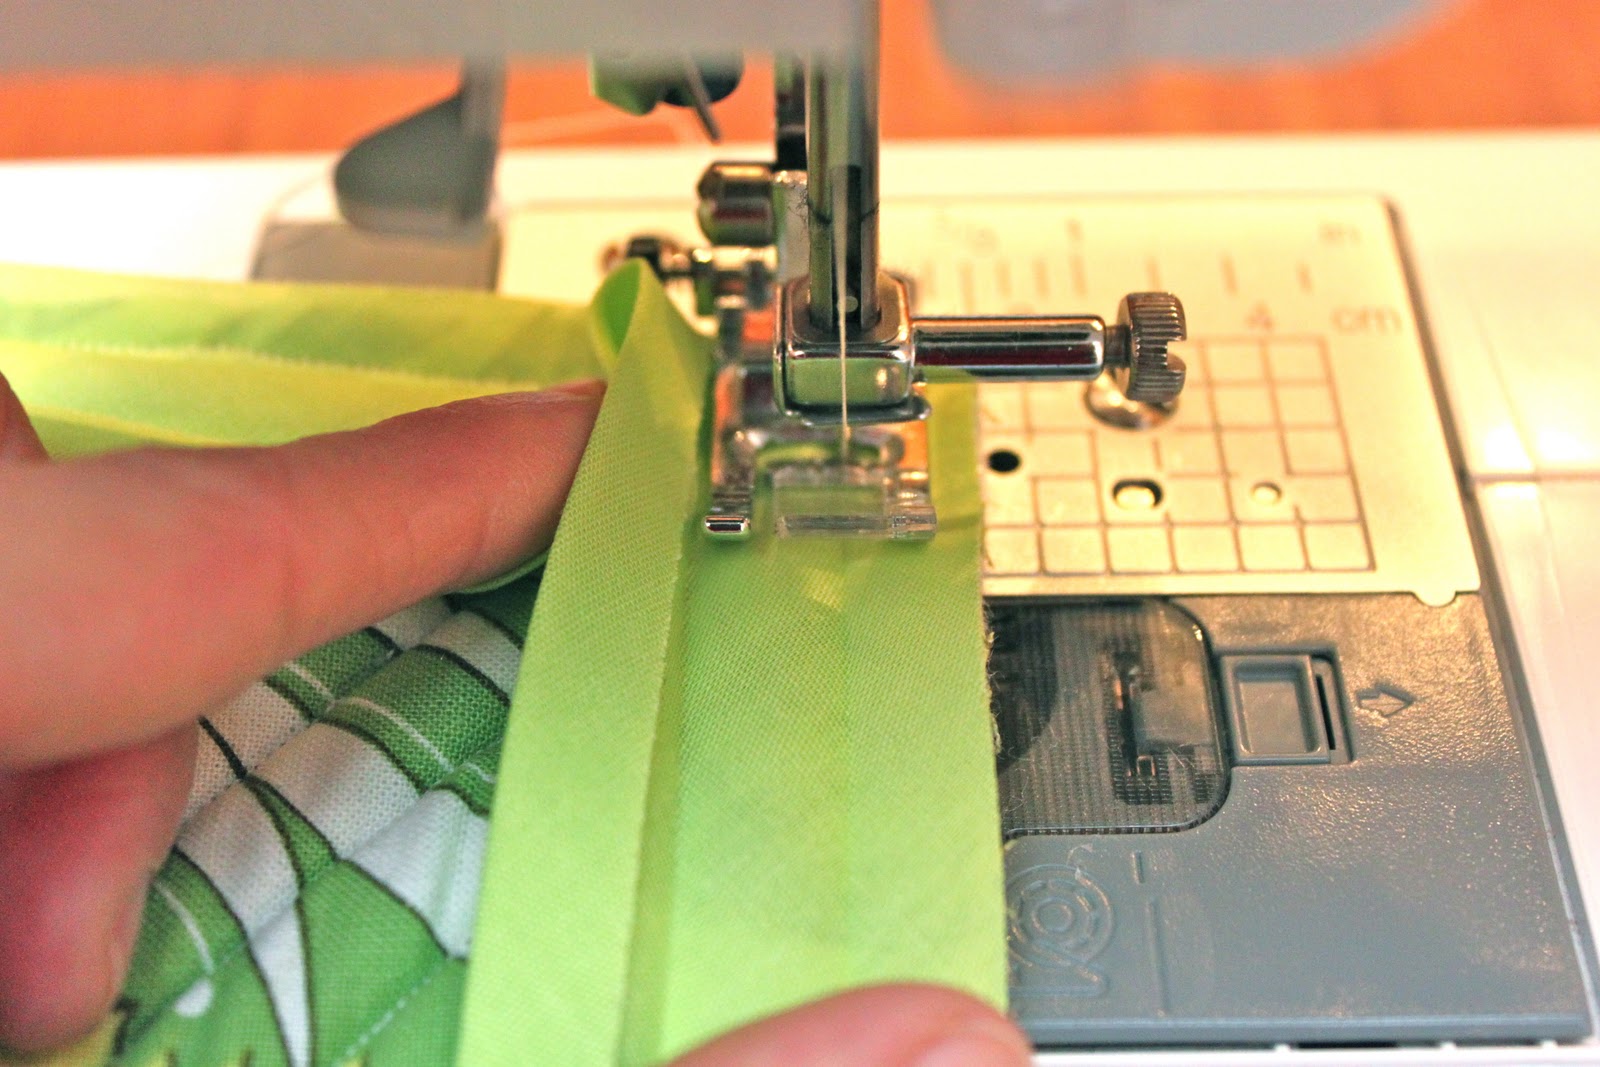
Here’s the view from the side.
Now, just continue sewing each side just like this. After you have sewn EACH SIDE SEPARATELY (starting at one corner, stitching down the crease, stopping about 1/4 inch from the edge of your fabric and then backstitching and cutting your thread) you will be ready to flip your corners. Sounds fun, right!?! Good, cause it totally is!!
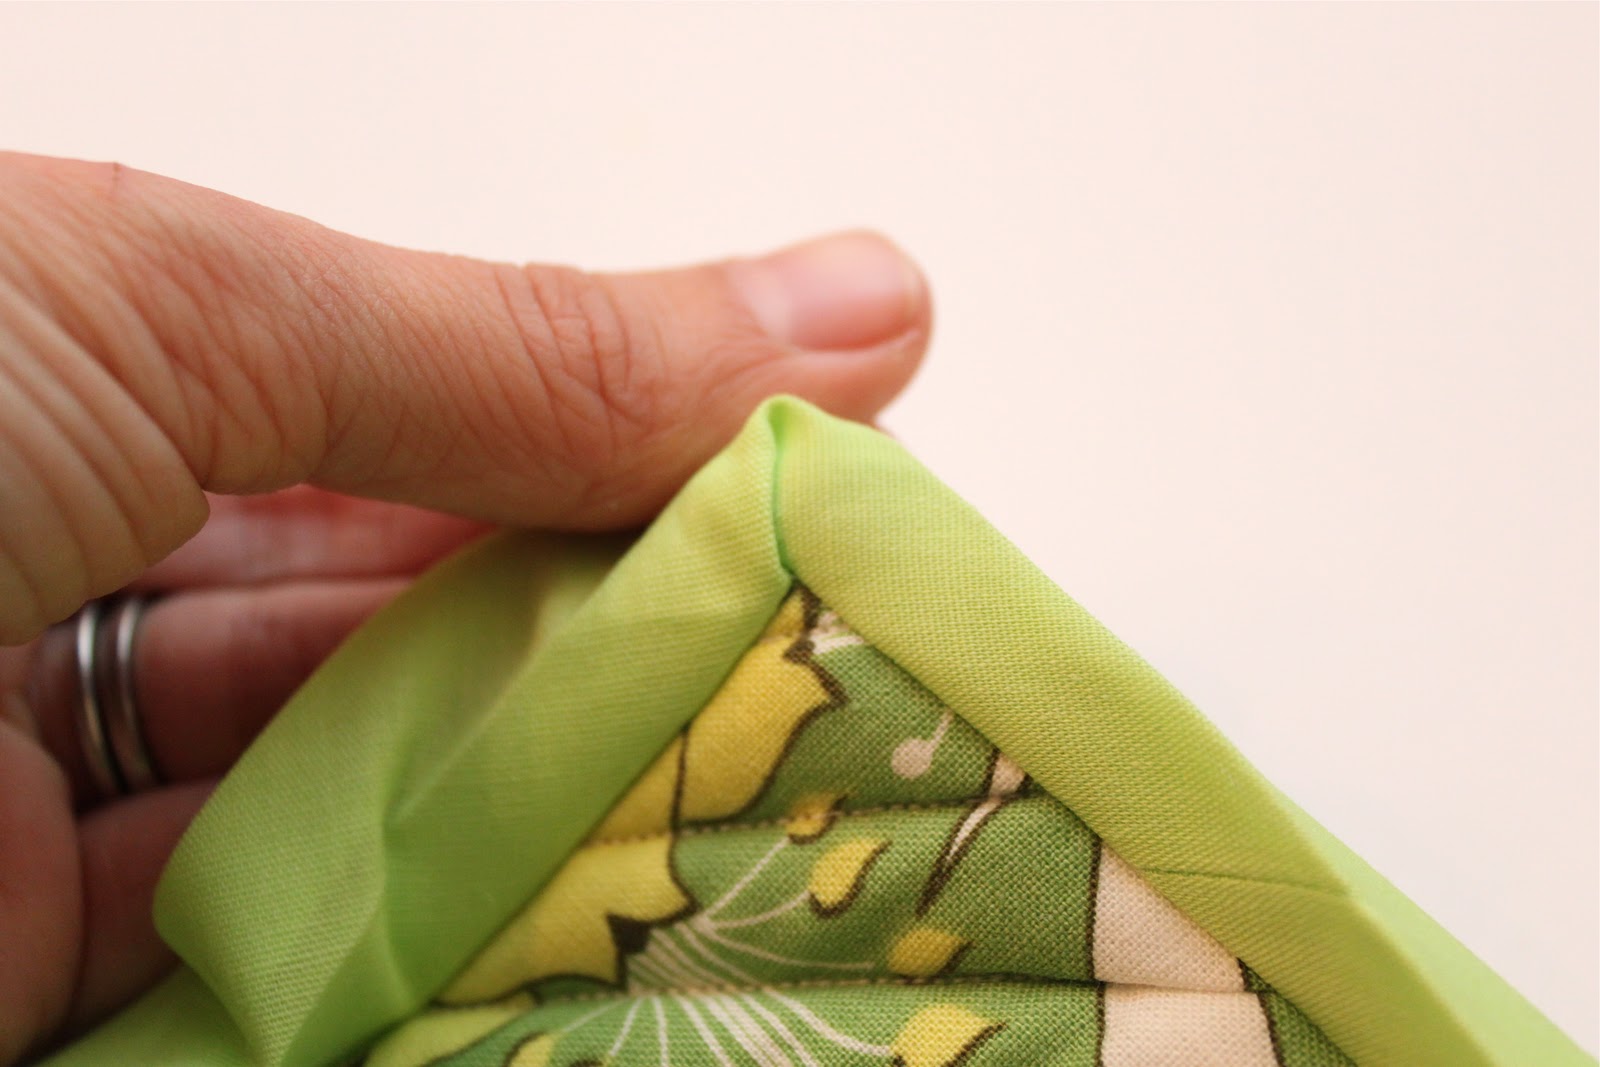
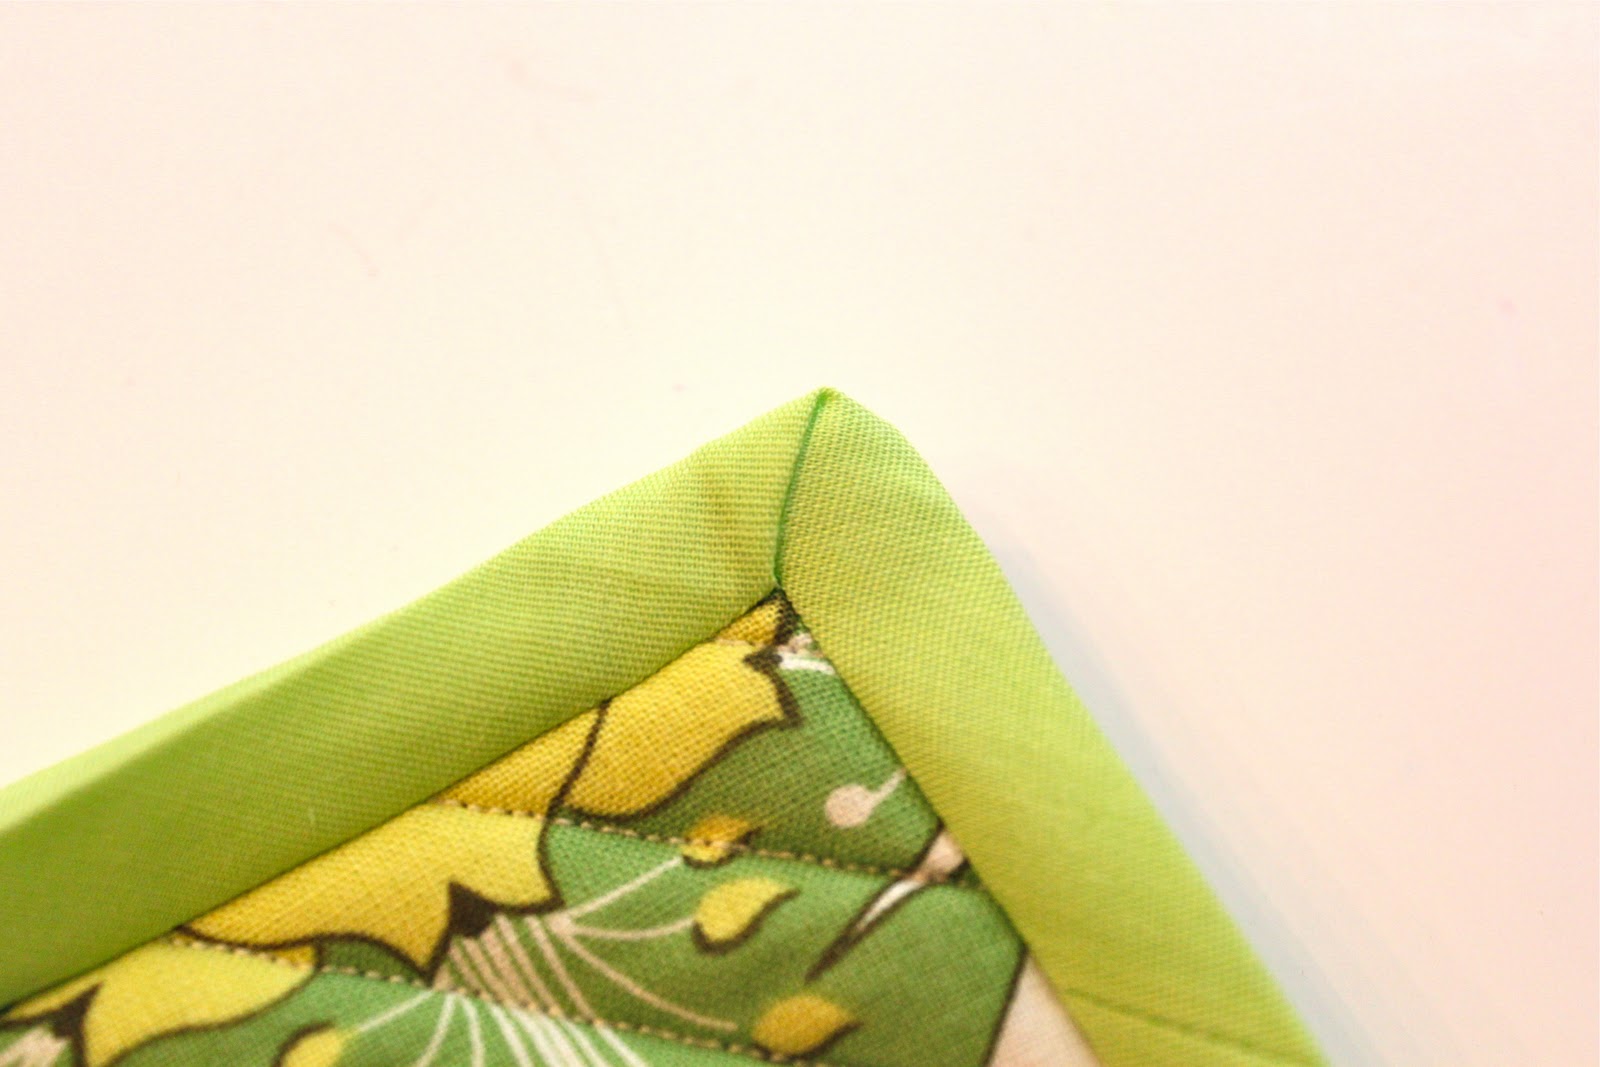
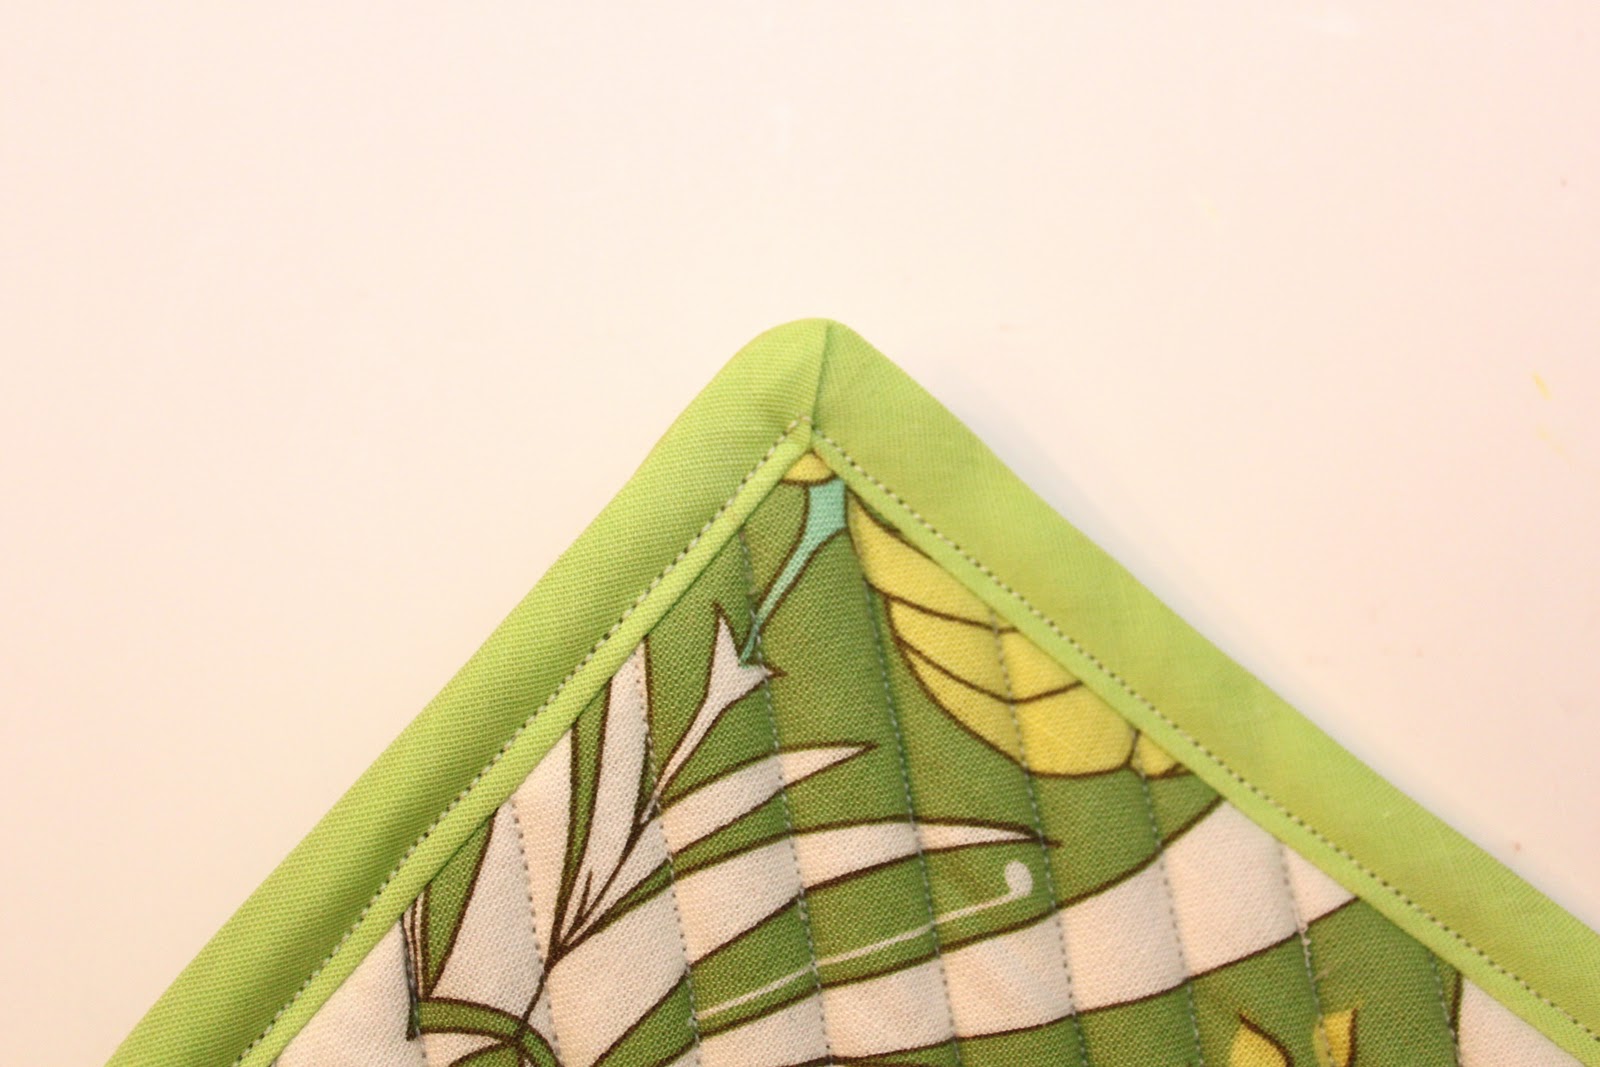
So here is what the front or right-side of your mug rug/potholder should look like at the corners as you are flipping the bias tape back to the other side. As you flip the corner you are going to ease the tape into a ‘mitered’ corner on the back side.
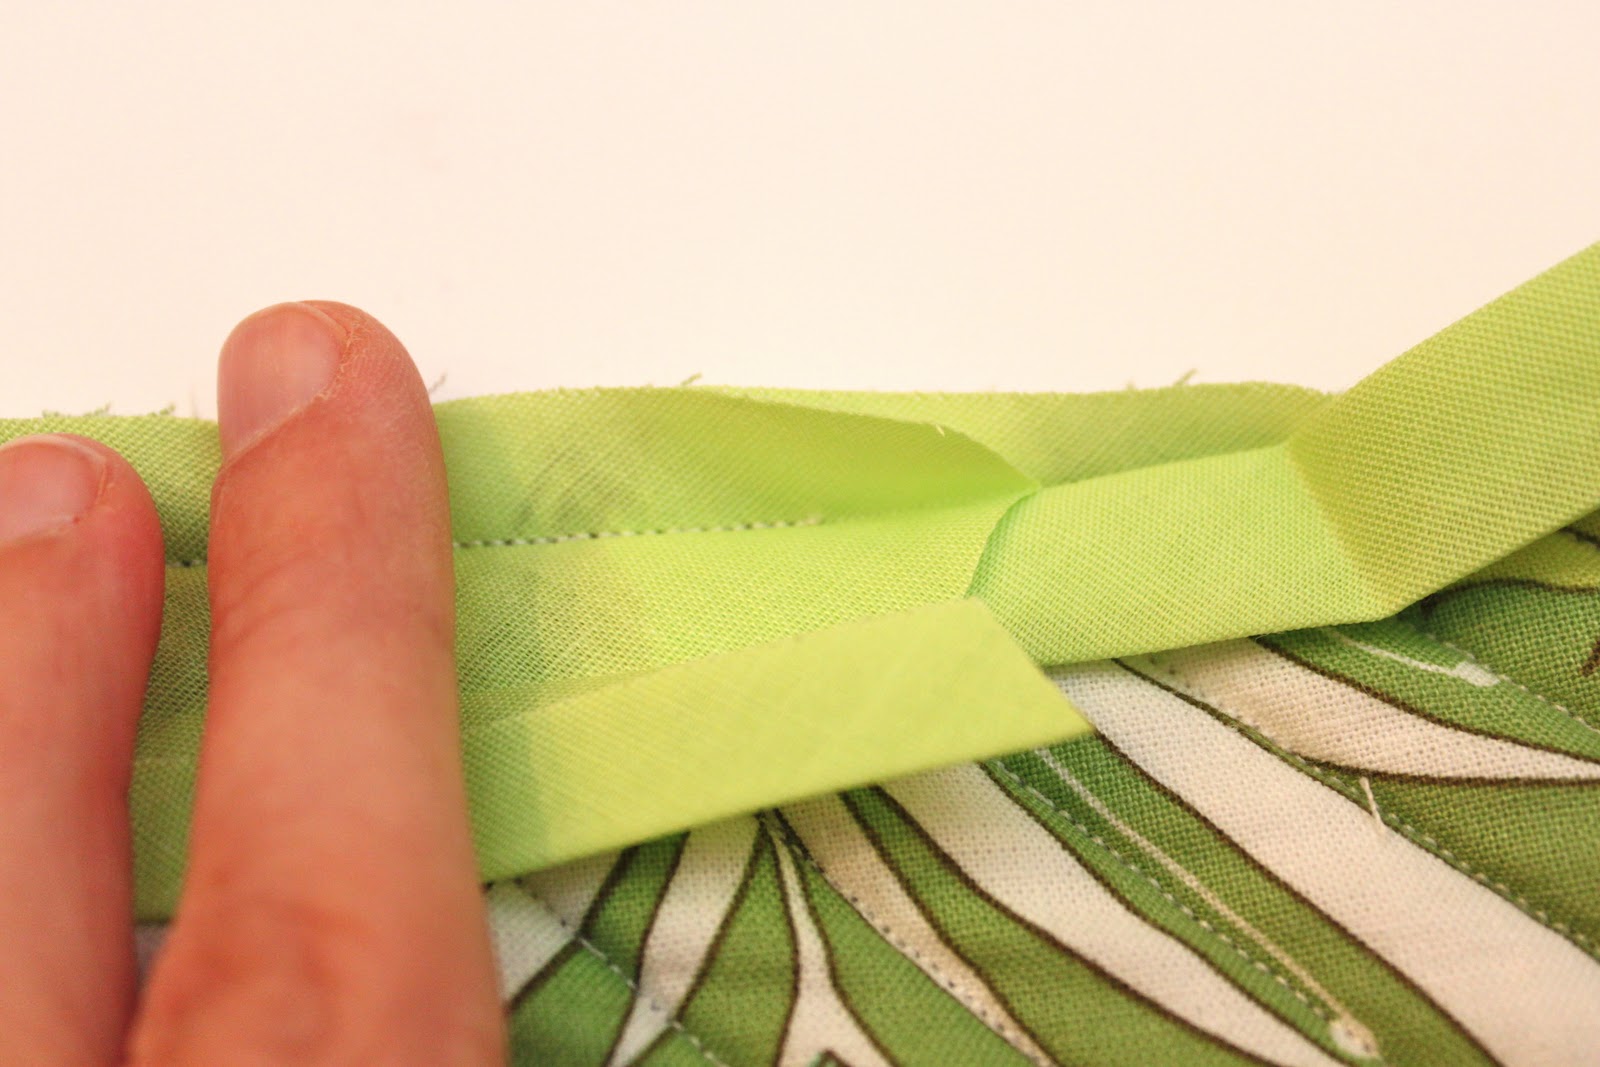
To miter the corner you are just going to lay one side of the bias tape flat and then fold the other side over the top of it. You may need to shimmy the bias tape a bit but it should for the most part ‘miter’ pretty easily.
And it should look like this on the back (wrong) side. Corner all mitered….check!
And remember, you may want to be pin-heavy while doing this!! Go very slowly to make sure your corners stay mitered while you are sewing them down. It sounds hard but if you go slowly it won’t be so awful I promise!
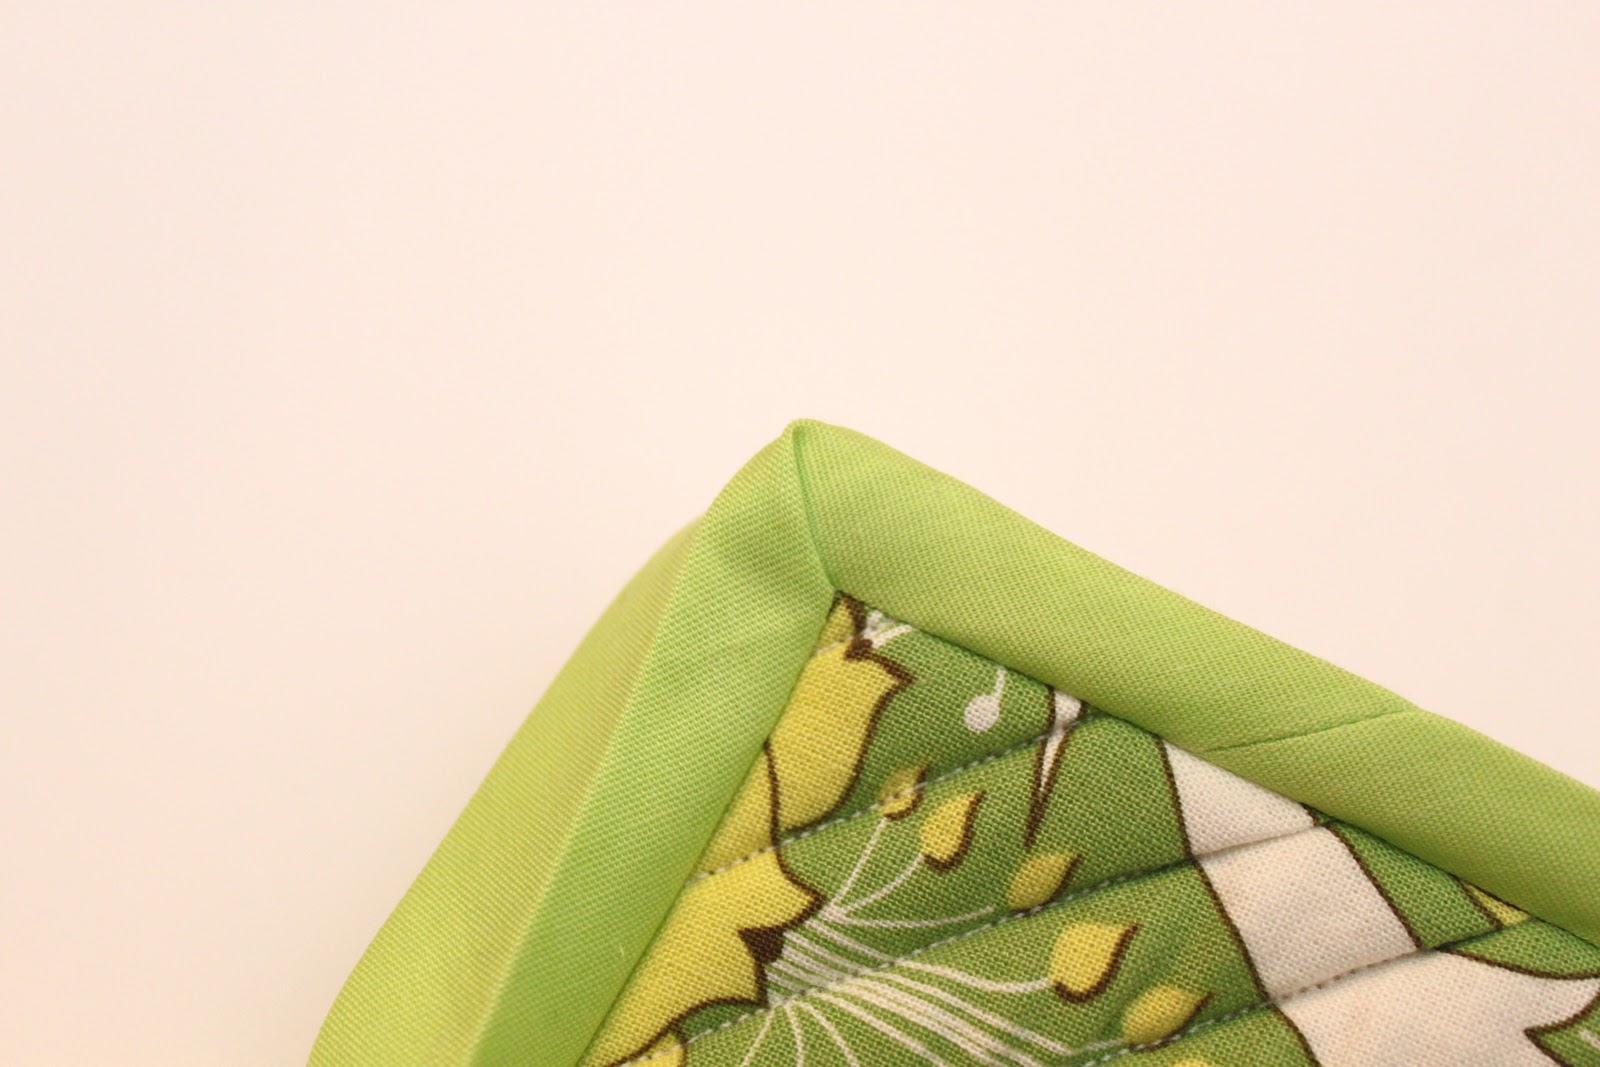
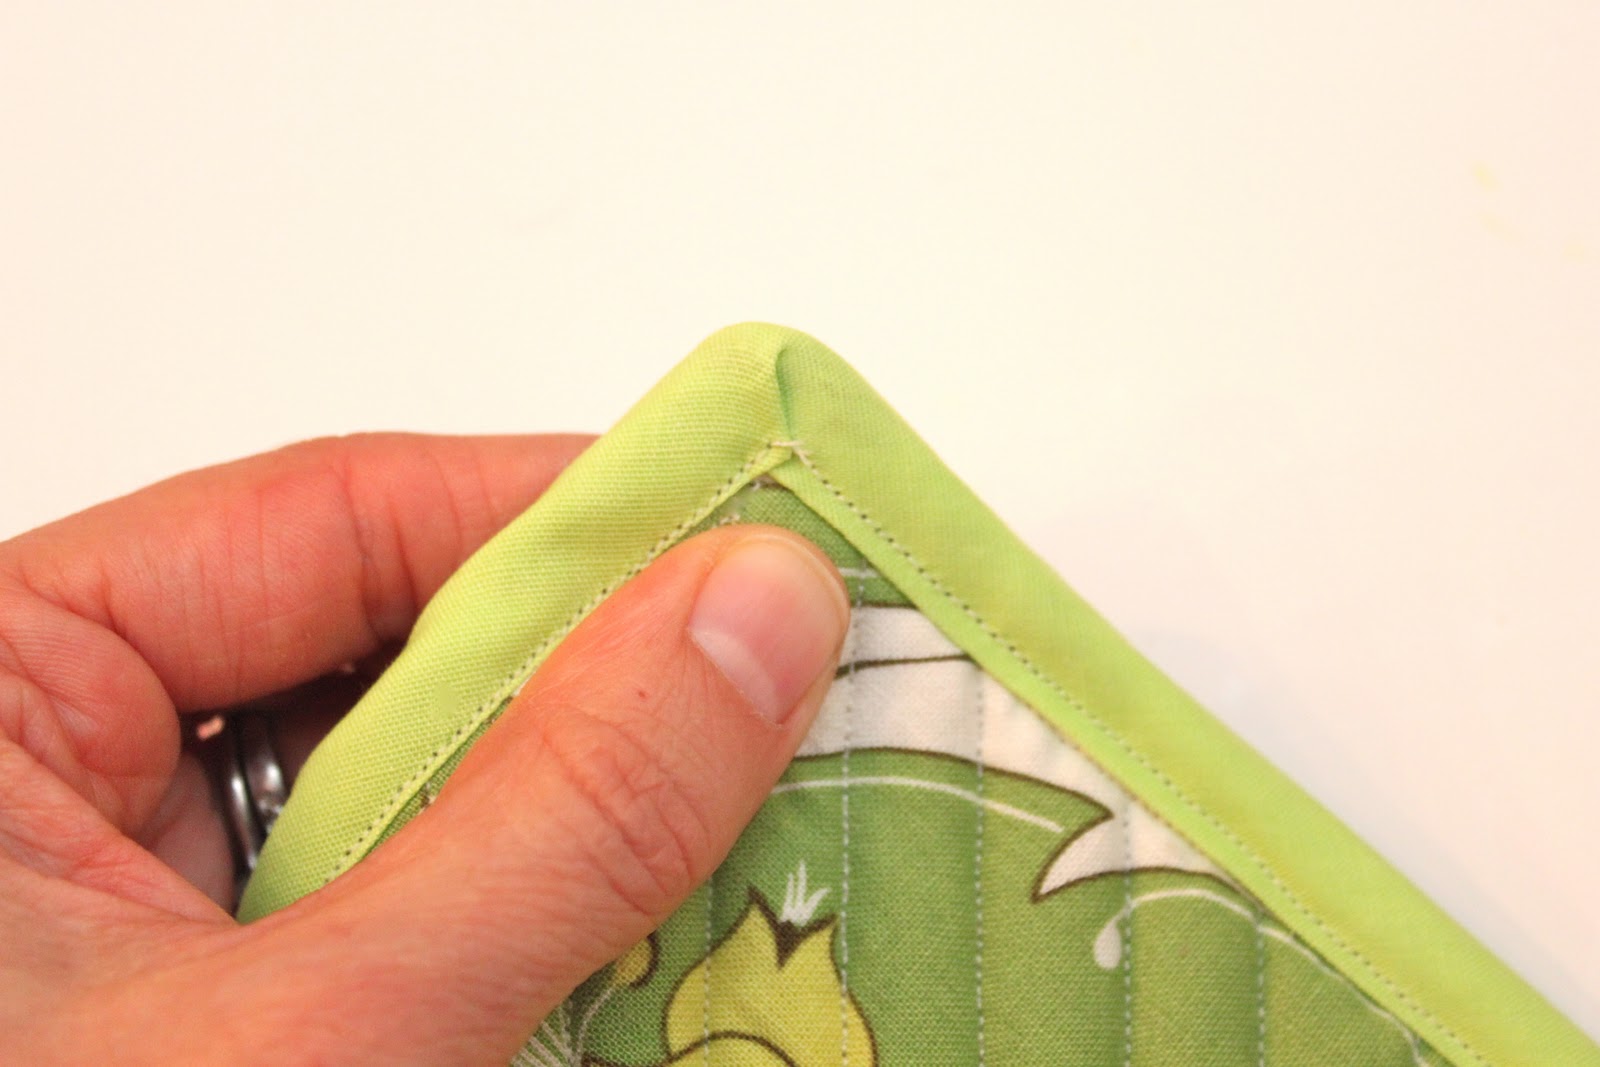
See…as you flip the corner the front ‘miters’ itself pretty darn nicely, wouldn’t you agree?
Then, just top-stitch the front side of the bias tape about 1/8 inch from the inner edge so that you catch the back side of the bias tape.
Oh, and in case your wondering…I usually overlap the ends of bias tape about an inch before I cut it loose from the rest of the tape. This way you are sure to have enough to cover the raw edge when you flip the tape here!

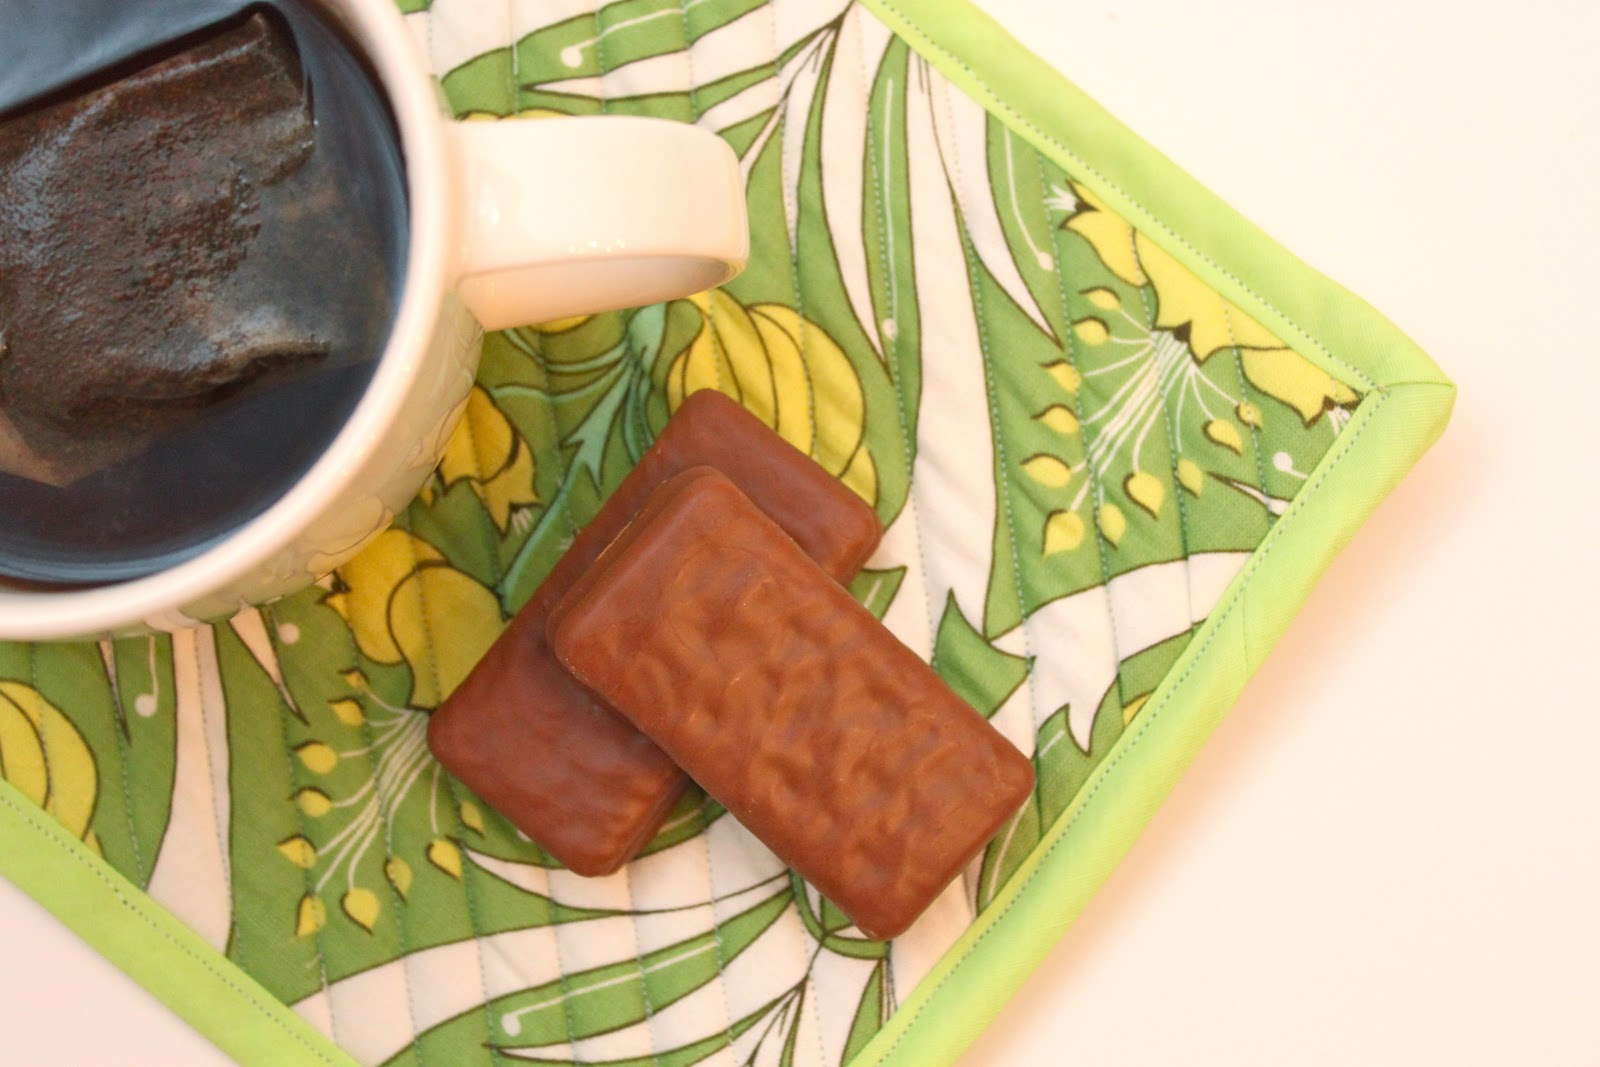
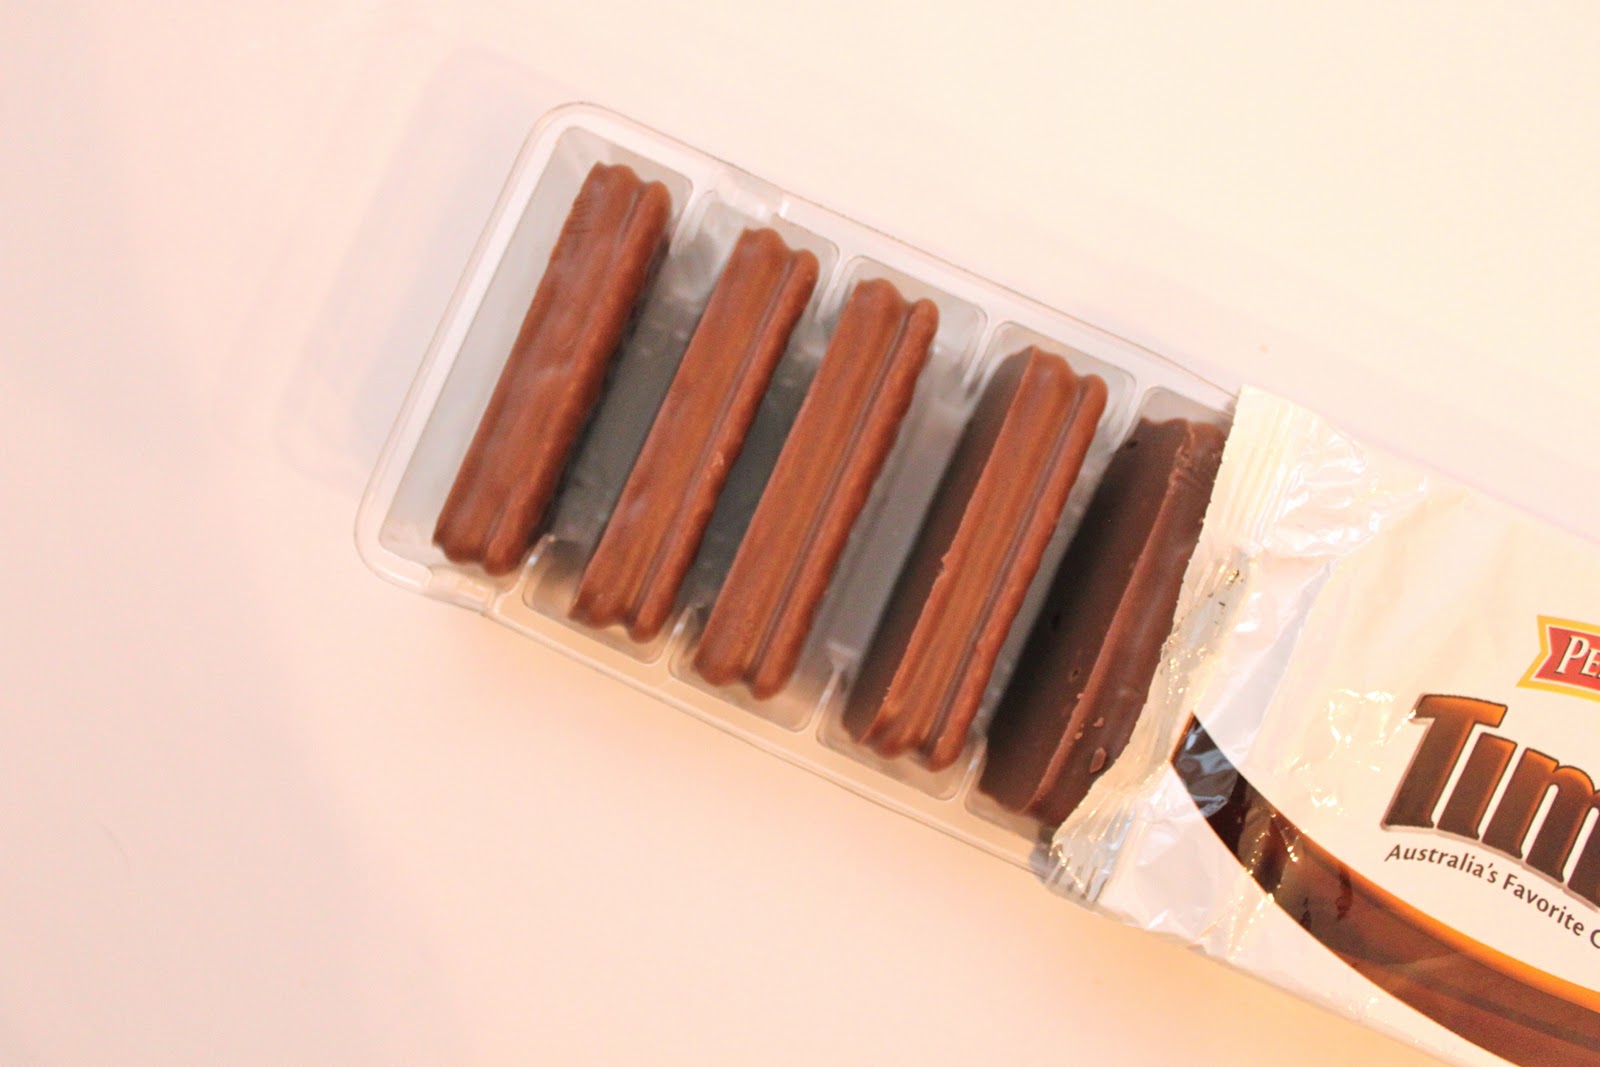
Mmm…I love me some Tim Tams!!

Have you ever had these babies? They are an Australian cookie but now Pepperidge Farm makes/sells them at Target, woot woot!! My SIL lived in Australia for a bit and got our family hooked on them. My favorite is the caramel in case you wondered. Maybe I’ll do a post to show you my Tim Tam Slam it’s the whole reason these cookies are to die for. Seriously. It makes them That Good.


Thks for the great tutorial!
Oh and I just love Tim Tams, we from South Africa and also have a family member who live in NZ who introduced our family to them! unfortunately you only get plain Chocolate ones here in SA 🙁
how about a learn to sew tutorial??? i bought a machine for christmas and it is my new years resolution! your tutorials are great!
I {heart} TimTams.. been hooked since I took a 3 months sabbatical in Sidney, Brisbane and Adelaide…
I loved your bias tape tutorial, and thank you for the corner recap. I am teaching myself to sew, and kinda wing things sometimes, so it’s nice to see how others do it.
Thanks for all you post! I always look forward to checking out your blog!
Barb
Thank you SO much!!! I have a baby blanket waiting because I wasn’t sure how to bind it. I have that thick ribbon type binding for it and was trying to figure out how to get it on. This will work famously!
You need to try a tim tam slam! Bite off the ends of your tim tam and use it as a straw to drink hot chocolate until it starts to get moist and then SLAM – pop that tim tam in your mouth… glorious.
I love me some Tim Tams! And the caramel ones are totally the best. My husband picked up on these when he went to Australia just before we got married. He talked of them all the time until they finally arrived here!
Now I want a Tim Tam! Lucky for me I live in Australia so its only a trip to the supermarket for me, unluckily I cant tolerate dairy!
I’m glad someone FINALLY decided to cash in on the lucrative Americans-loving-Australian-chocolate market, we’ve been talking about it for years! You guys are due a chocolate revolution!
p.s. thanks for the tute, I’ve been doing bias the cheats way and it really was not good!
Darn I should have waited for this tutorial to finish my very first blanket ever!!! Great tuts and YES, PLEASE I would LOVE sewing tuts as I’m venturing myself into the sewing world and me likey a lot. Right now I’m working on making baby shoes for my baby to come…hopefully I finish them before he makes his appearance lol!
Yes! Sewing tutes would be awesome!! I am basically new to sewing, so any advice is totally appreciated… but I have to say, even if it’s over my head, it does help.. or will, eventually.
And Tim Tams are WIN. I did not know they sold them at the Bullseye. SWEET.
AND, your sugar cookies and the icing you posted(around Christmas) are fab. I made a few batches at Christmas and everyone loved them. Especially the kiddos. And my mom was most impressed that they were not burned… and they were very very easy to work with! Thank you! 🙂
Nice idea. Your explanation is so clear. Thanks. I have a similar but slightly different way of doing this which i blogged over here. I do this for sweetheart and other sharp edge neck lines either for turning the bias facing or as piping.
http://adithisammasews.blogspot.com/2010/01/bias-strip-preparation-for-shaped.html
Thanks for taking time to visit the link
Pepperidge Farms has NOTHING on Arnotts original tim tams! (I’m in Brisbane and have heard from friends in the US that the PF ones are ok but not the real deal.)
GO ARNOTTS TIM TAMS! 😉
P.S. The raspberry ones are quite nice when chilled. The raspberry stuff gets nice and chewy. 🙂
Cool. Thanks for the post, this is very helpful. I guess bias tape was used for quilts back in the days as this is now how people greating binding strips. However I like the concept of using bias tape for smaller projects. I have to think about what tutorial I would like to see next. I know others do this, but a sew-along would be cool, maybe a small project. Thanks again.
Thank you so much! I almost always cut my own tape, but I’ve wanted to work more with pre-made double folds, but I could never figure out the corners! This helps a lot!
Mmmmmmmm…Tim Tam slam…*drool*
Great tutorial! Thank you!
Thanks for posting this – great explanations. I saw your mug rug previously and am going to make one for my Mother, which I think she will adore. No more paper napkins for her morning coffee and cookies!
I have to agree with the whole Tim Tam thing! I Too love them…the caramel as well!!! My brother lived there for a couple years also and brougt some back and showed us the Tim Tam Slam. He was so stoked when I called him to tell him Target had some! Thank you Australia!!!
Fantastic tute. Thanks so much. Bias, corners and I are not normally friends but this might just bring us together. Also, did you know it’s practically illegal in Australia *not* to drink your tea through a tim tam? And rightly so. 😉 Not very ladylike (especially the noise it makes) but totally delish.
Thank you for the tutorial, it’s wonderful for me, I’m new in this works.
xo
Wow it is wonderful! Thank you, thank you so very much. Yes, keep it coming the photos were and are a big help:)
Loved the tutorial!! I hate bias tape sewing cause it always looks****. My friend is good at it and doesn’t see my hang ups. :{ But now I am going to be the Queen Bee!!:) I hope you do more things, you explained it so well and the pics are Great! Love the humor and comments too.
YEAH YEAH YEAH…..YOU DID IT YOU DID IT…..OKAY, I think I have been watching to much Dora….LOL…
Thank you so much for doing this….and we don’t have Tim Tam’s here so I will just drool over your picture of them…
Shannon Margaret
Okay, I’ll admit it. I was looking (okay, drooling) at the Tim Tams before I ever noticed your lovely sewing project. Can you blame me? They’re Tim Tams!
I would really love to learn to sew, so the tutorial idea sounds great to me! And if you could use simple terms for the many beginners out there, I’d be much obliged.
Excellent tutorial! Thanks so much! I tried following another one in the past that didn’t explain the corners so well – my results will be much neater now!
Good to see Tim Tams have made it to the US too, they must be our best invention 🙂
I added a link to this from my blog. I am a dreadful miterer and definitely want to refer back to your instructions often. Maybe I can get past my “curved corners only” rule!
No.1 – Love the tutorial
No.2 – Love the pictures
No.3 – YES to Sewing Series!!!
hi.
i have never seen this done before. you are awesome.
i have never even wondered how and now i know! thank you!!
i am making your bbq crock pot chicken and fries right now! 🙂
i have been here before but forgot to book mark you but i am doing it now. you have great pictures…and that baby up there was scrumptious!
happy sunday.
I just wanted to let you know that I used these directions over and over and it clicked…Thanks so much… I made some mug rugs with these directions for the binding…. My flicker picture of it is: http://www.flickr.com/photos/sydneysfabric/5434036459/in/photostream/
Thanks for the awesome directions,
Shannon Margaret
Thank you for the tutorial. You made it very clear! ^_^
Hello, I just found your site today, May 12, 2011, and I love, love it!!! I guess I’m a little late to post a FAQ, but I was wondering if you could do a simple, but detailed, post on how to sew those darn bottoms on handbags, especially around the curves? I read a lot of posts on how to do this, like leaving 5/8” open on all four corners (on square bottoms), but when I tried it, I got all messed up. I would be very appreciative if you could address this for me, and maybe anyone else experiencing the same issue, and it just might be the one shot I need to get the hang of this. Thanks so much for your site! Jerri
I’m feeling this would be great for Christmas gifts – a $1 store mug, a mug rug, and a box of cookies. Awesome tutorial! The pictures are perfect!
Thanks so much for the help! Great explanations and beautiful/helpful visuals!
Thanks for this awesome tute. My sister came back from Australia and was hooked on Tim Tams. She’s got me hooked as well.
First off, thanks for this awesome tutorial! I don’t use bias tape that much but I’m about to finish my first quilt and will be using bias tape soon enough. Secondly, I’m actually not too happy that you just shared that Target/Pepperridge farm now carries TimTams. I become quite addicted to them while spending several weeks in Australia!
I am also teaching myself to sew. I love this tutorial and your blog.
I am making fleece blankets for my nephews and I did not think I would like using bias tape. I mitered a corner perfectly the first time….Woop Woop, doing the happy dance.
Thank you sooooooo much
My husband learned the Tim Tam slam in Taiwan with the chocolate ones and hot chocolate. Bite off both corners and see how fast you can drink up the hot chocolate through the Tim Tam before it “melts” in the hot chocolate.
I have sewn for years and never knew the bias tape trick. Thanks!!!!!
Hi, thanks soooo much for the tute, am off to have a go around some chalkboard fabric and plastic! wish me luck,
Thanks again (all the way from Australia((land of the Tim Tam)).
Lee
Hi, I’m making a dress for a school art project and needed to bias bind some flags: this helped me hugely! Thanks so much for a really easy-to-understand explanation! 😀
Hermione x
can i do the same with a quilt?
Just used your tutorial for corners. Worked great! Thanks so much.
I would love to see your projects in video form as well.
Thank you Thank you Thank you!!!!! You have saved Christmas~ or at least a Christmas GIFT! I was so dang frustrated trying to figure out HOW to attach bias tape ( having never sewn with it before, and having basically taught MYSELF how to sew…) I was about to chuck the project I had been working on. Then I thought…there are tutorials all over the web for EVERYTHING…there’s GOT to be one for bias tape…and woot woot woot there you were!!!! I can’t thank you enough…and your “picture heavy” tutorials were PERFECT and JUST RIGHT for those of us who are totally clueless…and NEEEEED pictures!!!!
Thank you so much for you wonderful tutorial! It saved me from chucking a project I have been working on for a Christmas gift! I can’t tell you how EASY it was to follow, and put into practice! Totally a “duh” moment when I realized exactly how to do it…and your “picture heavy” tutorial, was just PERFECT!!! Thanks Again!! You saved Christmas!!! *grin*
Thanks so much for the bias help. I have been sewing 10 months and actually know how to make a few things now. I’m embarrased to say I have several pkgs of this, and did not know exactly how to attach it…hee hee. Thanks!
Thank you so much for a great tutorial! I am making my daughter a duffle bag and can’t remember if I have ever sewn with bias tape. I just put the tape around the inside pocket and it came out great, thanks to your fantastic instructions and photos! Kind of a lot of work for an INSIDE pocket, but I did it! WooHoo!
Does this technique work going the opposite way? say I have a corner that instead of going 90degrees its going 225degrees if 0 is north?
This was by far the BEST tutorial I have found to explain mitered corners with bias tape! The pictures were awesome and there was no guessing. I appreciate that!
What a great tutorial. I love that you included so many great photos along the way also. I have passed this on to all that really try to do this on their quilts but fail. Just one little tip is all someone needs to set you in the right direction. I remember goofing on my first one and trimming. I have learned my lesson the very hard way. Keep up the great tuts. It is a blessing with the photos. I teach ITH this way with machine embroidery. We have a Facebook group called Cyber Stitchers and then there is always Embroidery Mentor. Did not know about Embroidery Mentor when I first learned machine embroidery. We have since started a closed group also for those working on certain projects at the same time. Cyber Stitchers is for people that have a basic knowledge and sometimes just need a quick refresher. Would love to have a blog that pays money. I would appreciate any info on doing this. Even though I am retired, my time is so valuable also.
Here I sit on a beautiful sunny day in January overlooking the beach. Sun is too hot to sit out in at mid day so thought I would look up some sewing cheats. I’ve been sewing most of my 55 years and am self taught. I’ve bound many an item in my life and never taken the time to learn the correct method. Thank you for taking the time to take photos and detail your instructions. In return for your time I would love to send you some genuine Arnotts Tim tams. White chocolate, black forrest, caramel to name a few. Let me know your address and I’ll send some Pronto so you can really enjoy that tea.