So, last week in all the glory of the beautiful weather we were having (before the snow, which in case your wondering, has mostly melted…can I get a WOO HOO!!!) I went and made this:
Oh so pretty!
An Easter door hanging for my front door! I just felt like making something Spring-y since we were having such nice weather, ‘were’ being the operative word 🙂 Aaah, how warmer weather just puts you in a happy place! I was totally in the mood for some pastel colors and thought pink and green were the way to go…what do you think?
Anyways, I thought I’d show you what I did in case the warm Spring-y weather has put you in a good mood too and you want to make one for your home!
Lettered Ribbon Door Hanging
1 roll of 3 inch wide ribbon (my roll was 3 yards in length and I used most of that sucker too!)
unfinished wood letters (to spell whatever word you want to hang)
spray paint (I used Rustoleum American Accents in Sweet Pea)
fabric glue or hot glue and gun
scissors
needle and thread (mine was a light-colored thread to blend in with the ribbon)
newspaper
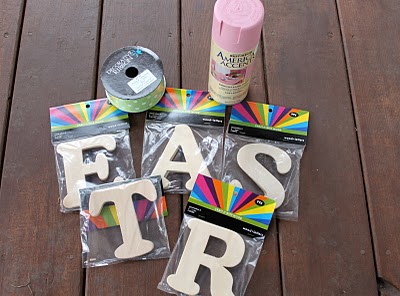
Here’s a look-sie at some of what I used to do the project.
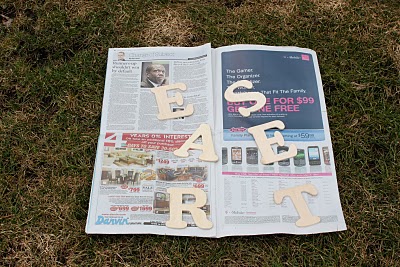
OK, so get some newspaper and head outside to do your spray painting…fumes are just no good here, especially if your preggie like me. And a pink yard would just be double no good for my hubby to see when he comes home from work.
Spray your letters with nice even strokes to get good coverage. I did three coats that were applied about 3 minutes apart...as per instructions on my can of spray paint 🙂 I also flipped mine over and did the backs although you can totally skip this since you’ll never have to look at the backside! Save yourself the time.

Once your letters are dry, cut a yard of your ribbon (or you may need it longer to spell a different word) and evenly space out the letters. Then fabric glue or hot glue them in place. Make sure you have a nice tail of ribbon at the bottom and top too!

I cut the bottom of my ribbon into a v-shape cause I thought it gave it a nice, finished look…but really do whatever you like, I won’t get mad 😉

Then, glue the ends together to make the loops of your bow.

Then, cut another smaller 3-inch piece of ribbon to decorate the center of your bow. Just glue the ends together like we did above and set aside.
Take your needle and thread and stitch the bow loops, all criss-crossed and such, like in the picture above.
Then, glue the bow to the top tail portion of your ribbon with the letters glued on to it.
Next, add a dab of glue to the center of the bow (right on top of your stitching)…






It’s perfect! I wanted to make something for our front door but I’m kind of wreathed out. Great idea! 🙂
Soooooo Cute!!!!!!!!!!!!!!!
I will copy and post on my struggling blog too.
I do have a question: What do you use to hang it on the door. Well… not on the door but on the ribbon?
I love your blog. You and your family are soooo cute.
MommyMelback.blogspot.com
Yup! It’s official! I love your blog and all your front door decorating goodness!
Great job on this by the way… 😉 Think I have another project on my ‘to do’ list!
Great idea! It’s a wonderful alternative to a wreath. Love the colors.
Love it! It is more original too. Very fun. I really need to get the Easter bug going. I haven’t even gotten my easter decorations out. What is with me? I have two on my mantle that are new, but seriosuly, I need to get with the program. Loving this!
I dropped by via Making the world cuter. This is really pretty. Great idea and result!
that is just too cute!!!
That looks lovely and is such an easy thing to do. Thanks for sharing. Have a fab day, night, what ever the time is over yours… ines from Germany (o:
Love this idea! I am always looking for ideas for my door!
Great idea! This is a great change up from a wreath and it looks pretty easy to make too!
This is cute! A great alternative for those of us with storm doors, where a wreath just gets crushed!
What a beautiful way to welcome Spring and Easter! Noah is my favorite part of it though. 🙂
I love the simplicity of this – so cute and creative! Thanks for sharing!
OH I LOVE LOVE LOVE IT! That is so cute! Thanks for sharing!
How cute! I love the polka dot ribbon!
Thanks for linking to CC!
This is adorable! I need letters like yours to make one! I am always excited to see what you will come up with and post! I hope you will come vistit my blog at nightowlcrafting!
I love this! I am going to try and make one!!
Adorable! I love it and it’s actually something that I could handle making. lol
Jen
Creative and Curious Kids!
I love your door hanging. You did an incredible job on the tutorial too!
God’s blessings,
Sarah 😀
This is such a great tutorial. SO easy to follow. I love it! Thanks for sharing at Fun to Craft’s Spring has Sprung Party.
Pretty nice site you’ve got here. Thanks for it. I like such topics and everything connected to them. I would like to read more soon.
Anete Kuree
Ok, so I just came from Sumo’s sweet stuff, and so I’m a little late on seeing this and I TOTALLY love this. I might have to do one for Christmas!
Hi,
I love this tutorial, since I’m a crafting newbie. I had just 1 repeat question, what are you using to attach this to the door? Is it glue, or something else? Please let me know as I want to get mine hung this weekend.
Thanks,
Jamika