So, I thought I would post the tutorial that I did for my guest blogging stint I did on Someday Crafts. Wow! That was just really fun to do, thanks again Michelle! This is one of my favorites because it is so darn easy to make! I am making it in tons of different fleece colors and patterns for the winter months…jumpers rule!!!…on little girls anyways 😉

Super easy and super cute…pinky swear!
So, like what you see!?! Ok then, here is what you need:
Little Girls’ Fleece Jumper
1/2 yard fleece
2 coordinating buttons (any size you like)
coordinating thread
scissors, rotary cutter, needle, sewing machine…the usual supsects!
Aaaaah, cuteness!
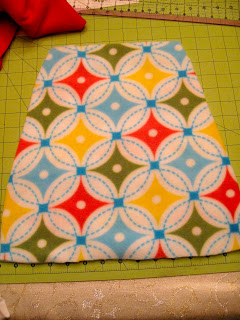 First off, fold your fleece in half and cut a rectangle with a bit of flair at the bottom. Mine was 9 inches across the top, 16 inches across the bottom and 14 inches in length. Make sure you have enough on each side for a seam allowance AND you don’t have to worry about hemming the top or bottom since fleece doesn’t fray…Yep, super sweet, I know!
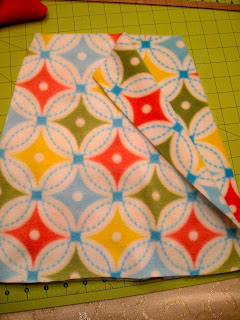 Then, with right sides facing each other (see picture above) straight stitch both sides of the jumper together, remembering to backstitch at your beginnings and ends of each side!
Next up, cutting your straps, WooHoo! I made mine 7 inches long and 1 1/2 inches wide. The length will really depend on your little girl though, you may want to measure her first 🙂
 Now, just place the short end of one strap with it’s right side facing the wrong side (or inside) of the back of the jumper. Sew a straight stitch all the way around making a nice little square box, like the picture above. Cute. Do this to the other strap. Good. Now they are nice and secure!
 Next, bring the free end of the strap to the front of the jumper and make sure that it’s at the right length for your little ones shoulders. Mark with a pin (or a disappearing ink pen) where you want to place you button. Then just sew those buttons right on with needle and thread! Be sure you sew your buttons to the right side of the strap!
Then, go ahead and cut a small slit a bit smaller than the actual size of the button into the front of the jumper, making sure to line it up with the button/strap. I like to use the really itty bitty rotary cutter for this and make sure to put your self-healing mat inbetween the two layers of the jumper…you don’t want any button holes on the backside, that would be an uh oh, oh no…!
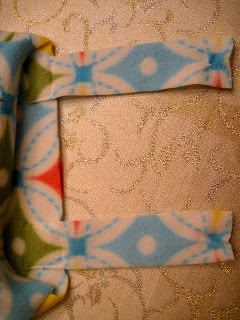
Here is what the straps will look like when they are attached to the back of the jumper…you can also see my hand-sewn button knots at the free end.
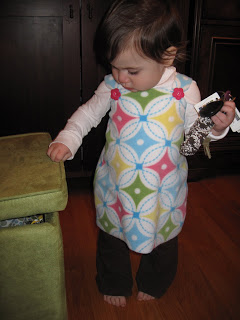
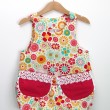
And, here is the finished product…perfect for fall…or winter!
So nice and cozy.
Want to see it on my little model again? Ok, since you asked…
A side view of the lil’ jumper…humm, this could describe both Penny and the dress! 😉
A front view…and she’s sooo getting into all of my sewing stuff lately, hrmmm…
Ooooh, if you want to learn how to make that elasticized fabric keychain she’s holding on to just go to my blog, Smashed Peas and Carrots, for that and a bunch of other super sweet tutorials that you can finish in no time at all!

A back view…and a see ya later alligator!
And that’s it…a simple little girls’ jumper done in the shortest of naptimes!
Hope you all get to makin’ one (or two) for your little peanut!




I just wanted to let you know I left you an award on my blog! =)
Enjoy!
Too, too cute. I wish we were neighbors and I could learn all your creative secrets!!
Yay I found you! Great little crafty blog you’ve got here. I am adding this project to my “To Do List”. I heart tunics and jumpers on little girls– especially with pans/jeans! Thanks in advance for the tutorial– I’ll be sure to let you know how mine comes out!
I LOVE IT! Actually, I made FIVE! It’s funny, now that I look back at your post, I see that I happened, by chance, to use the same flower buttons on one that I made! Just in yellow though. I also made the lama too! I posted both on my website http://www.theekstromfamily.com. Check them out! THANK YOU!
I so want to make this for my daughter. It looks simple enough for me to do 🙂 Do you think regular cotton fabric can be substituted instead of fleece?
Oh for sure Slippah Bloggah!! You’ll just need to add in a seam allowance to your fabric to account for the raw edges before you cut your pattern out!!
Maggie
Thanks for posting this! I’m heading upstairs right now to get started. Cheers!
very cute! I really want to make one. pinning. thank you!!!