Oh, spring is here and summertime is on it’s way…Yippee…I just love this time of year, cool breezes and sunny days! Since we have really been getting a dose of some beautiful weather we have been enjoying lots of picnics (ALREADY!!), they are just so much fun! Mr. Noah and Miss Penny love to sit on the grass with a blanket and their special little lunch or dinner, they think it’s the coolest thing to eat outside…and well, it is, isn’t it!?! (crumbs go directly on the grass…no clean-up equals super awesome in my book!) And what better way to have a picnic then to get them to carry their own food to the table…er, blanket…this preggie momma really digs that idea!!
Anyhoo, I saw this neat-o idea for making lunch bags on Skip To My Lou and since I am in an Oil cloth-crazed phase lately I thought how perfect would these be for a picnic! I changed it up a bit though and added a velcro closure so the oilcloth would stay folded shut and make carrying the lunch bag a little easier for smaller hands. Wanna see what I did?

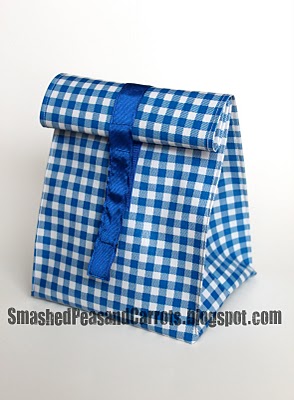
Adorable, isn’t it?
Ok, so here’s how to make one to tote your picnic lunch in:
Oil Cloth Lunch Bag with Closure
2-12 x 15 inch pieces of oil cloth
1-10 inch piece of 3/4 inch wide grosgrain ribbon
1-5 inch piece of 3/4 inch wide velcro (5 inches needed of the rough side and 3 inches needed for the soft side)
coordinating thread
sewing machine
rotary cutter and mat
*Again, I used a microtex 80/12 needle to sew through the oil cloth.
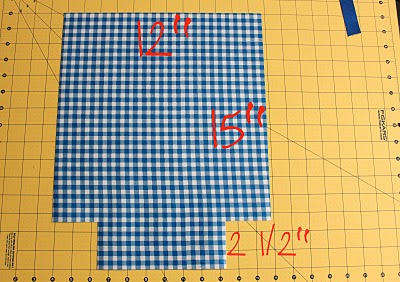
To make the lunch bag I basically followed the instructions on Skip To My Lou but added the closure to make it easier to carry. I first cut two 12 x 15 inch pieces of oil cloth and then cut two smaller 2 1/2 inch squares at the bottom of each shorter edge.
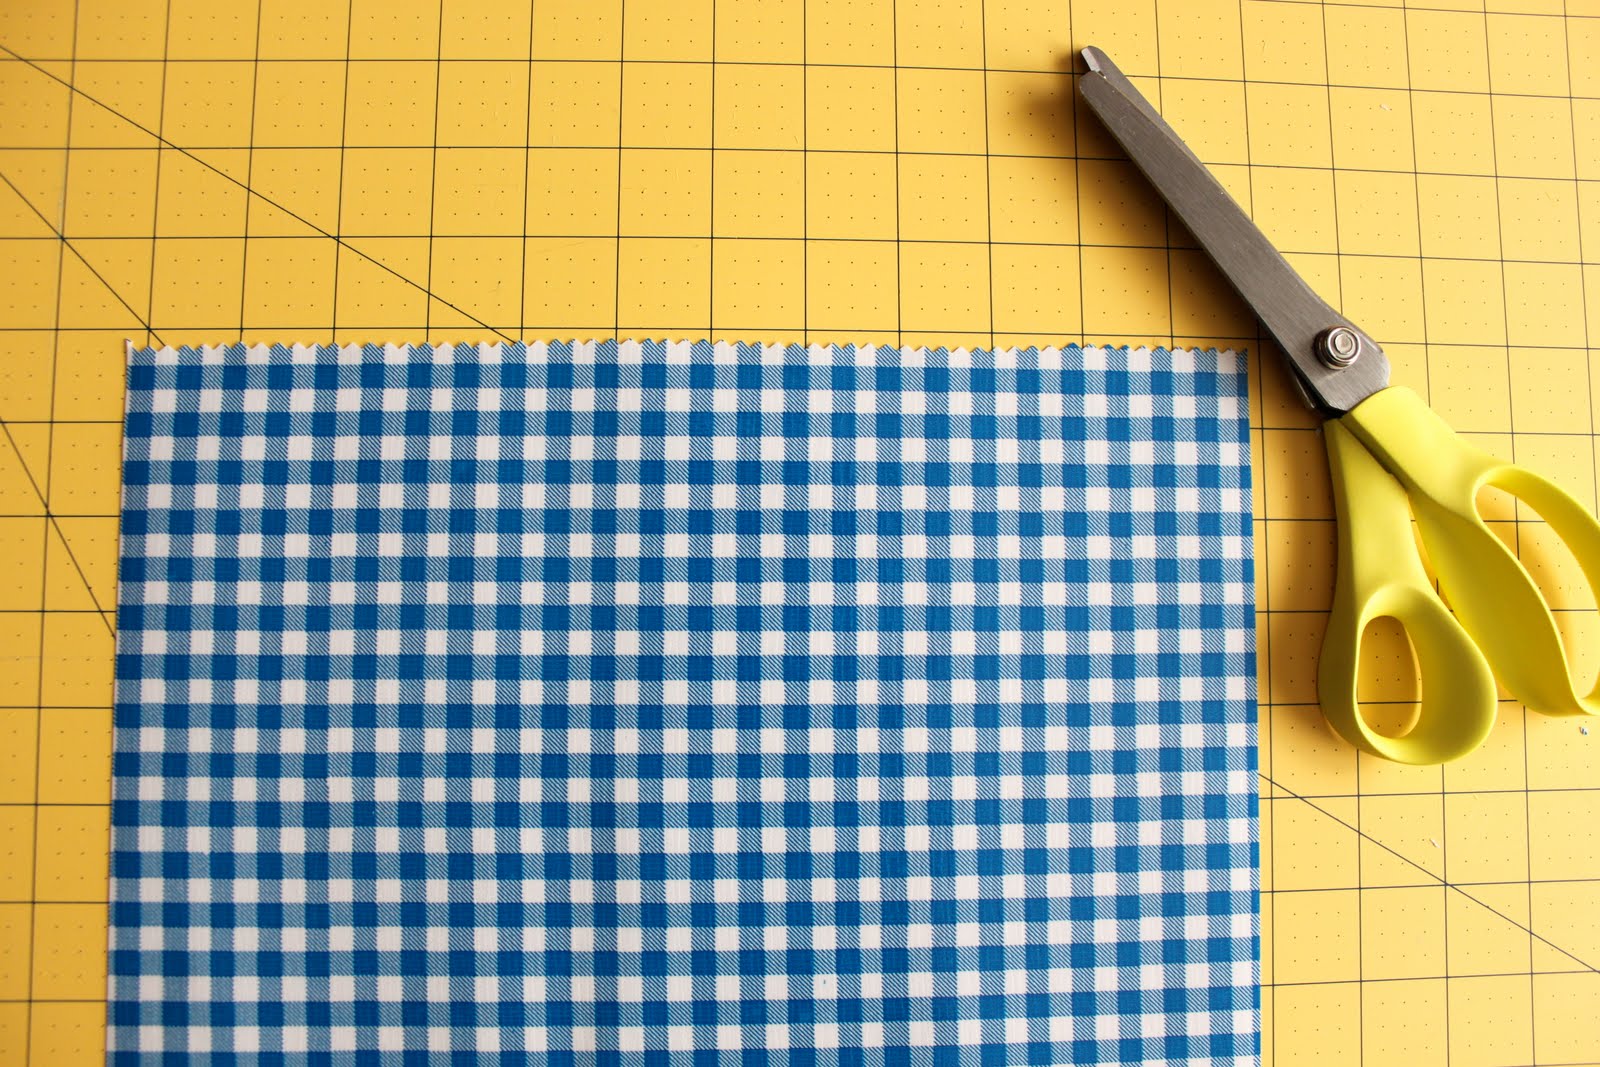
Then, I trimmed the top edges with pinking shears mainly to pretty-ify the top edge…not necessary but cute!
Go ahead and set aside your oilcloth now and get out your velcro and ribbon.
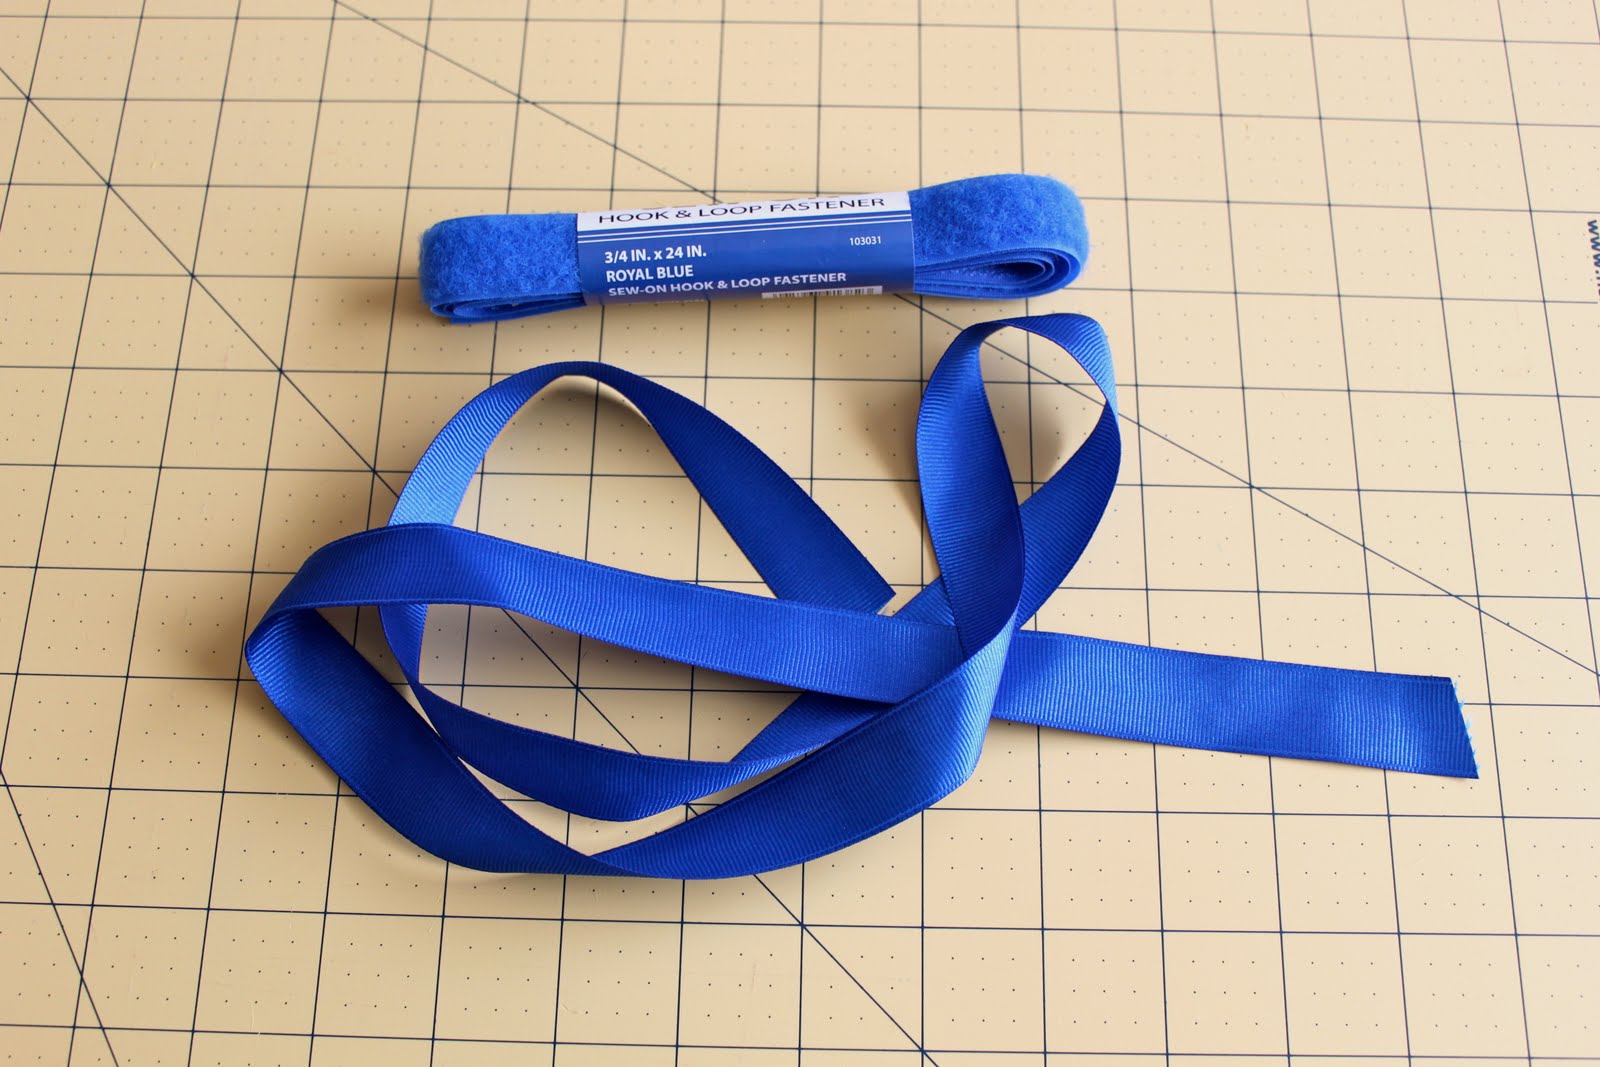
Here is my velcro and ribbon all ready to be cut!
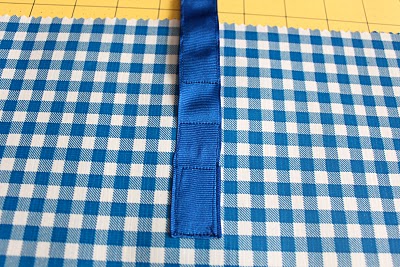
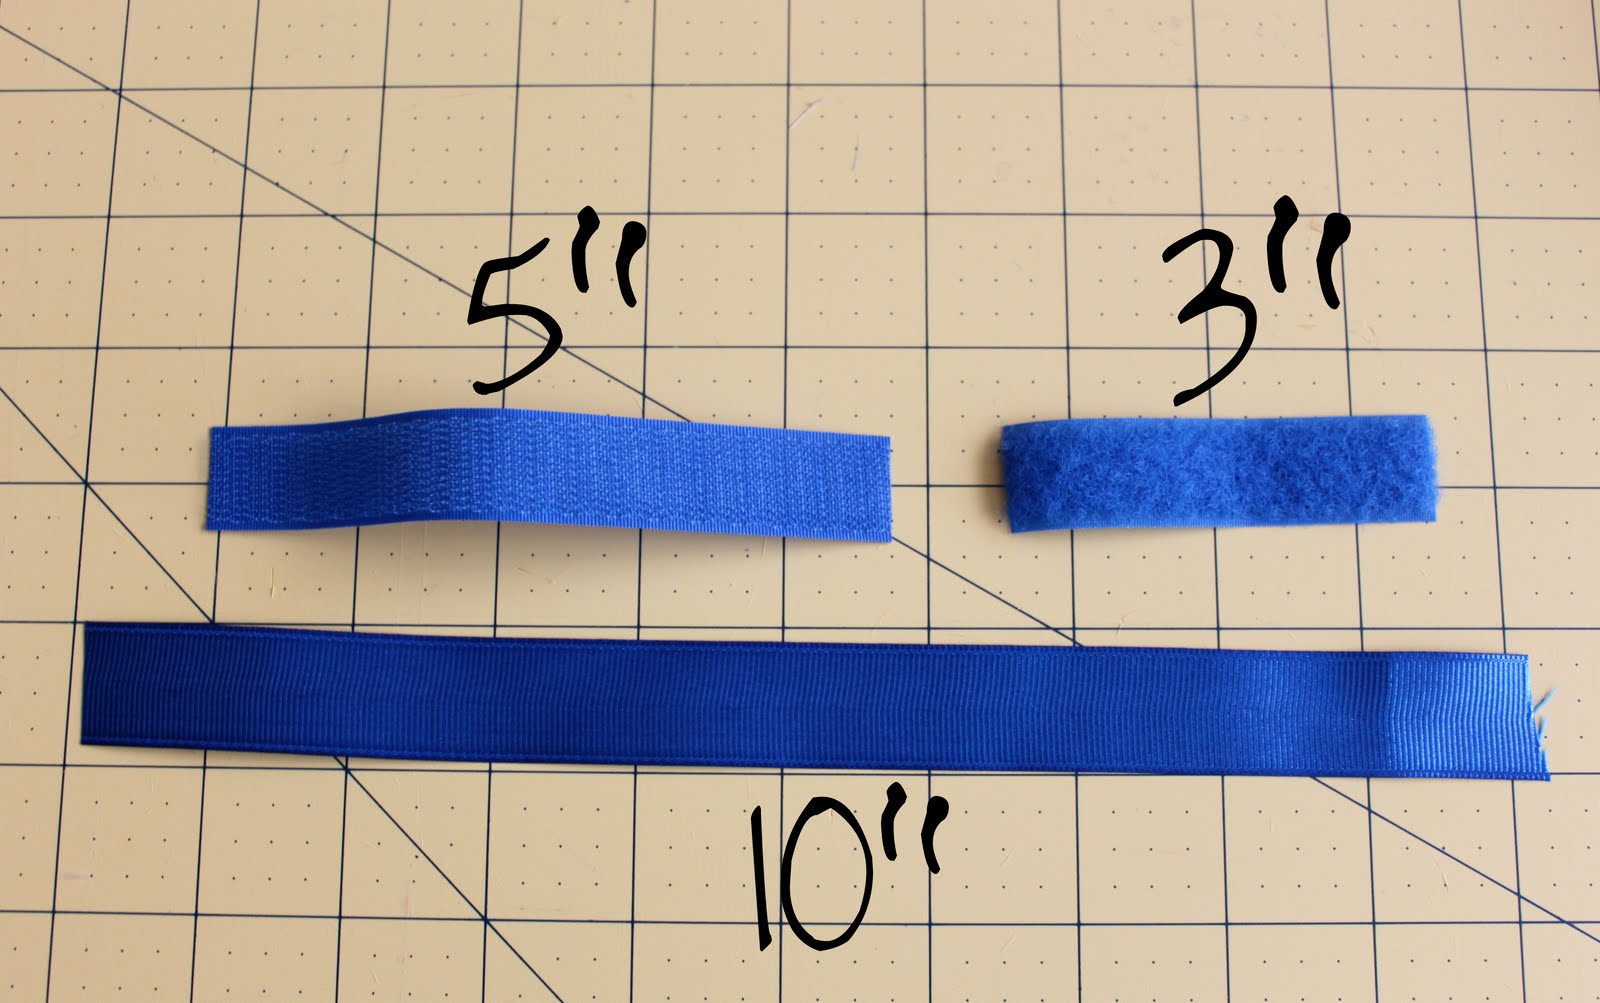 Cut one 5 inch piece of the rough side of the velcro, one 3 inch piece of the soft side of the velcro and a 10 inch piece of your ribbon.
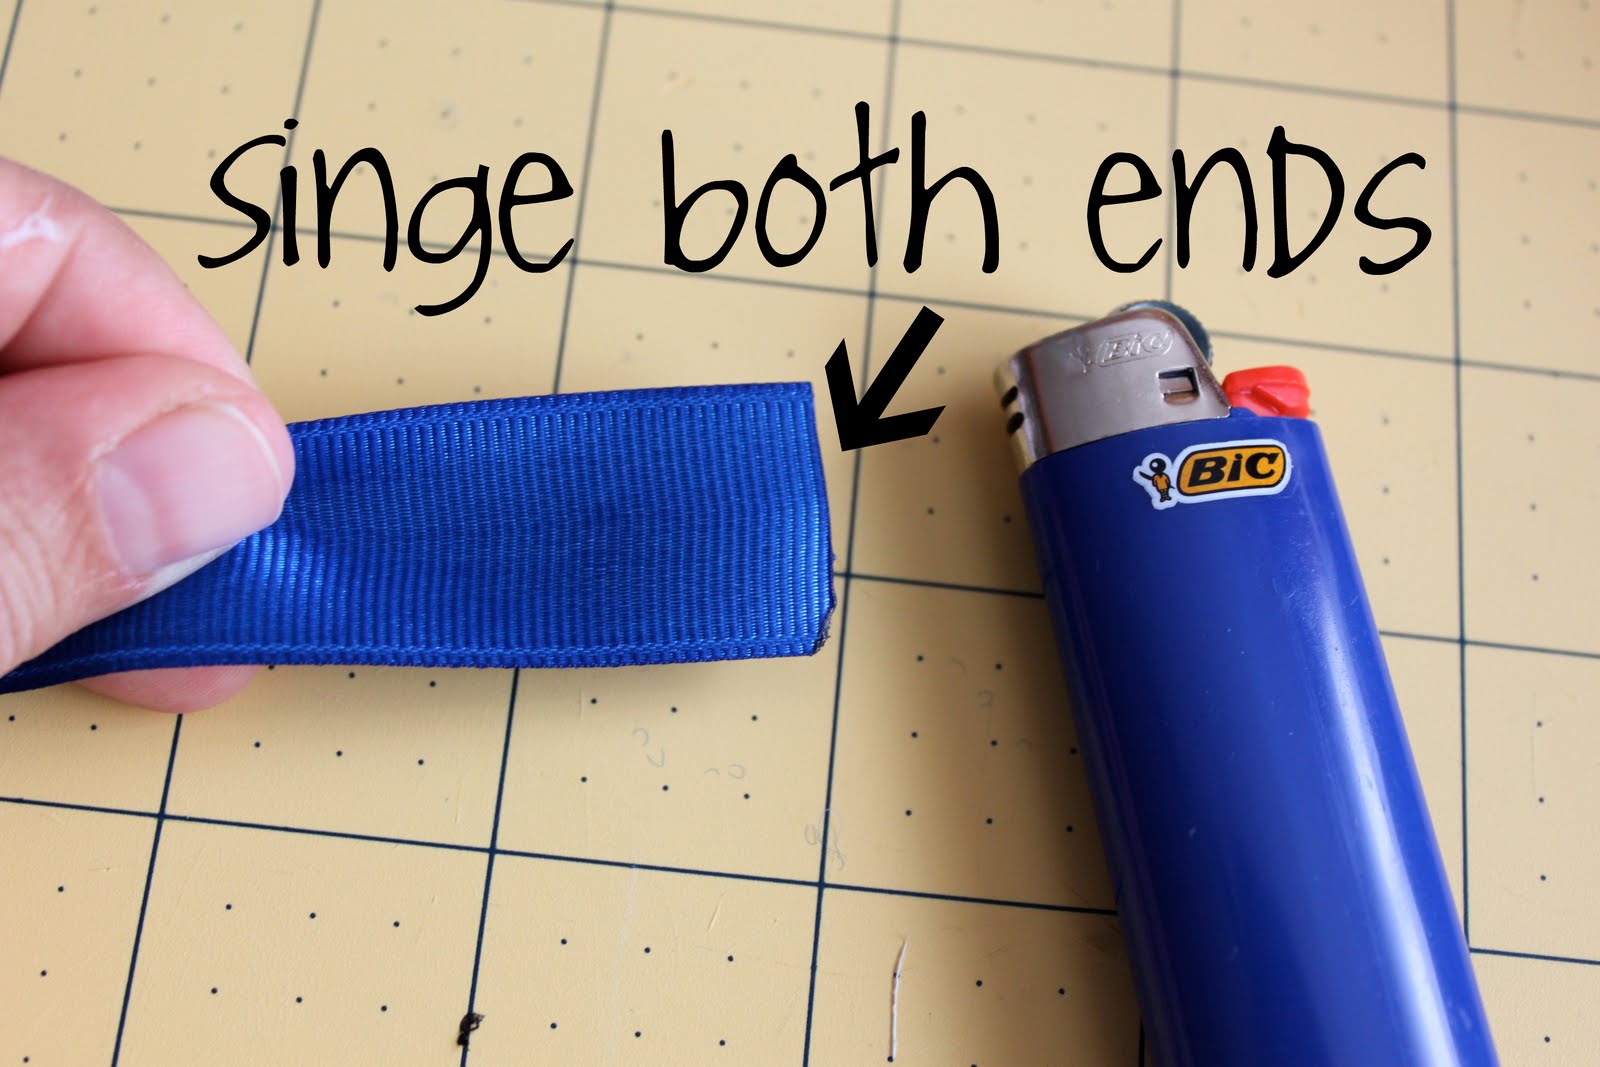
Singe both ends of your ribbon with a lighter so they won’t fray.
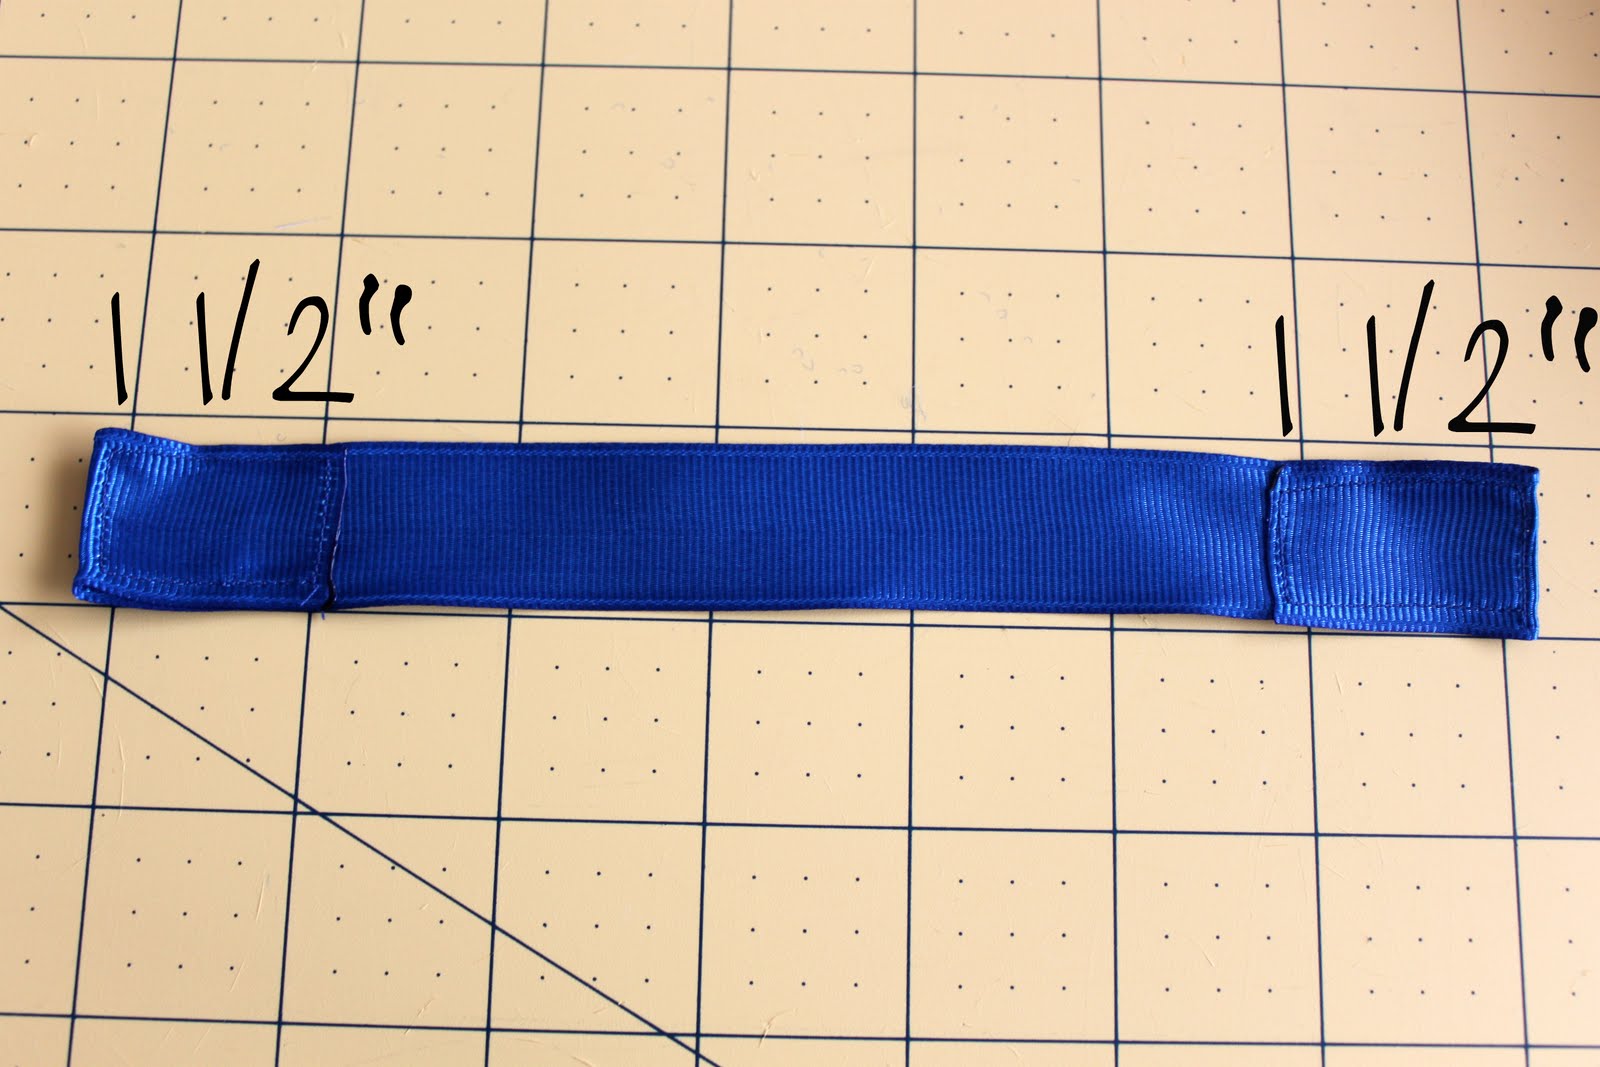 Then, fold both ends of your ribbon in about 1 1/2 inches and sew around the edges in a box shape, like the picture above.
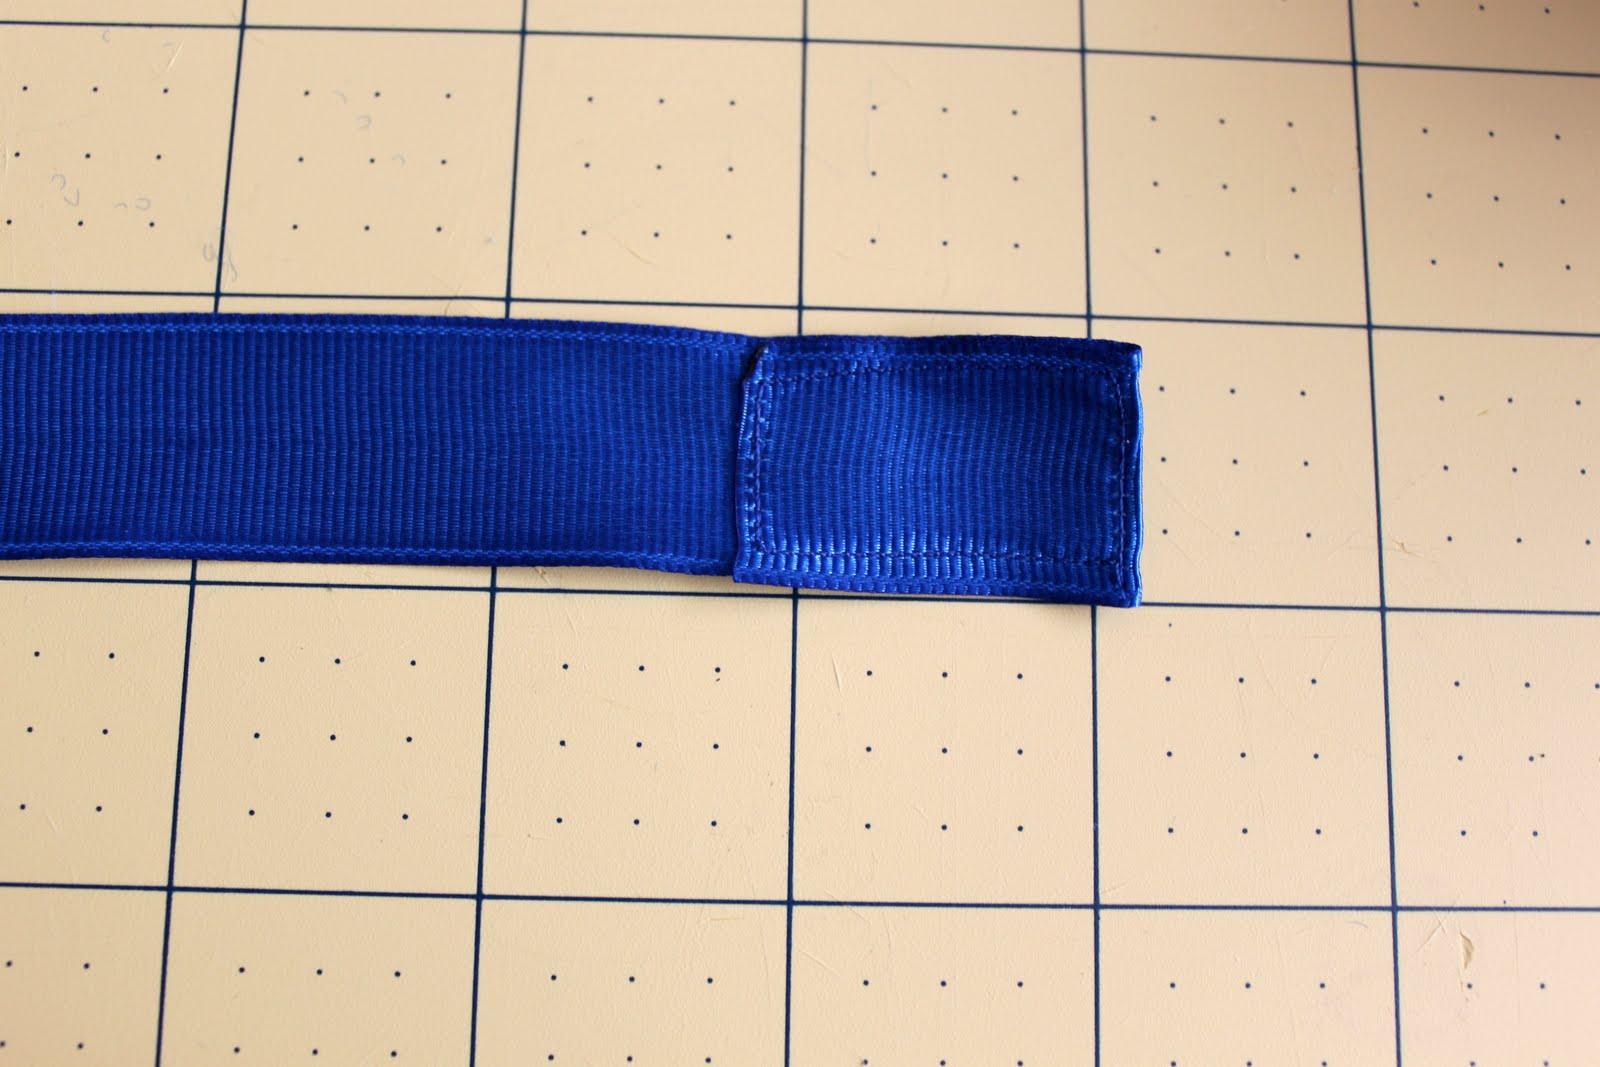
Ok, so here’s a close-up for ya’ll
 Then, sew the 3 inch long piece of the soft part of the velcro next to one of the folded edges you just sewed up.
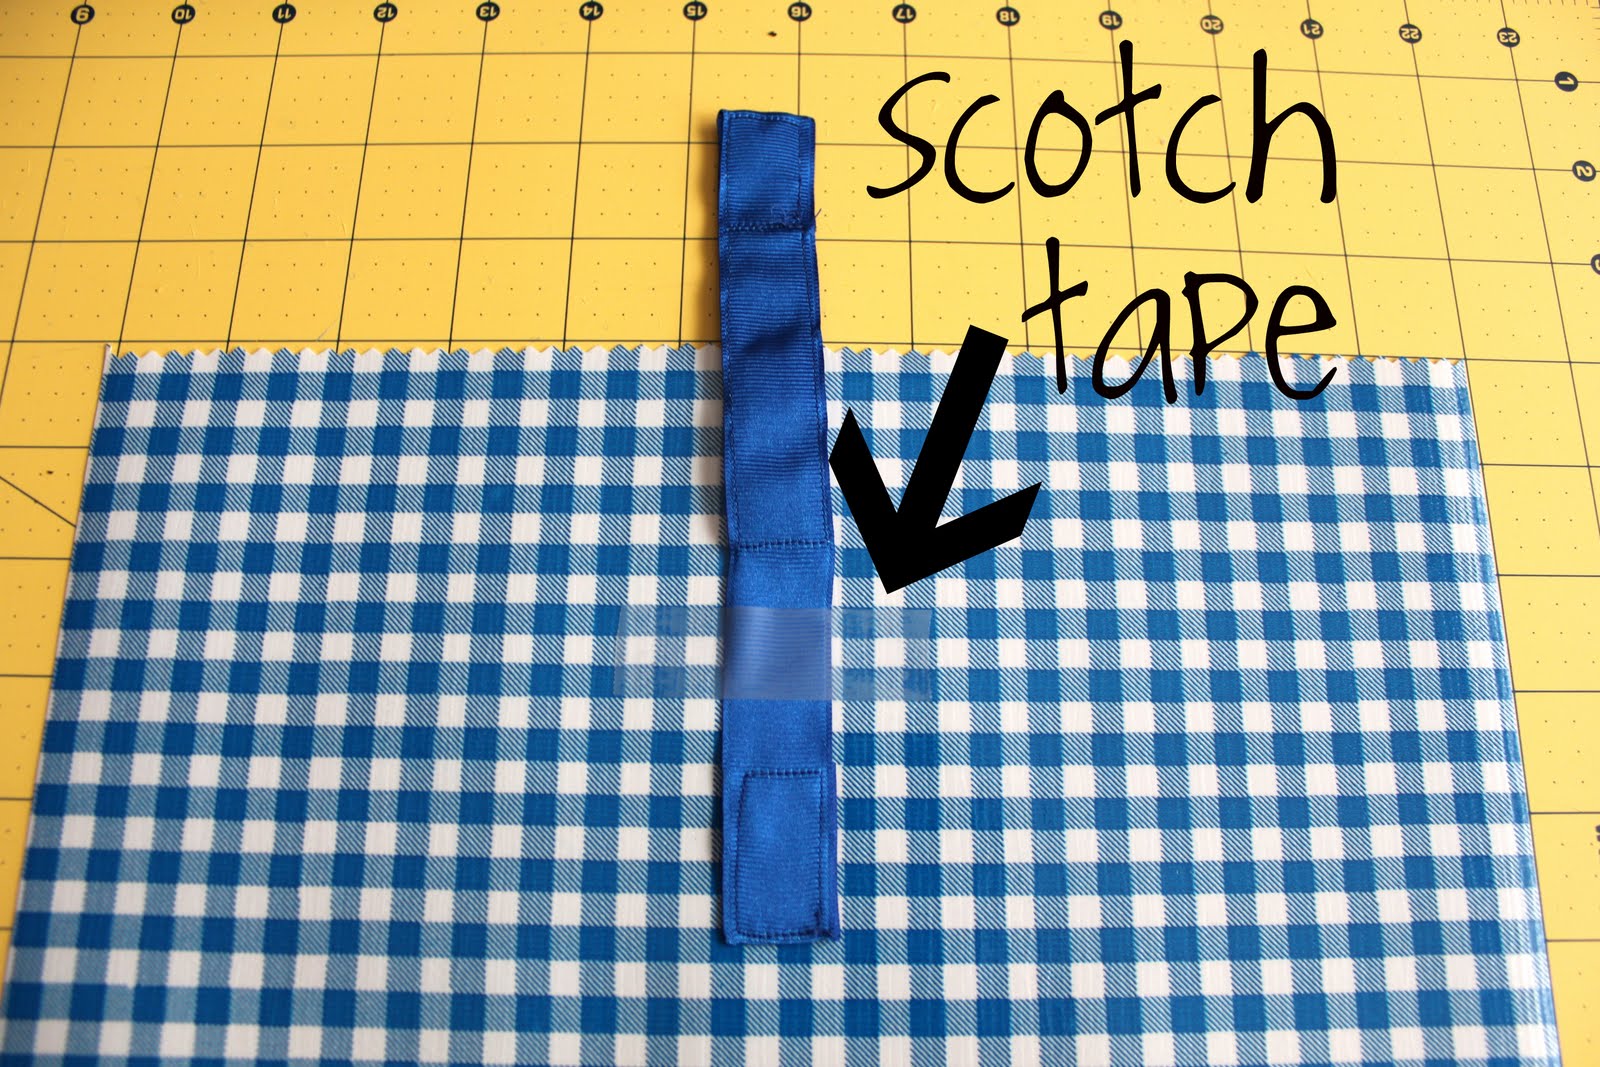
Next, place the ribbon (soft velcro side facing the right side of the oil cloth) in the middle of one piece of oil cloth. The end with the soft side of velcro should be toward the top edge with about 2 inches of the ribbon hanging off.
I used scotch tape to hold down the ribbon closure while I sewed it in place since oil cloth is so slippery. You will just sew right over it and peel it off when you’re done…easy peasy!
Here’s a close-up of how I sewed it onto the oil cloth.
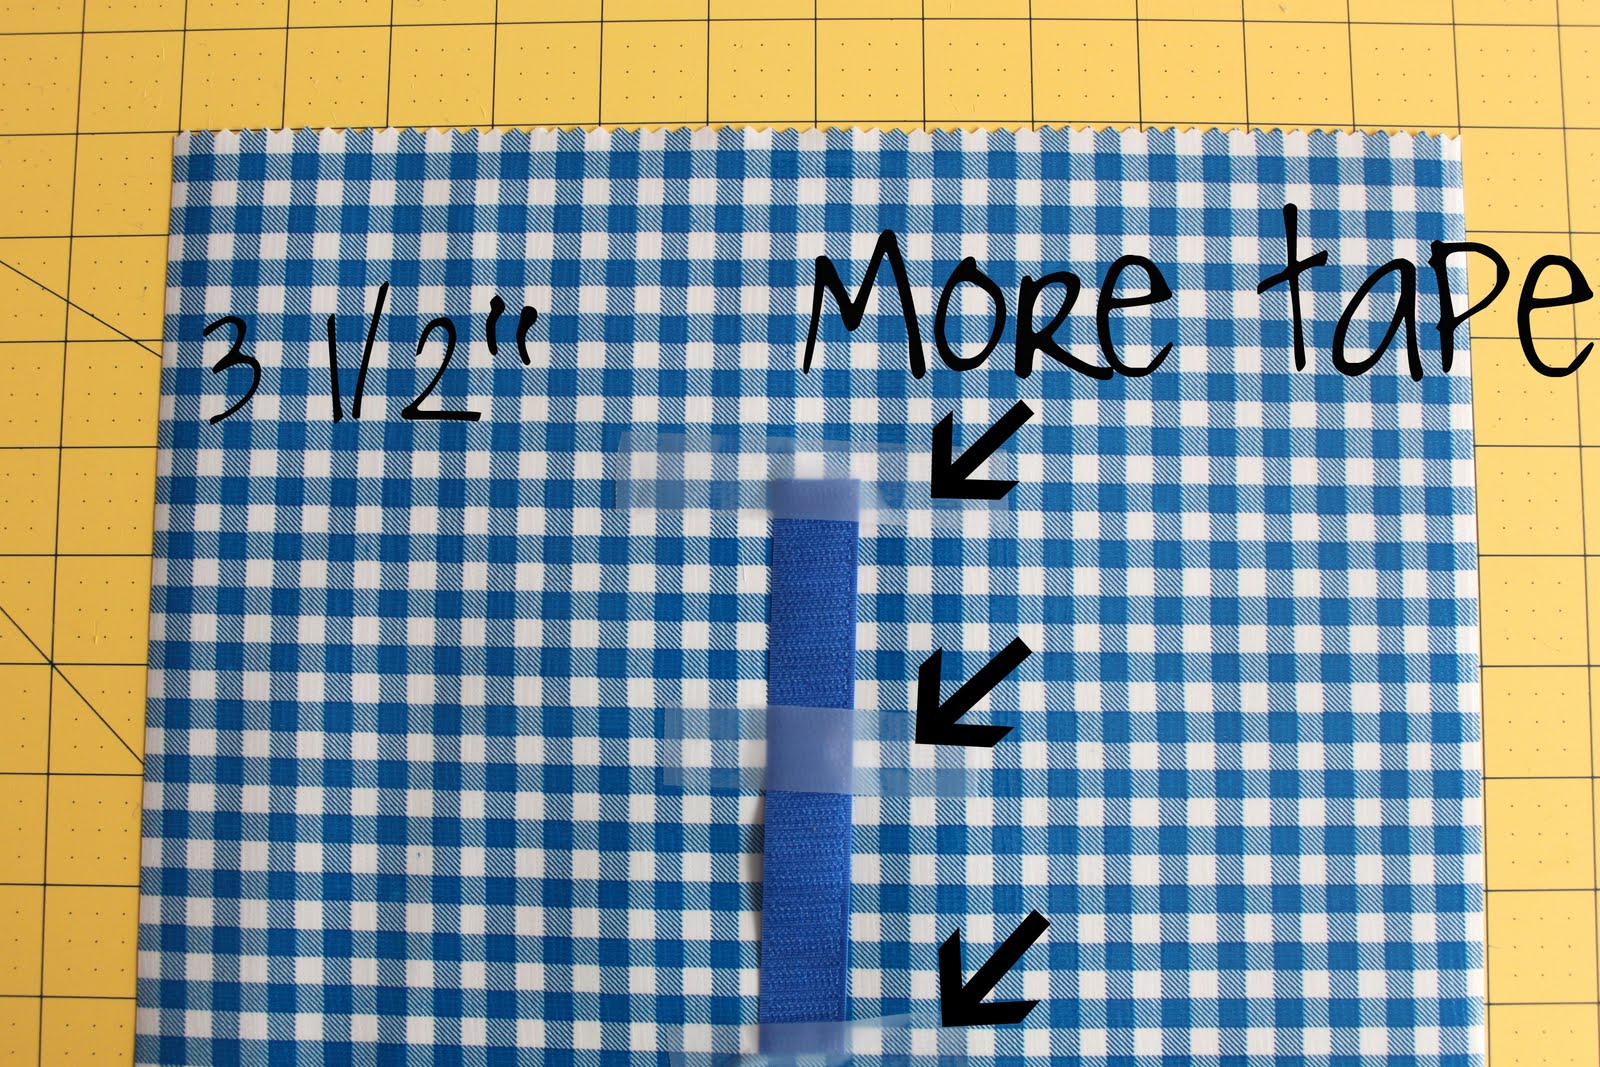 Then, place the rough side of the velcro (rough side facing toward you not the oil cloth!) in the middle of the other piece of oilcloth but this time about 3 1/2 inches down from the top edge…see picture above! Use some more tape to keep it in place while you sew!
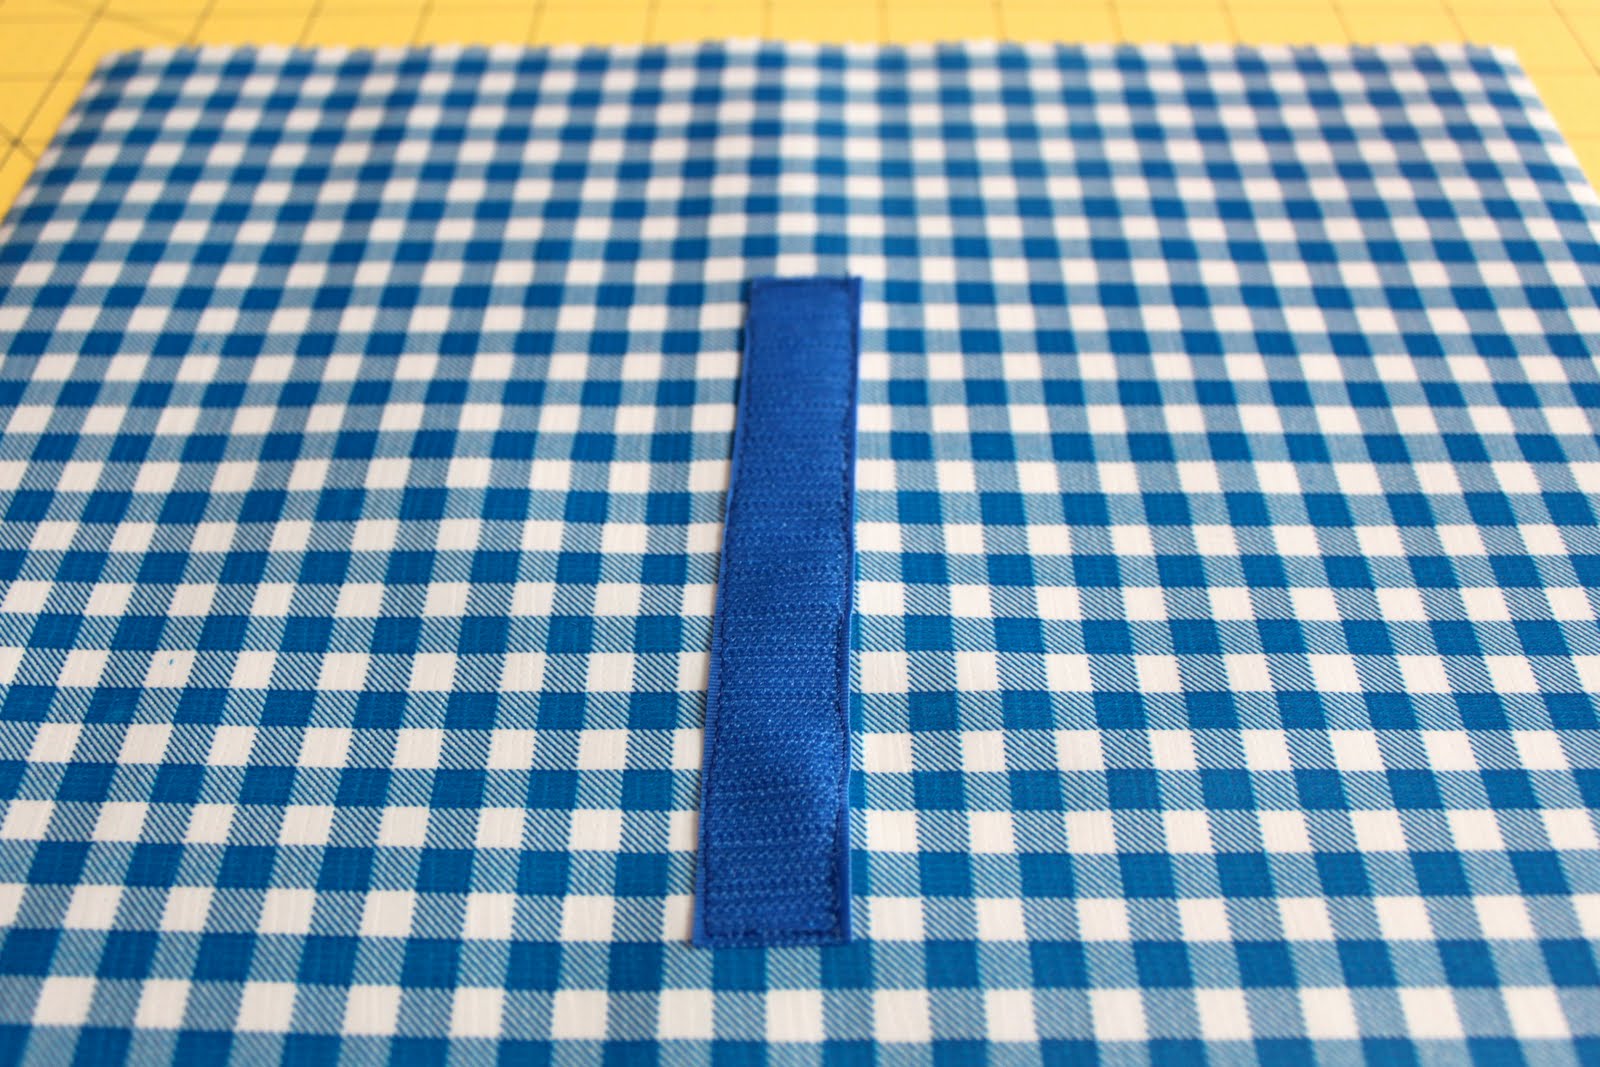
It should look like this when your done.
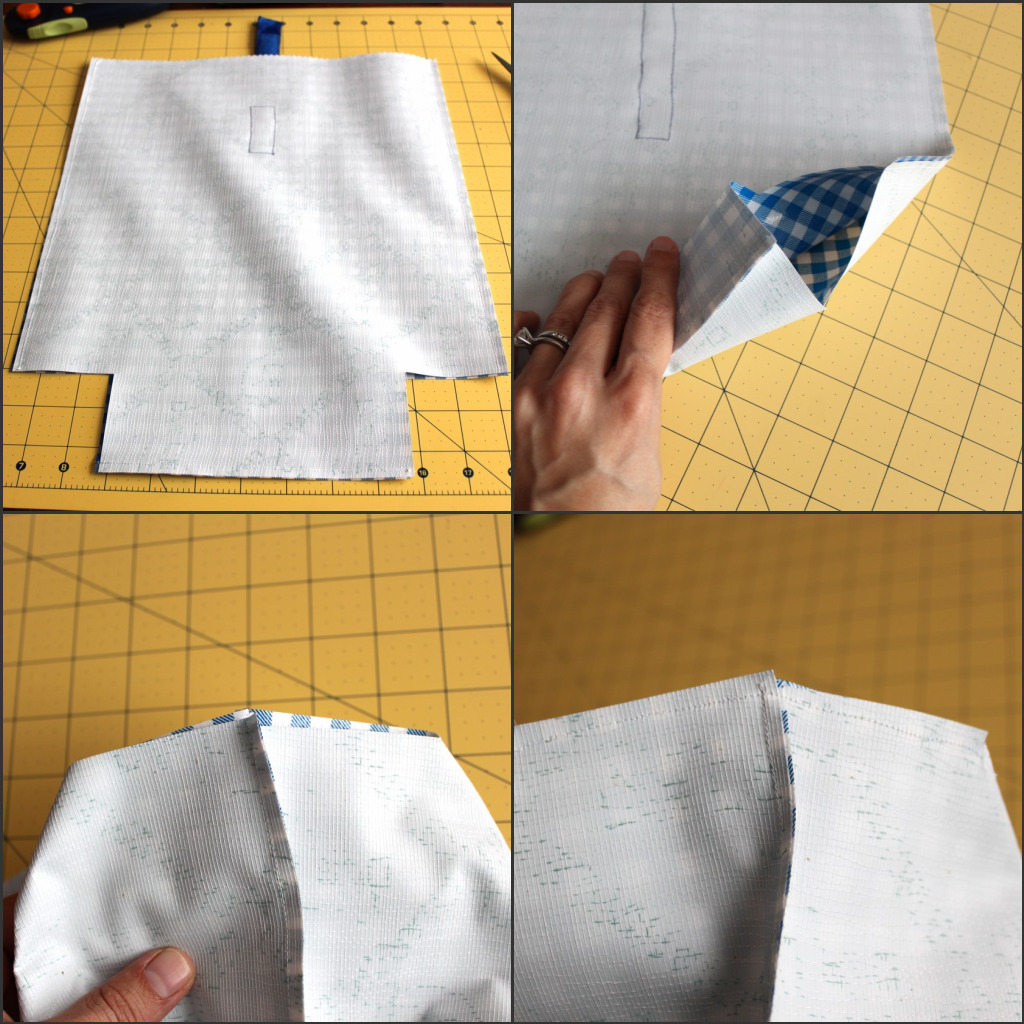 Then, place right sides of your oil cloth pieces together and sew along the long length of both sides and the short length of the bottom (top left picture). Then, press the bottom corners together with your hand so the cut edges line up and sew across (top right and two bottom pictures).
Flip your bag inside out and turn the top seam (pinked edge) inwards 1/4 inch and sew in place. And lastly, sew down each corner edge of the bag to give them that nice crisp look…sorry no pictures of this part, I got way to excited to finish! Go check out Skip To My Lou for some pics of this!!
All done!!
Shall we take a look at our super awesome finished product again?
Ok, cool…let’s do it then!

So if you have lots of food to tote around (like we usually do…little piggies, I know!), here’s what the bag looks like with the top folded over once.
And here’s the lunch bag folded over twice!

Here’s the front of the bag when it’s all the way open.

And of course the backside of the bag when it’s opened up.
Lunch has never been so cool!
Ready, Set…PICNIC!!!


Oh! Wonderful. I keep meaning to make one of these for myself actually. Didn’t know I needed a different kind of needle so thanks so much for that info! That brings me to another question though. I’m wanting to make the Niblet a raincoat (for the terribly rainless weather we’ve having lately, boo.), but have no experience with laminates. Have you ever used them? Would oil cloth be considered the same thing? Should I use a special needle to sew the laminate? Do you know if I should do any special prep work to the laminate before beginning my sewing?
Thanks Maggie! I appreciate any help/ideas!!
Oh my, this the cutest bag I have ever seen! Just popped onto your blog, it’s lovely!!
Wishing you a happy Monday. xo
Where do you get your oilcloth? I’m a very beginner, self-taught, sewer, but I think I can actually attempt some of these great projects! Thanks for your “teacher-heart”!
Sam
I have bought oil cloth at http://www.voguefabricsstore.com and also through the Oil Cloth Addict on Etsy!
-Mags
Love your little lunch bag!! I especially love the blue gingham oilcloth material! Very sweet!
This is just adorable little lunch bag! What a great idea! Just had a question, does the oilcloth act as a insulation material? So could you use a icepack in the bag to keep anything that needs to be cold? I’ve just never worked with oil cloth before.
Thanks,
Chris (ArtzeeChris)
http://www.artzccc.blogspot.com
Great tutorial! I can not wait to make these! Thanks!
Thank you so very much! Where I live there is no such thing as lunch bags for sale so now I’ll try to make one, actually four! Thanks!!!
How COOL that you made this CUTE lunch bag! Hope you have a FUN week:)
Blessings,
Linda
I’m having a GIVEAWAY…come by and check it out…I think you will like it!
ArtzeeChris-oil cloth is not insulated but it is a type of laminated cloth so you could put an ice pack in it and it wouldn’t get all sopping wet…it would hold the cold better than cloth would.
-Mags
Love this idea….my daughter is going to make one for our little MM
Hey, I want to make a reuseable sandwich bag with oil cloth. Where did you get yours?
Thanks,
Tammy
p.s. I love your recipes and tutorials! Cool!
My Goodness – Totally want to make some of these! Great idea! Would love to have you stop by the Sunday Showcase Party if you get a chance ~ Hope you are enjoying your weekend! Your tutorial is amazing – thanks for the inspiration – Great job!
I would like to exchange links with your site http://www.blogger.com
Is this possible?