Ok, so my day ran away from me yesterday and I forgot to post the art project for the day…so without much ado, here it is! Noah and Penny’s newest project was to make some little tie-dye bags that they can use for going to the library and then a t-shirt for Noah since the smallest size they had at Michaels was a 4-6T, sorry Penny! Super easy. And then we have the long awaited for Paper Mache project. Here is how we did them:
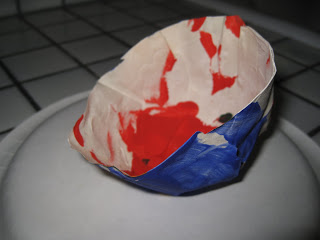
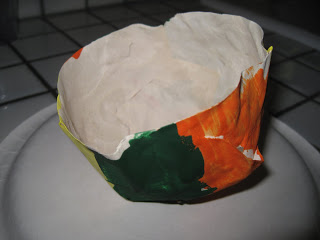
Paper Mache Painted Bowls
1/2 cup flour
1 cup liquid starch
newspaper, construction paper, brown paper bags
balloon
plastic drinking cup
Blow up the balloon until it fits nicely into the opening of the plastic cup. The cup is just used as a holder for the balloon. Mix together the flour and liquid starch trying to get as many lumps out as possible. Tear the paper of your choice into 2-inch thick strips. Dip paper into the liquid mixture and place all over the balloon, pressing paper so that it lays flat and letting excess liquid just drip off. You may want to put a paper plate under the cup to catch all the mess. Make sure there are no parts of the balloon showing and it is okay for there to be paper hanging below the balloon and onto the cup itself. Let dry for a minimum of 24 hours. Once paper is dry, you can pop the balloon and flip the paper bowl right side up. Decorate with paint or other fun crafty supplies. Put m&m’s in your bowl (yum!) and admire!
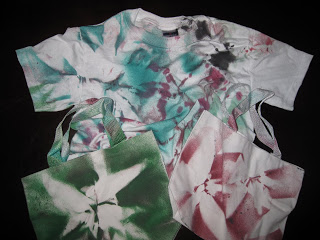
Tie-Dye Fabric Project
t-shirt, bags, pillowcases (whatever fabric items you want to dye)
lots of rubberbands
fabric spray paint (found in the fabric paint section at Joann’s)
the great outdoors
Grab whatever item you decided to dye and pull up the fabric in various places all around the item so you can wind the rubberbands around the puffs of fabric. Use as many rubberbands as you would like…and don’t forget about the back of the item! Go outside and put your desired item on the grass. Spray all sorts of fabric spray paint colors all over your item. Go wild, this is the best part! When you are happy with your color scheme take the rubberbands off. Let your fabric item dry for 20 minutes or however long your fabric spray directions state. Enjoy the fruits of your hard labor and show off that cute item you just made!





I love all of your amazing little one projects. 🙂
They are absolutely amazing!!!
Blog On!!
P.S : your little ones are adorable!!