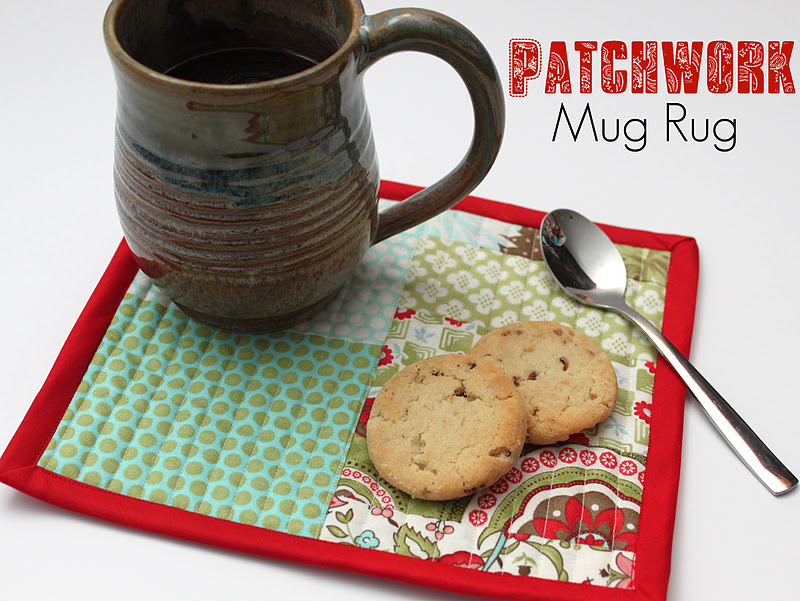
I thought I’d bring another one of the tutorials I did for Delish magazine home again today. This mug rug would be the perfect gift to make for someone this Christmas, especially nice because you could even use up some scraps! Plus, you could certainly get a few done in under an hour…yay for gifts done in a flash!

Patchwork Mug Rug
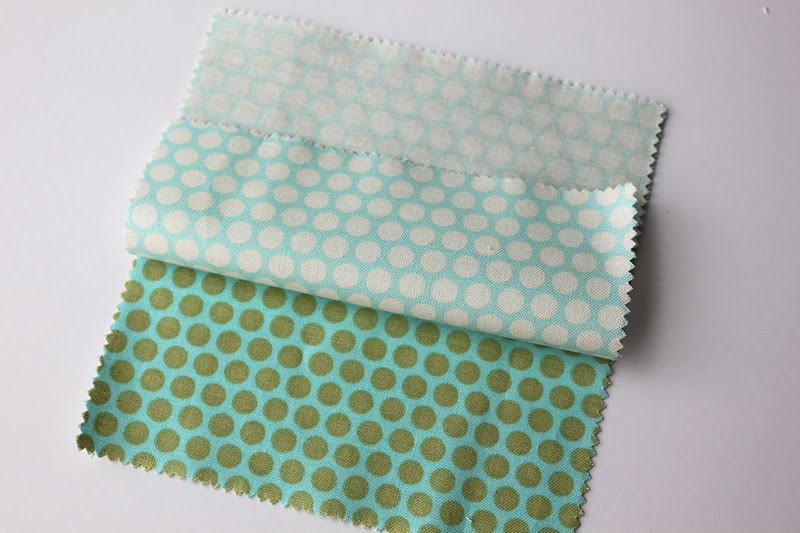
(10) 5 x 5 inch fabric squares from a charm pack or scraps of the same size
(1) 10 x10 inch piece of cotton batting or felt
1 package of coordinating extra wide double fold bias tape
coordinating thread
sewing machine
rotary cutter and mat
straight needles
iron and ironing board
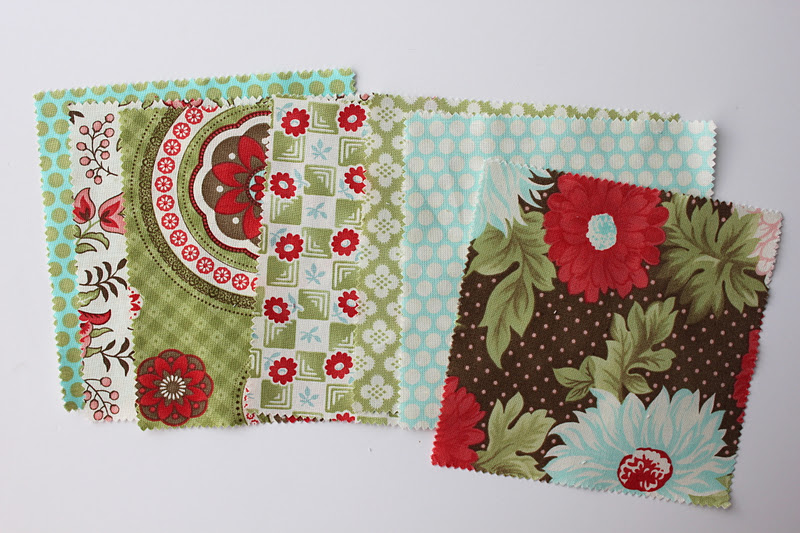
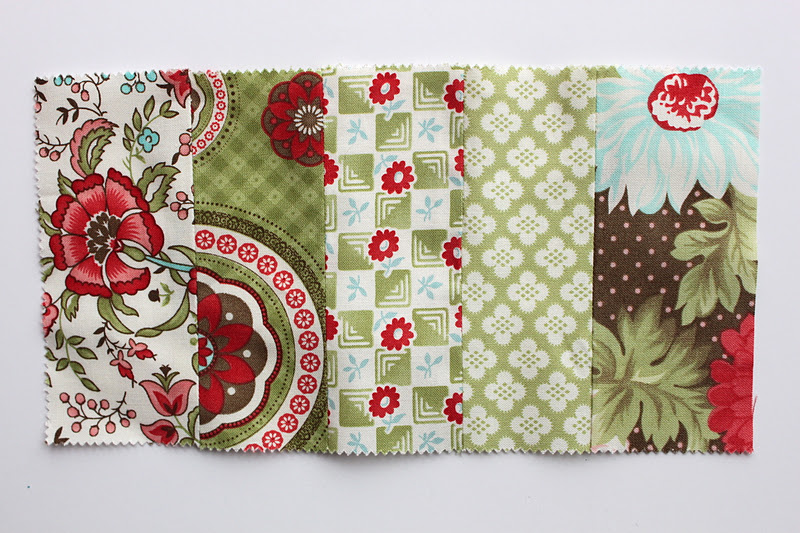
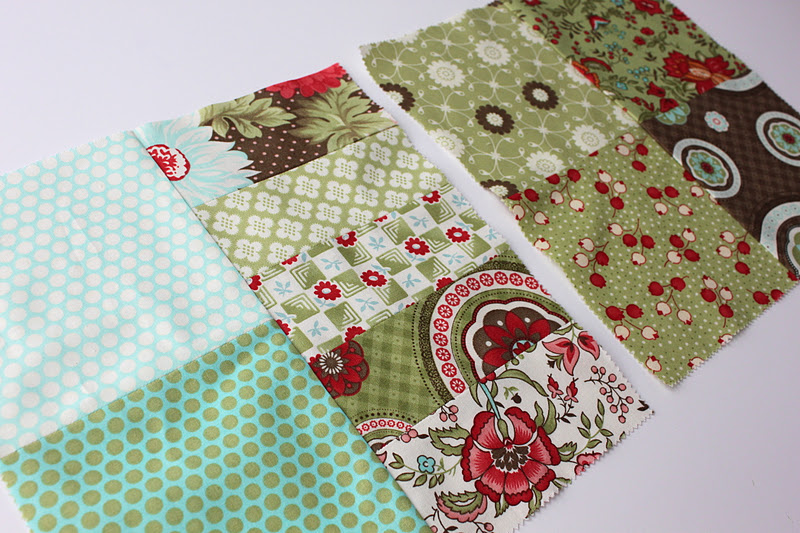
Gather your ten pieces of coordinating charm squares or scraps and decide how you would like to have them situated on both the front and the back of the mug rug. The front will consist of two 5 x 5 inch pieces of fabric and five 2.5 x 5 inch pieces. The back will consist of four 5 x 5 inch pieces only. For this mug rug I used a charm pack from the beautiful Bliss by Bonnie and Camille..love this line! If you remember, I used this line in Eloise’s first birthday party earlier this year too 🙂
Take two 5 x 5 squares that will be on the front right side of the mug rug and sew them right sides together at one end using a 1/4 inch seam allowance.

On the wrong side, press the seam apart like the picture above.
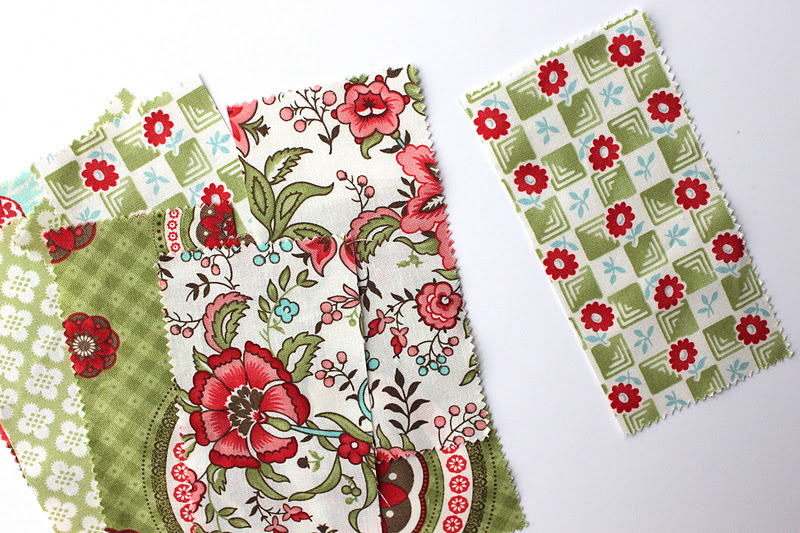
Next cut four of the charm squares in half into 2.5 x 5 inch pieces. You will only need to choose five of these pieces for the front side of the mug rug.
Sew two of these pieces of fabric, right sides together, along the longer 5 inch side using a 1/4 inch seam allowance. Continue to do this until all pieces of fabric are joined together.
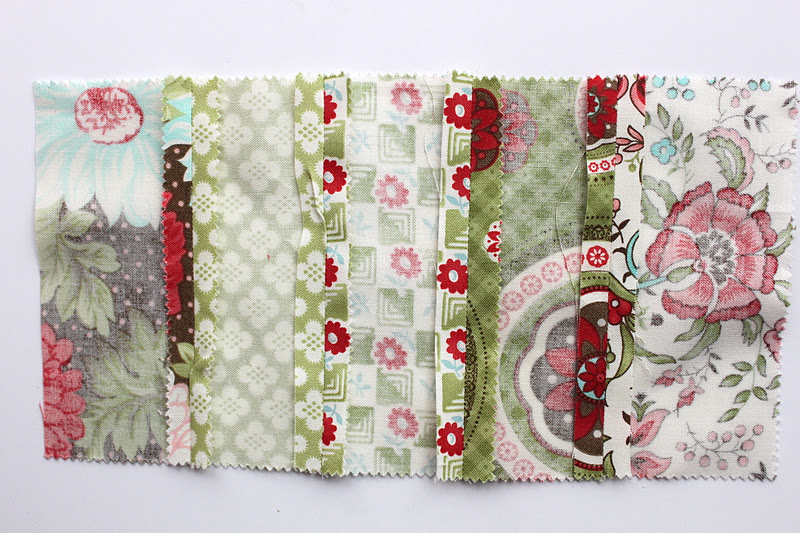
With the wrong side up, press each seam open.
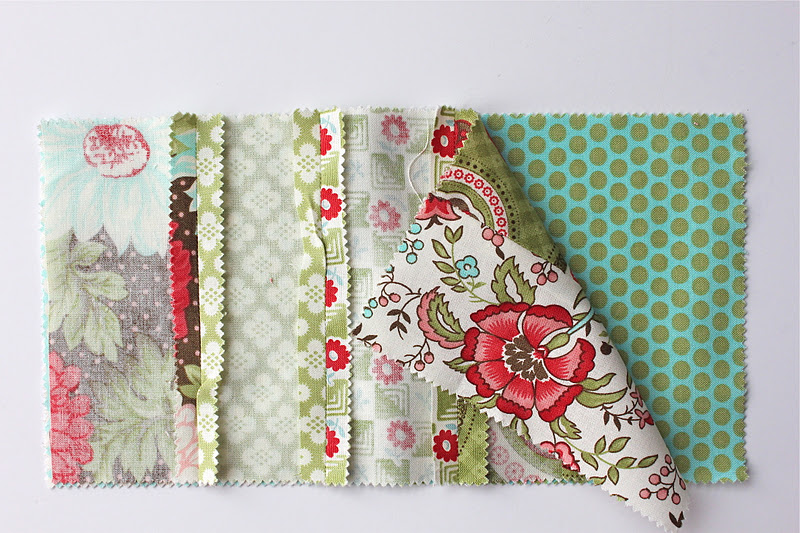
Next take the strip of fabric you just finished and the first two squares you joined together earlier and sew them together with right sides facing along one of the longer sides only.
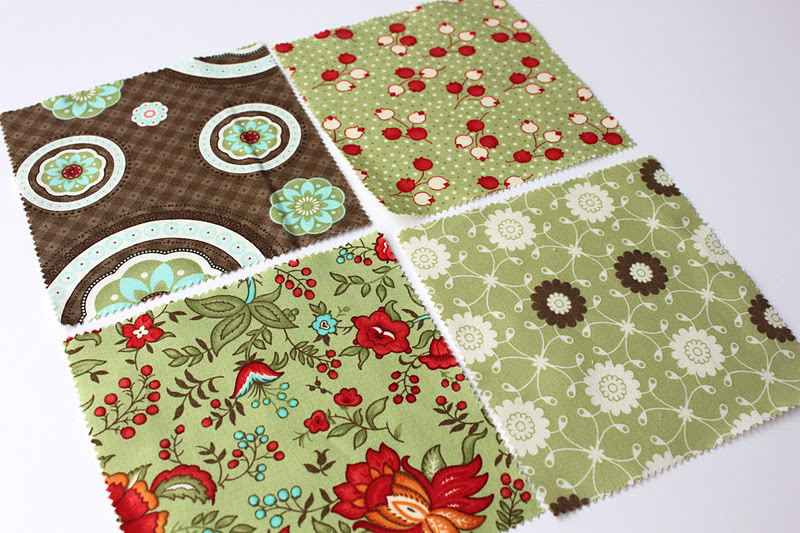
Now take the remaining four pieces of 5 x 5 inch charm squares and sew them all together like we did earlier, making sure to use a 1/4 seam allowance and pressing the seams open when done.
You should have both front and back pieces finished now!
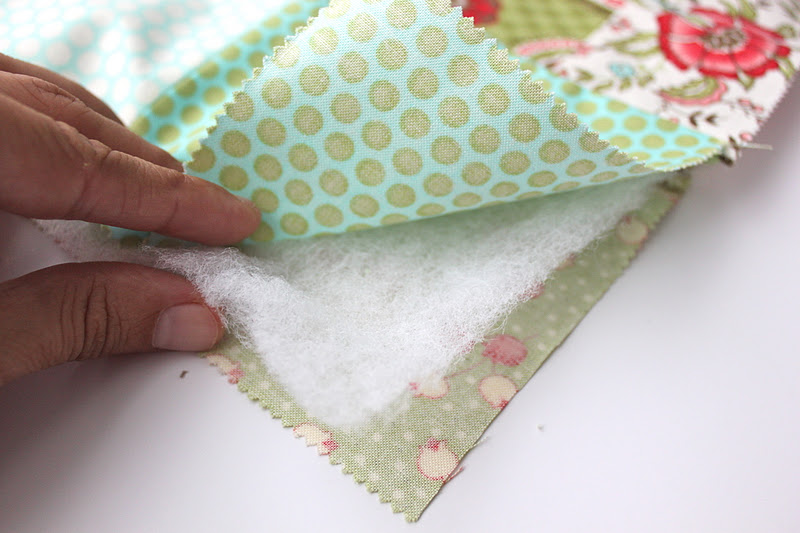
Next take the piece of cotton batting or felt and sandwich it between the front and back pieces, making sure both pieces have their right sides facing out.
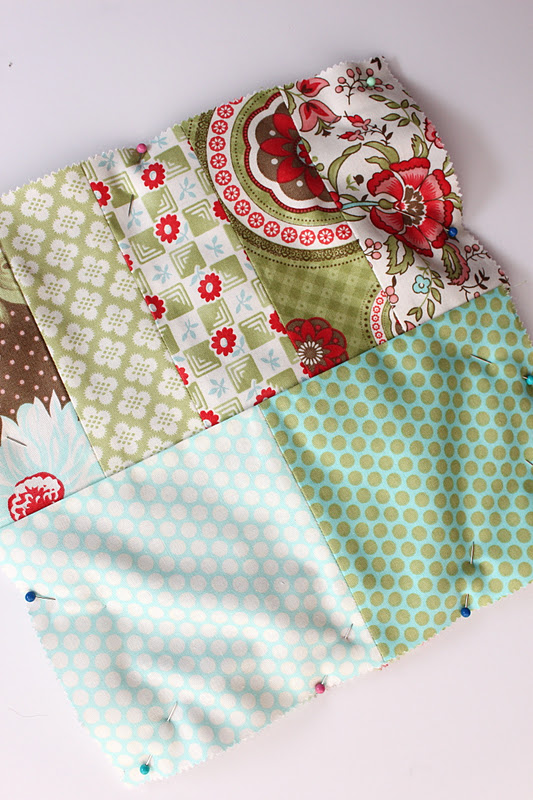
Pin around the outside edges to keep the batting from moving while sewing the next step.
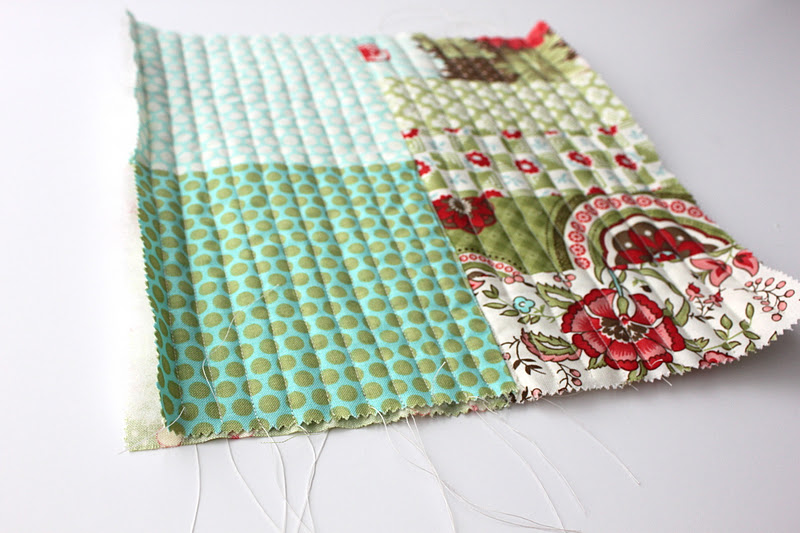
Time to quilt the mug rug! Starting down the center of the mug rug, sew a straight line down from one edge to the opposite side. Then move your fabric over about 1/2 inch from your center line and sew another straight line. Continue sewing straight lines until you have quilted the whole mug rug.
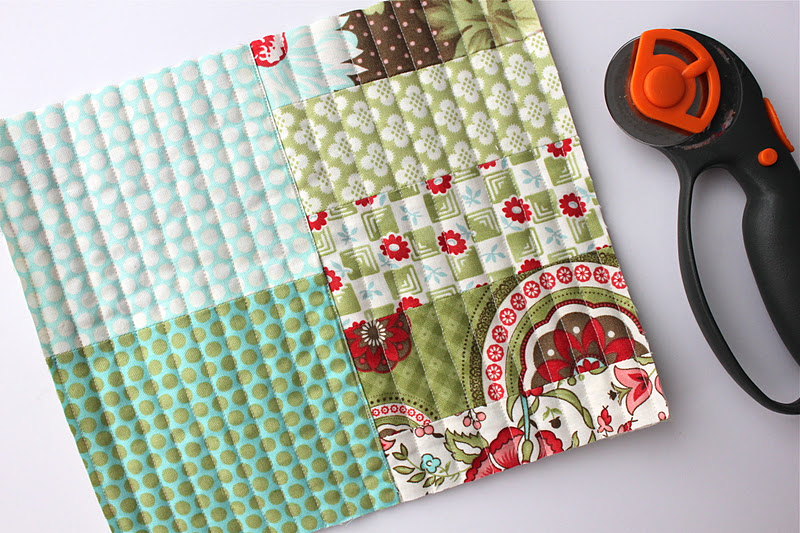
Using your rotary cutter clean up the edges of the mug rug by cutting it down to a 9 x 9 inch square.

Take your bias tape and sew it around the mug rug making sure to catch all the raw edges while you sew.
If you need some help with how to sew with bias tape, check out my tutorial here!

All done! And perfect for gifting to someone special this holiday season 🙂

Happy sewing my friends!
XOXO,


This is a great idea! Thanks for the tutorial, I think I’ll make one of these with a mug for my Secret Santa gift!
Your bias tape always comes out so good! I am starting to hate you a teeny bit… =D
I love it! And I love this blog. Your ideas are original and very creative and your tutorial are clear and easy!
Kisses
Carmen
I like these! Thanks for sharing!
This is such a cute idea! I’ve been wanting to make quilted coasters for my coffee table, but these are nice because they’re bigger than a coaster. Thanks for posting the tutorial!
I finally made one of these and I love it! Thanks for the great tutorial, I made sure to link back to you!
I love this idea and love the fabric you used – great tutorial!
Mary
I had heard of this and ask friends but no one could tell me the details. Many thanks for the tutorial. I bought special food fabric for this project. quiltapillow in Texas.
Great tutorial – about to make a few. But I am confused with the directions where you are sewing the 5 pieces together — wrong sides together
Thanks
Diane
Hi Diane!
Ok, I see the step you are talking about and I just changed it…it should say ‘right sides together’, sorry about the confusion!
I’m confused too- I now have the seam up on the right side of the joined pieces???
Hi Pammy
I’m not exactly sure what part you are having problems with, if you could be a bit more specific I can try to help you.
I’m confused too my seams are now on the right side???
I have a question about the 5 section piece. Mine is measuring 10.5 inches after sewing together with 1 / 4 inch seams. The other piece I’m joining it to is measuring 9.5 inches so there is a half inch overhang on each side. Your pics look like they are the same length but I’m not sure how this is possible after working out the maths? Your help would be greatly appreciated.
Cheers
CG
With the 5-piece section, I used a 1/2″ SA to correct the issue of that piece being longer than the two-square piece, if that makes sense.
I believe the “wrong sides together” is a typo. You want to sew the 5-pieces right sides together.
Yes, it is supposed to say “right sides together”! I just corrected that, thanks for letting me know!
Hi Maggie,
Thank you so much for posting this tutorial! I think these are so cute. I am making one out of some left over fabric right now just to practice, but I can’t wait to get some pretty fabric and make some more! I have been sewing for a few years, but have been wary about trying to quilt. I love the patchwork quilted look, and you made these look so easy I decided to give it a try! This is a great starting place for people like me who want to quilt but don’t know how to start. Its easy and allows you to get the hang of quilting in a small space that’s not overwhelming. I look forward to exploring you site some more.
Thanks again for the great tutorial, and sorry this comment is so long!
Sincerely,
Callie Anne (email: xoxocallieanne@yahoo.com)
Wonderful Callie Anne!
I am so glad that you liked this tutorial! It is an awesome way to use up scraps!!
I agree with the messages above that reference to the “wrong sides together” is a typo – especially when you look at the pictures and see the seams are all on the wrong side so clearly the methodology must be “right” sides together. These are lovely and what a good idea for the Secret Santa – especially if I can find a pattern for the mug huggers too.
The directions should say “right sides together” I just corrected that!! Sorry about any confusion!!!
Okay I tried this tonight … what is wrong with my tension that the whole thing became completely misshapen??? So frustrating!!!
Mary
Hi Mary!
Try flipping the direction of your thread and/or bobbin. I know if I put either of those on my machine in the reverse of how they should be then my tension is completely off! Either that or maybe you need to replace the needle? Good luck figuring it out!!