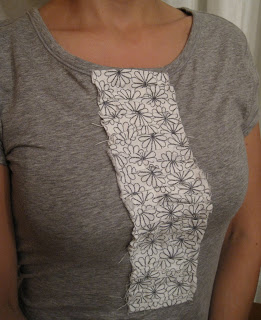
The other day I found some clearanced heather grey t-shirts in the sleepwear section of Target. Not a huge fan of heather grey (it reminds me of jogging pants with elastic at the ankles…sooo not flattering on anyone!) but knowing that I can’t pass up a bargain, I snatched them up…two for around $5 a piece…Sweet Deal! I brought them home and had been debating what to do with them ever since. Well, since every time I look at the J.Crew website I start drooling over all the cute ruffles they have on all their stuff right now but just cringe at the insanely high price tag, I decided at least one of these shirts was destined for the Ruffle look! So, I started scrounging around my stash and found one of the fabrics I bought on clearance at Ikea (see post on that shopping trip here)…it was perfect. It’s actually a thicker fabric for drapery but the small flowers have a grey tone so they work well with the shirt. The jersey knit of the t-shirt and the drapery fabric are a great contrast in fabric feel which I think makes them work nicely together. Never disregard any types or styles of fabrics when you are creating…who knows what will inspire you! Here’s what I came up with:






This is amazing! I love it! I don’t think I ever thanked you property for giving me the One Lovely Blog award! THANK YOU!
And I have to say it: I love this shirt