Smashed Peas & Carrots

Inspiration For Living Creatively - DIY Crafts, Sewing, Recipes, Crafts & More

  • Press
  • Disclosure
  • Collaborate
  • Contact
  • Facebook
  • Twitter
  • Pinterest
  • Instagram
  • Dots
  • Google Plus

Become a Subscriber

never miss a thing!

  • Home
  • About
    • Advertising
    • Disclosure & Safety Disclaimer
    • Privacy Policy
  • Recipes
    • Appetizers
    • Bento Lunch
    • Beverages
    • Smoothies
    • Breads
    • Breakfast
    • Casserole
    • Crockpot
      • Visual Library
    • Dairy Free
    • Dessert
    • Gluten Free
    • Main Course
    • Holiday
    • Instant Pot
    • Paleo
    • Party Food
    • Salad
    • Side Dish
    • Soup
    • All Recipes
  • Tutorials
    • Children
    • Adult
    • Home Decor
    • No Sew
    • Sewing
      • Children Sewing
      • Adult Sewing
      • Home Decor Sewing
      • Sewing Basics
    • Sewing Studio
    • Knitting
    • Kids Crafts
    • Bento
    • Holiday
    • Parties
    • Gift Ideas
    • Natural Living
    • All Tutorials
  • shop
You are here: Home / Tutorials / Gift Ideas / Simple Gift Card Holder {A Tutorial}
Dec
16

Simple Gift Card Holder {A Tutorial}

| Filed Under: Gift Ideas, Holiday, Tutorials

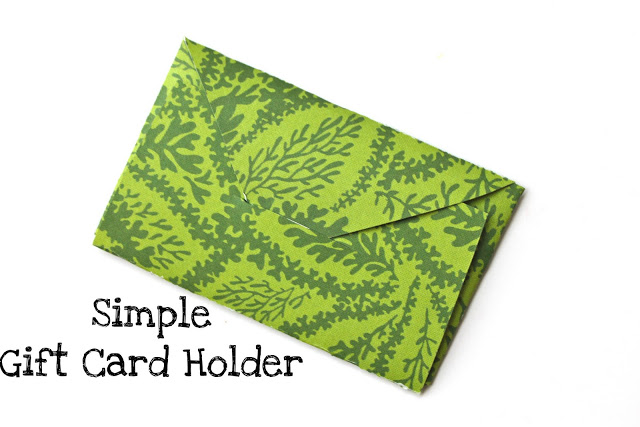
Need something fun and handmade for all those gift cards lovers on your list?  I have a few of those peeps on my list too and to add a touch of handmade to those gift cards I made some Simple Gift Card Holders in lou of those not-so-handmade ones that most stores usually give you when you buy them.  
These are easy to make and there’s no sewing required!  
All you need is a pretty piece of paper, any kind will do, and a pair of scissors or an exacto knife!  
{How’s that for handmade!!}

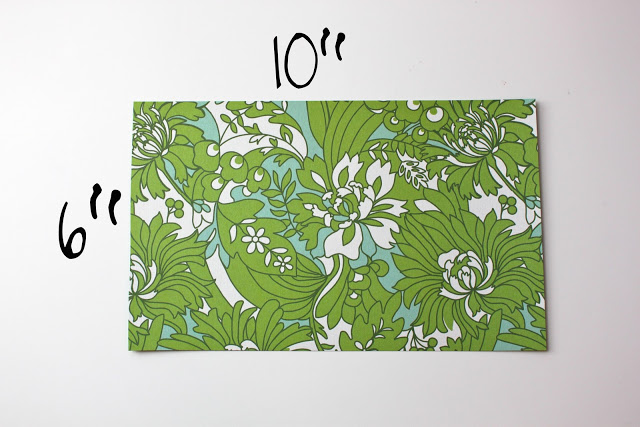
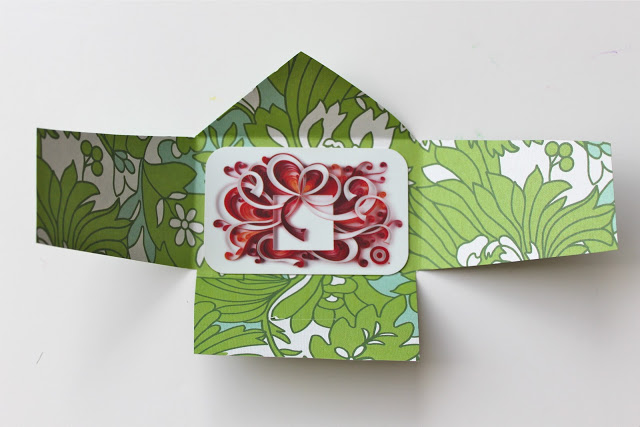
First cut yourself a 6 x 10″ piece of paper.  I used some Amy Butler scrapbook paper but like I said before any kind will do!  Think brown kraft paper, newspaper, even pretty cardstock…they would all fit the bill nicely in my opinion.

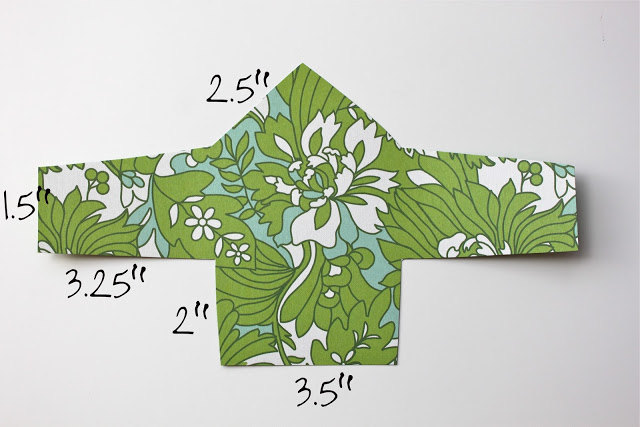
Cut your paper to the dimensions above.  You’ll be left with some crazy looking origami thing but rest assured that this will actually turn into a simple envelope-style gift card holder!!

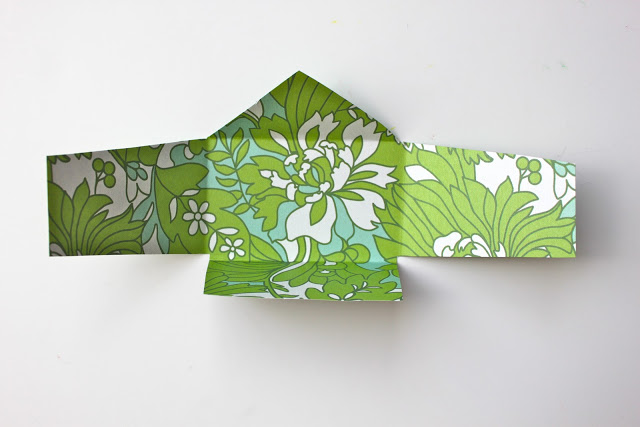
Now just fold around the center rectangle like in the picture above.  
If you had one of those handy dandy bone folders they would work perfect here, if not no probs, you and I are in the same boat.  I just used my hands, amazing tools that they are 🙂

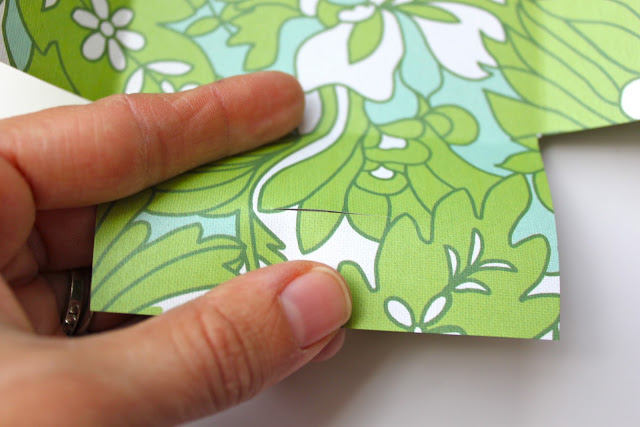
Then on the bottom rectangle you will cut a slit horizontally that is about an inch long for the pointed flap to go in.  Your gift card will be nice and secure then!!

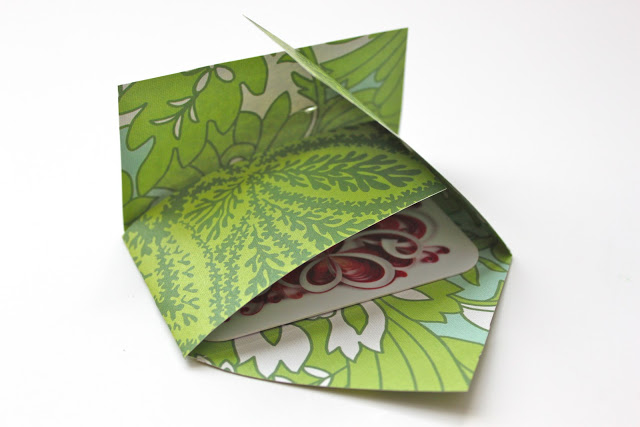
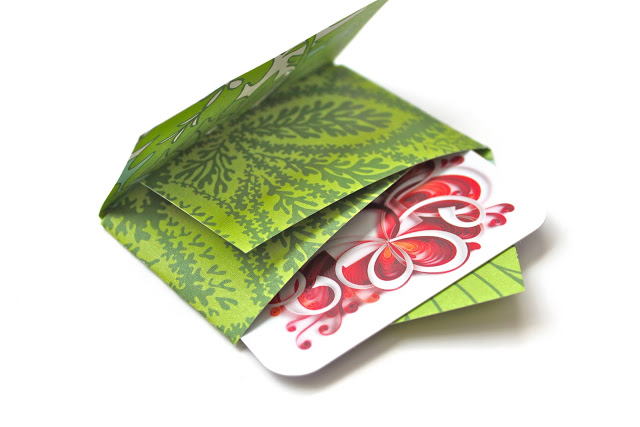
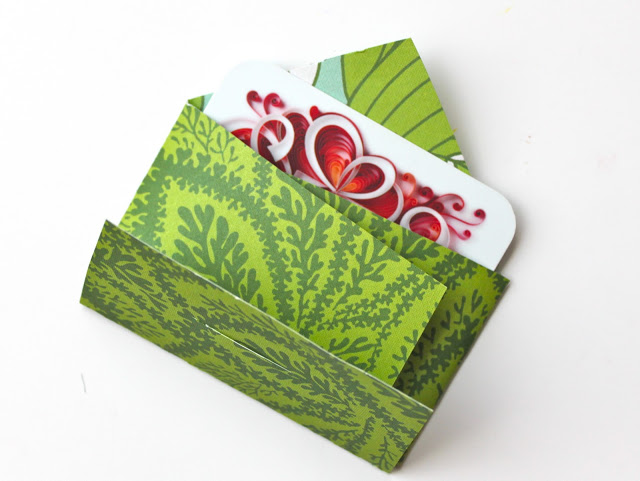
Place your gift card in like so…
Ahhh, Target…you may be my most favorite type of gift card to receive!!

Then, just fold the ‘arms’ in to hug your gift card and bring the bottom flap up towards the top flap…

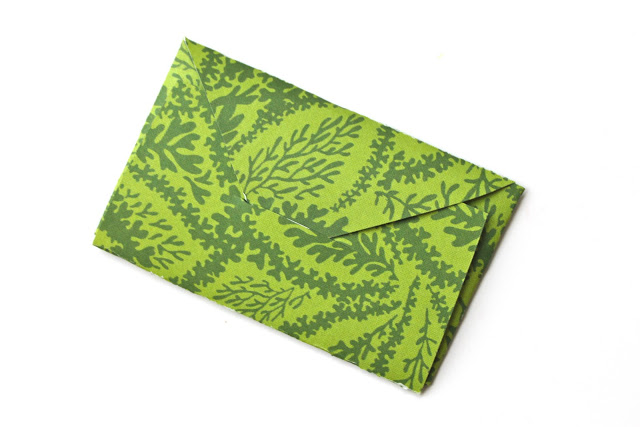
Tuck the point into your slit and your gift card is ready for giving!

And receiving!!

Simple.  Pretty.  Functional
and…
HANDMADE!!
Take that gift card lovers!!

    You may also like -

    Dunkin Donuts Thank You PrintableDunkin Donuts Thank You PrintableSuper fun Rainbow Paper Plate Windsocks. The perfect craft for little ones!How to Make a Rainbow Paper Plate WindsockA Day In My Life Journal Using Polaroid Instax PhotosA Day in My Life Polaroid Instax Photo JournalFloral Wooden Circle EarringsHow to Make Floral Wooden Circle EarringsTUTORIAL: Paper Rosette Gift Name Tags

    Become a Subscriber

    never miss a thing!

    Comments

    1. Emily says

      December 16, 2010 at 3:48 am

      I love it! Great paper choice. 🙂

    2. CreativeMama says

      December 16, 2010 at 10:56 am

      Cute and simple to make. Thanks

    3. Phoebe @ Cents to Get Debt Free says

      December 16, 2010 at 6:02 pm

      Love that paper! What a brillant idea. I don’t give gift cards very often, but I will have to do this when I do.

    4. luvinthemommyhood says

      December 16, 2010 at 8:04 pm

      Fab idea! Love it!

    5. The Path Traveled says

      December 17, 2010 at 12:21 am

      I am so glad you posted this today! I just told my husband this afternoon that I needed some gift cards. I am going to do this instead. Thanks!

    6. Tiffany says

      December 18, 2010 at 2:04 am

      I got a starbucks holder like this today and my first thought was, “I can make a cut file in SCAL so I can make LOTS of these.” LOVE yours- great tutorial too! 🙂

    7. Rosana Garcia Hess says

      December 18, 2010 at 12:19 pm

      WOW!!!! I LOVED IT!!!!
      hope you don´t mind if I feature on my blog.
      Hugs from Brazil

    8. Gloria says

      September 29, 2011 at 2:17 pm

      Another great idea! Thank you. Really enjoying all your tutorials.

    Welcome to Smashed Peas and Carrots. You can read more about me HERE
     photo designTeam.png
    Follow on Bloglovin

    Popular Tutorials

    Highlighter Valentine Card with Free Printable

    Highlighter Valentine Card with Free Printable…

    Play Doh Valentine Card Free Printable

    Play Doh Valentine Card Free Printable…

    Elderberry Syrup Recipe

    Elderberry Syrup Recipe: Natural Cold and Flu…

    Teacher Survival Kit

    Teacher Survival Kit with FREE Printable…

    Notebook Paper Pencil Pouch Teacher Gift Idea

    Notebook Paper Pencil Pouch Teacher Gift Idea…

    Free Silhouette File Teacher Canvas Bag Gift Idea

    Free Silhouette File: Teacher Canvas Bag Gift…

    Popular Recipes

    No Bake Energy Bites Recipe…

    Chocolate Coconut Cups {Gluten and Dairy Free}…

    DIY Taco Seasoning Recipe…

    Sugar. Cookie. Icing. {The Recipe}…

    French Dip..Crockpot Style!…

    Crockpot Banana Bread…for Real!…

    My Sponsors

     photo FatQuarterShop-175x175.png

     photo cdf15248-e6f8-4276-abc0-c145e2451c35.jpg


    Blog Archives

    Posts by Topic

    Stay Connected

    • Facebook
    • Twitter
    • Pinterest
    • Instagram
    • Dots
    • Google Plus

    Join me on Facebook

    Copyright Smashed Peas and Carrots © 2025 · All rights reserved · Design by Emily White Designs

    Copyright © 2025 · Smashed Peas & Carrots Custom on Genesis Framework · WordPress · Log in