Today I am pumped to be a part of the Riley Blake Home Decor Love Blog Tour! There is a whole mess of sewing bloggers sharing lots of fun tutorials for projects using different lines of the Riley Blake Home Decor fabric for the past two weeks and the next two weeks to come. For my project, I decided that I should finally make something I have desperately needed my whole life…a Grocery Bag Holder…yes, I fully admit my grocery bags have been a hot mess cluttering up my mud room the entire existence of my adult life. 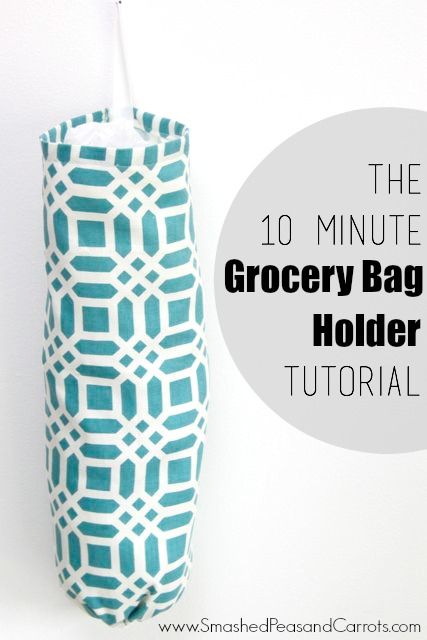

 I have seen Grocery Holder Bags here and there but to me, the ones you can buy are usually made with some not so pretty fabric and in some not so pretty colors. Probably the underlying reason I have never bought one. After realizing that we have been in our home for 8 years and with four little ones in tow now, I think it’s high time I rectify this situation and make a pretty one just for my newly expanded and organized mud room (thank you dear husband!) Are you in need of one too? Well, then you are in luck my friend!
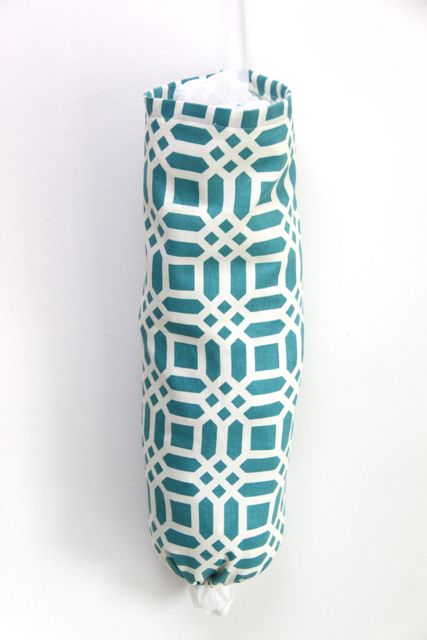
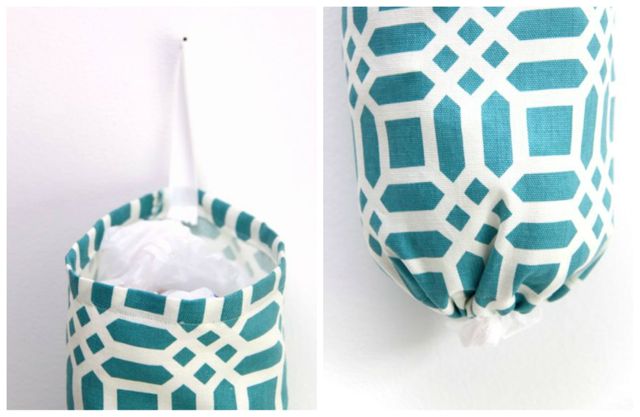 To make my Grocery Bag Holder I decided to use the super pretty and modern home decor weight fabric from Patty Young’s line called Vivid Lattice in Teal. Isn’t it awesome!
Here is what you will need to make your own bag and tame those unruly grocery bags in your life:
Grocery Bag Holder
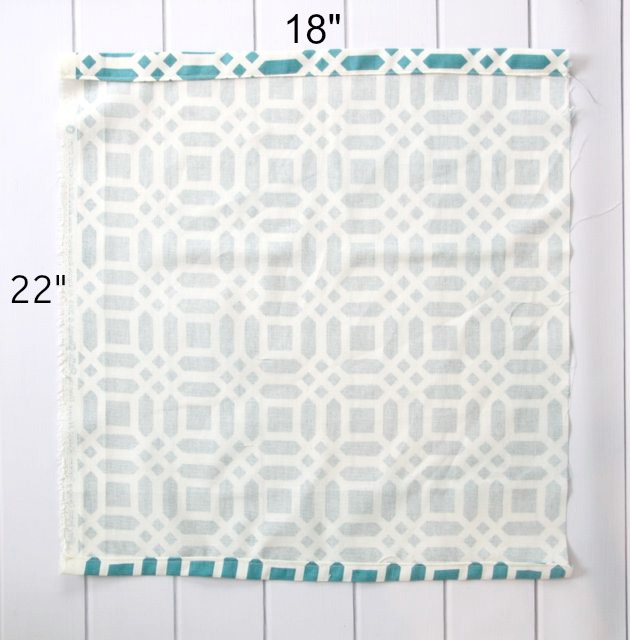
1-fat quarter or 18″ x 22″ piece of fabric (home decor weight is best)
1-8 inch piece of 1/4 inch wide elastic
1-8 inch piece of twill or ribbon
Safety pin, pins, thread, iron, sewing machine
 First, fold the short ends (the 18 inch sides) over 1/2 inch and then over another 1/2 inch and press with an iron. Sew using a 1/2 inch seam allowance so that you will have room to add in the elastic. You are essentially making a casing.
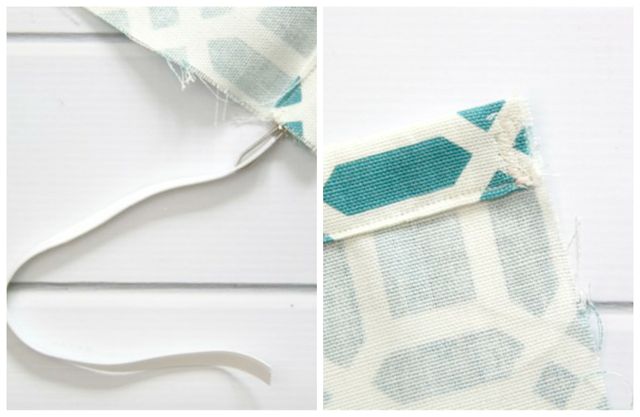 Next, using a safety pin, pin one end of the elastic and start threading it through one of the casings you just made (like the first picture above). Once you have the non-safety pin end of the elastic just barely at the open end of the casing, sew it down to keep it in place (like the second picture above).
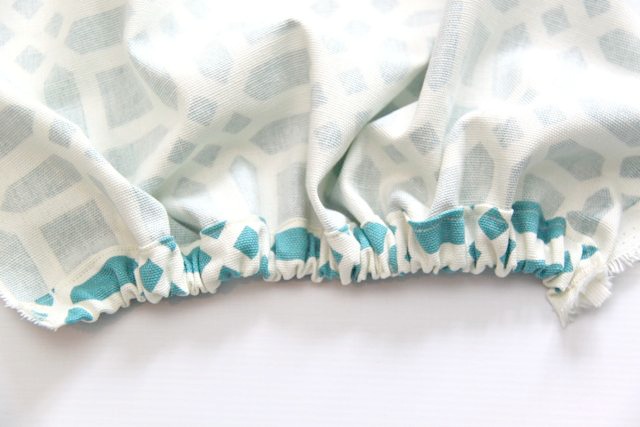 Next, using the safety pin as your gripper, pull the elastic all the way through the casing and out the other end. Sew the elastic in place at this end as well. Now this casing will look all ruffled!
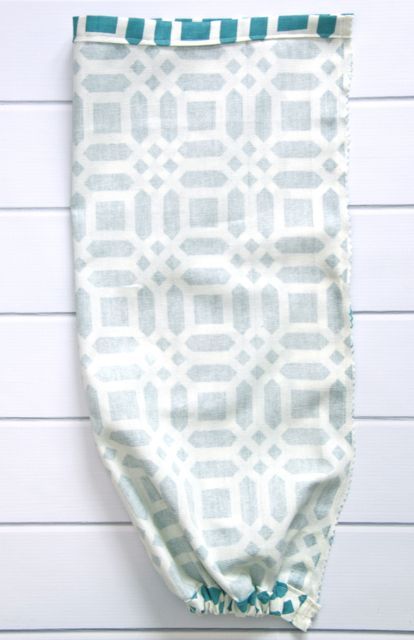 Next, fold the grocery bag holder in half with right sides together, lengthwise (the 22 inch side) and sew the unfinished edges together using a 1/2 inch seam allowance. You can use your serger to finish the seam edge or use pinking shears like I did.
 And lastly, near the seam at the top of the bag holder, fold the piece of twill or ribbon in half and place it near the hemmed edge. Sew in place.
 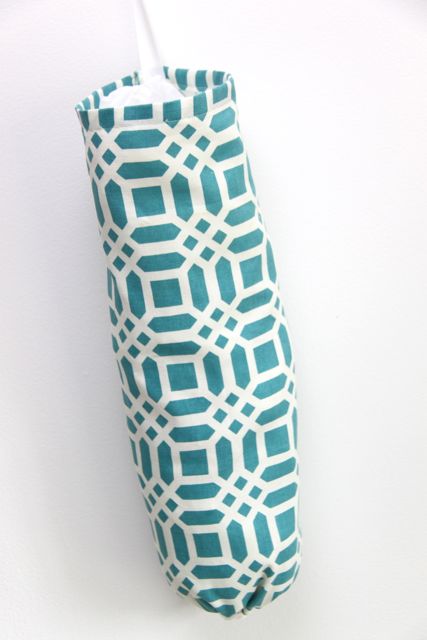 Now you get to flip your Grocery Bag Holder the right way out and fill it full of bags…woo hoo! My mud room thanks me for mine! 🙂
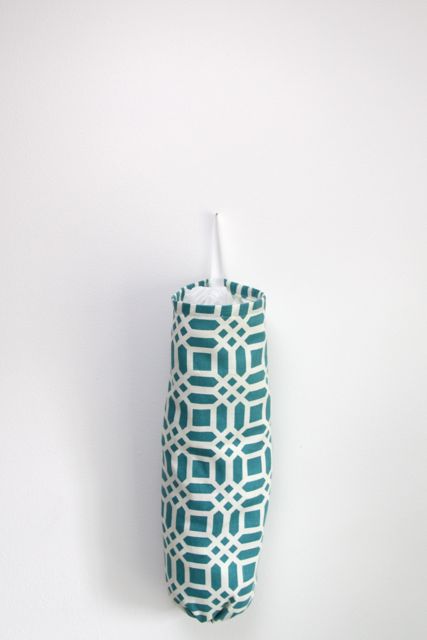 You can check out the rest of the stops on the Home Decor Love Tour here:
Love,


These things are so handy!! We got one years ago as a wedding present. We still use it today. They hold a ton of bags, too. I’ve got a Craft Gossip post scheduled for tomorrow afternoon that links to your tutorial:
http://sewing.craftgossip.com/?p=83284
–Anne
I agree, sooo handy! Thanks for the share too, Anne!!
thanks so much loks so easy I imagine there are other uses for these such as storing dusters rags for cleaning etc … awesome thank you
Yes, the possibilities for using this holder are endless!! Happy sewing!
Just made one of these from your easy instructions. It turned out so nice!
Thank you!
Awesome! I am so happy to hear that!!!
I dont understand how to get the elastic pulled all the way through. Mine keeps getting stuck.
You just need to do it very carefully!
I love it. I changed it just slightly and added a string through the top casing and tied it so that it could be pulled tight too. So easy!
Maggie, thank you for such a great tutorial!! I had plastic bags cluttering my entire pantry, and now they are contained out of the way. It was such an easy project, I ended up making two more as last minute gifts for friends.
So awesome!! I am so glad this tutorial was helpful to you!! Happy New Year!!