Smashed Peas & Carrots

Inspiration For Living Creatively - DIY Crafts, Sewing, Recipes, Crafts & More

  • Press
  • Disclosure
  • Collaborate
  • Contact
  • Facebook
  • Twitter
  • Pinterest
  • Instagram
  • Dots
  • Google Plus

Become a Subscriber

never miss a thing!

  • Home
  • About
    • Advertising
    • Disclosure & Safety Disclaimer
    • Privacy Policy
  • Recipes
    • Appetizers
    • Bento Lunch
    • Beverages
    • Smoothies
    • Breads
    • Breakfast
    • Casserole
    • Crockpot
      • Visual Library
    • Dairy Free
    • Dessert
    • Gluten Free
    • Main Course
    • Holiday
    • Instant Pot
    • Paleo
    • Party Food
    • Salad
    • Side Dish
    • Soup
    • All Recipes
  • Tutorials
    • Children
    • Adult
    • Home Decor
    • No Sew
    • Sewing
      • Children Sewing
      • Adult Sewing
      • Home Decor Sewing
      • Sewing Basics
    • Sewing Studio
    • Knitting
    • Kids Crafts
    • Bento
    • Holiday
    • Parties
    • Gift Ideas
    • Natural Living
    • All Tutorials
  • shop
You are here: Home / Fabric / TUTORIAL: Be Married Burlap Wedding Banner
Mar
4

TUTORIAL: Be Married Burlap Wedding Banner

| Filed Under: Fabric, Gift Ideas, Home Decor, Home Decor Sewing, Sewing, Tutorials

My littlest sister is getting married at the end of the month, hooray!  And over here we are getting so so so excited for them! She will be the last one in our family to tie the knot…and she couldn’t be doing it with a nicer guy (hi Nathan!)  Since I can’t really be over there (all the way in Seattle) to help them in person I asked if there was anything I could do here and mail out before the big date…you know I love wedding planning and decorating!! 
Little sister’s wedding is going to be in the colors gray and yellow.  I can’t wait to be out there at the end of the month to help her set things up, every time I speak to her it is sounding sweeter and more awesome than the last! Their plan is to make it a rustic wedding with cute signage, twinkle lights, and a donut wedding cake–be still my heart!  One of the things she asked that I make for them is a “Be Married” banner made out of burlap flags that will hang behind their table at the reception.  Hello!  I can totally do that!!
Here’s the 411 in case you need one of these sweet signs for a wedding in your future!
“Be Married” Burlap Wedding Banner
1 yard of burlap
rotary cutter and mat
ruler
twine
sewing machine and thread
stenciled letters (I used my Cricut Mini but you could print of the computer too!)
acrylic paint
brush
marker for tracing letters
wax paper
First cut out a template for the burlap flags.  I made my flags to the dimensions above as I thought that allowed for nice sized letters you will be able to see from afar in a pretty large reception hall/banquet area.  The flag size will allow the words “Be Married” and a Heart shape inbetween to hang on about 9 feet of twine with room on each end for tying up.
Cut out 10 flags using your template and cut on the fold.  You should have enough burlap if you get one yard of it…you may want to get a wee bit more burlap if you think you might mess up!

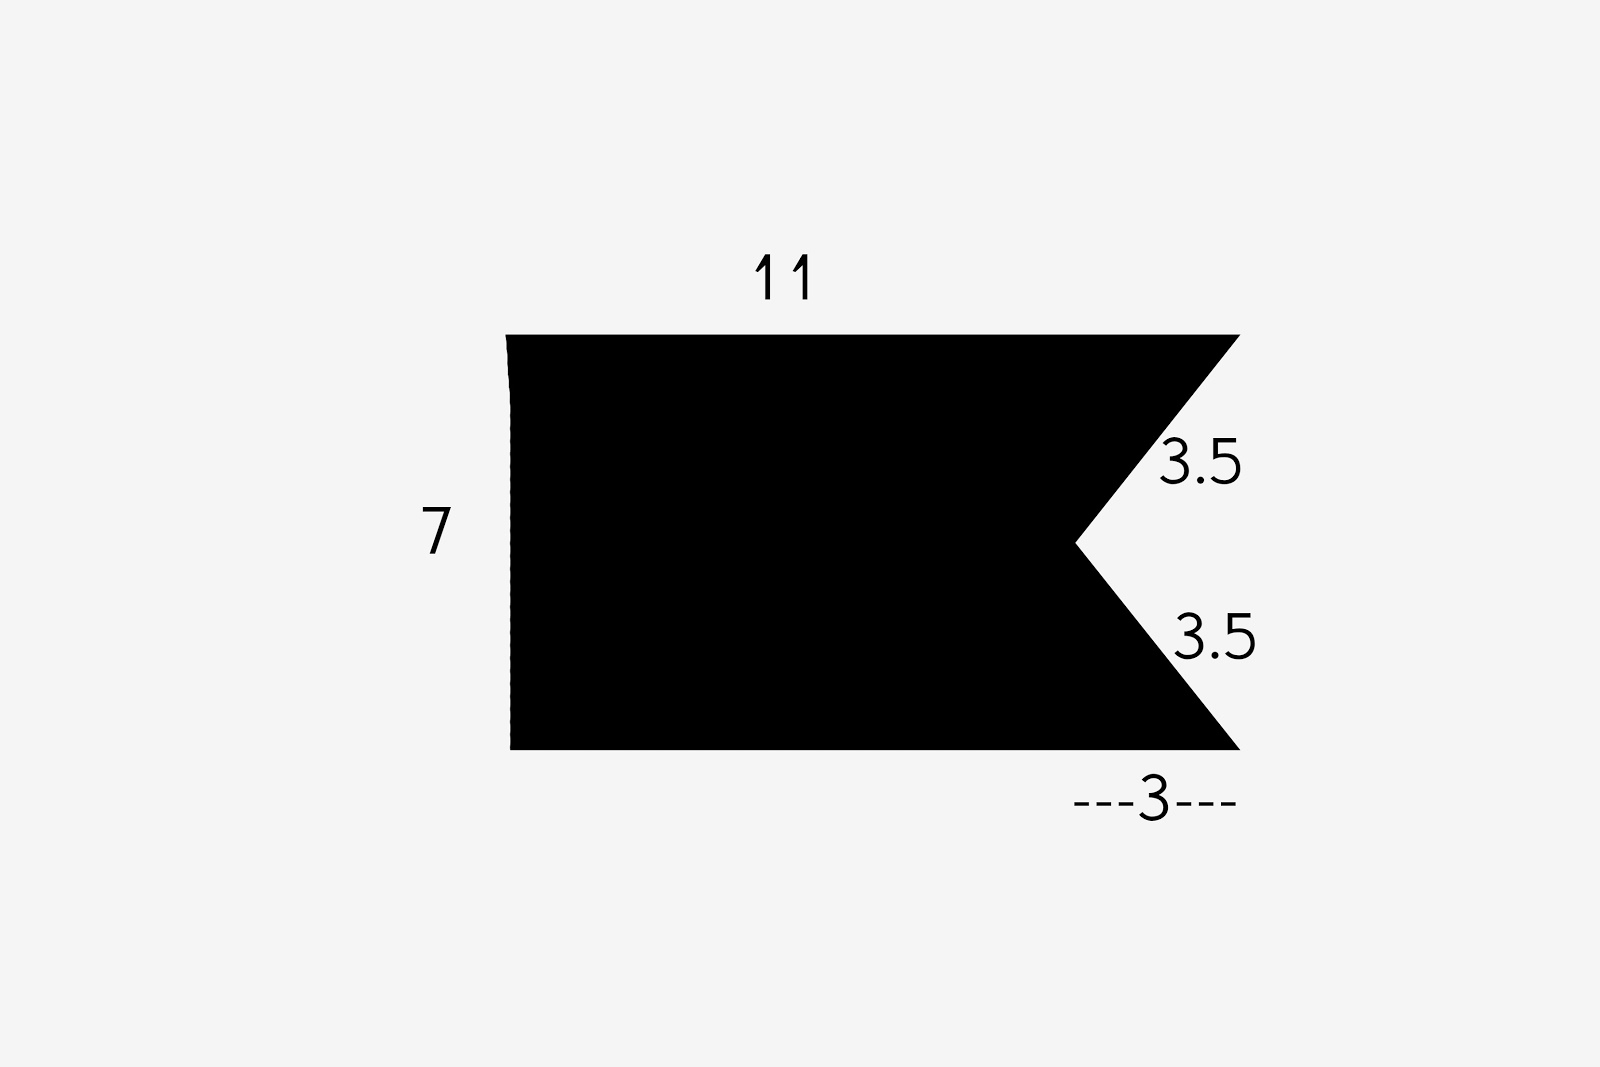
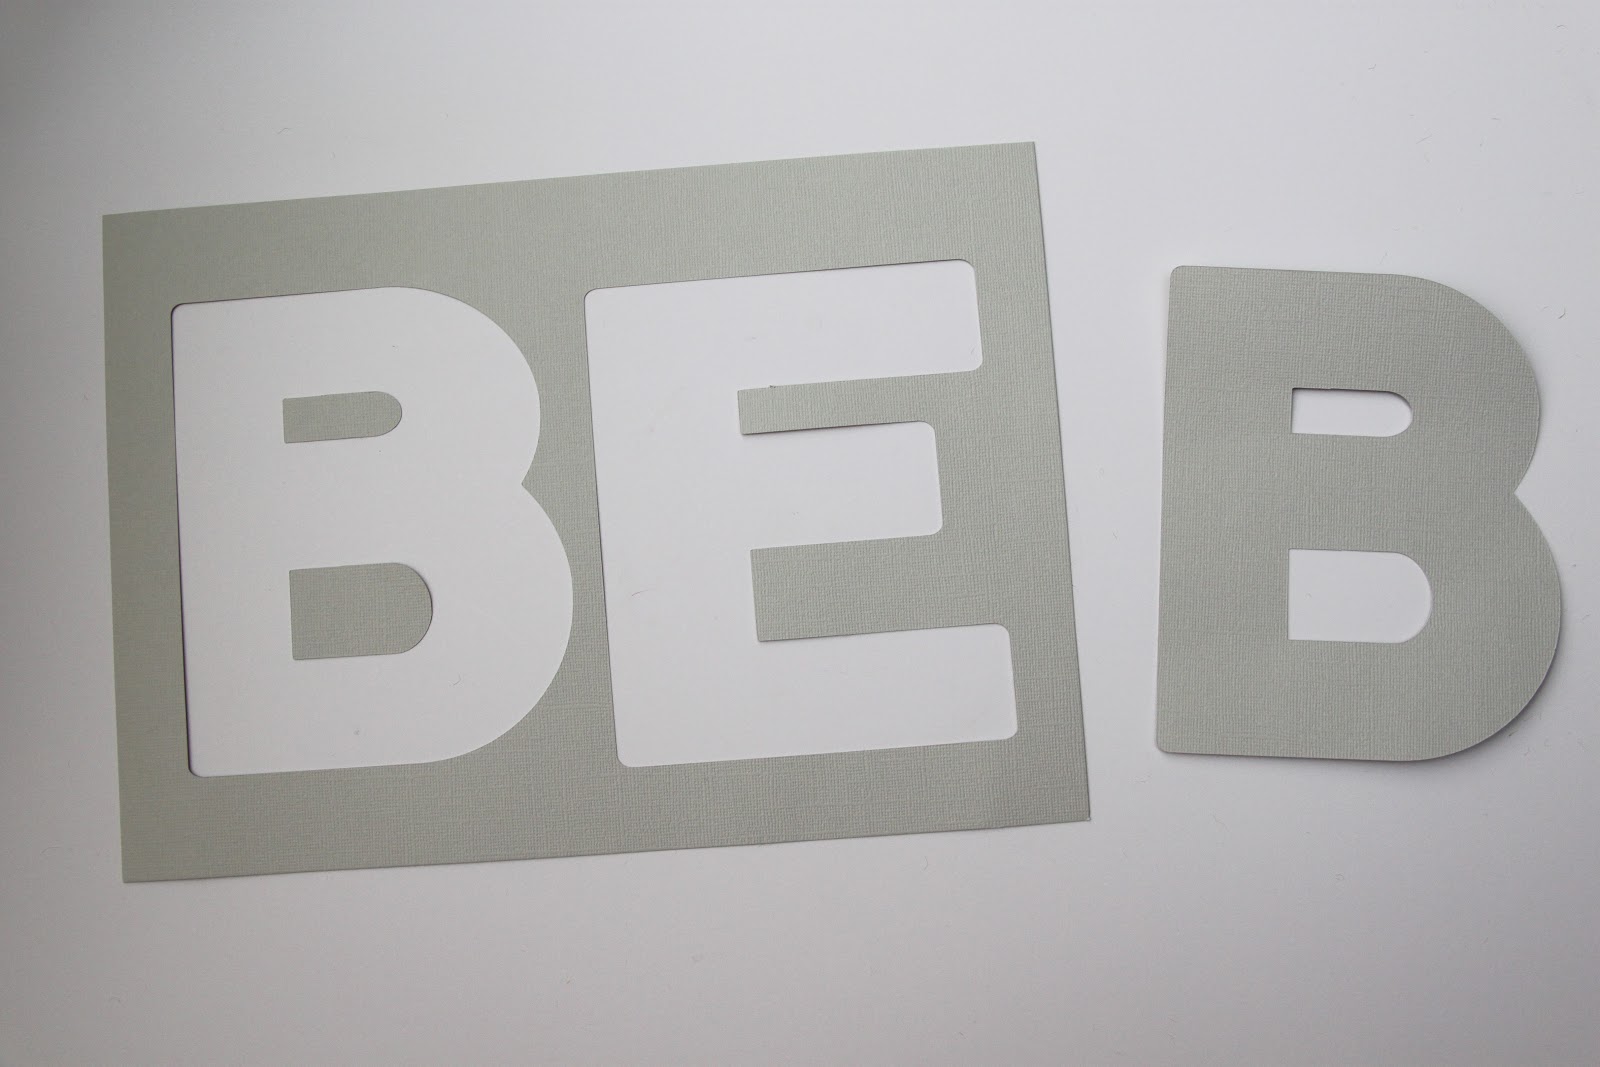
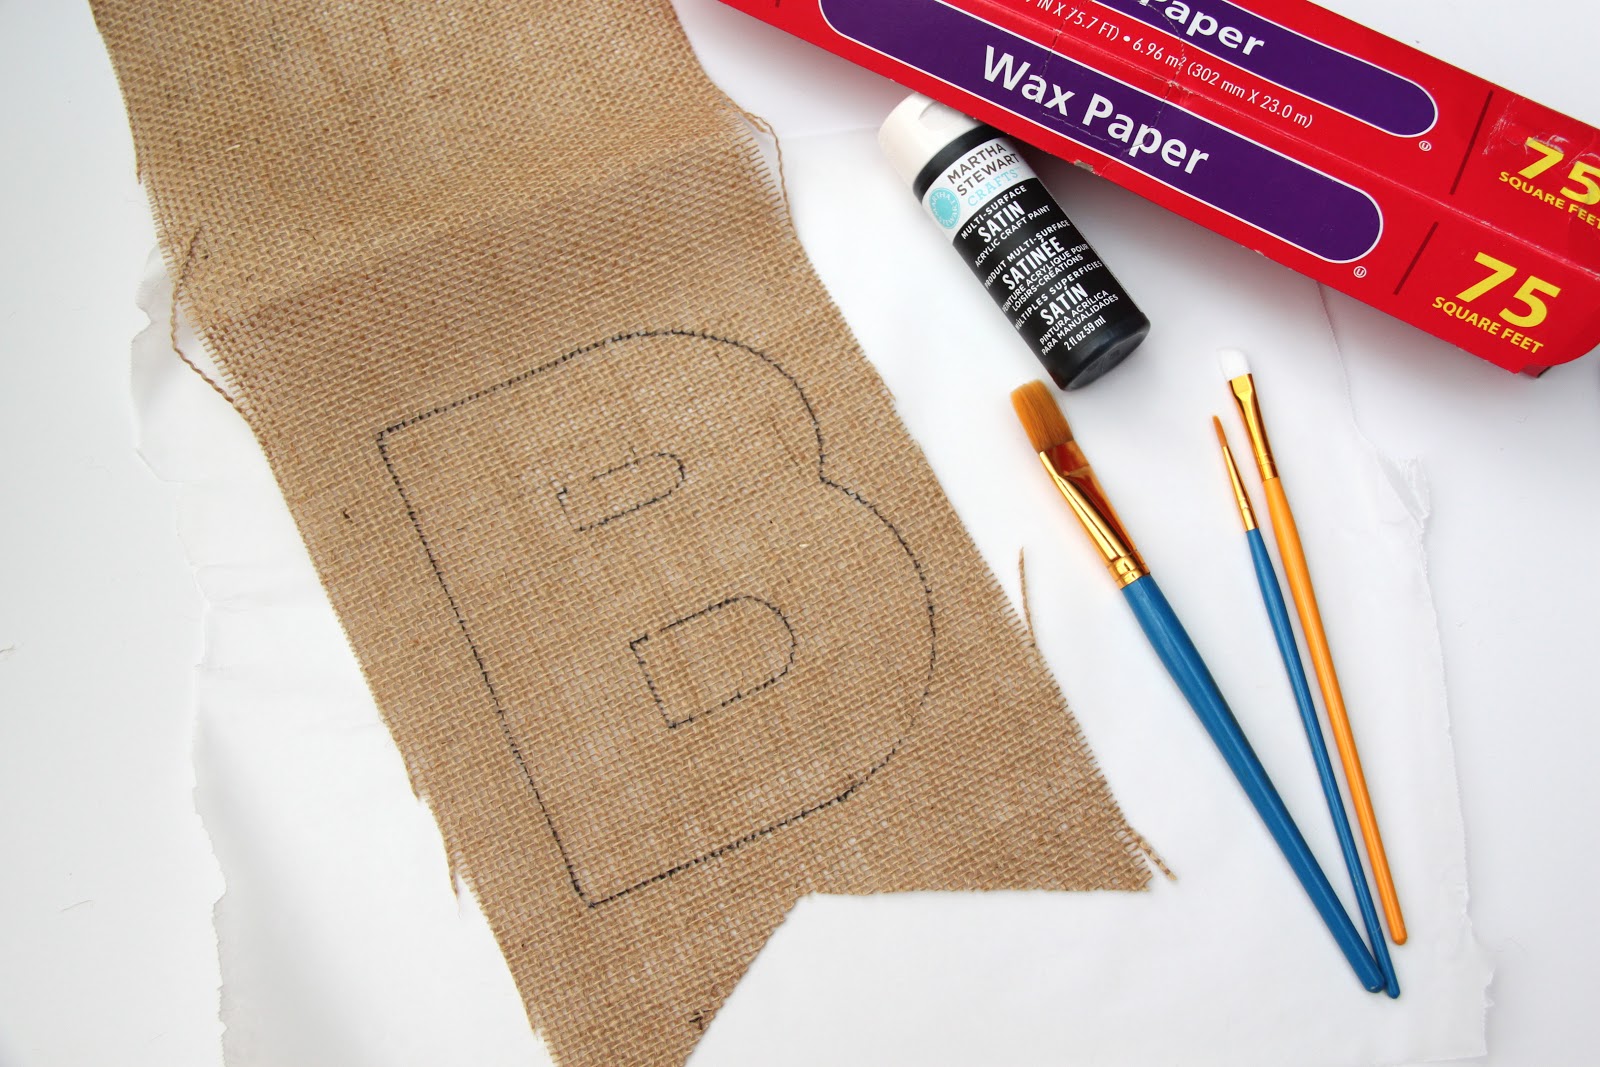
Then using my Cricut Mini and their free basic font I cut out the letters “BE MARRIED” and a heart shape sizing everything to 5 inches wide by 6 inches long.  You could also use any font on your computer as well.  Just use an x-acto knife to cut out the letters for your flags if you do.

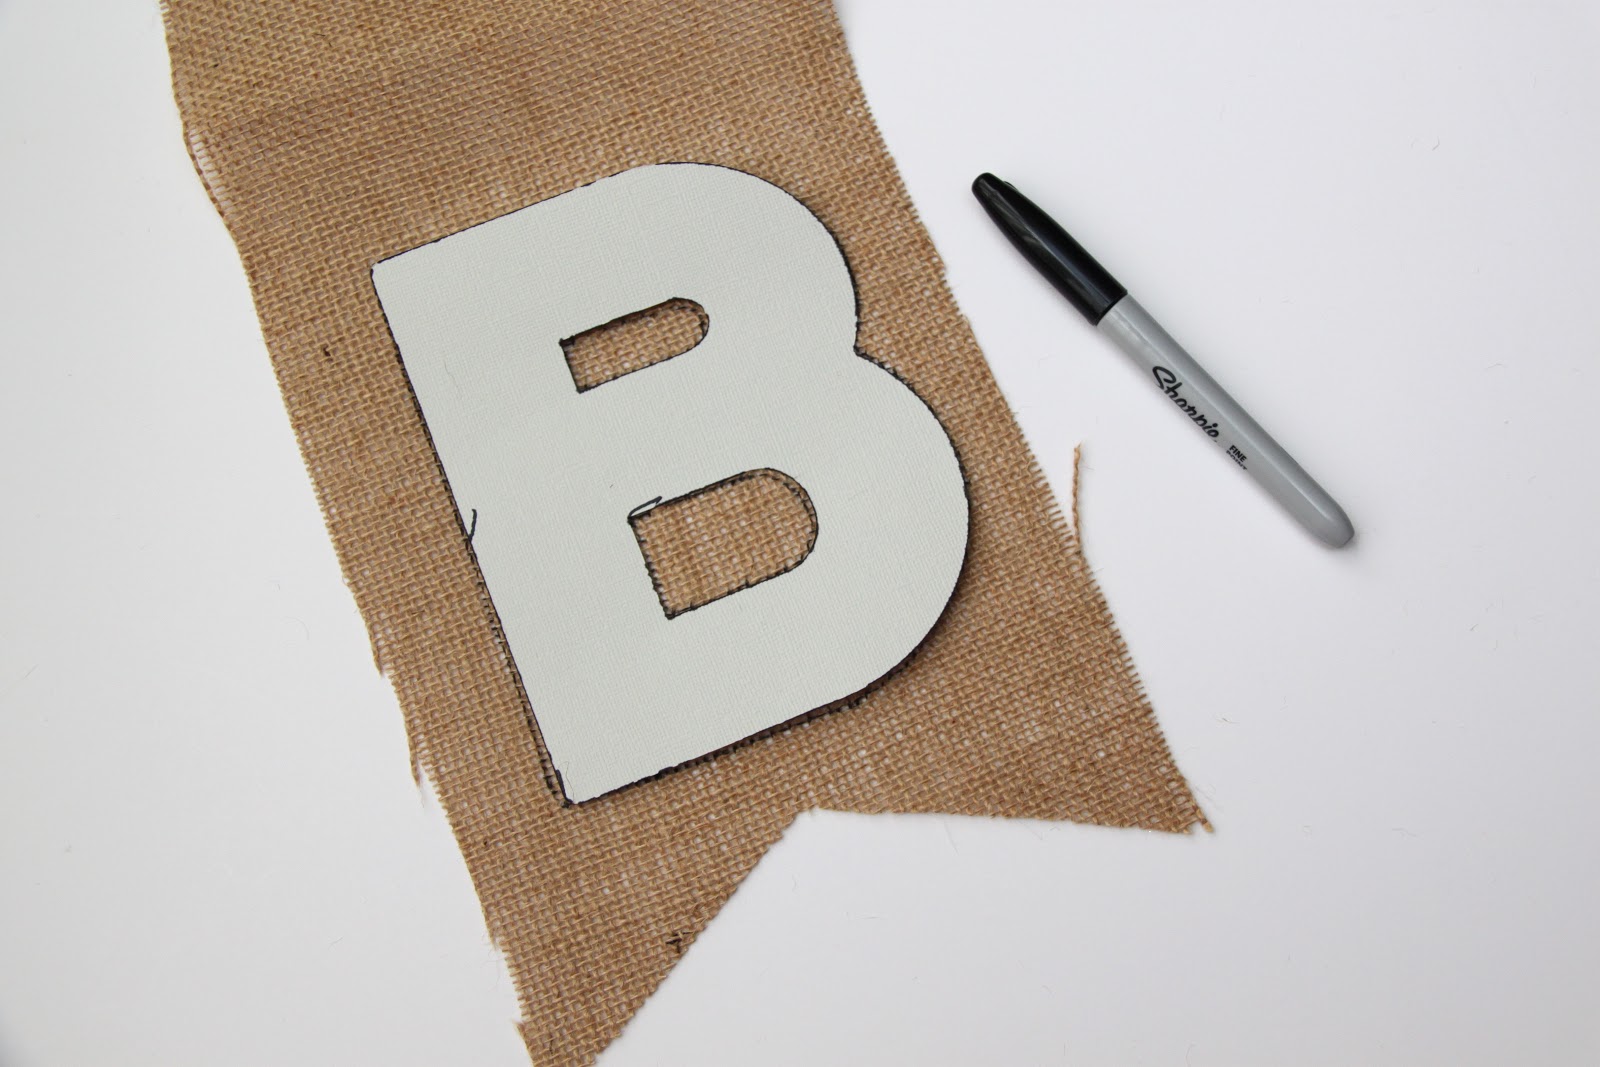
I traced each letter onto the flags with a marker like so…making sure to have ample room at the top of the flag so I could stitch a casing for the twine.

If you cut a piece of wax paper and place it behind the flag before you paint the letters in it will help protect whatever surface you are painting on.  The wax paper peels away nicely once the paint is dry too!

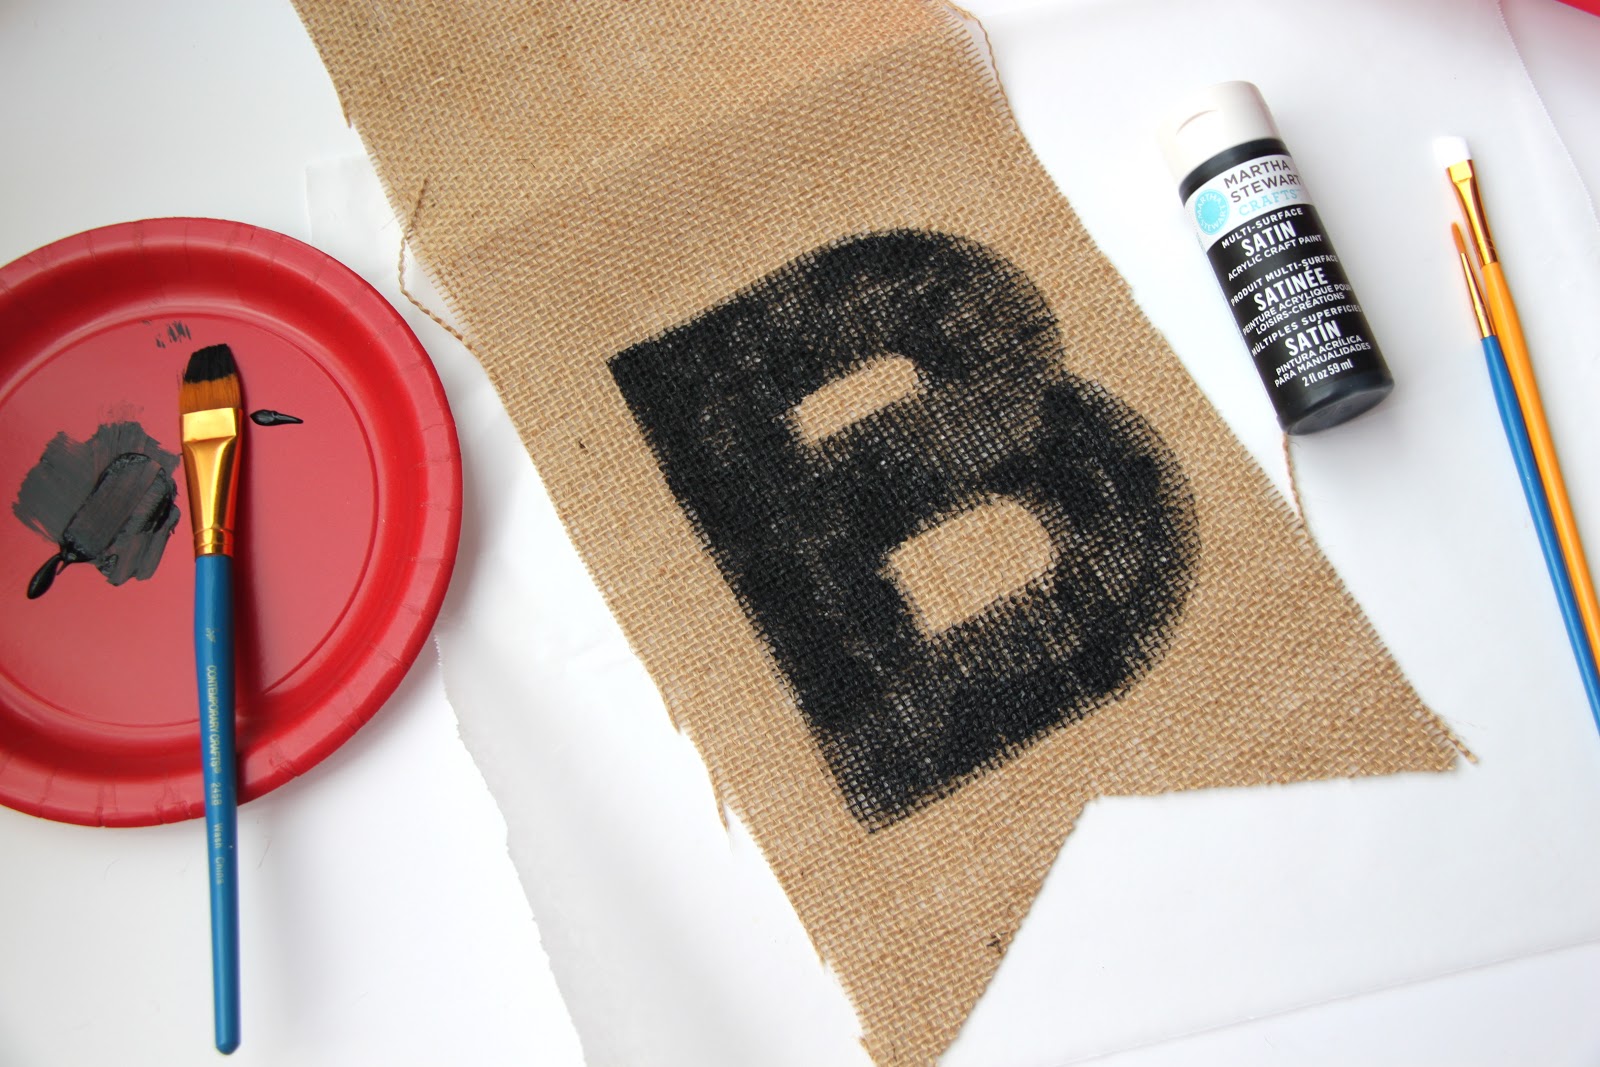
Then grab your paint and a brush and thoroughly paint in each letter (I used Martha Stewarts Satin Finish Craft Paint!) Once it is dry, fold your flags in half.  Using your sewing machine, make a casing for the twine by sewing a line about 1/2 inch from the fold.  I also stitched all around the side of the flags and the bottom as well to keep the flags as one unit.

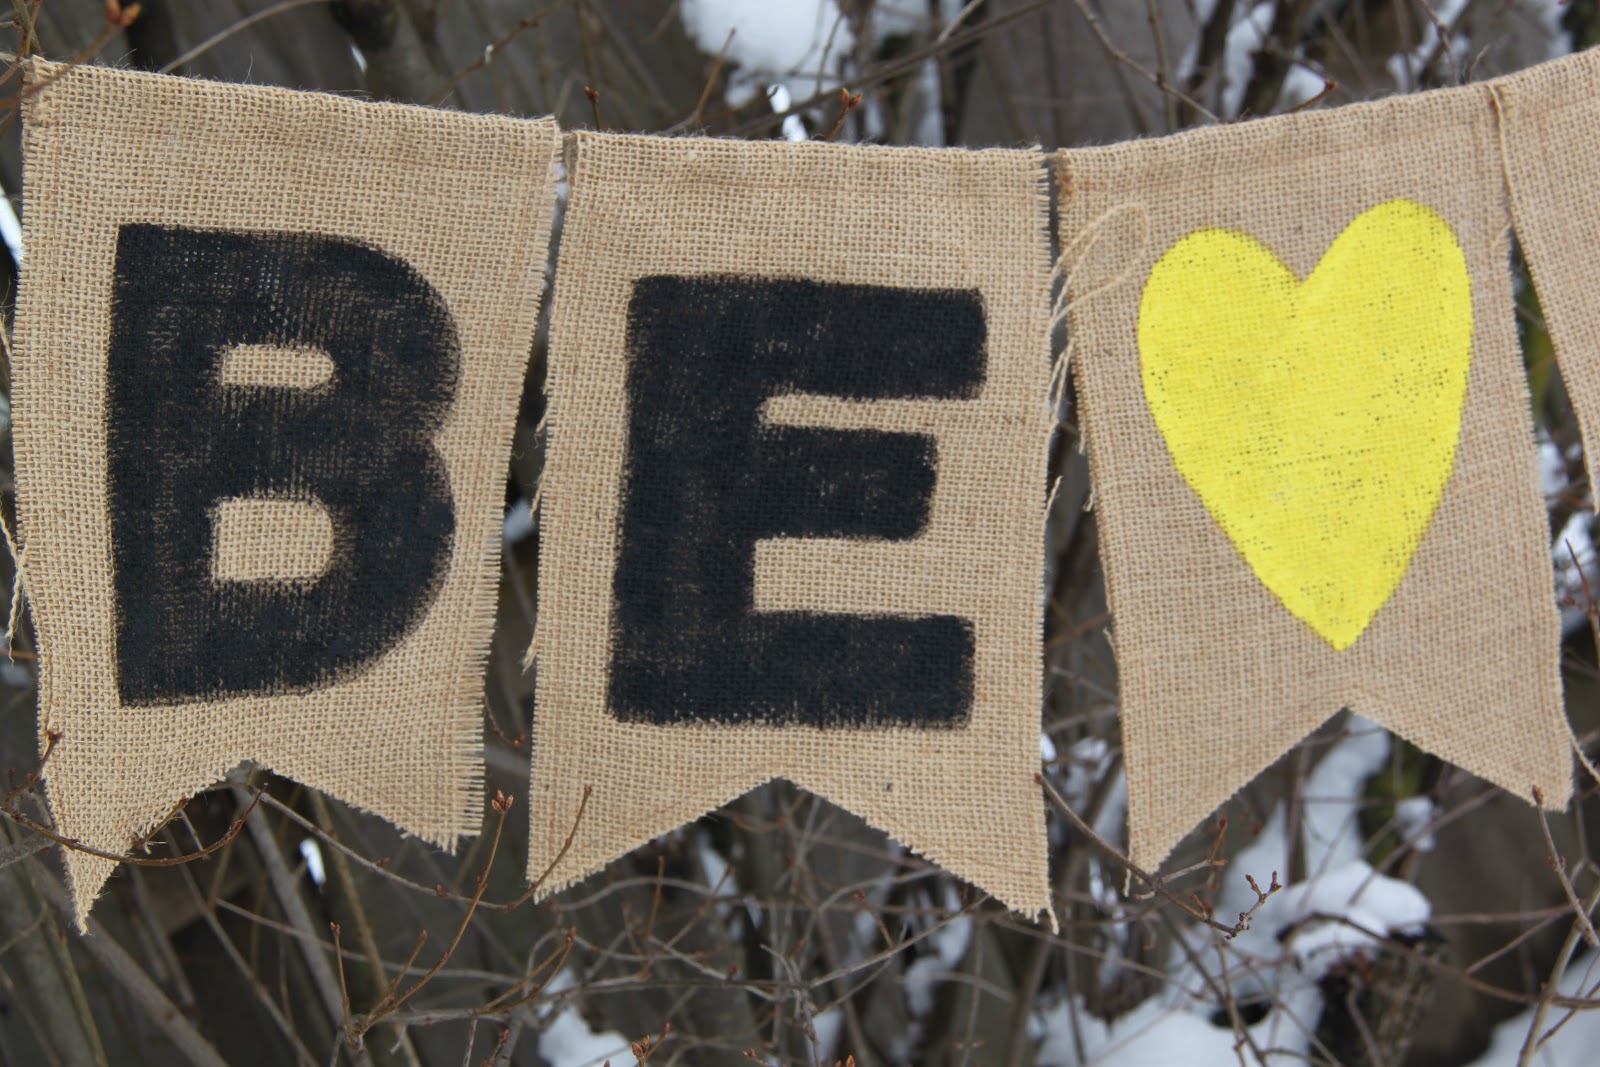
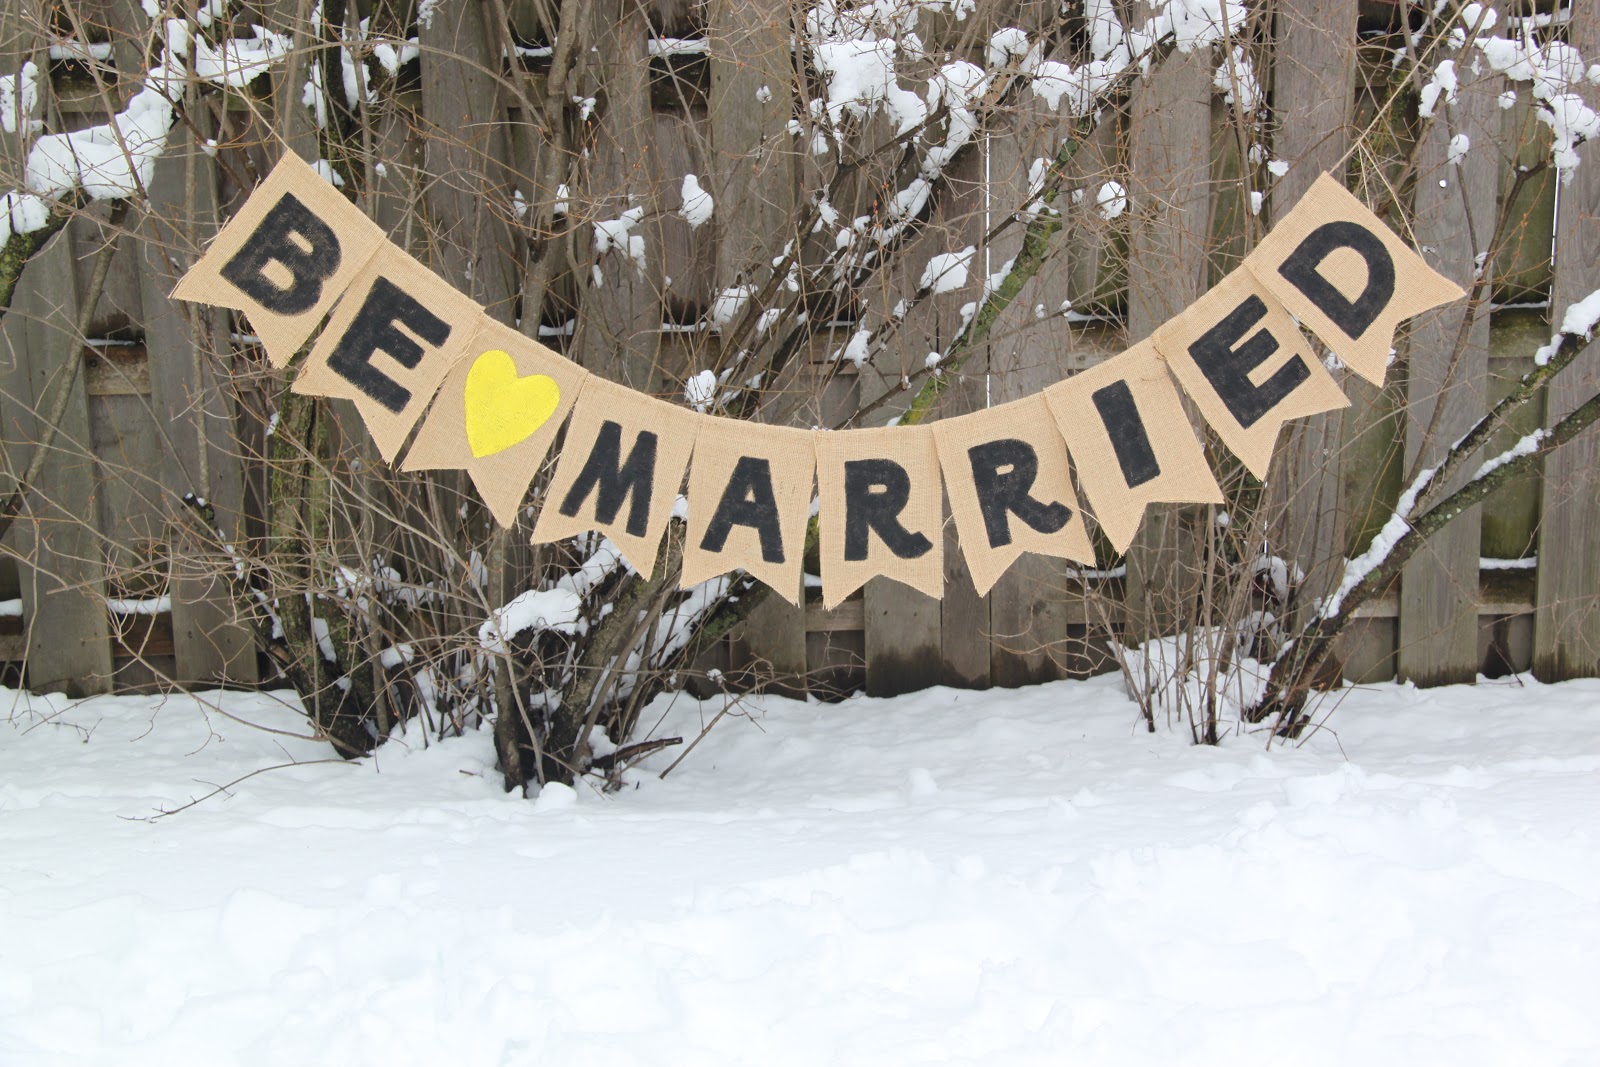
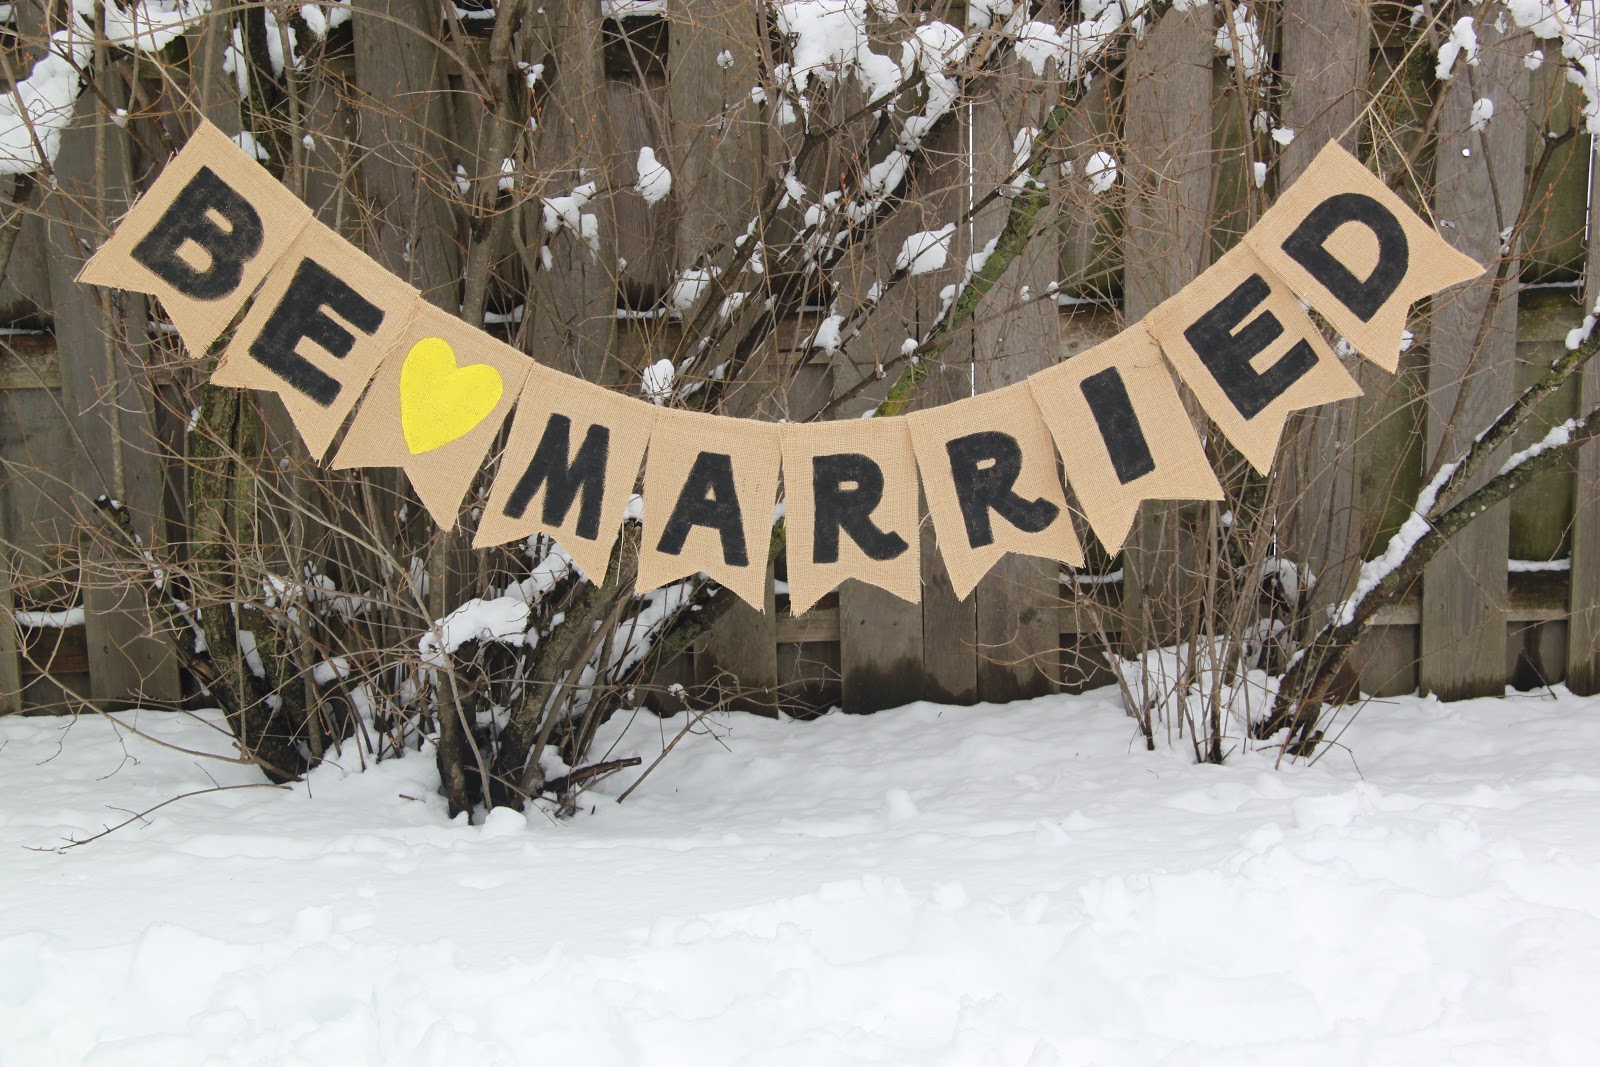
And there you have it…

BE MARRIED!

Now I just have to get this and a few other things I made for them out into the mail today 🙂

I hope they like it!
Thanks for stopping by today!!
XOXO,

You may also like -

Now this is so cute! A Stretched Burlap Canvas Jewelry Holder that holds necklaces, bracelets, drop earrings and studs….love!Stretched Burlap Canvas Jewelry HolderBurlap Silverware Pouches-TUTORIALBurlap & Lace Placemats-TUTORIALBurlap Covered Letters-TUTORIALFabric Rose {Valentine’s} Wreath Tutorial

Become a Subscriber

never miss a thing!

Comments

  1. Anna says

    March 4, 2013 at 3:52 pm

    My wedding colors were grey & yellow – loved and still do! Hope to see more pictures afterward 🙂

    • Maggie says

      March 8, 2013 at 3:26 pm

      Oh! Love that Anna! I’ll be sure to take pictures of her big day when it happens!!!

  2. KC @ genxfinance says

    March 5, 2013 at 2:05 pm

    That’s very creative.. and unique. Yeah, more pictures please.

    • Maggie says

      March 8, 2013 at 3:26 pm

      Thanks!! Will do! 🙂

  3. Megan says

    March 6, 2013 at 4:17 am

    You did a great job! So creative!

    • Maggie says

      March 8, 2013 at 3:26 pm

      Thanks Megan! I’m so excited to see everything come together!!

Welcome to Smashed Peas and Carrots. You can read more about me HERE
 photo designTeam.png
Follow on Bloglovin

Popular Tutorials

Highlighter Valentine Card with Free Printable

Highlighter Valentine Card with Free Printable…

Play Doh Valentine Card Free Printable

Play Doh Valentine Card Free Printable…

Elderberry Syrup Recipe

Elderberry Syrup Recipe: Natural Cold and Flu…

Teacher Survival Kit

Teacher Survival Kit with FREE Printable…

Notebook Paper Pencil Pouch Teacher Gift Idea

Notebook Paper Pencil Pouch Teacher Gift Idea…

Free Silhouette File Teacher Canvas Bag Gift Idea

Free Silhouette File: Teacher Canvas Bag Gift…

Popular Recipes

No Bake Energy Bites Recipe…

Chocolate Coconut Cups {Gluten and Dairy Free}…

DIY Taco Seasoning Recipe…

Sugar. Cookie. Icing. {The Recipe}…

French Dip..Crockpot Style!…

Crockpot Banana Bread…for Real!…

My Sponsors

 photo FatQuarterShop-175x175.png

 photo cdf15248-e6f8-4276-abc0-c145e2451c35.jpg


Blog Archives

Posts by Topic

Stay Connected

  • Facebook
  • Twitter
  • Pinterest
  • Instagram
  • Dots
  • Google Plus

Join me on Facebook

Copyright Smashed Peas and Carrots © 2025 · All rights reserved · Design by Emily White Designs

Copyright © 2025 · Smashed Peas & Carrots Custom on Genesis Framework · WordPress · Log in