Smashed Peas & Carrots

Inspiration For Living Creatively - DIY Crafts, Sewing, Recipes, Crafts & More

  • Press
  • Disclosure
  • Collaborate
  • Contact
  • Facebook
  • Twitter
  • Pinterest
  • Instagram
  • Dots
  • Google Plus

Become a Subscriber

never miss a thing!

  • Home
  • About
    • Advertising
    • Disclosure & Safety Disclaimer
    • Privacy Policy
  • Recipes
    • Appetizers
    • Bento Lunch
    • Beverages
    • Smoothies
    • Breads
    • Breakfast
    • Casserole
    • Crockpot
      • Visual Library
    • Dairy Free
    • Dessert
    • Gluten Free
    • Main Course
    • Holiday
    • Instant Pot
    • Paleo
    • Party Food
    • Salad
    • Side Dish
    • Soup
    • All Recipes
  • Tutorials
    • Children
    • Adult
    • Home Decor
    • No Sew
    • Sewing
      • Children Sewing
      • Adult Sewing
      • Home Decor Sewing
      • Sewing Basics
    • Sewing Studio
    • Knitting
    • Kids Crafts
    • Bento
    • Holiday
    • Parties
    • Gift Ideas
    • Natural Living
    • All Tutorials
  • shop
You are here: Home / Furniture Rehab / TUTORIAL: Ikea Raskog Kitchen Cart Makeover
Aug
19

TUTORIAL: Ikea Raskog Kitchen Cart Makeover

| Filed Under: Furniture Rehab, Home Decor, Tutorials

I’m sure by now you’ve all seen that super cool vintage-inspired kitchen cart at Ikea called the Raskog. I have loved it since it came out, seriously, I would pet it every time I went to Ikea. Almost as if I was visiting it like I would one of my kids at a sleep-away camp. How are you today? Aren’t you just such a pretty little cart! Aww, you’re sold out, you are so popular!  Everyone loves you! 
I kept telling myself I should by one and I had a running mental list of all the things I could use it for…but I never bit the bullet. Until now. 
image via 
Yessirree Bob, I am now the proud owner of a Raskog…woo to the hoo! 
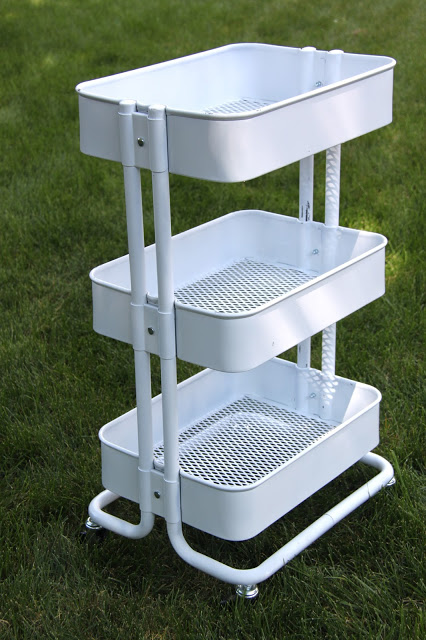
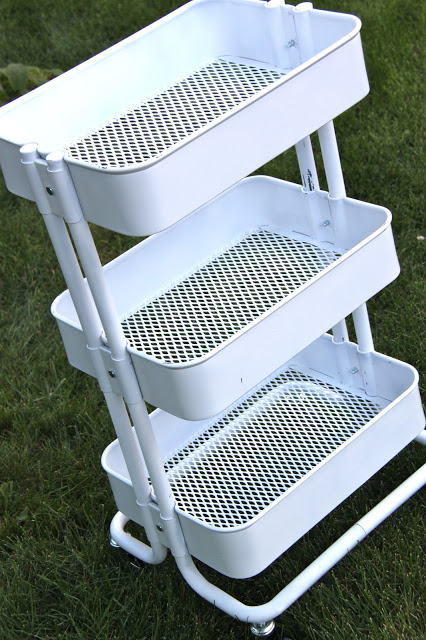
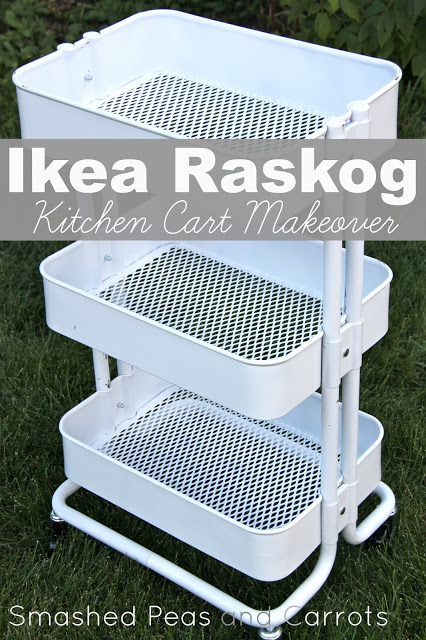
I think the biggest hurdle I had for not buying one was the colors.  I love the turquoise color but wasn’t sure if it would work so well in the long term. Most of the furniture I fall in love with is white…it’s clean looking and well, goes with everything. So, after my latest trip to Ikea I finally had a light bulb moment while staring at My Precious and realized…I could just paint it white..duh! And that is just what I did. *giggles*
This is seriously so easy to do, I have no clue why I hadn’t thought of it sooner! It took me a good half day to paint it using two coats of a Primer plus Paint spray paint. I assembled it after 24 hours although the can said if you spray on metal that it will take 5-7 days to cure. 
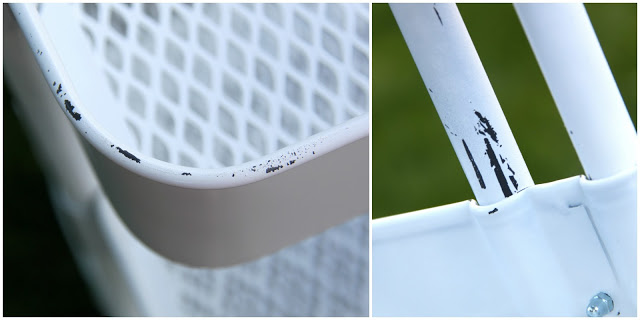
Now, I wanted that vintage chippy look so I assembled mine after only a day…and it did scrape the paint much to my heart’s desire…it looks so awesome.  I suppose it may keep chipping to an undesirable level but you could always spray a clear top coat to protect it so there’s that.

So, if you are interested in doing this too…think about all the color options!!…this is what I did.  (again, super easy folks, this truly shouldn’t even be considered a tutorial but hey, here it is.)

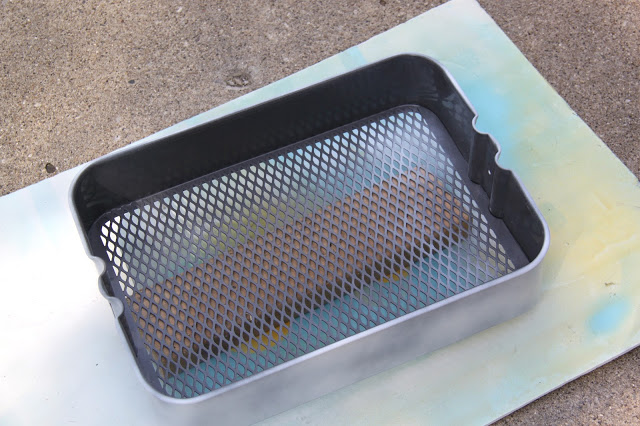
Unassembled, place your metal baskets on a piece of wood or something similar and spray.  I did the side you see in the picture above first (two coats) and then flipped it over and did the bottom. Don’t forget to spray paint all the structural pieces too!

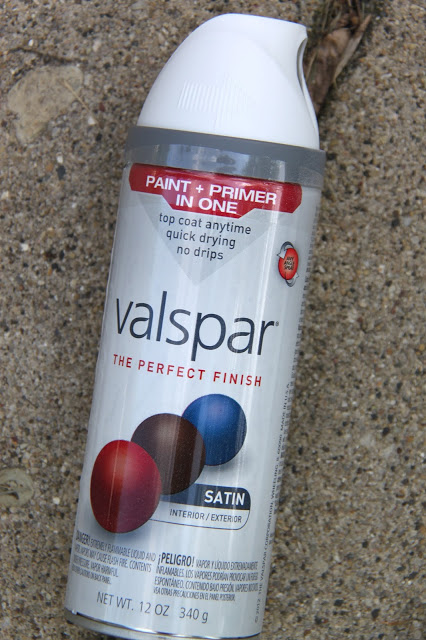
Oh, this is the paint I used…although after the first coat I realized I didn’t like the look of the Satin finish. The paint that comes on the cart is a shiny gloss, so I switched over to a Gloss finish and wowie zowie, how I love it so!

Like I said earlier, I wanted that chippy vintage look. I bought the Dark Gray Raskog as I thought that the dark color would show through really nicely underneath the white paint. I didn’t take too much care while assembling it. I also scraped up some of the edges and sides of the wire baskets too.

And there you have it…love and love!
I am so happy I finally get to own this sweet little cart and in a color that is just perfect for me!!

Thanks for stopping by today!
 XOXO,

You may also like -

Tutorial: Easy Frosted Glass Chevron PatternTUTORIAL: Magnetic Paint Craft Pumpkins with Magnetic LettersTUTORIAL: Gold Accented Decoupaged PumpkinsTUTORIAL: Framed Chalkboard To Do ListTUTORIAL: Teacher Appreciation Gift And FREE Printable!

Become a Subscriber

never miss a thing!

Comments

  1. Verbenabeth says

    August 19, 2013 at 2:04 pm

    Very cool! Wish I had room for one of those in my miniscule kitchen. Now if you have tips on redoing kitchen cabinets, bring it on! 🙂

    • Maggie says

      August 20, 2013 at 5:12 am

      Ha! If I ever get around to re-doing my cabinets I will definitely share!!

  2. Bridget =) says

    January 19, 2014 at 4:37 pm

    this looks great! i plan on spray painting mine too – question, did you have the poles assembled or did you spray paint them separately too?

    • Maggie says

      January 19, 2014 at 5:09 pm

      I separated all the pieces (poles included) before spray painting, I figured it would just be easier that way! It is still holding up beautifully, I hope you love yours just as much!
      Love,
      Maggie

  3. Jeanette Egemann says

    March 20, 2015 at 12:55 pm

    Thank you so much for this wonderful tutorial! My Raskog is also grey and if IKEA would have a white one, I would buy it.

    Now I can make it how I want it.

    Thanks!!

    Jeanette

    • Maggie says

      March 20, 2015 at 1:33 pm

      That is totally how I felt, I wish white was one of their colors!!! Have fun with the paint, Jeanette!!

  4. TeaJae says

    March 27, 2015 at 3:00 am

    how many cans of spray paint did you have to use to cover the entire cart? I can’t wait to get mine. I really think I can use this cart in the kitchen, bathroom, living room and even as a bedside table. It’s functional I love it. I’d like to paint mine like antique gold. I’m excited, lol

    • Maggie says

      March 27, 2015 at 8:15 pm

      This took one can total. Happy spray painting!!!

  5. Diane says

    October 24, 2015 at 9:58 pm

    Just a question before I buy…do the basket/ shelves have to be placed like it is shown or are they somewhat customizable?

    • Maggie says

      October 26, 2015 at 12:50 am

      The shelves are customizable with their height!

  6. Dawn says

    November 22, 2016 at 2:06 am

    We started with a turquoise one for the school room. The color isn’t excellent for our color scheme, but it’s SO functional so we overlook the color. We recently bought the rust colored one to match our accent wall, then promptly ditched the accent wall. Waaaaah! I was sickened by what to to with the potentially orphaned Raskog… and I happened across this post. HOORAY! I’ve become pretty adept at spray painting and look forward to making a phenomenal cart perfect for our home. Thank you for the inspiration!

    • Maggie says

      November 23, 2016 at 5:28 am

      So glad I could help!!!

  7. Denise says

    November 28, 2016 at 9:09 pm

    I recently bought this IKEA utility cart. I thought it would make a great addition to my kitchen and later when I don’t need it in the kitchen I can use it for art supplies. However, I can’t assemble it. The bottom part is a little wonky, but it’s the bolts that attach the baskets to the side pieces that are impossible. They’re not long enough so that I can fit the nuts on on the inside of the baskets. Did anyone else have this problem?

    • Maggie says

      November 30, 2016 at 4:55 am

      I did not..maybe try calling Ikea..they are very good about giving you new parts if you need them!

Trackbacks

  1. White Raskog Cart Anyone? | Hello. I'm a Paper Addict. says:
    February 12, 2014 at 2:04 am

    […] easy to spray paint. I google-imaged “white raskog cart” and I found a blog entry from Smashed Peas and Carrots and she did it and it looked […]

  2. This Kitchen Cart Is The Only IKEA Item You Really Need | Sharing Interesting Stuff, Updates News & Free Tips says:
    September 1, 2014 at 5:41 pm

    […] smashedpeasandcarrots.com […]

Welcome to Smashed Peas and Carrots. You can read more about me HERE
 photo designTeam.png
Follow on Bloglovin

Popular Tutorials

Highlighter Valentine Card with Free Printable

Highlighter Valentine Card with Free Printable…

Play Doh Valentine Card Free Printable

Play Doh Valentine Card Free Printable…

Elderberry Syrup Recipe

Elderberry Syrup Recipe: Natural Cold and Flu…

Teacher Survival Kit

Teacher Survival Kit with FREE Printable…

Notebook Paper Pencil Pouch Teacher Gift Idea

Notebook Paper Pencil Pouch Teacher Gift Idea…

Free Silhouette File Teacher Canvas Bag Gift Idea

Free Silhouette File: Teacher Canvas Bag Gift…

Popular Recipes

No Bake Energy Bites Recipe…

Chocolate Coconut Cups {Gluten and Dairy Free}…

DIY Taco Seasoning Recipe…

Sugar. Cookie. Icing. {The Recipe}…

French Dip..Crockpot Style!…

Crockpot Banana Bread…for Real!…

My Sponsors

 photo FatQuarterShop-175x175.png

 photo cdf15248-e6f8-4276-abc0-c145e2451c35.jpg


Blog Archives

Posts by Topic

Stay Connected

  • Facebook
  • Twitter
  • Pinterest
  • Instagram
  • Dots
  • Google Plus

Join me on Facebook

Copyright Smashed Peas and Carrots © 2025 · All rights reserved · Design by Emily White Designs

Copyright © 2025 · Smashed Peas & Carrots Custom on Genesis Framework · WordPress · Log in