If you remember from this post here, I was invited to participate in Michaels‘ Great Pumpkin Challenge where they sent me a box of their neat-o craft pumpkins to create, carve, or design something fun with them for Fall/Halloween. Since we are in Back to School mode as my kids are finally starting school (Noah started his first day of FULL day school today, hold me!) I thought how fun would it be to use those colorful magnetic letters we all have on our fridge and make a magnetic pumpkin to spell out fun Halloween-type words!

This project is so, so easy! All it takes is a few short 5-10 minute stretches of time over a couple of days as you will need a few coats of magnetic paint to get a good magnetic attraction going. Here is how I did it…
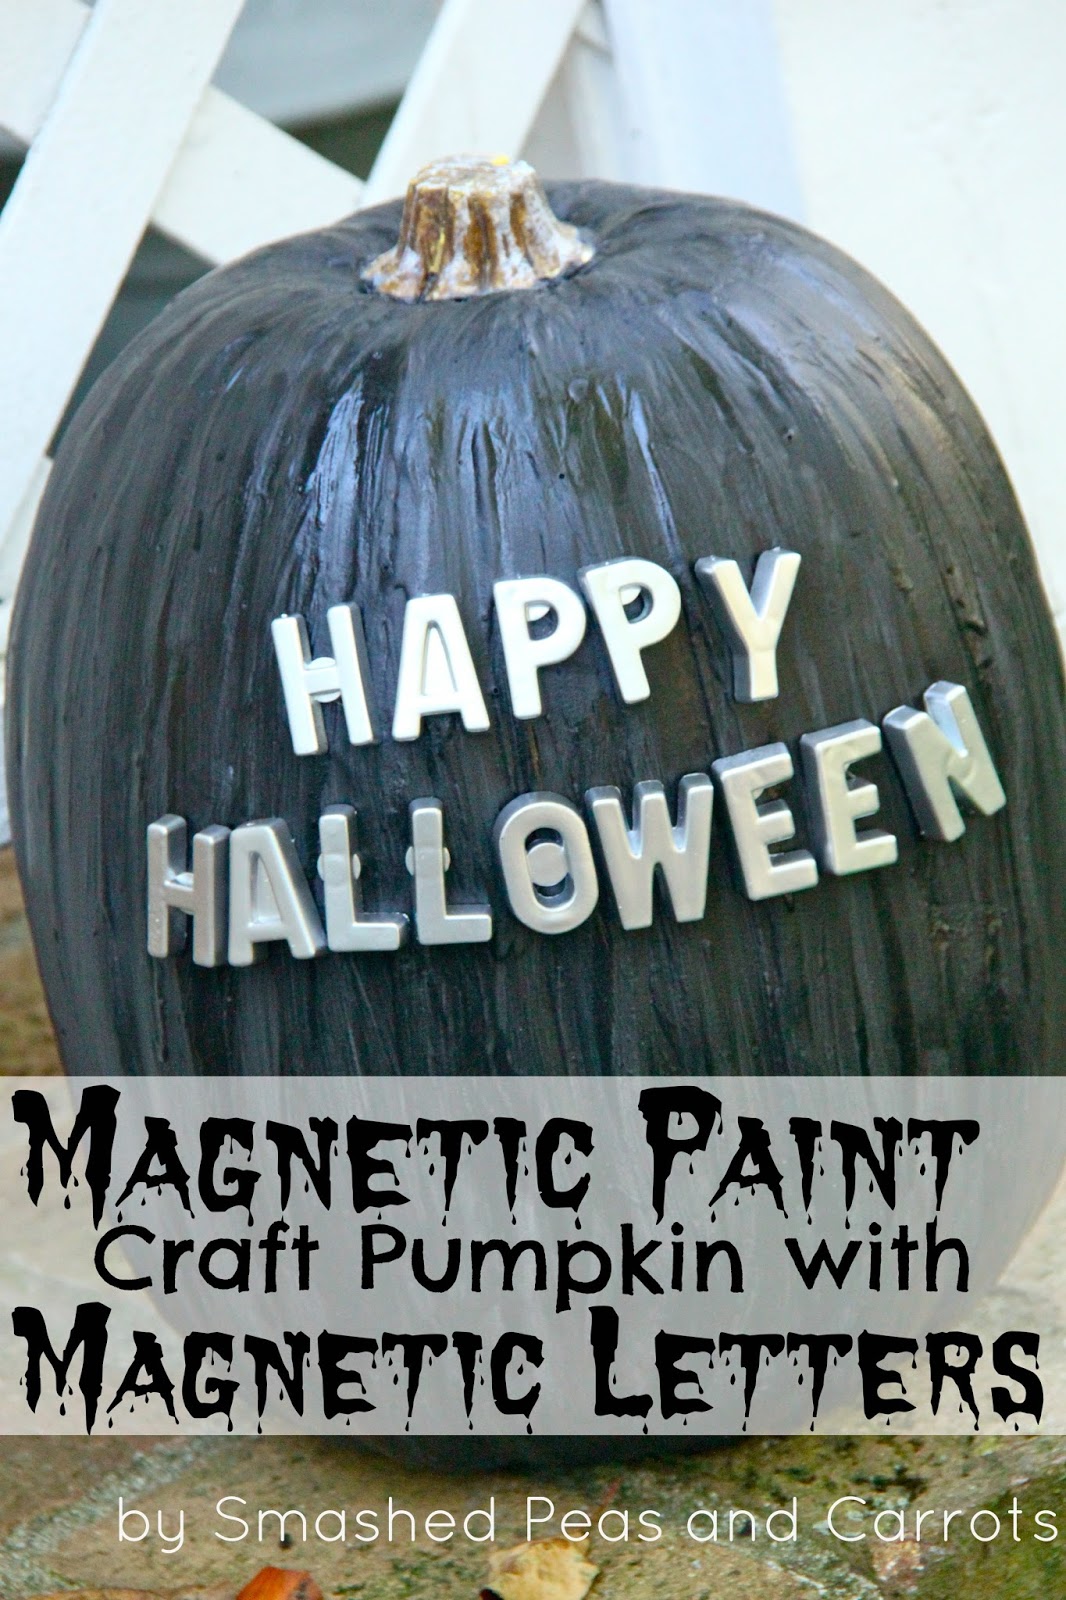
Magnetic Paint Craft Pumpkin with Magnetic Letters
Craft pumpkin
Can of magnetic paint
Foam brush
Painter’s tape
Small can of latex paint in the color of your choice (will be the final color of the pumpkin!)
Magnetic letters
Can of Primer for Plastic
Can of spray paint in the color of you choice (for the letters!)

For this project I used the largest craft pumpkin sold at Michaels…it has the most surface area for spelling out fun words! Since you will be painting over it with the magnetic paint you can use any color pumpkin.

I bought this small can of magnetic paint at Michaels (found in the spray paint aisle). I used about half of it for this project!

Take your painter’s tape and tape off the stem to protect it from the paint. Then using your foam brush, give the pumpkin one coat of magnetic paint and let dry for 24 hours (as per the can instructions). The can states you will need at least 2 coats of paint but I found the magnets were still falling off with 2 coats so I did an additional 3rd coat which ended up being the perfect amount of magnetic attraction!

Once your last coat of magnetic paint is dry (another 24 hours!) you can paint over the magnetic paint with any color latex paint. Since I wanted my pumpkin to be used for Halloween decorating, I painted mine Gloss Black in color but how cute would a cream color be with gold letters! Let your topcoat dry for a few hours. You can remove the painter’s tape once the paint is dry.

In between coats of magnetic paint you can spray paint your magnetic letters. Remember these? I think we have about 32,498 of them on our fridge and laying around every one of my kids’ rooms.
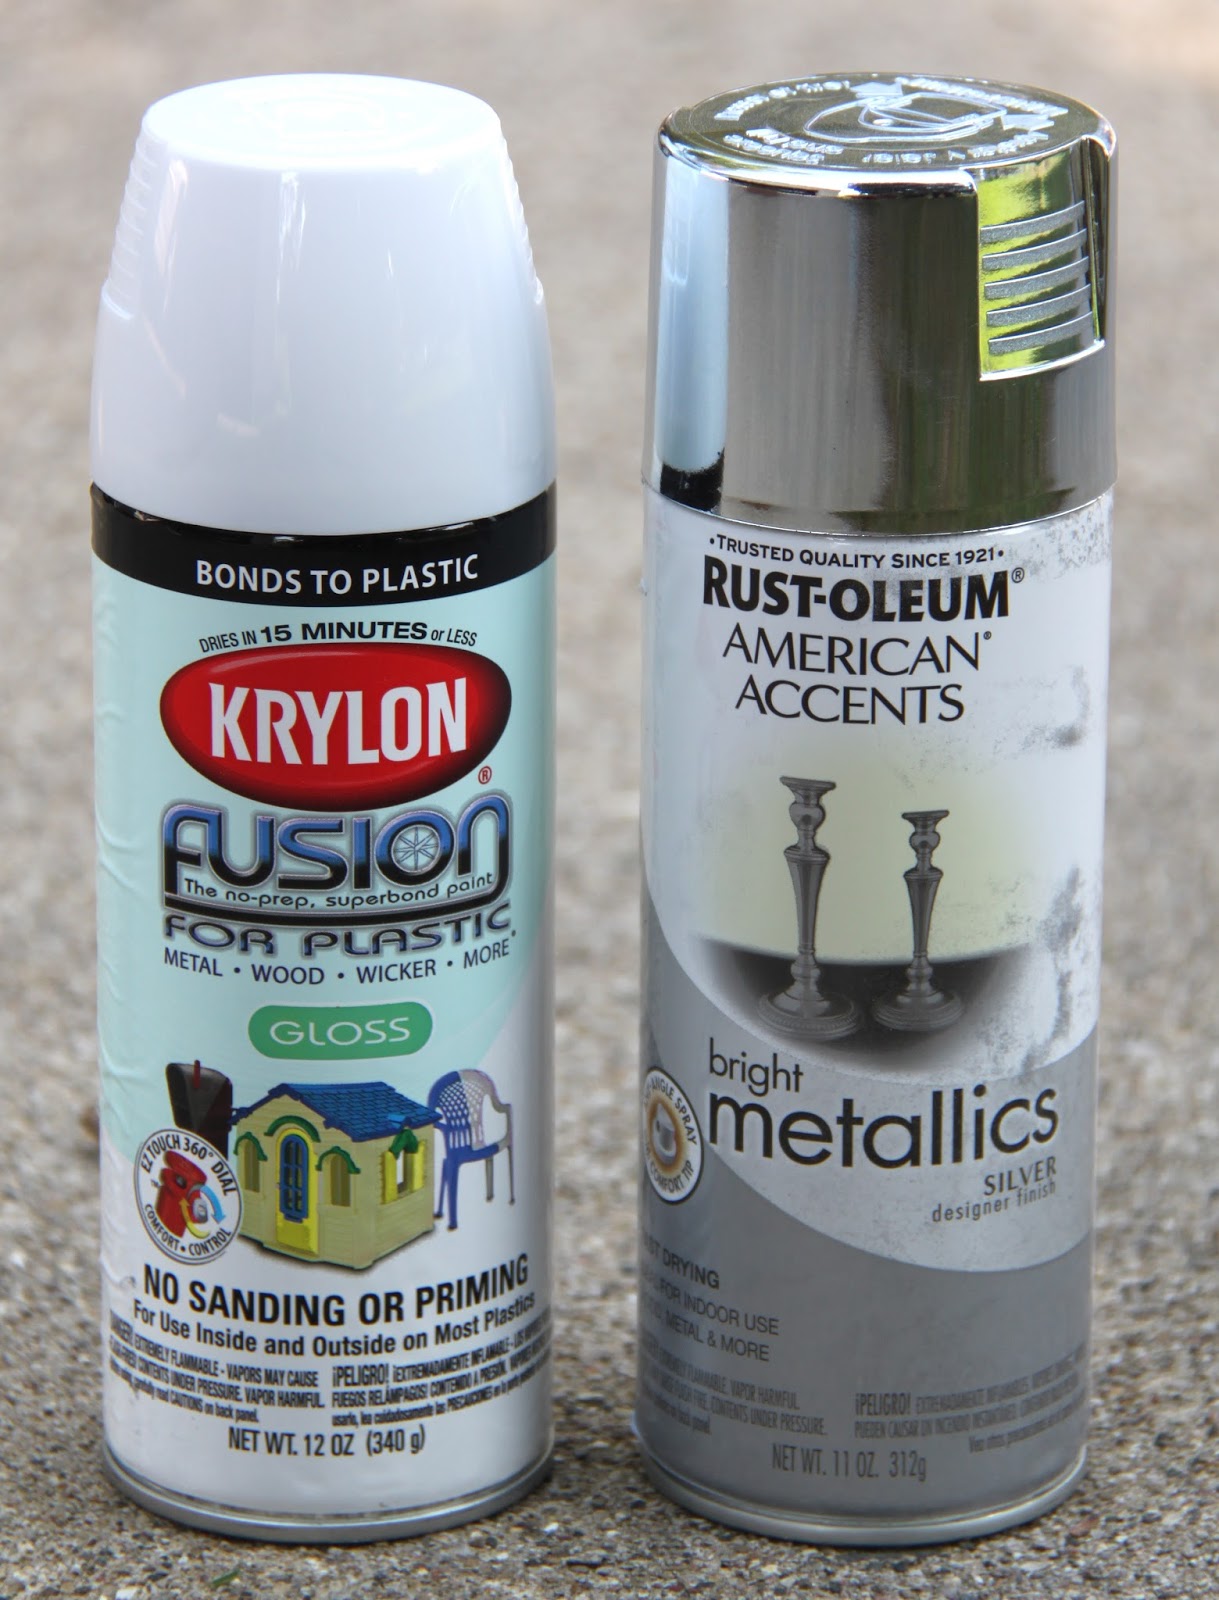
Since the letters are plastic you will want to spray them with a coat of Primer made for Plastic. I happened to have some of this Krylon Fusion for plastic so I used it like a primer! Once the primer coat is dry you can spray the letters with your topcoat color of choice. I love the look of a silver metallic on black so that is what I chose 🙂

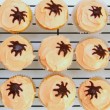
And there you have it…silver metallic letters on a jet black magnetic pumpkin…Happy Halloween indeed!

Now, your kids (or you!) can have fun spelling out lots of fun Halloween-y type words!

Enjoy! See, I told you this one was easy!!
Oh and PS. Just in case you didn’t know…
· All Michaels locations are hosting a Great Pumpkin Event on Saturday, October 5 from 1 p.m.-3 p.m. For only $6 (which covers the cost of a 9” carveable pumpkin) kids can create their own pumpkin design and a free face painter will also be on hand. A great weekend event for the whole family!
· Did you know that Michaels offers custom carved pumpkins that can be personalized with a variety of designs and names? Prices start at $19.99 and you can them order at all Michaels locations, just make sure to place your order by Oct. 13 so that it will be completed by Halloween. Visit www.michaels.com/custom-carved-pumpkins for more information.
Thanks for stopping by today!
XOXO,

*I received compensation for this post; however, this is my personal, honest opinion based on my experience with the product.


Idea carinissima!
Thank you Carmen!!
Very cool idea, but I think for the “o”s in BOO you need to put googly eyes over the spot where the magnet is in the center of the hole. I might have to try the magnetic paint on a couple of projects I have in mind. A number of years ago I worked for Michael’s and we got to decorate the carvable pumpkins and bring them back into the store, I think it was a contest. I still have the one I made which was a girl in a poodle skirt but she’s in bad shape from being bounced around the garage. I also used one of the gourds to make a poodle to go with her. I haven’t made any others since them, but look at them every year.