Happy Monday, I hope you all had a great weekend! We are diligently working on finishing up our raised garden beds, I’m so excited we have already picked out some great veggies for our garden this year!
Since there were quite a few of you who requested the pattern for Eloise’s dress in this post here (and by the way, Hello Blogger what did you do with all the comments? Did anyone else loose a whole bunch of comments off your posts?) I’m going to give you a pattern for that little cutie today, woot!
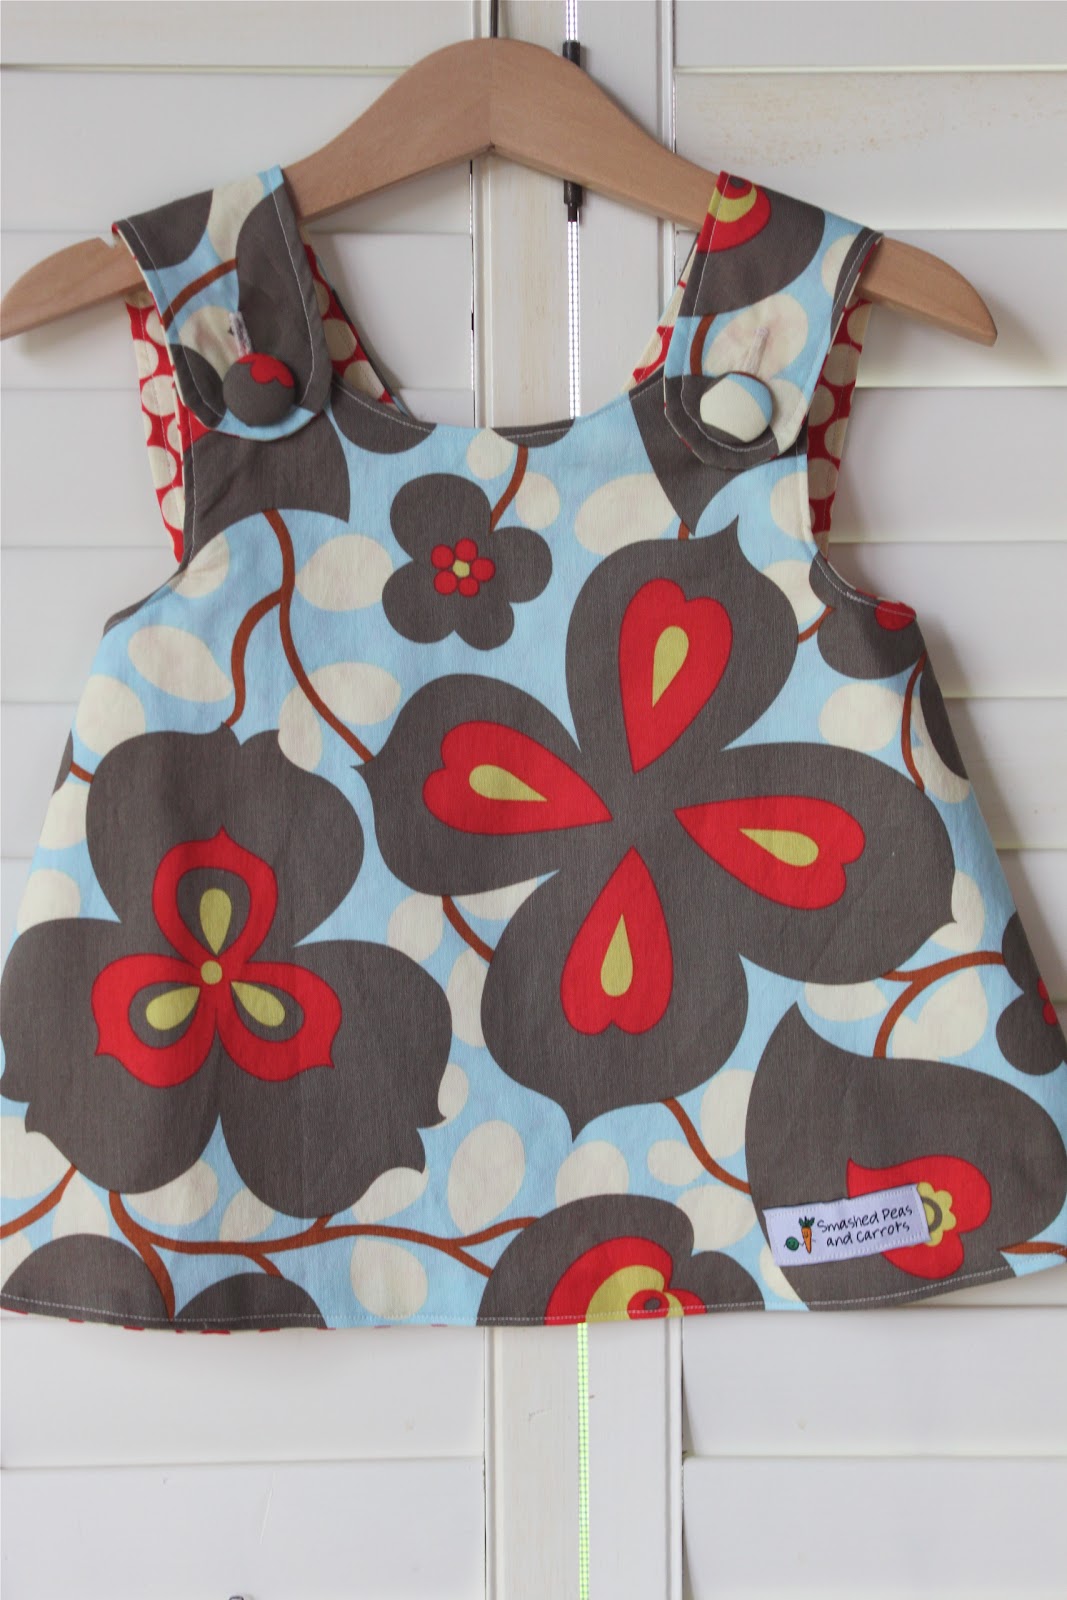
The pattern for the Little Girl’s Crossover Pinafore that I’m sharing is for ages 6-12 months but really you could use it well beyond that age range as the pinafore could become a tunic and top later on as your little sweetpea grows.

I loved drafting up this pattern because it was super easy to do, it’s really just 2 pattern pieces drawn from an a-line dress, who knew! What I love even more is that the finished dress showcases two beautiful fabric designs, swoon! A beginner sewist could definitely sew this with no problems. The hardest part might be the buttonholes but I’ll give you some links for making those if you don’t have a machine that can do it for you!
Ok, let’s begin!
Little Girl’s Crossover Pinafore (ages 6-12 months)
1 yard of fabric for the outer fabric
1 yard of fabric for the inner fabric
two buttons (I love using covered button kits…they rock!)
coordinating thread
sewing machine
scissors
rotary cutter and mat
the pattern pdf
First, print out the Pinafore 6-12mo .
*If you are having trouble lining up the pattern pieces you may need to change your printer settings. When you choose to print and your printer settings pop up, check to see if your printer is set to “fit to page”. If it is, you need to click the “scale” setting and make sure the scale is set to 100%. Many times that is why the pattern is off and doesn’t line up properly! If that doesn’t work (which it should!!!) and the pattern lines are slightly off, know that the pinafore should still work out fine! There is a small margin for error that you should be able to work within!
I’m also sorry to say that I cannot email this pattern right now as we have a new baby in our home and I am trying to spend my evenings with him since he’ll be our last little one, thanks for understanding!
**Take a look at the Pinafore as a top in this post here!
***Edit 4/1/12*** Many of you are asking about the diaper cover and if I can email the PDF to you. Sorry but I have not uploaded this as a PDF yet so, in other words I have nothing to email out to you. When I do get it in a PDF format I will make it available within a blog post as a tutorial so just keep checking back by either following my blog in your Google Reader or clicking on the Tutorials tab at the top of the blog and going to the Children’s section to see if it has been posted yet! Thank you!!

Next cut one Front piece (using the pieces labeled F1, F2 and taping them together) from both the outer and inner fabrics doing so on the fold. Then cut two Back pieces (using the patterns pieces B1, B2, B3 taped together) each from the inner and outer fabrics.
*The picture above just shows the outer fabric pieces I cut out.

Starting with the outer fabric, place one Back piece and the Front piece right sides together like the picture above.

Sew together using a 1/2 inch seam allowance. I always serge my seams together after sewing to give them a nice finished look as well as a strong seam. You don’t have to though, if you don’t have a serger you could use a zig zag stitch to finish the seam or just use pinking shears to reduce the amount of fraying that will occur over time with washing. On the other hand, if you do have a serger you could just serge the seam. I just choose to do both cause I’m cool like that 🙂
Do this for all four seams, two for the outer fabric and two for the inner fabric!

Next, lay your sewn pieces one on top of the other like the picture above. Right sides facing!! Make sure you make a note somehow to yourself to leave about 3-4 inches open at the very bottom center of the pinafore for turning it right-side out. I do this by using a pair of pins very close together on each side of the opening, you can see it in the picture above.

Then, sew around the entire pinafore, minus the 3-4 inch opening at the center bottom, using a 1/2 inch seam allowance.

Once, it is sewn together take a pair of scissors and snip the curves so that when you turn the pinafore right-side out it will lay nicely for you. Make sure not to cut into the seam you just made!!

Then using the opening you left unsewn (you did leave it unsewn right?) go ahead and turn your pinafore right-side out. You may want to use a chopstick to push out all the curves.
Press the entire pinafore and PLEASE don’t skip this step, PLEASE!! It will make your garment go from looking homemade to looking AWESOME!!!

Then, topstitch the entire pinafore using a 1/8 inch seam allowance. Topstitching will also close up that opening we left for turning!

Now for the buttonholes! If your sewing machine makes buttonholes you may have an attachment similar to this above. You separate the left end and place your button in the space to determine how big a buttonhole your machine needs to make…fun!

I usually place the buttonhole over where I need it on my garment so that I can get an idea of spacing and centering. I use a disappearing ink pen to outline the general size of the buttonhole, you don’t have to do this but I like to get an idea of size, etc. My particular machine needs just the short bottom line to start the buttonhole process.
Now if you don’t have a machine that does buttonholes I found a few tutorials that can help you with that…why reinvent the wheel when these ladies did such a good job sharing their knowledge with us!
Dana of Made shows you here how to make a buttonhole using a standard buttonhole foot (for manual machines!)
Disney of Ruffles and Stuff shows you here how to make cheater’s buttonholes.
Cal Patch over at CraftStylish shows you here how to handsew a buttonhole!

Once you finished your buttonholes, use your seam ripper to open them. I place a pin at one end so that I don’t rip through the buttonhole I just made, tell me just how sad would that be! Now, all that’s left is to sew on your buttons. I usually do this by hand although many machines can do that for you too!

Now dress you little cutie in her new pinafore and you are all set for a hot summer day!

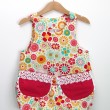
I used Amy Butler’s Morning Glory in Linen for the outer fabric and her Full Moon Polka Dot in Cherry for the inner fabric (both from her Lotus collection). I also used that same fabric to make Eloise a diaper cover too cause I just can’t help myself to a cute little coordinating clothing set!

So vintage apron-esque and So sweet!
Happy Sewing!!
XOXO,


This is a great tutorial! I had been looking at a pattern for this type of dress but they made it soooo difficult, I didn’t feel like doing it! This I can do!
Thanks again!
yippee! thanks for sharing! 🙂
Thank you so much for this post. I want to let you know that I posted a link to your blog in CBH Digital Scrapbooking Freebies, under the Page 4 post on May. 16, 2011. Thanks again.
WOW!!! This is amazing!!
I don’t have babies but it’ll be a great babyshower gift.
This looks great!! If you wanted to make it reversible would you just sew another button on the other side? I love the fabric you chose. 🙂
Thank You, Thank You, Thank You! I LOVE these dresses and have been wanting to try and make one (sewing is not one of my more abundant talents, haha). But with the pattern and tut, I just think I might be able to do it…I will let you know how it goes. Thanks again!
Yay! I’m so glad you are all loving the tutorial and pattern!!! Thank you!
@Lee Ann- Yes, you could totally add a button to the other side to make it reversible!! Just make sure to use a flat button as opposed to a covered button like I did cause the covered buttons are sewn on via a shank which makes them stand out a bit and could be a bit uncomfortable on your little girl’s shoulder region!
XOXO,
Mags
SHUT THE FRONT DOOR. I LOVE YOU FOREVER. Let’s always be together. I’m not sure if I’m talking to you or the pattern but I’m not even sure it matters, I’m just rolling around in a field of happy right now. This pattern and I will go sproinging through a meadow full of flowers together very, very soon. I have to first finish a tiered skirt I was working on for my three year old, but maybe if I’m a very good girl and get all my chores done quickly it will happen today. If not, tomorrow or the next day. I’ll throw a hissy fit if its much longer than that.
This is so so so cute. I will be featuring it at somedaycrafts.blogspot.com tonight. Thanks!
Love it! One problem, the pattern isn’t quite lining up correctly. I am, however, assuming you would tape the little dots together…… I can send a pic of how they turned out for me 🙁 ……. help, please?\
katessewgreat.blogspot.com
PS…. B2 and B3 fit together perfectly at the dots, the rest are off a bit. 🙂
Hmm, that is weird because I just printed it out and it all lines up…not sure why that is!! Please send me a picture and I’ll see what I can do to make it work for you!!
I had the same problem with the pattern not lining up correctly. And my middle piece wound up longer than my side pieces when I cut them so they didn’t line up along the sides when I stitched them together. I figured I will fudge the seam and it will just be a tad shorter, unfortunately. Let me know if you resolved this for Katie.
Oh lovely… Thanks for sharing!
http://thendralscaft.blogspot.com
SUPER!!!!!!!!!!!!!!!!
This is great! Can you add a tutorial on those cute bloomers too?
I LOVE this. And of course Amy B’s fabrics are always fab.
Any chance you could help me figure out how to adapt this so I could make one for me!? (there are currently no tiny people in my life to make this for)
Could I print the pattern and then enlarge it at a print shop? Just wondering about the amount of fabric I would need…any help or suggestions would be sooo appreciated!! 🙂
-Jen
(jen.baller@gmail.com)
Woot!
Adult size sounds cool, I’d get in trouble if I showed my butt like that though!
It would work with trousers (Sorry ‘pants’ or ‘slacks’?)or leggings.
Brilliant Idea! : )
I LOVE pinafores and this is a great, and easy tutorial! Thank you so very much! Is there a trick or a way to enlarge this pattern? I’d love to be able to make a matching set for the new baby and older sister! I’d need a 4T….
This is SO cute!!
OMG! Maggie, your daughter has gotten so big! I remember when she was first born! I absolutely love the cute crossover pinafore you made her!
Yea!!!!! I’m done. Pictures at katessewgreat.blogspot.com
It turned out great! Thanks for sharing!
Hey Maggie, I wanted to let you know that I featured this dress on my blog: http://koolbeenz-blog.blogspot.com/2011/05/featured-crafter-smashed-peas-carrots.html
Feel free to grab my Featured Button if you like.
I love your blog.
This is so great!! I’ve literally been on the lookout for a pinafore pattern for the last year. Thank you so much!! I was wondering, do you print it at 100% or 111%? When I went to print it automatically came up at 111%, so I wasn’t sure
Love it! How would you increase the size on this? I have two niece’s that I would love to make this for the older is 3 and pretty lanky.
very nice!
i love it but my girl is 13 years old…
greetings from germany
katrin
This is awesome! Thanks! Perfect for the baby showers I’ll be attending in the coming months! Just wanting to be sure of one thing: the square should measure 1″ on all sides when printed? Mine is measuring 1 1/4″ exactly. Wondering if because I’m printing from good reader on the iPad? Can I correct this without reprinting (make a bigger seam allowance)?
Hi Mel! Yes, the square should be measuring at 1 inch. If everything lines up correctly I think it would be okay to assume that you can just add a 1/4 inch to your seam allowance…have fun!!
XOXO,
Maggie
Hi! Want to make this for a friend’s little girl who is turning one this month – unfortunately scribd won’t let me log on through facebook – have tried all sorts of things to get it to work. Any chance you could email the pattern to me?
Sure @AtHomeWithMontessori!! I’ll email you a PDF attachment now!
XOXO,
Maggie
Awesome inspiration and tutorial! I whipped this up while my babe napped today. I skipped the button, slipped the back straps inside the end of the front straps, folded the ends under and stitched them closed. Still slips on easily. Very cute! Thanks!
Thanks so much for this pattern! I made this for my 6 mo. old neice and it is my favorite sewing project to date. AND it was my first time putting in button holes and covering buttons and I didn’t screw it up! YAY me!
Extreme newbie at sewing here, but I have a quick question. The photo showing the opening left to turn the pinafore right side out shows the edges of the fabric are raw/fraying. The picture of top stitching shows a clean edge, and the following pictures show a very clean edge. Did I miss a step, or is top stitching what makes the edges look clean?
Thanks!!
When you turn the dress inside out and press it, you fold the seam allowances there at the opening towards the “inside” of the dress. That gives the smooth, folded looking edge that you then top stitch over.
Hope that helps!
This pattern is just what I have been looking for. My mother used to make the same kind of dresses for my daughters, they are now 29,25, and 21. But my first granddaughter was born last week, and I wanted to make her some of these, as they are not only cool, but also really cute and versatile. Thanks again.
Great project! I just wanted to let you know that we featured this project on our Facebook page with almost 12,000 fans. We’d love it if you’d use our Featured Blogger button, available at: http://www.dailycraft.com/thank-you-for-crafting/. Our audience loved the project and we look forward to sharing more from you. Please let us know if you have any questions or projects you’d love us to feature! Thanks!
Such a great tutorial and design, Thank you! I want to make one for my 15 month old and a matching one for a 3 year old. How would you suggest making a larger size?
Hi Kari! You need to stretch the pattern at the shoulder and then at the width and length toward the bottom…I have been meaning to do this but just have so much to do elsewhere!! I’ll try to get on this sooner than later!!! thanks for the interest!!
Did you end up doing thid ‘stretching’ at all? I love ur dress and pattern but would also love to make it for my 2/1/2 and 6 yr old. Gorgeous!!
I am interested in the same thing!! 🙂
Me three! (or is it four?;)
Maggie….What exactly do you mean by “stretch”. I printed it and would like to make it for a 2T so do you mean something like add 1/2″ to the width and length then cut the paper? Please explain 🙂
Love this! As soon as my baby girl wakes up, we’re running to the fabric store so I can make this for her. My niece might be getting a matching one for her birthday too. 🙂 Thanks for sharing!
Thank you so much for this!
I am new to sewing and this has been the first project I’ve started and actually finished (and all in an afternoon!)
I made it for my 11 month old as a top in polar fleece (as it’s winter here in South Africa) and she looks adorable in it!
Hello Maggie,
Thank you so mucht for this tutorial and the pattern, I’ve started out yesterday on this little dress.
I’m a starter with sewing, and this is the first project i’ve made.
Yessss i did it.
Thank’s a lot hope you continue to write tutorials that are easy to maken 😉
Excuse me for the bad englisch i’m from the Netherlands so my englisch is not verry good.
Thanks again.
Lots of love Semantha
Are you supposed to do a borderless print or just regular. This may also answer one of the other commenters question. I printed borderless and it doesn’t line up, but regular, it does. Just want the finished size to be right though. Would you mind commenting which way you intended on the print optioN?
loooooooooooooove this! thank you so so so so SO MUCH! it’s perfect for all the birthday gifts i need soon.
I just made this dress using Amy Butler’s Sea Glass Peacock feather material. I LOVE it, and wanted to thank you for putting up this post! Such a simple and elegant pattern. Might have to make a few more, b/c I can’t resist Amy Butler’s fabrics! I also had the issue of the print pages not lining up exactly, but it was easy to work around. Would you mind posting a pattern for the diaper cover? 🙂
OMG, you have got to be kidding on how cute that lil dress is…question please…how did you make the diaper cover? Is that something you are willing to share? Thanks!
Hi Sarah and The One and Only! Currently my scanner is broken right now so if and when it ever gets fixed I will try to upload that pattern for you! thanks for your interest!!
XOXO,
Maggie
Jeej i would love this 2!! Awsome pattern 🙂
thanks for this tutorial. it’s so sweet.
I just came back again to see if anyone else asked for the diaper cover pattern too & I see they did! 🙂
Would love to know if that’s up and running. This is adorable – Thank you!!
sumrluvr4 @ aol.com
Anonymous said…
Hi Maggie, I found your adorable outfit on Pinterest. My daughter is 9 months old and I cannot wait to make this for her! I was having some trouble downloading the pdf pattern through scribd. Is there any way you could e-mail it to me? My address is kristenjeanmiller@yahoo.com
Thanks a bunch!
Kristen
Also wondering if the dress pattern is email-able like Kristen above. 🙂
Thanks a whole bunch.
sumrluvr4 @ aol. com
Adorable. I was able to copy the pattern without downloading (and paying Sribd’s fee) by right-clicking on each pattern image and pasting into a Word document. Then I resized each image to 69% so that what I assume is a 1″ test square on page B1 actually measured 1″. Here’s hoping everything is sized properly!
Thanks for posting the pattern – very cute and I look forward to making it. Is there a way to get the patter without paying a fee to download it? Thanks!
This is totally awesome! I made two of these yesterday and they look so cute on my little one. I actually downsized this pattern because my little girl is only 3 mos. Too cute! Thanks for sharing. Love the fabric, by the way!
would you mind sharing how exactly you downsized and what measurements you used? I’d love to make this for my niece in closer to a 3-6 month size. thanks!
Any tips on making this for a 3-6 month size? what measurements would you use? Thanks!
Fantastic! I have been looking for a free, printable pinafore pattern for a long time. Your tutorial made it super clear on how to construct it 🙂 I am going to try and upsize it also for my six and eight year olds. Thank you!
I just made this and it looks so good! Did not take me long at all and you are so right about pressing it, makes all the difference. I can tell my little girl is going to be wear an array of these over summer. Thank you so so much!
I found the link on Pinterest.
This is an awesome Tutorial. Way to go! Love all the pics and instructions are easy to follow. Love you fabric color/print choices too!
I can’t wait to get started!
I’m having the same issue with the dots not lining up. Can you help? Thanks!
Love this dress and I am so excited to try our your pattern! Just curious though, when I printed it in Google Docs the pattern does not fill the whole space of an 8×11 paper. Should it? It looks kind of tiny but I haven’t pieced it all together either. Thanks for any advice so that I can end up with a correct size and not a “mini” dress.
Thanks a lot for this tutorial. I tried it and the dress came out wonderfull. Thank you!!!
Hi Christine!
The pattern will not fill all the space on each 8×11 paper, it will look small as it fits size 6-12 months! If you need help just email me!!
I am wanting a copy of the pattern to fit a toddler 4-5-6. Can anyone help me out here?
Thank you and have a nice and safe Memorial Day Weekend.
Carol
clargent60@gmail.com
Hi Maggie!
I’ve just started sewing and I’ve been glued to your blog. I just love your creations! Could you email me the pattern for the diaper cover? Also, my daughter is a small 14 months. I think this will fit her but any suggestions on sizing up the pattern?
maggie…oh maggie…
what a legend you are!! this pinafore is SOOOOO adorable! i don’t have any lil ones and am gonna attempt to make this for myself. hahahaha! yep, so cute that i have to have one!
ok so i was being selfish. i do have new nieces whom i have not seen for a while so i’ll be making one each for them.
thank you so much for sharing this.
THANK YOU!
I am so OVERJOYED to find this tutorial I was wondering if you would possibly know hot much I should reduce the pattern to make it fit a 15 inch doll? Also was the diaper cover pattern ever shared? I can’t wait to make my little one a wardrobe for her dolly 🙂 xx
Hi Gab!
You know, I am not sure how much reducing you would need to do to make this doll-sized!! If you figure it out let me know. I also haven’t added the pattern for the diaper cover to my blog yet…sorry, life has been crazy!
Hope you enjoy the pattern!!
Ay suggestions on how to shrink for 3-6 mo?
I too an having trouble getting the dots to line up. Any hints?
I’m not sure why some have trouble lining up the dots and others don’t??? If you email me, I can send you the PDF and you can try it that way, thanks!
Any chance that you could do a tutorial for those precious diaper covers? I have been looking all over and cannot find one as cute as yours!
Please email me and I’ll send you the original PDF!
Thank you very much for great tutorial! I made one last night, so nice, I want one for myself.
I LOVE this dress! I think I’ll be making one VERY soon for my little bebe-to be! Thank you!!
I can’t wait to make this! It’s wonderful! I am having a difficult time printing it from google docs. Is there any way you could email it to me? jenny@simplelifelove.com? Thank you so much!
I am SEW making this! Thanks for the pattern!
I have been trying to print your pattern, but the Scribd page keeps wanting me to pay to access it, and the Google link, while free, is not printing the pages for the three back pieces correctly. No matter what I try, it cuts off parts of each page so I only have half a pattern. I REALLLLLY want to make this adorable dress… any suggestions???
WOW!!! What a fantastic cute little dress and what a cutie little girl! Thankyou for sharing it… just a shame I have a little boy…. I don’t think he would appriciate this as much as I do!!
Thank you so much for this tutorial! I used it to make my daughter’s first birthday party dress, and I think it is my favorite thing I’ve ever made. See photos here: http://www.cottonbottommama.com/2012/01/very-hungry-caterpillar-birthday-party.html
Thank you! Thank you!!
Elle
I adore this! I’ve cut my fabric and am going to sew this afternoon 🙂 Can you send me the tutorial for the diaper cover?! Thanks!!
Nicki
nickimeldrum1119@gmail.com
Hello, I love this little dress and have beautiful fabrics ready to use; however, I am having a problem. Two pieces, B2 and B3 are not there. The pages where they should be in the PDF are blank. Please Help!!!
Hi Deb…and anyone else having printing problems! Please email me and I can forward my PDF to you! Thanks! If you don’t have your email attached to your profile I can’t get in touch with you any other way!!!!
Maggie, Thanks for responding. I finally was able to get the pattern printed! Thank you so much! I made the pinafore today for my 6 month old grand daughter. It is darling!! I’m also making the coordinating diaper cover – so cute! Love the tutorial.
Can you forward the PDF to me also. Didn’t print out right…missing pages and not to scale. I would love the diaper cover tutorial also. Thanks! This is the cutest thing I have ever seen. I just got my first girl after three boys and am having a blast finding all these CUTE items to make for little girls.
Oh my gosh!! My step daughter just had a daughter. I was looking for an easy, reversible pattern because I am new to sewing clothes. This is perfect. I just purchased some Minnie Mouse, red and white polka dots, and a bright yellow solid. This will be perfect for that. Thank you sew much!!
Hi Maggie,
I have tried and tried to print out this pattern, but it isn’t working. Would you mind emailing me the PDF as well, I would be so grateful! Have fallen in love with your blog! 🙂
Thankyou so much for this. I have just finished one, and all I want to do is get my little girl out of bed for her to try it on! Instead of doing button holes I have just sewn the buttons through both pieces, I figure there is enough slack in there to get it over her head! I’ve made it in quite lightweight fabric, will need some leggings ad a vest underneath, I’m thinking I may make another in cord or something similar for the winter months.
My first bit of dress making complete – now what else can I make?!
Thankyou for sharing.
Kate
Hi Daeon! Please email me with your email address in the text of the email, your address is not linked to your blogger profile and I cannot ‘REPLY’ in the threaded comments!! Thanks!
I would so love to see this pattern in sizes 7/8…..rlba272@hotmail.com
I agree!!!
Love this! I’m going to make it for my daughter today! Do you have directions for making the bloomers to go with it? Thanks!
I’m having printing issues as well. Can you please email me? Thank you! lormabean@gmail.com
My late grandmother was very good in making these kinds of lovely little dresses. Someday I will attempt this for a precious little girl.
Thank you so much for posting this tutorial! Do you have a tutorial for the diaper cover? I would love to make it also.
Love it! Going to use it for an upcoming wedding
Thank you so much for the fab tutorial! I’m a beginnner at sewing and had no problem following your clear instructions. It’s so damn cute! 🙂
I was so thrilled to see this little dress. I made these for my daughter 32 years ago with her Phi Phi who taught me how to sew. My daughter is now expecting my first grand child and I will make these if we have a girl! These brought back so many wonderful memories of Phi Phi, miss her. Thank you!
HELP please – I can’t access either of the patterns (won’t open for me) so could you please email them to me? jani_elle@live.com.au
Thanks in advance!
Jani
Lovely! Thanks for sharing such a sweet and easy pattern! I was hoping to get an email of the PDF as well.
julieward00(at)gmail(dot)com
Sorry to crowd your inbox!
I just remembered something…have you tried Dropbox? It’s a free file-sharing site and you can link to your blog.
I’m having difficulty printing as well. Email is michellelubbers (at) gmail (dot) com.
Thanks in advance as well.
I got it to work, thanks! Found you on Pinterest today, and I like what I see. I think I’ll look around a bit too.
I’m Italian so I apologize in advance for my English. Thanks for your very clear tutorial. I am a beginner but in a few hours I managed to sew the pinafore and I’m very happy with the result. All the best, Katy
Thanks for this super easy pattern! I used it to make my 6 month old daughter a Valentine’s Day dress. She has room to grow in it, so I’m sure I’ll be making more out of this pattern for the spring and early summer. Thanks!! (I blogged about it here: http://osuraccoon.blogspot.com/2012/02/sewing.html)
Will you be posting this on Pinterest? I’d like to keep track of it even tho I don’t have any little girls to sew for at this time.
Sure!! Will pin it now for you!
Beautiful! Thanks for sharing :))
OMG Thank you so much!! This was so easy and I can’t believe how cute it came out!! I’m making my daughter a ton for Summer!!
I love the pattern! I am going home today to try it! Will you please share your bloomer pattern?
klhenry@sbcglobal.net
Thank You
Found this pattern and cant wait to try it. Is there a way to make it smaller? i have a 2 month old now but by the time summer is over she wont be able to wear it. Also, back when i was a kid, I had the same top crossover style but it was all one piece. Is there a way to not do a button or snap and join the pieces altogether? Just curious. But i would like to figure a smaller size aswell as a toddler size for my niece. Thanks and love the pattern
Oops. Forgot email
Gigi B.
Benoitkids@gmail.com
Any advice from anyone how to make this in bigger sizes? Would love to make in a size 3 and a size 5. Thanks
I can’t believe how cute this is! I am pretty much a beginner sewer, but I have this pinned as something to make!
Could u email me the diaper cover pattern? I’m looking for 18 months, also in the pinofore…
klcpu@yahoo.com
I am looking for the diaper cover pattern, 18 months..? Could u email it to me?? Also, of you have the pattern for the pinofore in 18-24 months, that would be great!!! klcpu@yahoo.com
Could you send be the diaper cover pattern in 18-24 months? Also, if you have he pinofore in 18-24 that would be great!! My email is klcpu@yahoo.com
Thank you, thank you, thank you for a precious pattern. I am pinning it and saving it to make for my someday granddaughter.
Thank you, thank you, thank you for a precious pattern. I am pinning it and saving it to make for my some day granddaughter.
thanks for the free pattern
the pattern b1 and the top of b2 are not matching up should i side b1 down to match up the lines
kimbrad79@yahoo.com
You are awesome! I love this dress and diaper cover! I can’t size it correctly so if you could email me a PDF I’d be very greatful. Katysands@yahoo.com
Thank you!
I saw someone above mention that it automatically prints at 111%. Rescale it to 100% and the box will be exactly 1 inch and all the dots will line up correctly. I’ve wasted a bunch of paper printing out about 7 different attempts, but I’ve finally got it and I’m excited to start sewing! Hooray!!
themonaghanfamilyblog.blogspot.com
i love this thank you very much for this amazing dress your the best <3
Im having the same issue with the PDF iv printed of a few thinking gosh it cant be that hard but im still not getting how to i get it right? Sorry you must be over everyone asking for the PDF!! sarah.l.bell@gmail.com
I love this dress! I made it today and the pattern was very easy to follow! Thank you for sharing!
Here is a picture:
http://thepensiveowl.blogspot.com/2012/03/snow-day-sew-day.html
P.S. e-mail is kemingli@gmail.com
Is there any reason to make two pattern pieces? I looked at your picture, the one where you lay the inside and outside, right sides facing each other and drew up a pattern that split down the center of the chest. My thinking is to place that on the fold and cut it out that way so there would be no seams. I hope I am making sense here. Do you think this will work fine? I am making it in about a 4T size so I was unable to use your pattern as is.
You sure could do that…have fun!
Love this pinafore…I made lots of them when my 2 girls were little. I even put an applique on one side before sewing them together and made it reversible by sewing buttons on both sides….Then, when you’re out somewhere and spill something on it, voila..you can turn it over and have a clean pinafore!
Hello, I just fluid your blog and love it! So glad I have a new one in my list!
I printed the pattern for this pinafore and I can’t find a way to match the dots together. I’ve seen that one of your readers had the same problem… how could I fix this? thanks!
Hi there…
me again! maybe if you could tell me the length from the armpit to the bottom line I’ll be able to match it. Thanks!
This is the cutest pattern, I used to make clothes for my daughter when she was little. I have grandsons so this won’t work for them, but my sister has a granddaughter and I would love to make one for her. Can you email me the pattern for the diaper cover also. conirray@yahoo.com
Thanks so much for this pattern!
Hi Connie! I don’t have the diaper cover PDF available yet…hopefully soon!!!
Thank you so much!
I love this pattern. My mother made some of these dresses for my daughters when they were little. I wish I had kept them. Now that my girls are grown and thinking about families of their own I want to be prepared. Especially since we live in Texas and this is usual wear for about 8 months out of the year.
Hello! A crafty Stay-at-Home-Dad here… my pattern pieces also do not match up at the dots…. Can anyone send me an altered link? Or shall I just fudge it a bit and re-draw?
Thanks!
E_DaddySciotto
Make sure your printer settings are set to print 100% to the page. If it still doesn’t work you can just match the smaller page to the large until the dots match and if you are really unsure just email me and I can send you the pdf.
Thank you for getting back to me! I wondered if my printer settings might be off – I’ll check that today!! Much appreciated! Can’t wait to make this ADORABLE little frock for my daughter!!!!
E_DaddySciotto
You were 100% correct! I re-printed and everything matches up!!! YAY-HOOOOOO!
Awesome! I am so happy it worked!
I found your pattern weeks ago & fell in love!! I went right out and bought fabric, but I just now got around to printing off the pattern haha. I am so excited to start sewing this fab little dress. But I was wondering how easy it is to make a diaper cover (I’ve never made one before) Any tips or patterns?
Thanks so much for your creativity!
-Lynn
Hi Lynn! Diaper covers are pretty easy! I don’t have my pattern up yet…hopefully soon!
Thank you Maggie for the pattern and tutorial. 🙂 I’ve been looking for a pinafore pattern to make one for my 9-month-old daughter. Your’s is by far the best I’ve come across. Hope to make one sooner rather than later. 😀
Dear Maggie,
Thank you so much for your tutorial. I am looking forward to making it. I know you have been inundated with requests but, whenever you’ve got a moment, could you be kind enough to send me the pattern via email: biancagpg@gmail.com I’m still having a few problems printing it out.
Thank you,
Bianca
Love love this pattern I went out and bought a ton of fabric. Can you please send me the pdf for the diaper cover??? I so appreciate your ingenuity and willingness to share. mjborg@hotmail.com
I don’t have the pattern converted to a PDF yet, sorry! When I do I will post it as a blog post!
Não consigo baixar o PDF queria tanto fazer. Meu email se pude enviar debybarboza@gmail.com
Obrigada beijos!
I can not download the PDF so wanted to do. My email if I could send debybarboza@gmail.com
Thank you kisses!
The link finished working. Thank you!
I sewed this Crisscross Reversible Pinafore for by grandbaby. (March 2012) Thank you so much. When my daughter was 18 months old, her grandmother made her a similar Crisscross Pinafore so I thought it especially wonderful to do the same for my granddaughter. Thank you so very much for this and other patterns you have made available! Teresa San Antonio TX
thanks for the tutorial. I had made a top/dress similar to this 17 yrs ago…but it did not call for buttons it was all once piece..ok now I am on a mission TODAY thanks again.
I love it.
I AM SO EXCITED TO MAKE THIS DARLING PINAFORE FOR MY 8 MONTH OLD GRANDDAUGHTER…I MADE THIS EXACT SAME PINAFORE [NO BUTTONS] FOR HER MOMMA WHEN SHE WAS A TODDLER! tHANK YOU!!!!
This is adorable. Though chances of me being able to make it are slim, I’d love to try. I found you through Pinterest, and I am now subscribed to receive emails. 🙂
Hurray for tutorials! And thanks! I am just sewing on the buttons right now for my daughter’s new pinafore and it looks so good. I had to resize to 3T but it worked out just fine by laying one of her shirts on top and taking some guesses. Your photo of how the pieces should look once cut out and placed on top of each other really, really helped. Thanks soooo much.
Reply to drdianek@att.net thanks!
Looks like a really simple creation. Thanks for the easy to follow directions. And your choice of fabrics are delightful. This is one of those one yard.-one hour wonders. What is your source for your personaluzed labels?
Have you posted a bigger version yet? I’m looking for a 2T-3T version! 🙂 It looks ADORABLE in your tutorial pictures!
No yet!!
LOVE this adorable dress. Thank you so much for sharing your pattern and instructions. Could I get the pattern for the bloomers? My email is kstanglin@yahoo.com.
Hi
Thanks sooo much for sharing this Pinnie pattern!! Love, love love it! My new line of Pinnies will incorporate this design!
Your blogspot page is truely wonderful and inspirational!
What amazing lady you are to find time to create such fantastic things while also have little ones to raise!
Kind Regards
Pauline
paulinemarino@hotmail.com
Hi! I’m just wondering how you would make a smaller pattern like for NB -and or 0-6 months?? Thanks! You can email me at jamole84@gmail.com
Same here! Can you do a 3-6 mth pattern? Please email me @ bklaybourne@gmail.com Thanks!
I just made this for my daughter and it turned out great – even the buttonholes which I’ve never made before! Thank you, thank you!!
Hooray Meriel!!! I am so happy for you!!
Dear Maggie, I made this for my 8 year old daughter as a first “really cloths” project (I am a starter) and it turned out wonderfull! Thanks for the easy to follow tutorial. I loved making it and I love dressing my daughter with my creation!
That is so awesome to hear Eva, YAYYY!
Hi,
Thanks so much for sharing this!!! I’m just learning to sew, and even I think I can achieve this! I was wondering if you had any advice on how to adjust patterns for different sizes- I’d love to make this in a size 2-3. Thank-you!
jess
Thanks for sharing this patern and tutorial. I did my first Pinafore and i linked your post here: http://pontinhosdeartesaporsilvia.blogspot.pt/2012/04/pinafore.html
Sílvia from portugal 🙂
Do you have any ideas on how to make
It smaller? My 6 month old is a peanut! Made it today and it swims on her
Thanks for the tutorial! You can find my version here:
http://molenweg83.nl/?e=648
I would like the pattern for the diaper cover please my email is: krystalmorey@gmail.com.
Thank you so much, I can’t wait to make some for my daughter 🙂
Hi Krystal! I made an edit to this post back in April regarding the PDF of the diaper cover, read that for more info on it!
I LOVE this pattern! Thanks so much! I also had problems with some dots matching up – so I just tweaked my patterns a bit to make it work. It’s probably bigger than what you intended (the square was larger than 1″), but that’s okay because it’s for a 1 yr old girl and I figure she can grow into it if it’s too big.
I love it!
Just a comment about the BOX PDF – It prints out the pattern as a 2T-3T size pattern. To print the patter at the correct size, you have to download it as a PDF and print it. There is a HUGE size difference between printing it from the link and downloading it and printing it.
I just wanted to let you know that I am obsessed with this adorable little dress… so obsessed that I had to post a link to you tutorial in my blog (and I have no little one to put this on… I’ll find someone to gift with this little dress though).. Can’t wait to start on the diaper cover now.
Og my goodness! I am totally in love with this little top. I am not a sewer but i am going to give it a go and am very excited. 2 quick questions – would this fit a 17 month old as a little top & secondly (& very stupidly!) am i printing this on A4 or A3 paper??
Yes it would, my pinafores still fit my 22 month old as a top! And I’m not sure of those paper sizes but I just use 8 1/2 by 11!
hi maggie
i just made you pinafore. i did have trouble with the dots lining up so i just winged it..lol. anyways i think i goofed somewhere because the shoulder straps seem wide. my babe is 9mos.
I am so glad that I found this post! I have made 4 of these pinafores over the past 2 months and I have 4 more waiting to be finished. I made a set of 2 for my best friends daughters who are 33 months and 2 months old. The pinafore still fit the 33 month old, and I made no adjustments to the pattern. Thank you for putting the pattern and tutorial together!
How do I make it smaller?? For a 3month old?
Everytime I print my Sides are too large, and the 1 box is at 1.25″ what am I doing wrong?
I’m planning to make this for my 1-year old this week, adding some length and doing snaps instead of buttons for a simple solution to the reversibility question. (I have a snap press and size 16 snaps will be just perfect, I expect! Thanks! I have my fingers crossed for printing….) I’m hoping to figure it out for my 3 year old too. 🙂 Thank you!
Ps: does this use a full yard of each fabric?
I pinned the pinafore tutorial on my baby dress patternboard so more people would find your instructions.
If you would rather I didn’t, just contact me via the addy posted on the footer of my website and I’ll take it right down.
Jan
Unique Baby Nursery Ideas
LOVE the sweet little pinafore! Where can I find the pattern for the bloomers?
I’m going to make this right now! I hope it looks great when I’m done. My daughter may have to wear it as a top though. Although the pattern is for 6 -12 months and she’s 9 months, dresses tend to be short on her. I looked at your blog entry where it’s worn as a top. With the fabric I’m going to use, it should look good as a top with black pants. 🙂 Thanks for posting!
I sewed this up and it is so cute. This inspired me to do my first button holes on the machine. Worked great. Thank you for sharing and giving so much time. I’m wondering if you would consider marketing bigger sized crossover pinafore patterns too? Do you want to see the photos of the dress I sewed? I’m giving the dress to our tenants little girl. I also make a bean bag bunny and heart pin in the same fabric to accompany the gift. I’m really proud of how professional this dress looks. I am a recycle sewer, I used a thrift store pillow case for the inside layer and it was just enough. Thank you again. lagrasshopper@juno.com
Thanks again.
You stressed checking your printer settings…could someone please tell me what I am suppose to check on them? In other words, what is the correct printer setting?
I’m having trouble getting the dots to line up correctly. Please email me the PDF. jennielkern@gmail.com I’m so excited to make this! Thanks!
I found you on pinterest and LOVE this dress but haven’t been able to get the download link to work for me. Could you email me a pdf at jonirice2@gmail.com?
I found you on pinterest and LOVE this dress but the download link isn’t working for me (I can get to the page, but nothing happens when I try to download the pattern). Could you send it to me at jonirice2@gmail.com?
Thank you so much for the tutorial, I did it for my niece (14months) and it is really wonderful, everybody wants to know the name of shop where have I bought it 🙂
And I have just finished one yesterday for my friend’s little princess and I guess it is not the last one – everybody loves it!
I want to make this for a 3 month old, any idea how much to shrink down or how many inches of pattern to reduce? Thanks.
Thank you for this pattern and tutorial. I’d been wanting to make one for years. I just made one for my 20 month old using 100% when printing the pattern and it’s swallowing her. It’s so too big. I used 1/2″ seam allowance too. Any idea what I could be doing wrong?
Hi, I was wondering how I would change pattern to 0-6 months? Can you send email to samanthalouiserees@rocketmail.com please ? (^)>
Hi i love this my daugher is very tall how would i adjust these sizes to fit a 18-24 month size?
I would really like to make this in 24M or 2T can you help me figure out how much would needed to be added to this pattern once printed AS IS? I assume i wouldn’t add anything in the zone thats “place on fold” but its the other parts i’m worried about and then theres the whole matching them up after its “hand drawn” and wondering if i’m doing it exactly the same on all parts. IDK??
t.biggers@gmail.com
I made this today for my niece who is going to be born in August. It turned out perfect! I did snaps so that my SIL can reverse it, if she wants and there won’t be buttons to potentially bother the baby’s skin. Thanks for such a fabulous pattern and instructions!
Oh, and I had no problem opening and printing the pattern from your new hosting site. I even did it from my iPhone.
I wish I had read this before making the buttonholes! Snaps sound so much easier! I wonder if I could just sew up the buttonholes and add snaps. This sounds fantastic.
I would LOVE to use this pattern but am a little confused when it comes to scaling the pages up. I don’t know what % to use to scale the pdf up to a size 18-24 mos? Trying to make my daughter a 4th of july pinafore for tomorrow and can’t figure it out. :/
Okay I know that many have asked but I did not see a response. How do I reduce the size down to 0-3 months? Thank you so much
Jennie77g@msn.com
Hi, just love love LOVE the little labels you sewed onto the apron and the diaper cover. Where did you get them made?
Kristin
I absolutely LOVE those labels you sewed onto the dress and the diaper cover. Where did you get them made?
I made this last night for my 8 month old daughter. It was so easy to make and your directions were awesome for a beginner like me. The pinafore is sooooo adorable! I’m making a diaper cover to match and probably putting ruffles on the bum of it. I can’t wait for my daughter to wear it!
I’ve used this pattern for the second time now and LOVE it! Thanks so much for sharing 🙂 I know how much hard work and effort goes into tutorials!
You can check out my post with a link to this page here – http://casscansew.blogspot.com.au/2012/07/holly-hobbie-cross-over-pinafore.html
can’t wait to post a pic of my granddaughter in her pinafore! Over 20 years ago I made my daughter one just like this but used velcro. She called it her “rip dress”. So… I made my granddaughter with velcro and made it reversible! I will post a pic when I can get one!
I just made this for my little niece who turned 1 today. It was easy – once I had the pattern! Thank you for sharing the pattern on your blog. Very kind of you. 🙂 Love the fabric you have used in the pictures. And I look forward to the pattern for the bottoms to be posted.
Cheers
Just posted about this on my blog and wanted to let you know http://www.moderndaymemorykeeper.com/2012/07/what-we-wore-handmade-style.html
I found this on Pinterest and it is one of the better tutorials I’ve found online. Thank you so much for sharing with us! So happy I found your blog, it’s absolutely charming and inspiring and I’ve just added it to my daily blog roll. Thanks!
I finally made this!! After getting the pattern just right, it looks a little haggard, but it’s my 3rd sewing project. It turned out a little wide and a little big, but hey, my daughter can grow into it! I think I did the button holes like 4 different times before I got it placed where I wanted it.. but oh well! I have more fabric to make another one, maybe for a baby gift!? Thanks Maggie for the great pattern and tutorial! 🙂
Hi There, Have just found your blog and love it. I have been looking for a tutorial for a dress but they always look so complicated. You have made it seem achieveable even for a newbie like me:) But am having problems printing pattern please could you email it to me as can’t wait to get started. emmalkaye@btinternet.com
Thanks in advance , keep up the great work. Will let you know how I get on
Em
I made one of these for a gift for a friend of mine and as soon as he sends me a picture of his little girl in it, I will forward it to you. I loved making this so much I am making one for my grand-daughter on the way. So simple and easy to personalize. Thank you.
Oh yeah, and I wanted to say that because the first little girl recipient’s father is 6’11”, it’s really good this can be worn on bigger toddlers as well.
Thanks for the tutorial! Such a nice easy little dress to make. I didn’t have any trouble with the pattern matching – for me it printed just fine with my print settings at “actual size” and borderless turned off.
I made mine reversible – you can see pictures here: http://cassiadawn.blogspot.ca/2012/08/crossover-pinafore-and-ruffle-bum.html
thanks! I used the pattern exactly as written and it made adorable shirts for my 2.5 year old twins!
thanks! I used this pattern exactly as printed and it made perfect tops for my 2.5 year olds
I love this pattern, i found it on pinterest. Im looking to make it for a very small 3 month old and would like to know how to make it smaller. I was also wondering if you could send me the pattern for the bottoms too. thank you
adesourdy@gmail.com
I love this pattern, I found it on pinterest. Im looking to make it for a very small 3 month old, i was just wondering how to make it smaller. Also if you could please send me the pattern for the bottoms too. thank you
adesourdy@gmail,com
I don;t know if anyone mentioned this, but if you having trouble lining your pattern pieces up you may need to change your printer settings. When you choose print and you get the printer settings check to see if your printer is set to “fit to page”. If it is, you need to click the circle next to “scale” and make sure the scale is at 100% (if it’s not you can just delete it and type it in).
Hope this helps.
What do I do to size this up for a top for a 5 year old? Love your site, excited to browse around more! Thanks! dna508ATgmailDOTcom
I love this style pinafore and this tutorial was an awesome find! The scaling on my printer must be off because my pinafore ended up being really big, but it’s so adorable I’ll just wait until she grows into it to enjoy it! Thanks for the fabulous instructions!
Hi, I made this dresss for my grandaughter .I had to make it smaller because she is 2 months old, everyone loved it ,also she looks beautiful in it.Can’t beleive how easy it was to make. Thank you for the pattern I will be making more as she grows.
I love this pattern and I have made a couple in the original size, but I want to put my daughter in them now! 🙂 Is there any suggestions on how to reduce the size for 0-3 months and 3-6 months?
I absolutely love this pattern and have made 2 dresses for her in this size, but I want to dress her in them now 🙂 Do you have any suggestions on reducing the size to 0-3 mo and 3-6 mo. Thank you!
Is there any way to sew the top and back together without the buttons and just attach them? I’m new to sewing. Any advice would help. Thanks!
Sewing newbie here (and hopefully this hasn’t already been asked) but why not make it all one piece? Why three pieces? Does it make it easier to sew or….??? It’s a gorgeous pattern and I’m getting psyched to start sewing but my seams are always a mess and I guess I’m nervous the two sides won’t match up because I’ll sew one a little more. Does this make sense?
Have just lost a long saga about what I planned to do with your pattern…
But basically, what I need to know is how the fabric grain runs for the back pieces – can’t see an indication, unless the side seam is along the straight grain. But i woud expect it to have a bit of flare like the front?
Hi I just made this and it worked wonderfully, especially as it was my first sewing attempt. It is however too big for my 8mth old daughter. How do I make it smaller?? Thanks for your help x Laura (laurachin79@yahoo.com)
hi could you send me the PDF format? thanks
joann_tan10@hotmail.com
thanks for sharing this cute pattern and this great tutorial; i definitely will sew one for my granddaughter who will be born in may!
best wishes
elenor
I love this pattern! Thank you so much for sharing! Could you use metal snaps instead of button holes?
Thanks for the pattern and tutorial! I made one for my little girl, you can see it here: http://sparrowlanequilts.blogspot.com/2013/02/small-project-review.html
Hi, Maggie,
I had one of these pinafores for my youngest daughter 28 years ago and loved it. Now I can make it for her daughter. Thank you so much for the pattern. I had no problem printing and will make it using one piece instead of two.
I feel so sorry for you. You’ve done something great and you get so many repeat questions. I wish people would take a little time to read previous comments – most of their questions would be answered. Dinah L’s comment from March 31, 2012 using a shirt to compare and then “guessing” to adjust the pattern shows ingenuity on her part. Bravo!
Simplicity has a diaper cover pattern #1826. It comes in Small, Medium, and Large and Walmart carries it for only 2-3 dollars in their stores with sewing depts.
So again, thank you, thank you, thank you.
Oh I am so excited to find your blog!! I’ve been wanting to try this and your tutorial is excellent!! Saving the pattern to print after all go to bed – going fabric shopping tomorrow!! I have 5 grandchildren and another due in June 2013. That will be another precious girl – and she will certainly be a dollbaby in some of these dresses!! Bless your heart for posting this!!
Getting ready to cut and sew this pinafore for a birthday gift Saturday. Any suggestions on how to stretch length and width?
I just found this and can’t wait to make them for my very first grand daughter!!! I would love to make the diaper cover as well, any advice on how to do it, or information where I can find a pattern for them?
Thank you
Terri
Thank you so much for this pattern and tut! I made a dress and 2 little diaper covers (from your link) last night for my 3 month old niece. It turned out so well! Thanks for making me look talented! 😉
I would love to make this for my daughter to wear as a longer shirt, size 6. How would I go about sizing the pattern up? Suggestions?
Thanks for such a great tutorial and pattern – here are mine!! http://stickypikelet.wordpress.com/2013/04/09/polka-dots-and-pretty-pinafores/
I’m making coordinated dresses for my girls to wear on Mother’s Day, and a shortened version of this is going to be perfect for my not-quite-3-month old. I’m done except for the button holes, but I might wimp out and use snaps. Awesome tutorial, BTW.
Hi there,
I realize this is an older post, I hope you are still reading the replies. 🙂
I’m looking for a suggestion on the approximate size reduction for a 3 month old? If you could reply here or email me at joannbonnick@gmail.com that would be awesome!
Thanks for sharing! This pattern worked great for my 17 month old granddaughter! I used large snaps and sewed buttons on top. Also added some matching pantaloons to go with it! She is absolutely precious in it.
Judy (jstanley004@att.net)
Thank you for this pattern! I actually taped the two pieces together (where the straps cross and are buttoned), and made a fully reversible version-no buttons! The sewing required a little creative thought, but I think it came out great. 🙂
would you please email me on how you made this reversable without the buttons? Thank you so much!
Hi Maggie, I love this pattern. Absolutely gorg.Is it possible for you to send the diaper pdf pattern to my email? I can’t seem to email you through your blog. my email is shaiya08@live.ca
Much appreciated!
hi there! I made this outfit using your pattern when my daughter was born, thinking surely it will fit her in the summer….. she is 14 months now and wearing 18month clothes and this top is still huge on her, I DON’T KNOW WHAT I DID WRONG??!! I tried moving the buttons down and that helped a little but it just seems way too big and doesn’t hang right. HELP??!!
my email that I check regularly is wallace707@aol.com…. any help would greatly be appreciated, I really want to make her another one 🙂
Hello!!!
I just wanna thank you for this so cute dress and great tutorial!! I follow it and made this Little Girl’s Crossover Pinafore with African fabrics…. and i am very proud of me! 😀 eheheh!! I also made the diaper cover by Dana Made It and a little head scarf for my lovely baby. I would like to share it with you here: http://andreia-a-naif.blogs.sapo.pt/39131.html (its in Portuguese… but the pictures translate the essential)
thank you so much!! i’m very happy with this project
Thank you for the pattern I just finished a version of it for my nephew’s first child and made matching bloomers. I also made a version using just the front pattern cut out twice, lined but not sewn at the bottom, the lining extends beneath the top dress and is finished with lace so it looks like a petticoat, snap clasps on the shoulders topped with hand-made bows. No photos yet as its entered in the charity auction fundraiser. Great pattern.
Hi Maggie, I just finished my little pinafore dress and the diaper cover. I didn’t know what to give to a friend of mine because her mom made her such a beautiful layette, you know… first baby… And when I saw your post I thought it was just right. Thank you so much for posting in a simple yet rich way.
Best wishes,
Thais (from Brazil)
Am I the only dingbat that, because the pattern didn’t say FOLD on the jumper back piece, ended up with two back pieces facing the same direction?? 🙁
This is darling. When I was a toddler my mom made me an apron from a pattern like this and I remember trying to squeeze into it far longer than I ought to because I loved it so much (white with red rosebuds and edged in eyelet lace). Honestly it never occurred to me this style could be anything else. Very cute. It’s going to be a gift for my neighbor’s new little one in a few months.
I am so late to this party, but wanted to thank you for posting it! I found it on Pinterest and am looking forward to seeing what else you have posted here on the blog. I am making these for my niece, and plan to make the pinnies reversible. Pink and white dots on one side, gray chevron on the other. Rest assured that this baby will be stylin!
Thank you for sharing. I made this yesterday and it turned out fabulous! Your instructions are so easy to understand. Now if only I had a little cutie to wear mine…
I love your blog!!!! Thank you so much for sharing this. I too would love to know how to scale up the size.
🙂
Love this!! Check out my version here http://emmieloves.blogspot.com.au/2013/09/little-girls-apron-dress.html xox
I’ve linked to this site for more people to find you xox
Is there any reason you cant tape the pattern together and only cut out one piece for the front and one piece for the back? Thanks a bunch.
Thank you so much Maggie. This was my very first sewing project ever! I have added a link on my blog to your tutorial. http://rhythmofrhythm.blogspot.in/2013/10/crossover-pinafore-dress.html
Hello- I would also like to make this for a 2-3 year old. Any chance you could scale up the pattern for us? x
Hi, I am having some printer issues when I try to print it out. From the website where the pattern is shared, it prints out vertical on the paper which I am assuming is just wrong. When I print it horizontally not all pages get printed. I am not sure if that is an issue with my printer, but I can’t get B2 to print out. I would appreciate any help. I am expecting my daughter in February, so I still have some time. 🙂 Also if anyone has created this in 3-6 months, I’d love to have you help me scale it down. She’ll be just 6 months in October so this might be a little big in the summer… Thank you!
Thank you so much. I made one of these for my 9mo last night, and had fun showing it off today! Will def be making many more for her – she’s a “chucky” baby. I have a photo for you but don’t know how to post it?
Love this pattern!!! Already made 2 pinafores from it! One was even done in fleece. I also wanted to add that I used ribbon to hold it together instead of buttons (didn’t have buttons to match and didn’t want to run to the store, etc.) and that seemed to work just fine too! Sent you an e-mail with the pics! Thanks again for the pattern!
Thanks for the great pattern and tutorial. I have made about a dozen of these, one for a friend, one was donated to a Le Leche League fund raiser auction, and the rest for my little girl. I have made changes on some, like adding a second button hole or switching out the buttons with ties and making multiple holes to make it adjustable. This was the first pattern I ever used. I am going to try my hand at making my own pattern!
Thank you so much for this pattern. I only started sewing the month. The only things I’ve made so far have been a few burp cloths, a taggie blanket, and a cloth cube. This was my fourth sewing endeavor and it turned out perfectly. 😀
Hi Maggie,
I can’t seem to print this beautiful pattern. Would love to make it for my girls! Can you send me the PDF to my email chengmichelle0@gmail.com please? Many thanks!
Michelle
Hi Michelle!
I just switched the PDF over to be hosted on my website so you should be able to print it out now with no problems!
Thanks for the reminder!!
Love,
Maggie
Super cute and so fun with the polka dot bloomers!
Hi! I am a beginner sewer, I have my pattern all cut out and my fabric ready. But, I was wondering, when I cut the fabric from the pattern do I cut the exact pattern or do I allow 1/2 in for the inseam later? Sorry for the silly question! TIA.
The seam allowance is included in the pattern so you can just cut the fabric from the exact pattern!
Happy Sewing!
Maggie
Hey. Any suggestions on how to size this for 0-3 months?
Thanks for the pattern! I made it for my 1,5-yr-old (elongated the pattern a bit) and it is lovely!
I know a lot of people have asked about making it for a bigger child. So would making it longer just work? What else would I have to make bigger? Thanks!!
T_miller723@yahoo.com
Hi Trudy!
You will need to elongate it and widen it a bit depending on the size!
Thank you so much for posting such a descriptive and easy to follow tutorial.
I made this dress today, in about 2 hours. It was my first baby sewing project!
I was going to share a photo but can’t seem to figure out how to attach it. Ha.
I’m looking forward to trying more projects that you’ve posted!
Oh, and the hand sewn button link you posted was also very helpful.
Thanks again for inspiring us to get creative and to not forget the art of sewing.
Wonderful, Rachel!!! Thank you for the comment! I am so glad that this tutorial was helpful to you!
I hope your little one loves it!!
Love,
Maggie
Hey I love this! Thank you! Did you ever do a pattern for the diaper cover? I would love a copy if possible of that! Thank you!
X
Thanks Katherine! Not yet! Although it will be soon, I just figured out a brilliant way to do PDFs that hopefully everyone can access and print without trouble. I have a test run going through later this week!
Love,
Maggie
Hi!
Thank you so much for this pattern!!! 🙂 I finished one yesterday and it is too big on my 16 lb 9 month old so I reduced the pattern by 80% that looks as if it may fit a 3-6 month old. I am going to try 90% and see if it will fit her better. I LOVE the finished dress… it turned out soooo adorable! And I used buttons from one of my grandmothers and fabric from another so it is even more special 🙂
I want to make this cute little dress for my 6 month old grand daughter she ways approx. 17 lbs. The original pattern seems like it will be to larger for her. when you resize this on the computer is it best to print it out and then resize the copy or can I use the cut pattern. IDK please help 🙂
I would print it out and then resize it based off of your daughter’s other clothing!
Thanks so much! I featured your tutorial and pattern on my blog: refurbishedteacher.wordpress.com . Plus, I made a few changes- an extra contrasting panel on the front to see a monogram easier and a change in the button hole placement. I love your fabric covered buttons- do you offer a tutorial on those? Please share!!
All the best!
Awesome! Thank you Katrina! I don’t have a tutorial for fabric covered buttons but it’s really just a kit you can buy at Joann’s! They are super easy…with instructions right on the back of the packaging!!!
Love,
Maggie
Did I miss something I printed out the pieces but there was nothing for the base of the dress just F1 & F2, B1, 2, and 3.
Thanks
That’s it! The Front piece has 2 pattern pieces and the Back has 3 pieces. Tape the pieces together and you will see how they match up to my pictures in the post!
OMG !!!! I Love it !!! Thank you so much for this fantastic tutorial !
Thank you sooooo much I have been looking for this pattern for such a long time! My little one will enjoy several during the summer.
If I want to make this for a 0 to 3 month would I just size the scale before printing? If so how much do you think?
Can you please email me the diaper cover pattern and do you have a pattern for an infant like this one.
It is not available yet, so sorry!
So happy to find this pattern . A neighbor lady made this top for my daughter 36 years ago and I copied it over and over for my next 2 daughters. But now that I’ve had MY first granddaughter, I couldn’t find the pattern or the tops, but knew this was wonderful for year-round wear. Just finished the first, and will be making lots more! Thank you Thank you!!
Thank you i love this dress and the pattern is super
Elin from sweden
Just made on these and I LOVE it. Thanks so much for a sweet tutorial and pattern!
Thanks for the great – Pattern and Tutorial. My college is expecting a little girl. I made it up last night and she love’s it !
Hi,
Am going to try this as a present and was wondering if the diaper cover pattern is available? Your blog is fab!
Hi, how do I get the pdf for the dress pattern???
There is a link in the materials section!
Hi there! I know this was posted years ago, but I’m wondering if you could tell me where you got this exact fabric? I’m in love with it and would love to make the dress in it! This dress is incredibly cute! Thanks for sharing! 🙂
Email: karib30@hotmail.com
Hi Kari!
It’s an Amy Butler print that is out of circulation. You may be able to find it on Etsy though!
Good luck!!! It’s my absolute favorite print of all time!!!
Hi,
Where can I find the diaper cover pattern?
I really want to make this dress, but i have one question. I’ve seen this dress elsewhere and it’s always described as reversible. (Thats great!) but my issue comes with the buttons. do you put buttons on both the outside and inside of the garment front? wouldn’t that maybe bother the baby’s shoulder? i don’t know…. advice?
Yes, you would need another set of buttons on the reverse side to make this truly reversible. You can leave the second pair of buttons out and still have the pinafore reversible as well, it just depends on how you want the final look to be, it really is your call! You can sew it up and if you decided you want the extra pair of buttons you can always add them on at the end!
xo,
Maggie
Hi there,
I love this pattern! I’d like to make it for my niece who is between 12 and 18 months old and I was wondering the easiest way to scale up the pattern.
Thanks for your help,
Mel
I know what I’m doing today. Thanks so much for the adorable free pattern. Oh! By the way where on the page do I order this gorgeous baby?
Blessings,
Susie
Oh you are too sweet! That little baby is now four!!! How time flies 🙂
xo,
Maggie
Thank you… It´s wonderful … I love it 🙂
Look at my page… http://www.petras-kram.de
petra
I’m wondering if there is a way to do a 0-3 month dress using this pattern? I have a friend who volunteered to sew some things for me and I would love to have a dress like this for my new little bundle of joy.
You would just need to scale down the pattern. There may be a few tutorials online about how to go about doing this if your friend is unfamiliar! She sounds like a very sweet friend, you are lucky…I need more friends like that! 😉
xo,
Maggie
I love this! I just made one for my own little girl and made knots with the shoulder straps instead of buttons so that it’s reversible! Too cute!
Can someone help me with a pinafore pattern like this one in size 4 -5 I want so much to make my one and only granddaughter some dresses to remember me by. I have heart and alot of serious health issues and i can sew simple things but this pinafore has been my one i made these for my daughter but in all the years I lost the pattern I thought it was just a one piece pattern but guess I was wrong. But if someone can help me I thank you and my granddaughter thanks you with my heart condition and other serious health issues I want to make her some for this summer. If you can help me thank you and God Bless you and email me at clargent60@gmail.com
I just finished making this for my daughter. I’m a newbie sewer so very grateful for the comprehensive instructions. I absolutely love how it has turned out. Will get a picture up shortly! Thank you 🙂
YAY!!!!
Thank you for this pattern! I have been looking for easy to follow directions, and these are perfect! I know this post was from a few years back, and I liked through your other posts for the diaper cover. Are you going to post directions for those as well? Thanks again!
Hi! I’m very excited to make this pattern!! I am curious if you’re still giving out the diaper cover pattern. If so, I’d love it! Could you email it to rwmortensen at gmail dot com? Thank you!!
Good morning!
I would love to buy a button holer like the one you have here. Where would I get one?
Thanks so much.
Stephanie
Hi Stephanie!
My buttonholer came with my machine. If yours did not, check with your machine’s manual to see if there is one available for it! Good Luck!
LOVED pattern and tutorial, made making this dress so simple!!! will check back for more ideas!
So glad you enjoyed the pattern!!
Thank you so mucht for this tutorial and the pattern,
greetings from Romania !!!!
Thank you so much for this tutorial and the pattern
Greetings from Romania !!!
I just made one for my niece! unbelievable how easy it is! Thanks so much for sharing!
Oh yay!! I am glad you had fun making one!
THANK YOU so much for this pattern. It’s absolutely adorable and so easy! Your directions and commentary were perfect – and I can’t wait for my little girl to wear the pinafore!
You are so welcome!! I am glad you enjoyed making one!!!
Hey, I just thought everyone should know that if you don’t mind a shoulder seam on the back piece, you can use this pattern on a pair of coordinating fat quarters. Just don’t tape the very top of the back pattern piece onto the rest, and position it where you have extra space on the fabric above the main back piece. Don’t forget to add seam allowances! I was just super excited since I found really cute coordinating fat quarters at Meijer and wanted to use them for this. 🙂
Oops… it should read a few pairs of fat quarters.
I want to thank you for sharing this easy and fun pattern. I made my first one when my daughter was about 7 months old, she’s now 16 months old and still wears it as a top with jeggings (so adorable!). It’s perfect year-round with a long-sleeved shirt underneath when it’s cold. I just found out I’m having another girl, so I’m making more so my girls can share them.
Hi Maggie,
I just loved the pattern for the pinafore. My daughter is 16 months old and I’d like to sew her one as a dress rather than a tunica or top. How can I adjust the pattern for her size? Do I just increase the lenght? Or do you have another pattern. Moreover, is the diaper pattern available somewhere? I’m looking forward to your answer. Thanks.
Hi Maggie,
I LOVE this pinafore! I have a 8months old daughter and I must sew it for her.
I am a very beginner sewer and I am wondering how is it possible to reverse the dress? Will i have the button inside when I will reverse it?
Yes, if you use a button, the button will be inside if you reverse it. Otherwise you could use velcro or a snap instead!
thank you — made this evening — just a lovely, simple design.
So happy to be helpful to you, Janet!!
Dear Maggie,
thanks a lot for the great tutorial you shared. it was indeed very helpful. this was my first project to sew, and trust me I am happy with the work. this was possible only because of your simple to follow instructions. great work girl. thanks a ton. now my lil one is all dolled up with the cute dress her mamma sewed for her…
thanks to you!
XOXO
Prachi
Hi. Before sewing the back and front pieces together, should I press the side seams down? Or do I just finish the edge with a serger or pinking shears? Thanks
By the way, I am new to sewing 🙂
You can totally do that! I usually just zip the sewing machine right over top while pressing the seam down with my hand! 😉 Once you flip the pinafore right side out you will press the along the seam then, so it will eventually happen! 🙂
Do you have this in a bigger size
Sorry, I do not.
hi, how would i make this dress reversible without the buttons? would i just tape the straps together and cut out?
You would follow the same steps but instead of buttons use velcro!
Absolutely adorable! Thank you for sharing!
Oh my goodness!! I just started seeing and couldn’t wait to try this! It came out so cute and it was so easy to do!! Thank you so much!!!
Hello. This is an amazing tutorial and id love o make this for my three year old and she wears a size 6. How can i make it bigger? Or can you help by making a bigger template?
Thank you.
Hi Alicia, to increase the size you just need to expand the pattern a few inches in length and width. There may be a good tutorial if you google pattern increases online!
I saved this pattern when I was pregnant with my first hoping to make it for my daughter one day. Over 2 years and 2 BOYS later I finally made one for a friends daughter. It was super easy to make for the novice I am. Thank you!
Oh my goodness!!! You are just too sweet! I’m glad you finally had a chance to make one! 🙂 Hope you have a great rest of your week!
Hi Maggie! I would love to do this lovely appron for my little 2yo, but I am not able to find the pdf anymore…it seems as if the link was broken.
Could you help me?
Thanks and congrats on such a lovely blog!
Hi Alba! You can find the PDF underneath the list of fabric you will need to make this project! It is a highlighted link! Happy sewing!
Hi, Just found this amazing tutorial, thank you so much. I need to make it in size 3-6 months, how do I decrease the size ?
Btw, I can see on the comments below that you might have a pdf for diaper cover, could you email me ?
Thank you again from France !