Smashed Peas & Carrots

Inspiration For Living Creatively - DIY Crafts, Sewing, Recipes, Crafts & More

  • Press
  • Disclosure
  • Collaborate
  • Contact
  • Facebook
  • Twitter
  • Pinterest
  • Instagram
  • Dots
  • Google Plus

Become a Subscriber

never miss a thing!

  • Home
  • About
    • Advertising
    • Disclosure & Safety Disclaimer
    • Privacy Policy
  • Recipes
    • Appetizers
    • Bento Lunch
    • Beverages
    • Smoothies
    • Breads
    • Breakfast
    • Casserole
    • Crockpot
      • Visual Library
    • Dairy Free
    • Dessert
    • Gluten Free
    • Main Course
    • Holiday
    • Instant Pot
    • Paleo
    • Party Food
    • Salad
    • Side Dish
    • Soup
    • All Recipes
  • Tutorials
    • Children
    • Adult
    • Home Decor
    • No Sew
    • Sewing
      • Children Sewing
      • Adult Sewing
      • Home Decor Sewing
      • Sewing Basics
    • Sewing Studio
    • Knitting
    • Kids Crafts
    • Bento
    • Holiday
    • Parties
    • Gift Ideas
    • Natural Living
    • All Tutorials
  • shop
You are here: Home / Fall / TUTORIAL: Gold Accented Decoupaged Pumpkins
Aug
28

TUTORIAL: Gold Accented Decoupaged Pumpkins

| Filed Under: Fall, Halloween, Holiday, Tutorials

I was contacted by Michaels and asked to be a part of their Great Pumpkin Challenge and with my deep love of the Fall and Halloween I was pumped to participate. They sent me a box of their craft pumpkins and was told to create a look for them…how fun, right!

These are what the pumpkins looked like.  Michaels has a whole array of awesome craft pumpkins in stores now. They come in lots of different sizes and colors…cream, black and original orange….so you can create a whole multitude of looks.  And the best part is they never spoil! So you can paint them, carve them, glitterize them any time (like say August!) and they will last for months and years to come.

I am really into the gold color scheme these days and my first thought was that I wanted a cream and gold look for my pumpkins, how pretty and chic and perfect for Fall, right! I found the perfect shade of gold spray paint at Michaels, some pretty paper doilies in the cake decorating aisle, and then I fell head over heels in love with the awesome rolls of Martha Stewart’s new Decoupage papers as one set had the coolest gold cross-hatch design. All pure perfection for my idea to become reality.  Here is how I made them…

Gold Accented Pumpkin using Decoupage Paper
1 roll of Martha Stewart Decoupage papers
Mod Podge
Foam brush
Decoupage Tools from Mod Podge
Using the foam brush, cover the pumpkin with a thin layer of mod podge. Cut the decoupage papers into smaller strips based off of the curves of the pumpkin and brush mod podge on the wrong side of the paper. Place the decoupage papers onto the pumpkin (mod podge side facing the pumpkin) and smooth out the wrinkles as you go using the decoupage tools. Once completely covered wait 15-20 minutes for mod podge to dry. Add a coat of mod podge to the outside of the pumpkin (over top the decoupage papers) to seal, let dry, and have fun decorating with your new pretty pumpkin!
Ahhh, gold and cream prettiness!
Gold Accented Doily Pumpkin with Initial
Krylon Champagne Nouveau spray paint
Krylon Primer spray in White (if needed!)
Small 4″ paper doily
Scissors
Mod Podge
Foam brush
White Paint Pen or Chalk Pen

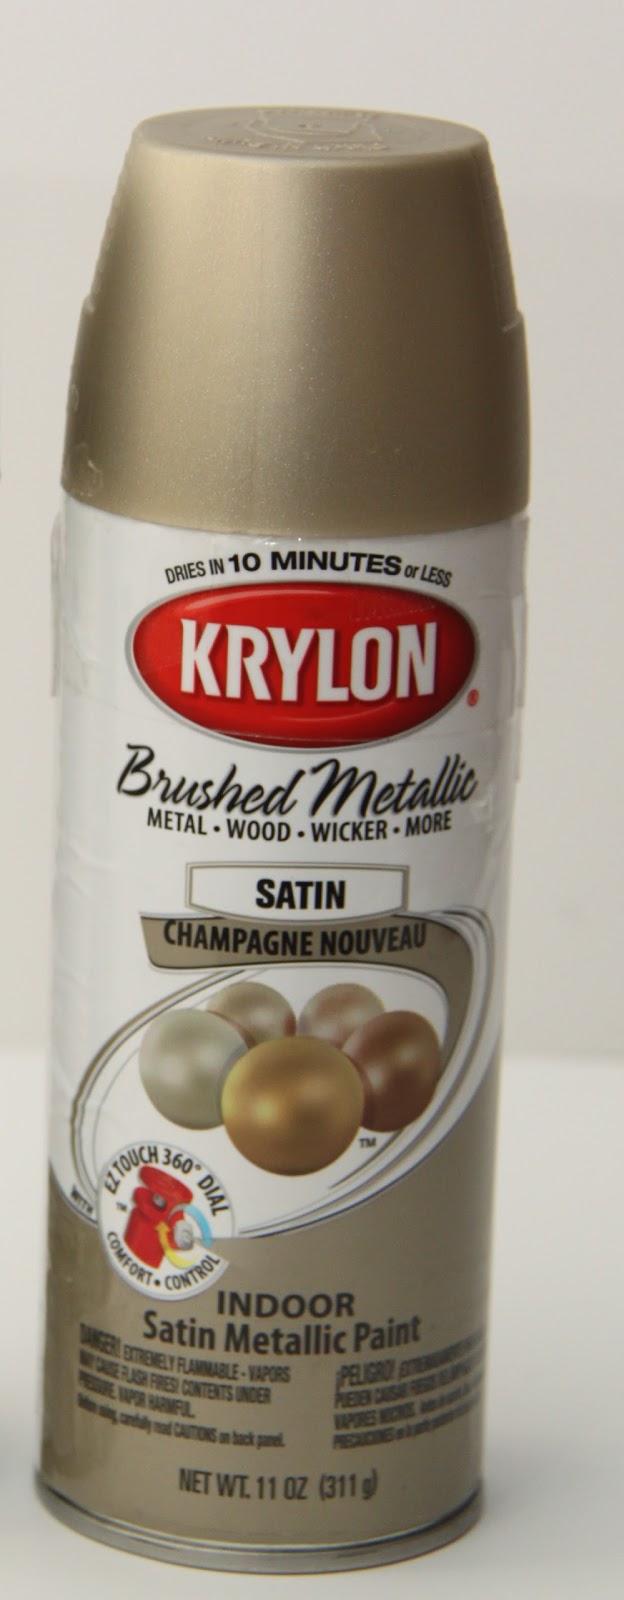
This is the gold spray paint that I just fell in love with…it is the perfect shade of gold!!!
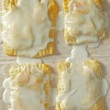
Spray your pumpkin all over (in a well ventilated area…outdoors is best!) and let dry for a few hours.

Once dry, take your doily and cut out the center of it.

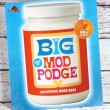
Using the foam brush, mod podge the pumpkin in the area you would like your doily to be placed. Mod podge the wrong side of the doily too. Place the doily (mod podge side facing pumpkin!) onto the pumpkin and let dry.

Once dry, place another layer of mod podge over top to seal the doily onto the pumpkin. Once that layer is dry (the modge podge should be invisible when it is dry!) you can take a paint pen or a chalk pen and write the initial of your family’s last name!

And now I’m off to a great start on my Fall decorating, thanks Michaels!
Also, did you know…
·         All Michaels locations are hosting a Great Pumpkin Event on Saturday, October 5 from 1 p.m.-3 p.m. For only $6 (which covers the cost of a 9” carveable pumpkin) kids can create their own pumpkin design and a free face painter will also be on hand. A great weekend event for the whole family!

·         Did you know that Michaels offers custom carved pumpkins that can be personalized with a variety of designs and names? Prices start at $19.99 and you can them order at all Michaels locations, just make sure to place your order by Oct. 13 so that it will be completed by Halloween. Visit www.michaels.com/custom-carved-pumpkins for more information.

Thanks for stopping by today!!

 XOXO,

*I received compensation for this post; however, this is my personal, honest opinion based on my experience with the product.

    You may also like -

    Easy and Delicious Pumpkin Pie Pop Tarts Recipe // SmashedPeasandCarrots.comThe Easiest Pumpkin Pie Pop Tarts RecipeThe Big Book of Mod Podge Review and Giveaway // SmashedPeasandCarrots.comThe Big Book of Mod Podge Review and GiveawayGift Idea: Hot Cocoa Concoctions with Spooky Mix-Ins.Gift Idea: Hot Cocoa Concoctions with Spooky Mix-InsSuper cute and easy to make Boo-tiful Stacked Pumpkin Tutorial. I really love this! #trickyourpumpkinBoo-tiful Stacked Pumpkin TopiaryThe best Guten Free Pumpkin Donut Muffins you'll ever taste!Gluten Free Pumpin Donut Muffin Recipe

    Become a Subscriber

    never miss a thing!

    Comments

    1. simply cintya, says

      August 28, 2013 at 4:11 am

      This is exactly what I was looking for, thank you!

      • Maggie says

        August 28, 2013 at 5:01 pm

        YAY! So glad I could help!

    2. Beth @ Whiskey Tango Hello says

      August 28, 2013 at 5:30 pm

      So adorable – love your craftiness with these pumpkins (and the magnetic one) – I am SO READY for Fall after this!

      • Maggie says

        September 4, 2013 at 2:05 am

        Thanks Beth! Me too, I am aching for some cool Fall weather now that the kids have started back to school!

    3. Steph @ Three Loud Kids! says

      August 29, 2013 at 6:49 pm

      Love how these turned out! Im going to have to make some whenever fall gets a little closer!

      • Maggie says

        September 4, 2013 at 2:05 am

        Thank you, Steph! I love the warm gold tones, right now they are my favorite colors!!

    Welcome to Smashed Peas and Carrots. You can read more about me HERE
     photo designTeam.png
    Follow on Bloglovin

    Popular Tutorials

    Highlighter Valentine Card with Free Printable

    Highlighter Valentine Card with Free Printable…

    Play Doh Valentine Card Free Printable

    Play Doh Valentine Card Free Printable…

    Elderberry Syrup Recipe

    Elderberry Syrup Recipe: Natural Cold and Flu…

    Teacher Survival Kit

    Teacher Survival Kit with FREE Printable…

    Notebook Paper Pencil Pouch Teacher Gift Idea

    Notebook Paper Pencil Pouch Teacher Gift Idea…

    Free Silhouette File Teacher Canvas Bag Gift Idea

    Free Silhouette File: Teacher Canvas Bag Gift…

    Popular Recipes

    No Bake Energy Bites Recipe…

    Chocolate Coconut Cups {Gluten and Dairy Free}…

    DIY Taco Seasoning Recipe…

    Sugar. Cookie. Icing. {The Recipe}…

    French Dip..Crockpot Style!…

    Crockpot Banana Bread…for Real!…

    My Sponsors

     photo FatQuarterShop-175x175.png

     photo cdf15248-e6f8-4276-abc0-c145e2451c35.jpg


    Blog Archives

    Posts by Topic

    Stay Connected

    • Facebook
    • Twitter
    • Pinterest
    • Instagram
    • Dots
    • Google Plus

    Join me on Facebook

    Copyright Smashed Peas and Carrots © 2025 · All rights reserved · Design by Emily White Designs

    Copyright © 2025 · Smashed Peas & Carrots Custom on Genesis Framework · WordPress · Log in